How to Set Up Accrual From ATM
You can set up accrual plans from 'Accrual' under Back Office main navigation of ATM.
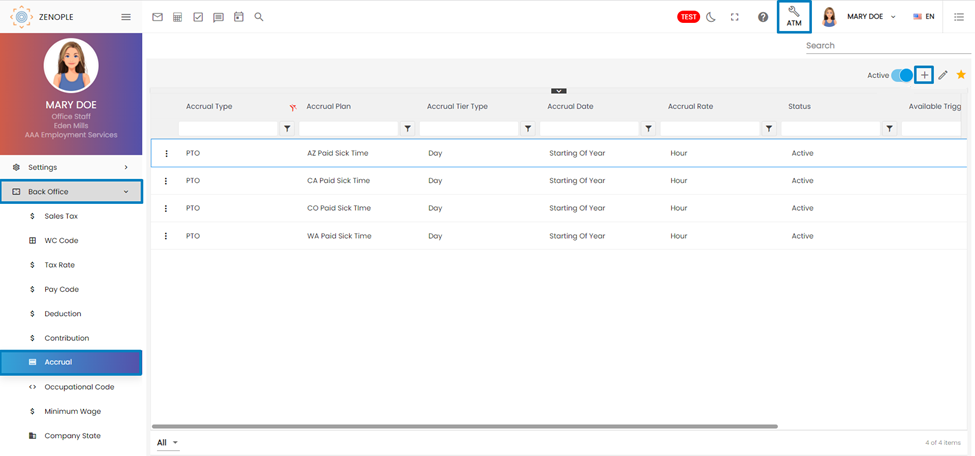
- Go to ATM and click on the 'Accrual' under Back Office main navigation. (ATM>Back Office>Accrual)
- Click on the ‘+’ or plus icon to Add an accrual plan as shown below,
An Add Accrual form will pop up,
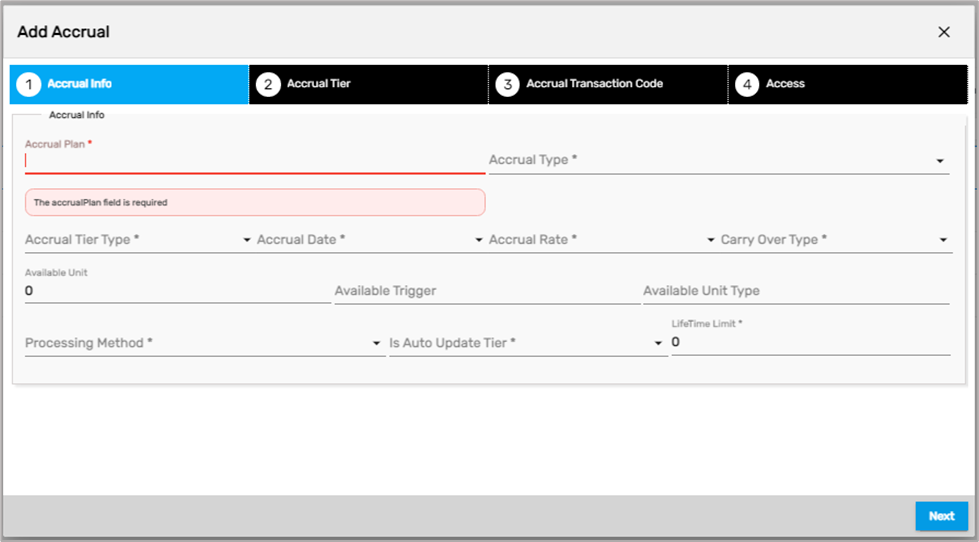
Users need to complete four steps to add an accrual plan and need to fill information in four tabs namely,
- Accrual Info
- Accrual Tier
- Accrual Transaction Code
- Access
Accrual Info
The first step is to add 'Accrual Info' and users need to fill in the following information.
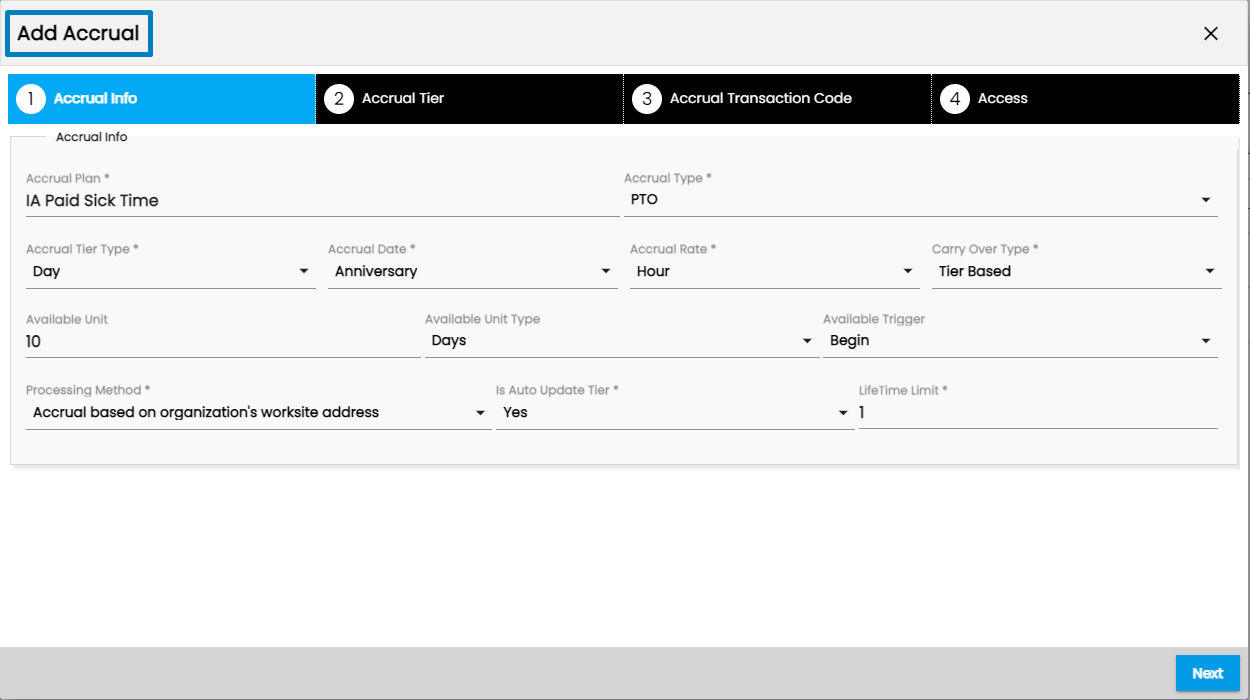
Here are the fields and descriptions of each field of the Accrual Info tab,
| S.N | Fields | Descriptions |
|---|---|---|
1 | Accrual Plan | Name the accrual plan that users would like to set up |
2 | Accrual Type | 'PTO' option will be available This doesn’t affect any accrual setup. Normally, all plans are marked as PTO. |
3 | Accrual Tier Type | The options of 'Day,' 'Hour,' and 'None' will be available. This is used to separate the tier (if there are multiple tiers to be created) Choose the option ‘Day,’ if a company has an Accrual Tier Type segregating the employees according to the number of days or years they worked. Choose the option of ‘Hours,’ if the company has an Accrual Tier Type segregating the employees according to the number of hours they worked. Choose the option of ‘None,’ if the company has a fixed condition for the accrual plan. |
4 | Accrual Date | The options of 'Anniversary' and 'Starting of Year' will be available. This sets which date to be considered while calculating accruals. ‘Anniversary’ means the hire date of an employee and ‘Starting of Year’ refers to January 1st. The accrual date is significant while calculating the accrual (if the rate is yearly) and Carry Over Type. |
5 | Accrual Rate | The options of 'Hour,' 'Month,' 'Pay Period,' and 'Year' will be available Choose Accrual Rate as ‘Hours’ if the employees accrue time-based on hours they worked. Choose Accrual Rate as ‘Month,’ ‘Pay Period,’ or ‘Year’ if the employees' Accrual Rate is a fixed lump sum amount per month/Pay Period/ Year. However, they must work at least on an accrued Pay Code. |
6 | Carry Over Type | The options of 'Year Based' and 'Tier Based' will be available. 'Carry Over Type' limits the number of carryover accrual balances when moving from one year to another or one tier to another. Choose the Carry Over Type as ‘Year Based’ if the carryover needs to be calculated on each ‘Anniversary’ or ‘Starting of Year’ as per the Accrual Date selected. Choose the Carry Over Type as ‘Tier Based’ if the carryover needs to be calculated when an employee switches from one tier to another. If the auto-update is turned on, then tier start and tier end will be clearly defined, and the switch will happen automatically. |
7 | Available Unit/ Available Unit Type/ Available Trigger | These three fields are related to each other. The 'Available Unit' is the number of units and its unit type is defined by the Available Unit Type. Available Unit Type can be either 'Days' or 'Hours.' Available Trigger is used to show or hide the accruals on the paystubs as per the requirement. Alternatively, it is used for triggering accruals on paystubs. The options for Available Triggers are 'Begin,' 'End,' and 'Every'. Choosing Available Trigger as ‘End’ means to show accrual plan on paystubs only after XX days/ hours. Choosing Available Trigger as ‘Every’ means to show accrual plan on paystubs every XX days/ hours. In 'XX days/hours,' 'XX' is Available Unit 'Days/hours' are Available Unit Time Available Triggers ‘End’ and ‘Every’ depends on the difference between a person’s Accrual Start Date and the Cheque Date. While processing the cheque if the conditions match the accrual details will be shown else will be hidden in the paystub. However, Available Trigger, ‘Begin’ is not yet implemented, so this makes no change. |
8 | Processing Method | Choose either ‘Accrual Based on Organization’s Worksite Address’ or ‘Accrual Based on Person’s Accrual Set Up’ as per the requirement. Select Accrual Based on Organization’s worksite address if employees accrue or deplete on the accrual plan in case they work in certain locations. Else, choose Accrual Based on Person’s accrual set up. |
9 | Is Auto Update Tier | The options of Yes or No will be available. If you want to automatically change employee tiers based on an accrual setup, choose ‘Yes’ or else choose ‘No.’ |
10 | Life Time Limit | Enter units to limit the maximum number of accruals for an employee. Alternatively, an employee will stop accruing forever if they reach the limit set by Life Time Limit. |
Click on the ‘Next’ button to move to the Accrual Tier Tab,
Accrual Tier
Users need to add at least one Tier. Click on the ‘+’ or add icon to create a tier.
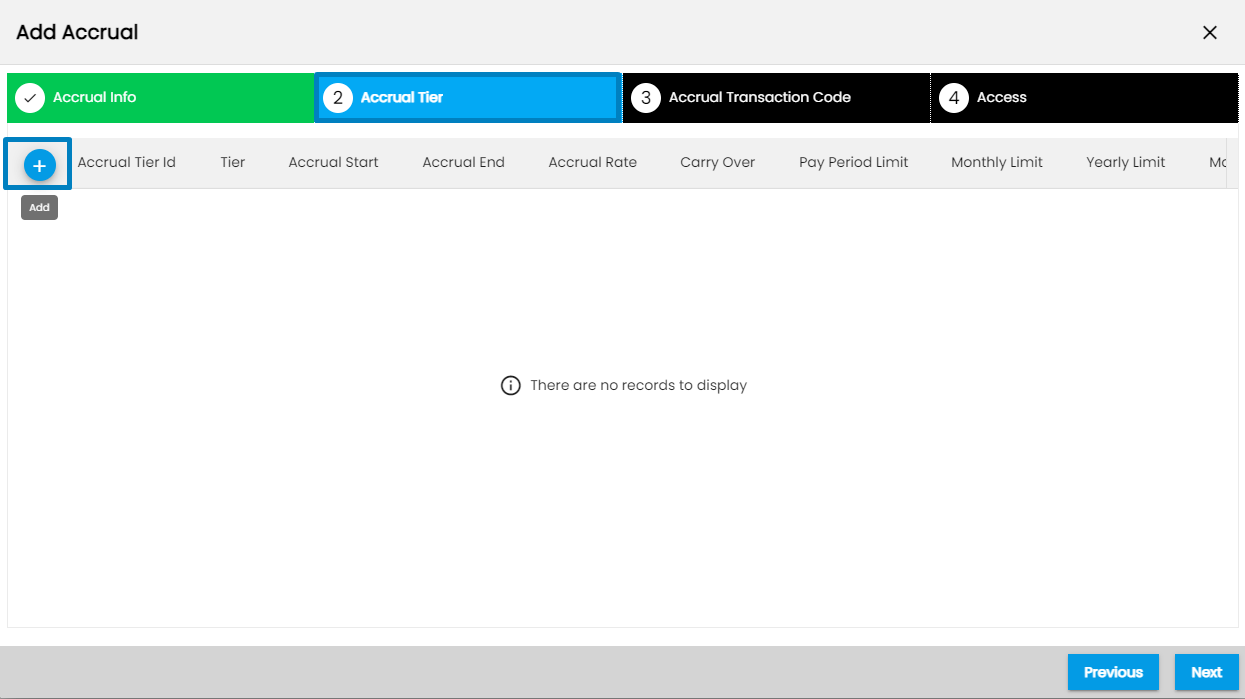
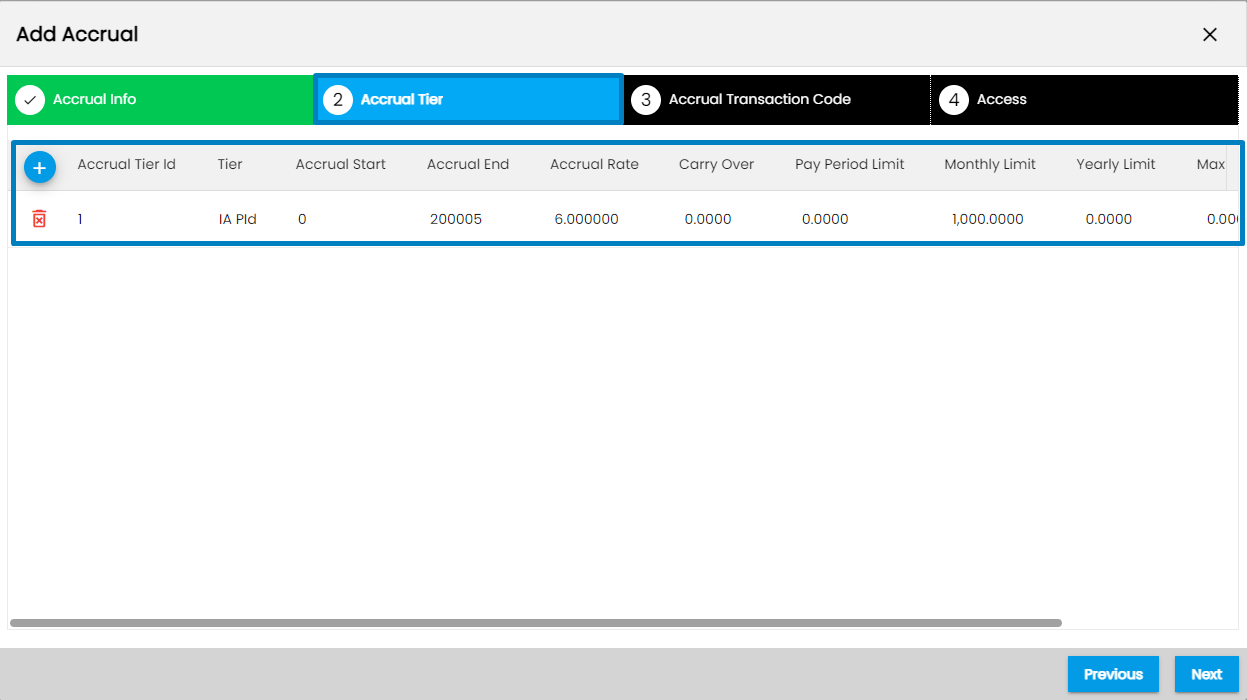
Here are the fields and descriptions of each field of the Accrual Tier tab,
| S.N | Fields | Description |
|---|---|---|
1 | Accrual Tier Id | It will be created as per the accrual tiers added. |
2 | Tier | Enter the name of the tier. |
3 | Accrual Start and Accrual End | Enter the starting and ending date of the accrual plan. The starting and ending date of a tier will be based on the Tier Type selected on the previous, 'Accrual Info' tab. Suppose, if you need Tier 1 for a year then choose ‘Accrual Tier Type’ as ‘Day’ on the Accrual Info tab. Then, Set 'Accrual Start' as '0' and Accrual End as '365' |
4 | Accrual Rate | It is the rate on the basis of which the accrual balance is calculated. In the case of the ‘Hours’ Rate Type, enter the accrual rate that will multiply with the accrued units to calculate the total accrued units. Else, enter a lump sum number in Accrual Rate in case of the Rate Type as ‘Pay Period,’ ‘Month,’ or ‘Year.’ |
5 | Carry Over | Carry Over is the number of units the users want to roll over or carry over to the next year or tier. Set the number of units to be rolled over to next year/tier. Note that, if it is set to 0, then the accrual balance will not be carried forward, all unused balances will be set to 0 for next year/ tier. If Carry Over is set to 999999, all accrual balances will be carried forward as it is, to the next year/ tier. The basic concept behind 999999 is to set up the highest value possible for the carryover value field so that it will never cross the actual carryover value and the value will be carried over in the next year. |
6 | Pay Period Limit | Sets the maximum units to be accrued by employees in a pay period. Zero will be neglected. |
7 | Monthly Limit | Sets the maximum units to be accrued by employees in a month. Zero will be neglected. |
8 | Yearly Limit | Sets the maximum units to be accrued by employees in a year. Zero will be neglected. |
9 | Max Balance | Limit the maximum balance an employee can have on this accrual plan. An employee will stop accruing once they hit this limit and starts accruing again if the balance drops below this limit. |
Click on the ‘Next’ button to move to the Accrual Transaction Code Tab,
Accrual Transaction Code
In the Accrual Transaction Code tab, users need to choose the required Pay Codes to link the accrual plan with the Pay Codes.
Users can choose to ‘Accrue’ or ‘Deplete’ time as per their requirements by marking the checkboxes and changing Accrual Action from the dropdown. Choosing ‘Accrue’ will add the balance while ‘Deplete’ will reduce the balance as per the selected unit.
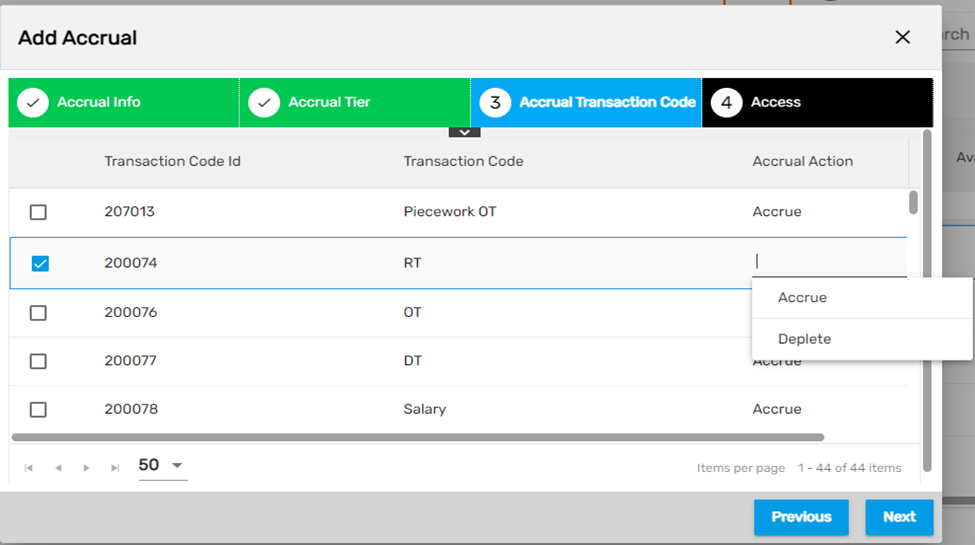
Note: An employee must have worked on specific accrue pay codes for them to accrue or deplete time.
Click on the ‘Next’ button to move to the Access Tab,
Access
Users can control the access to be provided to different offices from the Access Tab. If an office doesn’t have access even if all the setups are done they won’t be able to use an accrual plan.
Mark on the checkboxes to give access to the accrual plan to the required offices.

After completing all the steps, click on the Save button to implement the Accrual plan.
Note: Accrual Based on Organization’s Worksite Address will automatically be set up on an employee’s profile once they work on that specific location when linked to the plan. But access needs to be provided to the offices first. Further, if you want to tag locations, then you need to contact us as there is no UI for this as of now and each location will be tagged to the Accrual tier. Accrual Based on Organization’s Worksite Address must be set up manually from the employee’s profile.