Setting Up a Time Clock
- Go to CMS application
- Search the required customer and go to the Customer Detail
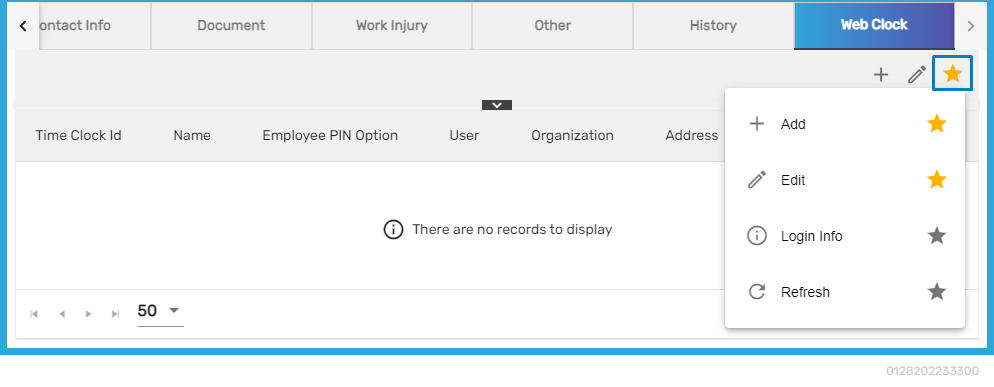
- Go to Web Clock top navigation
- Click on the 'Add' or 'Edit' button under the Favorite Action of Web Clock top navigation
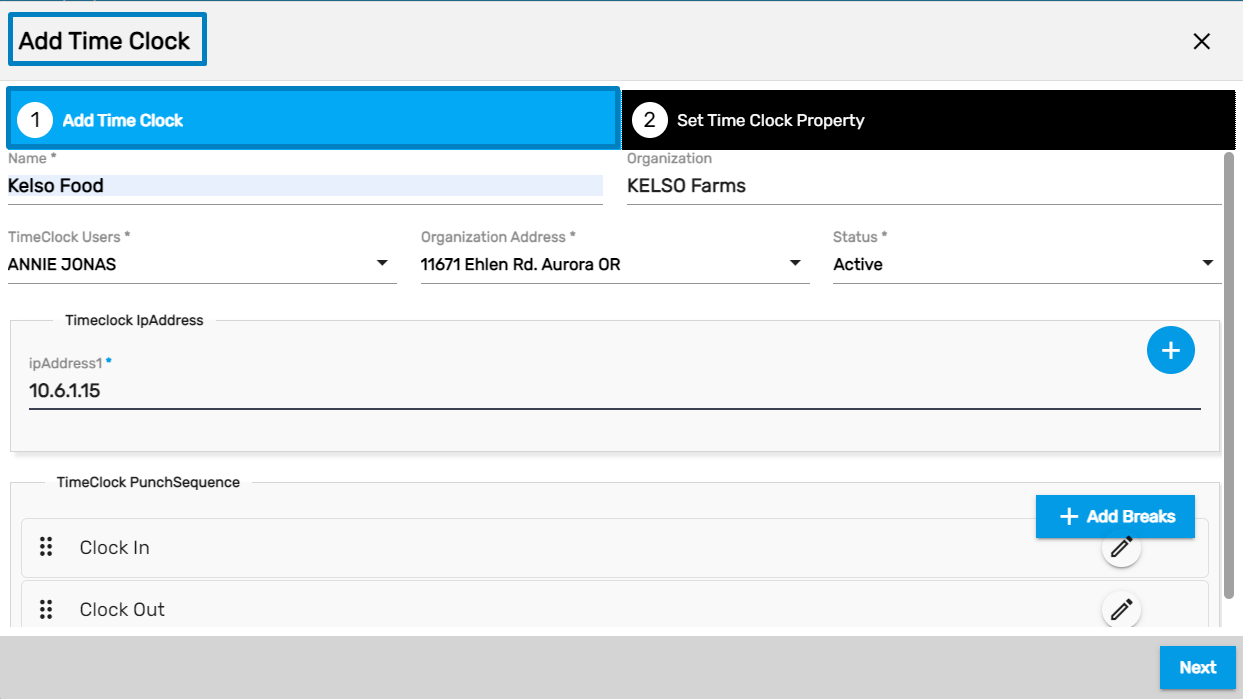
Add/ Edit Time Clock
Users can set up primary time clock related properties from the 'Add Time Clock' tab.
| S.N | Field | Description |
|---|---|---|
1 | Name | Enter the name of the time clock |
2 | Organization | Pre-populates organization name |
3 | Time Clock User | Create contact and assign the contact as a supervisor |
4 | Organization Address | Pre-populates the organization address |
5 | Status | Select status as ‘Active’ and ‘Inactive.’ If the users select Inactive status, then the time clock will not show up on the log-in page. |
6 | ipAddress1 | Enter the IP address from the time clock URL or related to the network. Users can enter multiple time clocks by clicking on the add icon. |
7 | Time clock punch sequence | By default, there is a clock in and clock out. Users can add breaks by clicking on ‘Add Breaks.’ Users can add multiple breaks in/ out of the system. |
Note: Clicking on the hamburger icon, users can drag in and drop the time clock punch sequence according to their preference.
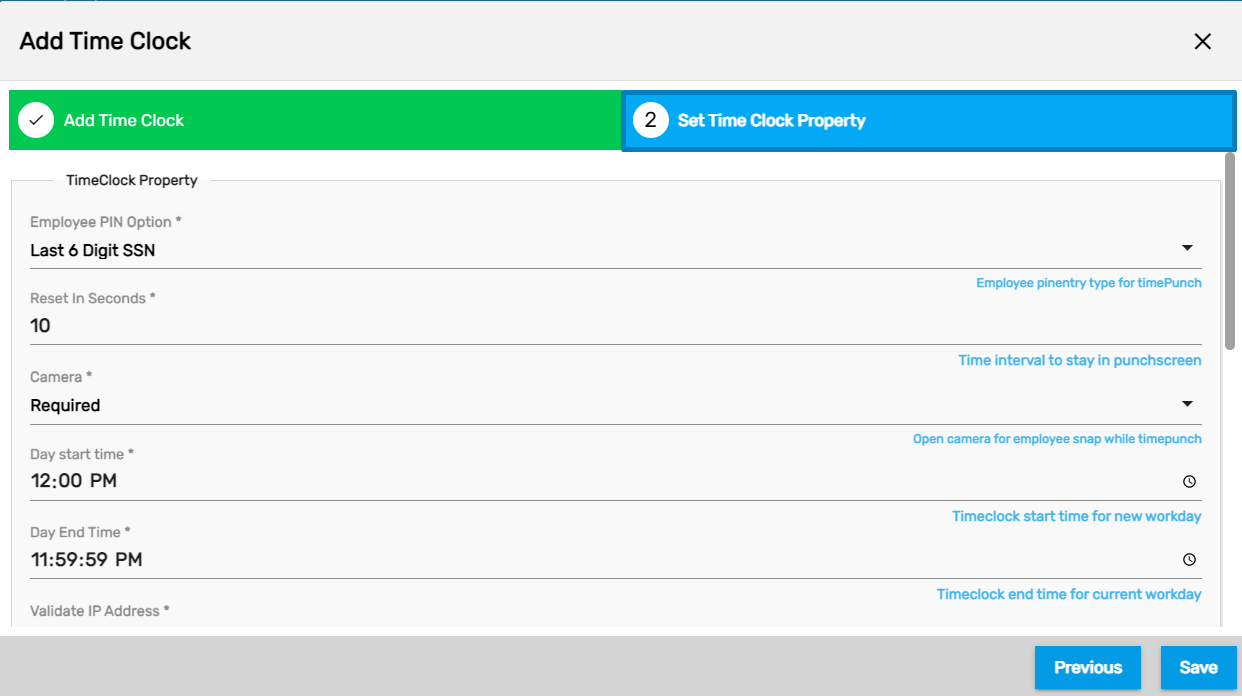
Set Time Clock Property
Users can set up time clock related properties from the 'Set Time Click Property' tab.
| S.N | Field | Description |
|---|---|---|
1 | Employee PIN Option | Users can select the Pin option from the dropdown. Based on selection users can punch time on the time clock. |
2 | Reset in Seconds | Reset in seconds is the ideal time to redirect back to the PIN entry screen from Punch Screen (in case the user forgets to punch) |
3 | Camera | Users can either choose 'Required' or 'Not Required' for the Time Punch of the employees as per the need |
4 | Day Start Time | Day Start Time is for an employee who forgets to Check out when using Time Clock on a previous day. The system will auto move the time clock to the ‘Check In’ screen after the time set in the ‘Day Start Time’ field. |
5 | Validate IP Address | Validate IP address should be True or False. If you choose TRUE then the IP of the time clock should match to IP set up with the time clock. If you choose FALSE vice versa. |
6 | Allow Employee Change Punch Type | Allow Employee Change Punch Type shall be 'True' or 'False.' If the user selects 'True' then they will be allowed to change the punch sequence and vice versa. |
7 | Allow Lunch Deduction Thresh | Auto Lunch Deduction Thresh is about taking a break after certain hours of work are done. It is the minimum amount of work hours for an auto lunch-break system. Generally, ‘Auto Lunch Deduction Thresh’ is used where time clock setup does not have or use punch sequence for Break in and Break Out.
|
8 | Amount Break Deduction | Amount Break Deduction is the break minute after the auto lunch deduction threshold hour. |
9 | Play Audio | Play Audio is to play the audio message during the punch in/ out time. You can select 'True' or 'False' to allow the punch success audio. |
10 | Skip Login UI | Skip Login UI allows users to determine whether login through the time clock app is required or not. Users need to select 'False' to get redirected to the time clock punches. Else users can choose 'True' to skip login UI. |
11 | Permitted Location | Permitted Location field helps users to restrict employees to clock in/ out from certain GPS zone. |
12 | Permitted Location Radius | This helps to restrict employees to clock in/ out within a radius from the permitted location. |
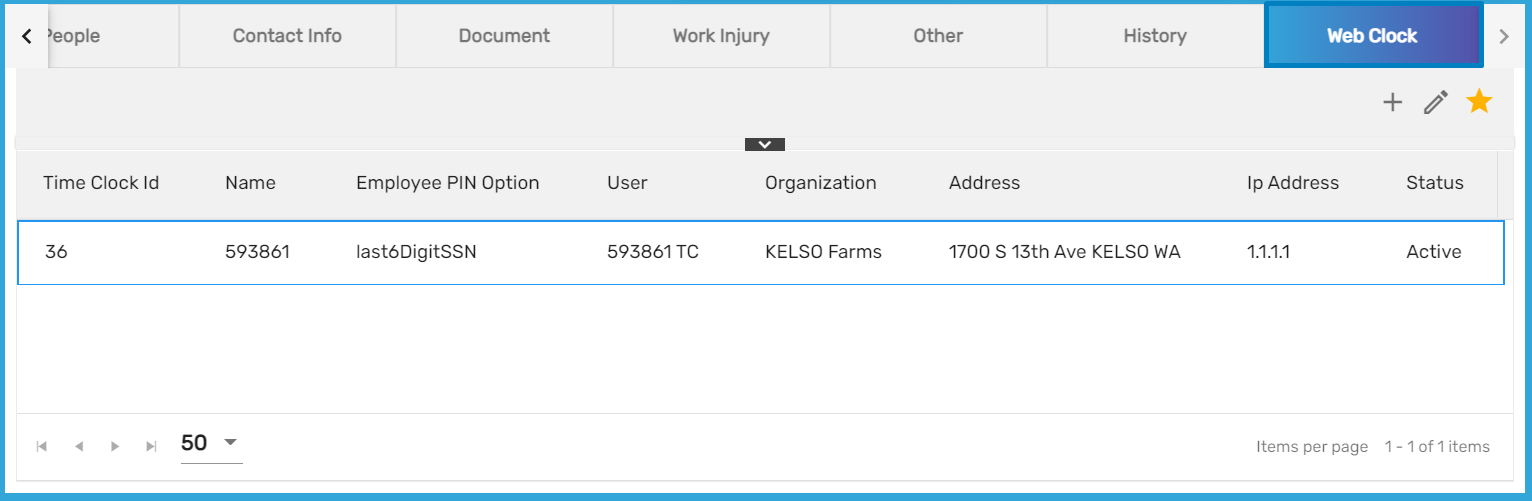
The added Time Clock can be viewed as:
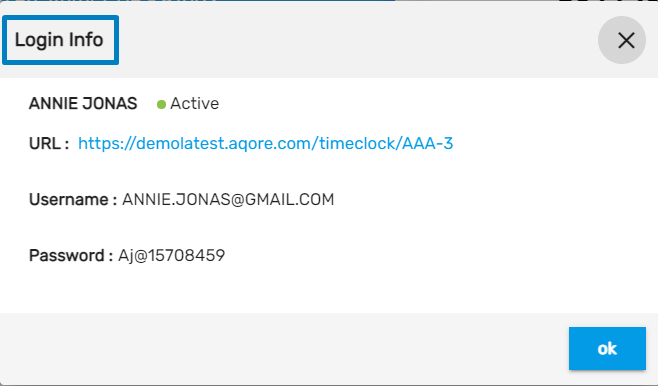
Login Info
Users can view their login credentials from the Login Info action under the Favorite Action of Web Clock top navigation of the Customer Detail page. Moreover, the users can see the Status of the Time Clock, URL, Username, and Password.