Overview
Time Clock is an online medium for the time entry system by which the employees complete time entries for their assignments. A customer may have multiple web time clock profiles. Time Clock allows users to set up various time clock properties.
How to Setup Time Clock
Setting Up a Time Clock
- Go to CMS application
- Search the required customer and go to the Customer Detail
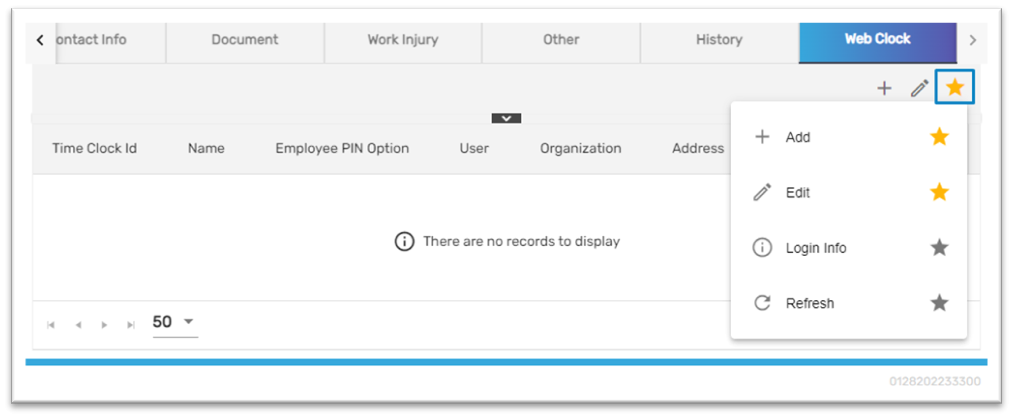
- Go to Web Clock top navigation
- Click on the 'Add' button under the Favorite Action of Web Clock top navigation
Add/ Edit Time Clock
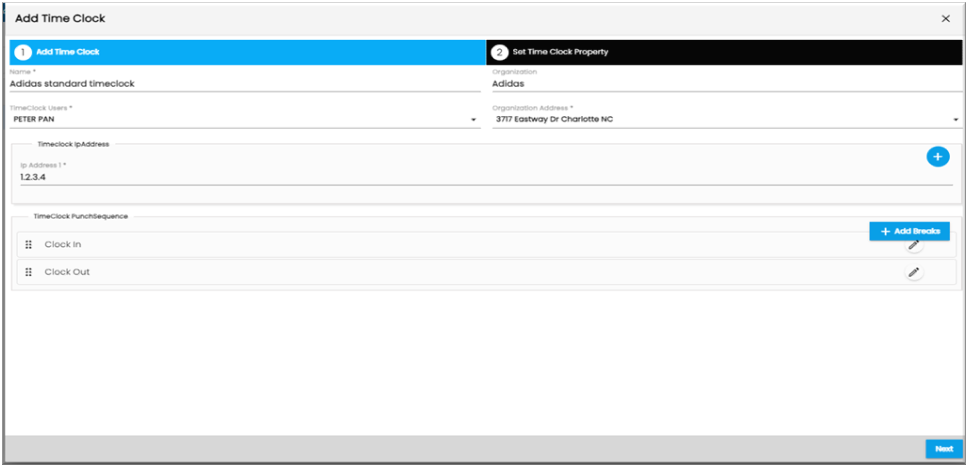
Users can set up primary time clock related properties from the 'Add Time Clock' tab.
S. N | Field | Description |
1 | Name | Enter the name of the time clock |
2 | Organization | Pre-populates organization name |
3 | Time Clock User | Create contact and assign the contact as a supervisor |
4 | Organization Address | Pre-populates the organization address |
5 | Status | Select status as ‘Active’ and ‘Inactive.’ If the users select Inactive status, then the time clock will not show up on the log-in page. |
6 | ipAddress1 | Enter the IP address from the time clock URL or related to the network. Users can enter multiple time clocks by clicking on the add icon. |
7 | Time clock punch sequence | By default, there is a clock in and clock out. Users can add breaks by clicking on ‘Add Breaks.’ Users can add multiple breaks in/ out of the system. |
Set Time Clock Property
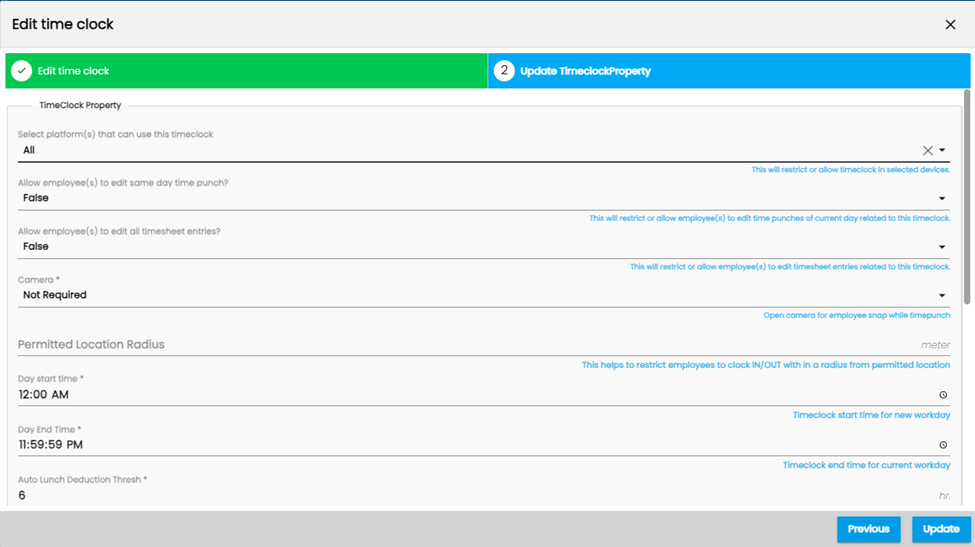
Users can set up time clock related properties from the 'Set Time Click Property' tab.
S. N | Field | Description |
| 1 | Select Platform | Users can select the platforms as All, Mobile-only and Web-only option from the dropdown. Based on selection users can use the platform to punch time on the time clock. |
| 2 | Edit Same day time punch (Mobile-only) | Based on the option selected as ‘True’ or ‘False’, employees will be able to edit the same day’s time punch. |
| 3 | EditTimesheet entries (Mobile-only) | Based on the option selected as ‘True’ or ‘False’, employees will be able to edit all the time entries entered. |
| 4 | Employee PIN Option | Users can select the Pin option from the dropdown. Based on selection users can punch time on the time clock. |
| 5 | Reset in Seconds | Reset in seconds is the ideal time to redirect back to the PIN entry screen from Punch Screen (in case the user forgets to punch) |
| 6 | Camera | Users can either choose 'Required' or 'Not Required' for the Time Punch of the employees as per the need |
| 7 | Day Start Time | Day Start Time is for an employee who forgets to Check out when using Time Clock on a previous day. The system will auto move the time clock to the ‘Check In’ screen after the time set in the ‘Day Start Time’ field. |
| 8 | Validate IP Address | Validate IP address should be True or False. If you choose TRUE then the IP of the time clock should match to IP set up with the time clock. If you choose FALSE vice versa. |
| 9 | Allow Employee Change Punch Type | Allow Employee Change Punch Type shall be 'True' or 'False.' If the user selects 'True' then they will be allowed to change the punch sequence and vice versa. |
| 10 | Allow Lunch Deduction Thresh | Auto Lunch Deduction Thresh is about taking a break after certain hours of work are done. It is the minimum amount of work hours for an auto lunch-break system. Generally, ‘Auto Lunch Deduction Thresh’ is used where time clock setup does not have or use punch sequence for Break in and Break Out. |
| 11 | Amount Break Deduction | Amount Break Deduction is the break minute after the auto lunch deduction threshold hour. |
| 12 | Play Audio | Play Audio is to play the audio message during the punch in/ out time. You can select 'True' or 'False' to allow the punch success audio. |
| 13 | Skip Login UI | Skip Login UI allows users to determine whether login through the time clock app is required or not. Users need to select 'False' to get redirected to the time clock punches. Else users can choose 'True' to skip login UI. |
| 14 | Permitted Location | Permitted Location field helps users to restrict employees to clock in/ out from certain GPS zone. |
| 15 | Permitted Location Radius | This helps to restrict employees to clock in/ out within a radius from the permitted location. |
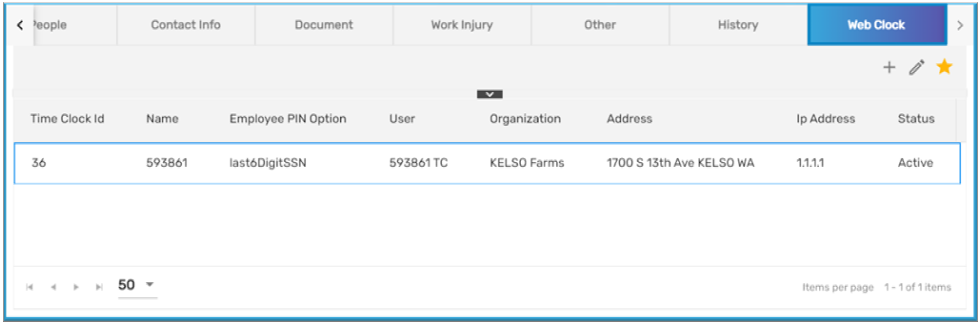
The added Time Clock can be viewed as:
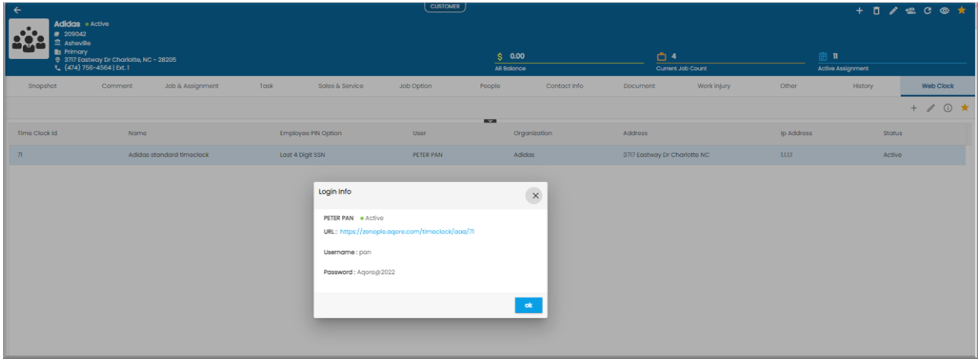
Login Info
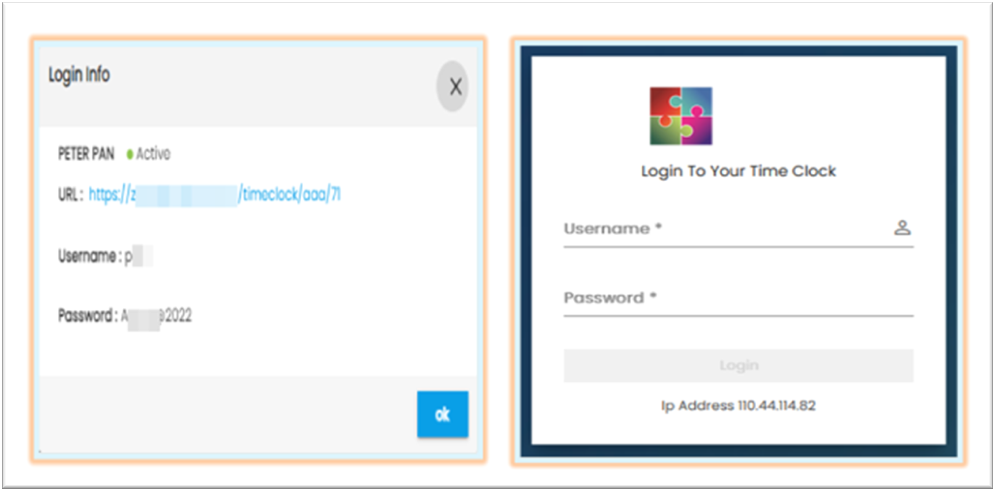
Users can view their login credentials from the Login Info action under the Favorite Action of Web Clock top navigation of the Customer Detail page. Moreover, the users can see the Status of the Time Clock, URL, Username, and Password.
Time Clock Employee Login
Using Mobile Application
Users can login to the employee portal and select the ‘Assignment’ from the bottom navigation.
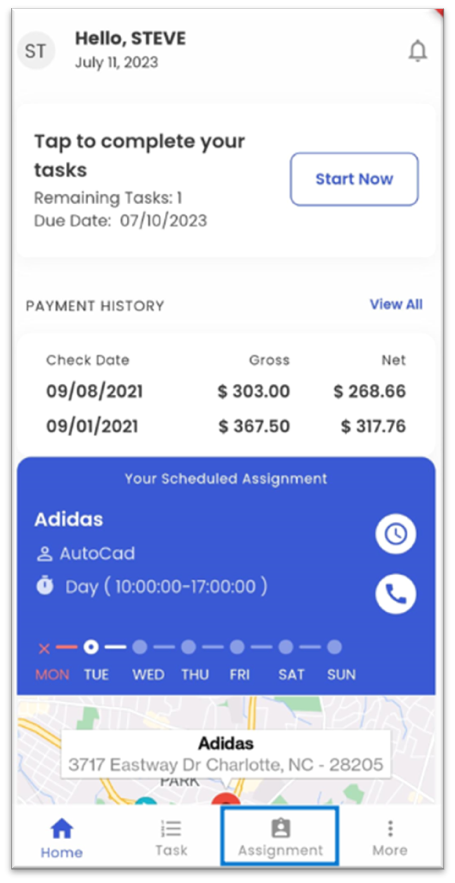
Users can then view the list of active assignments.
User can now select the assignment for which they want to use the Time Clock.
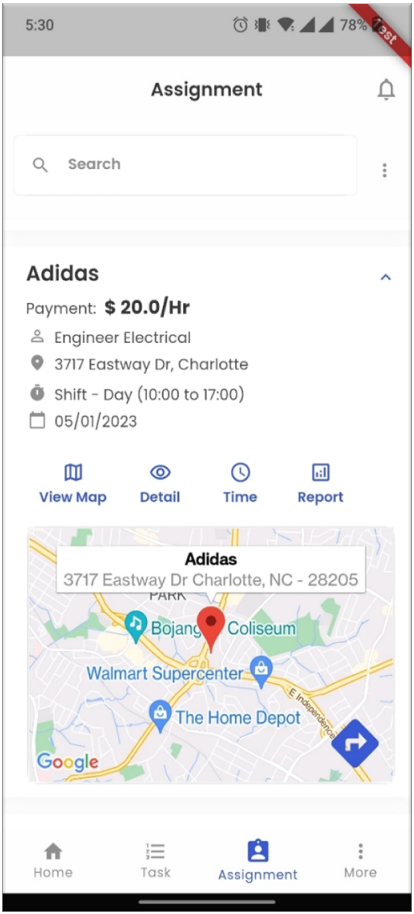
On choosing the active assignment having all the details like Company Name, Worksite Address (matching to user’s address), Job Title, Shift and Start Date, users can then choose ‘Time’ action to enter the Time Clock menu.
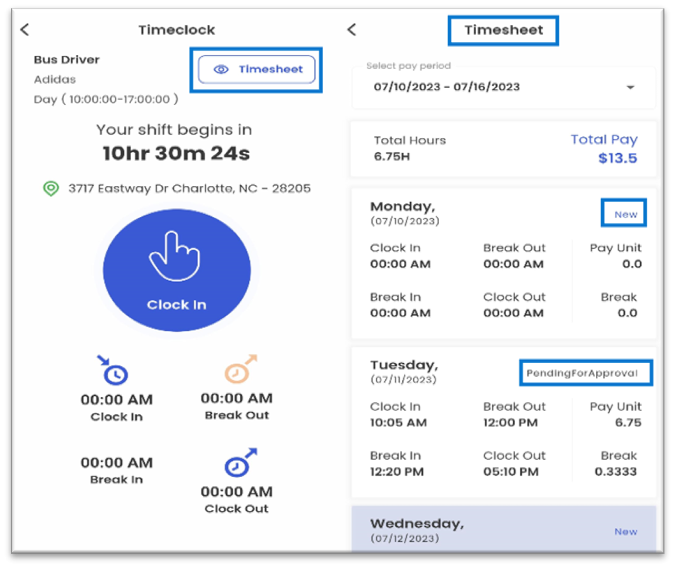
The ‘Timeclock’ window appears as per the setup done back in the ‘Set Time Clock Property’ tab of the ‘Add Time Clock’ window.
Currently, in the example aside the TimeClock PunchSequence has been set as:
- Clock In
- Break Out
- Break In
- Clock Out
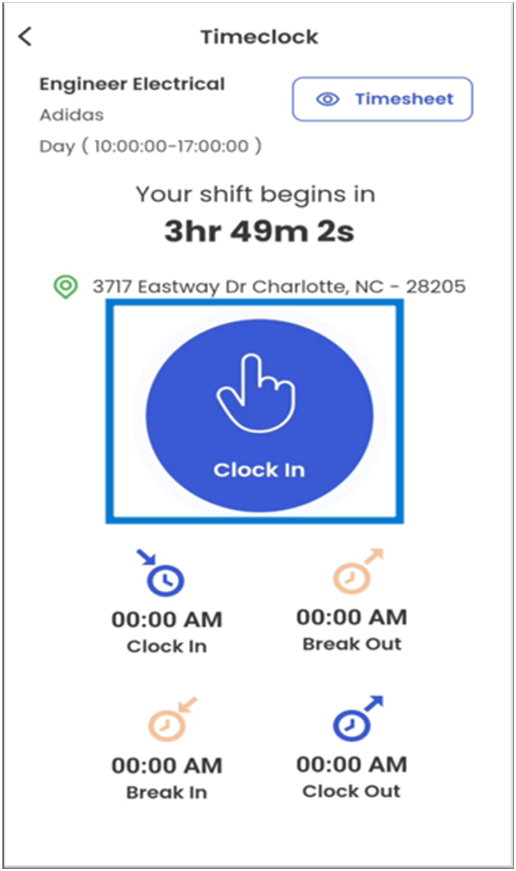
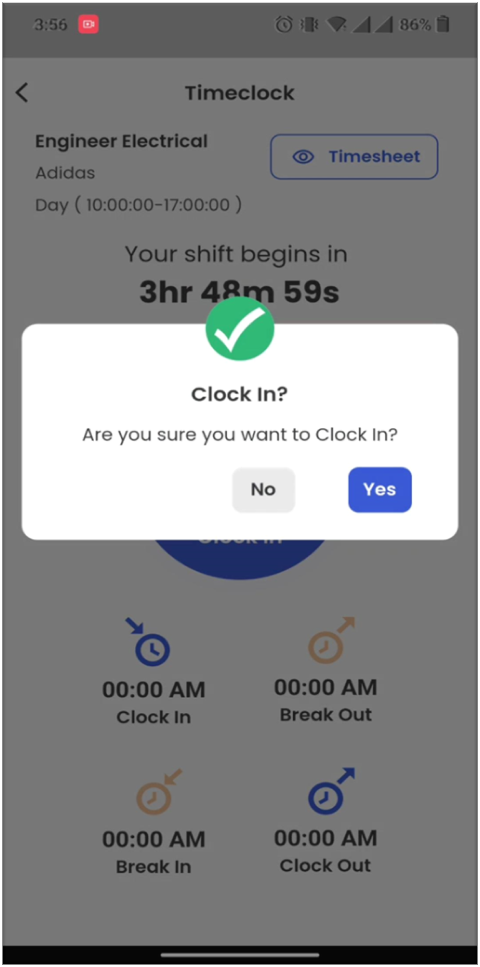
Users can now tap on the ‘Clock In’ Button to enter their time clock entry for checking in onto the assignment.
Once clicking the ‘Clock In’ button, user will see a pop-up window asking for confirmation regarding the time entry.
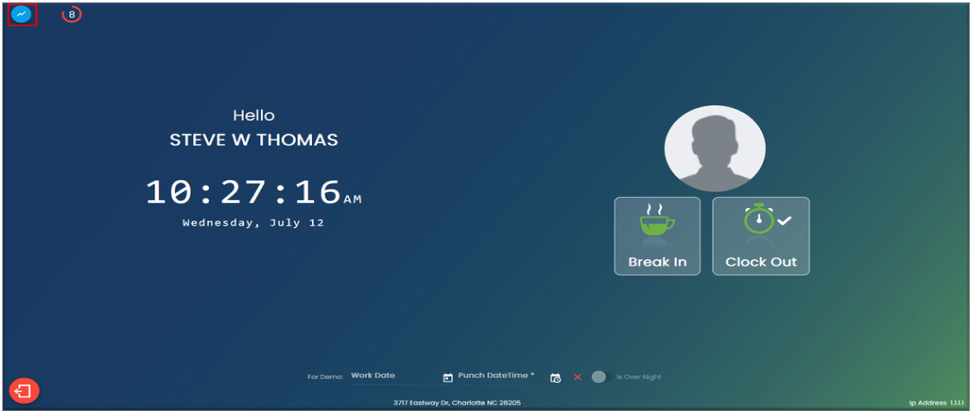
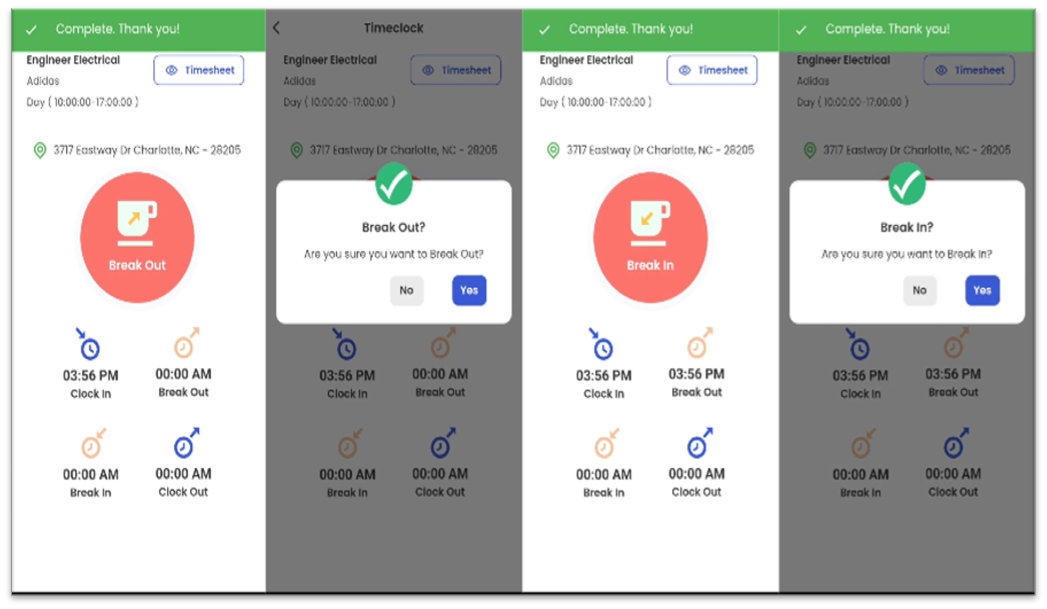 Likewise, users can facilitate themselves with ‘Break Out’ and ‘Break In’ functionality so that they can record the time entry for taking the break and coming back to work after completing the break respectively.
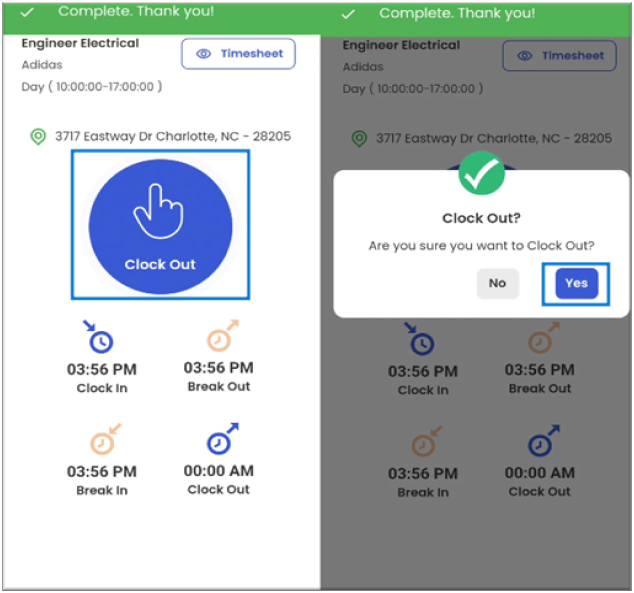
Once the shift is completed for the day, users can ‘Clock Out’ the time clock so as to record the check-out time for the day.
The timesheet automatically gets submitted to the time approver/supervisor, after clocking out the shift.
In such a way, employee can use time clock to record their daily timesheet entries.
Upon the competition of the timesheet entry, users can now view all the records from the Timesheet action.
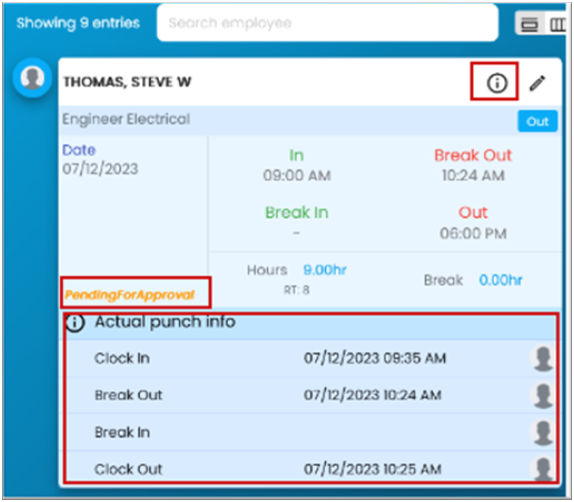
Timesheet window gets displayed with all the information available along with the status of time entry in the top right corner of each days’ entry.
‘PendingForApproval’ means the time entry has already been submitted for approval.
Editing Time Clock Entry
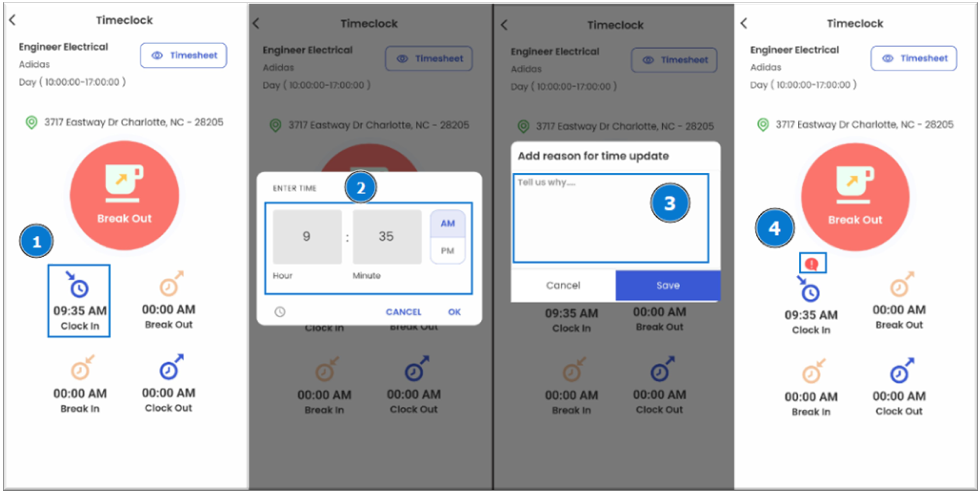
If users are provided with feasibility to edit the time clock entry which has not been submitted for approval yet can be edited in the following procedure:
- After making any entry, tap on the entry that users want to edit.
- Users can correct the time using time picker and proceed as OK.
- Users will then require to add the note mentioning the reason for change in the time entry.
- The edited time, now can be seen with the exclamation notification badge.
Editing Timesheet Entry
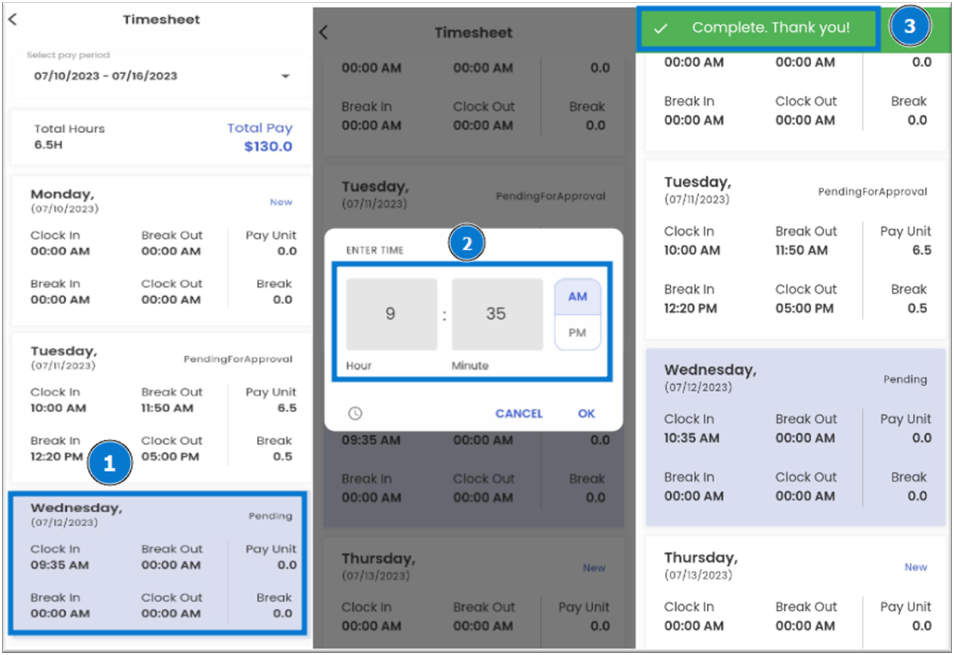
If users are provided with feasibility to edit the timesheet entry which has not been submitted for approval yet can be edited in the following procedure:
- After making timesheet entry, tap on the entry that users want to edit from the list of timesheets.
- Users can correct the time using time picker and proceed as OK.
- Users can see the toaster message as ‘Complete. Thank You’ on the top of the window and the edited timesheet, now can be seen with the updated detail in the timesheet list.
Using Web Application
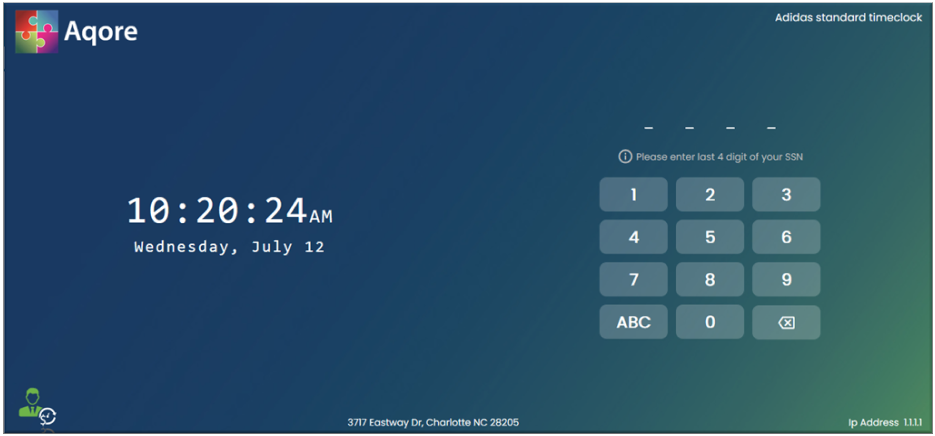
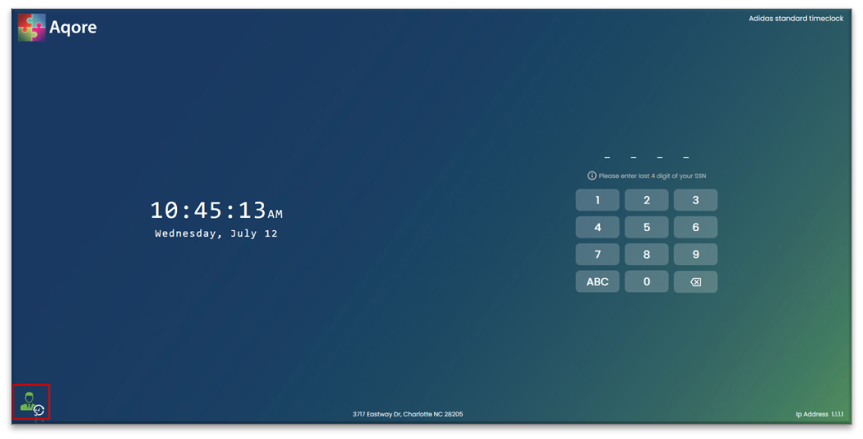
Users will find the Time Clock URL on the 'Login Info' action under the Favorite Action of Web Clock top navigation of the Customer Detail page. Clicking on the URL will redirect the users to the employee pin entry screen when the ‘Skip Login UI’ field is set as True in the ‘Set TimeClockProperty’ window. If there is more than one Time Clock setup for the organization, then the users need to select the respective Time Clock that they want to use.
While setting up the Time Clock, users must enter the 'Pin' as per the 'Employee Pin Option' chosen. Employees can log in with their last 6 digits, 4 digits, or full SSN as per the setup done on the Web Clock.
An employee can clock in/ clock out/ break in/ break out from this screen.

Users can click anywhere on the screen and stop the reset time.
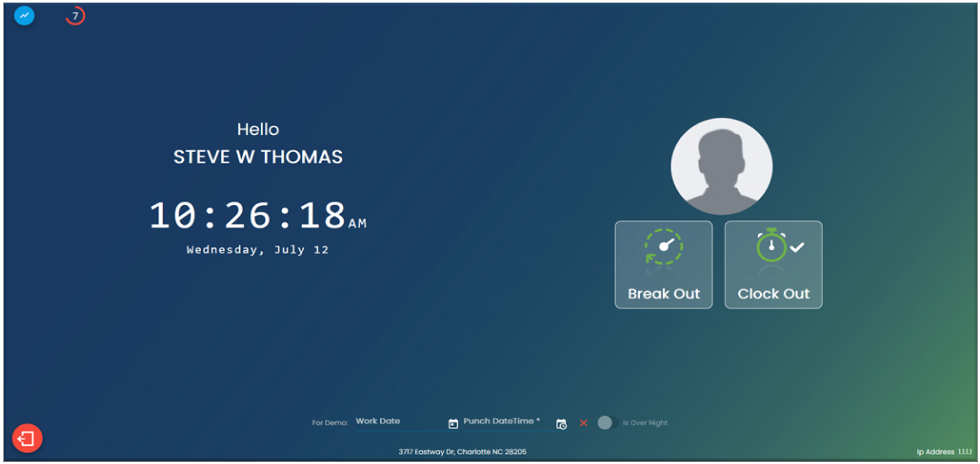
Users can view the summary of the employee by clicking on the ‘Employee Summary’ icon.
Users can view the history of the employee as:
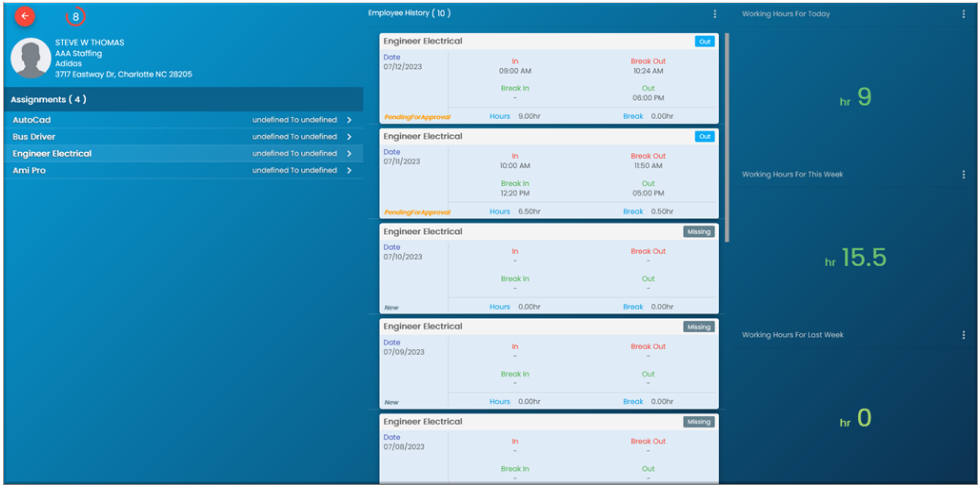
The history window is basically divided into 3 columnar compartments.
1st Compartment consist the employees’ detail along with the Company’s information followed by the lists of the assignment involved.
2nd Compartment consist of the Employees History of the time clock entries related to the assignment picked from the list of assignments of the 1st compartment.
3rd Compartment basically displays the duration of the employee’s engagement in the assignments partitioned as:
- Working Hours for Today
- Working Hours for This Week
- Working Hours for Last Week
Time Clock Admin Login
Logging in as an Admin on Time Clock
Clicking long on the 'Admin' icon will redirect the users to the admin page.
Users can click on the 'Admin' icon and then enter their credentials to log in as an TimeApprover/ Supervisor. 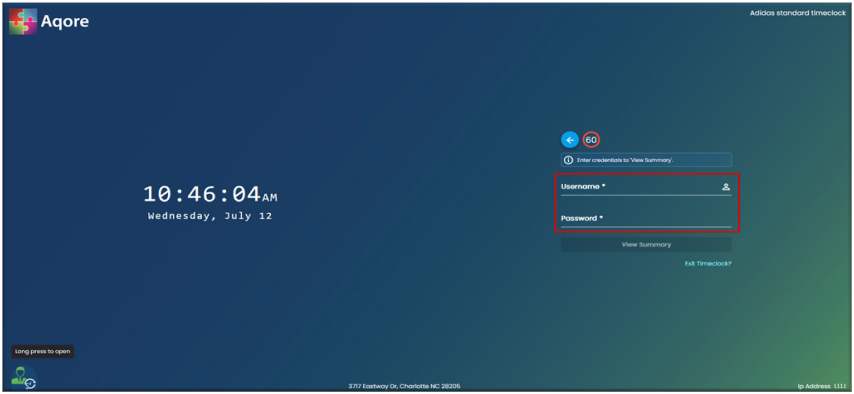
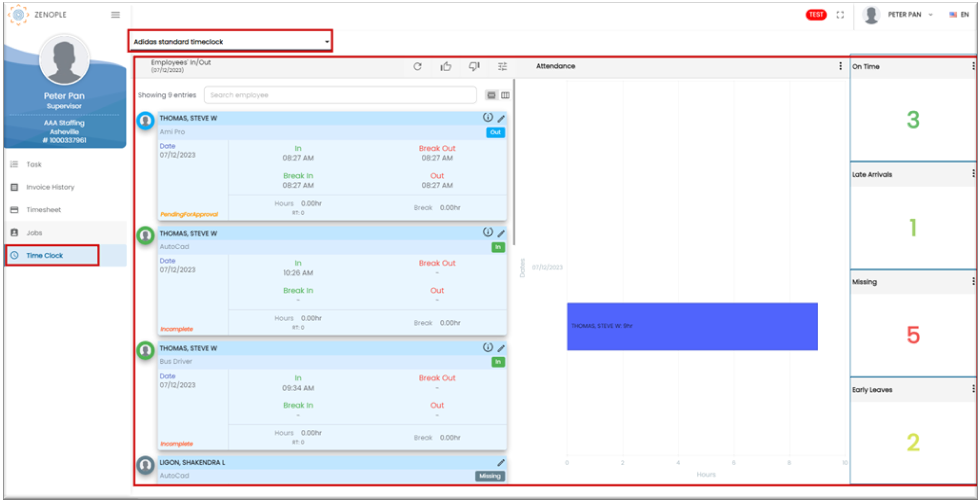
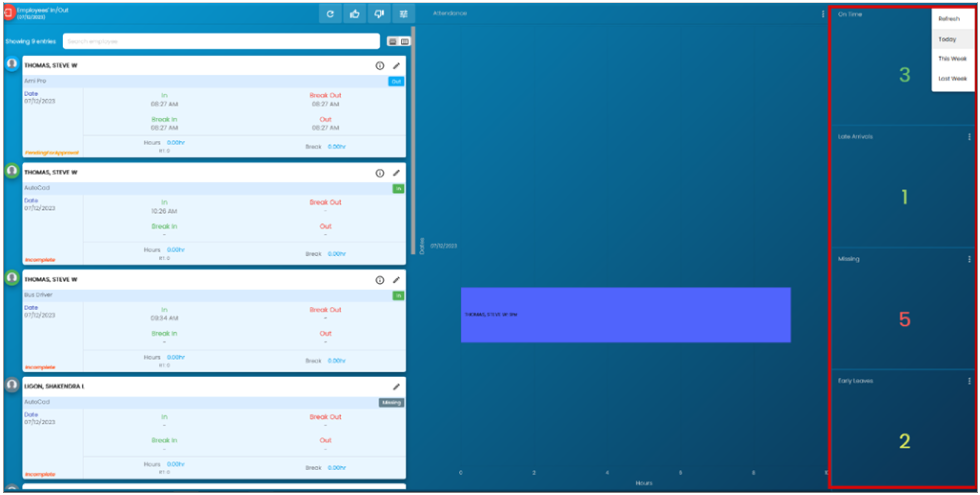
Users can view the details of the employees’ timeclock information as well. It is basically divided into 3 columnar compartments.
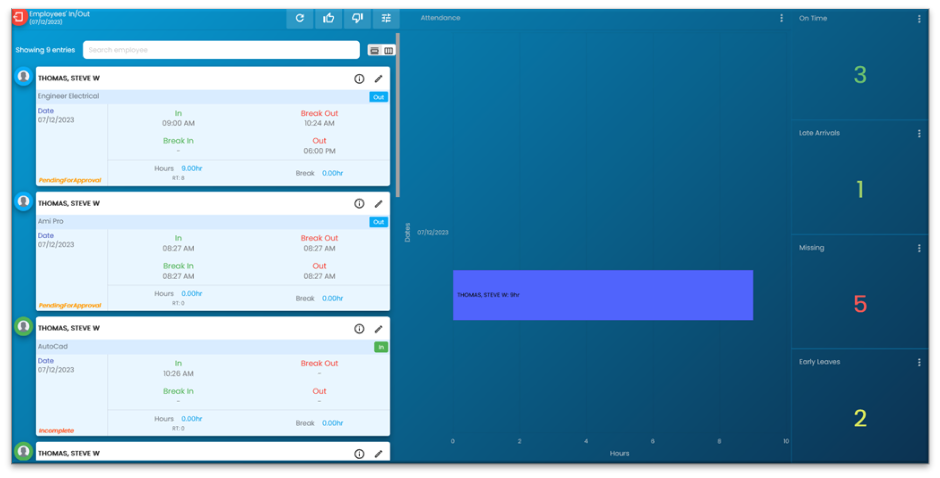
In the 1st Compartment, beside 'Employees' in/out' users can 'Refresh', 'Approve& Submit', 'Reject' and ‘Flip (Search)’ the time clock entries of an employee and also view the time entries within a 'Date Range' for specific employee.
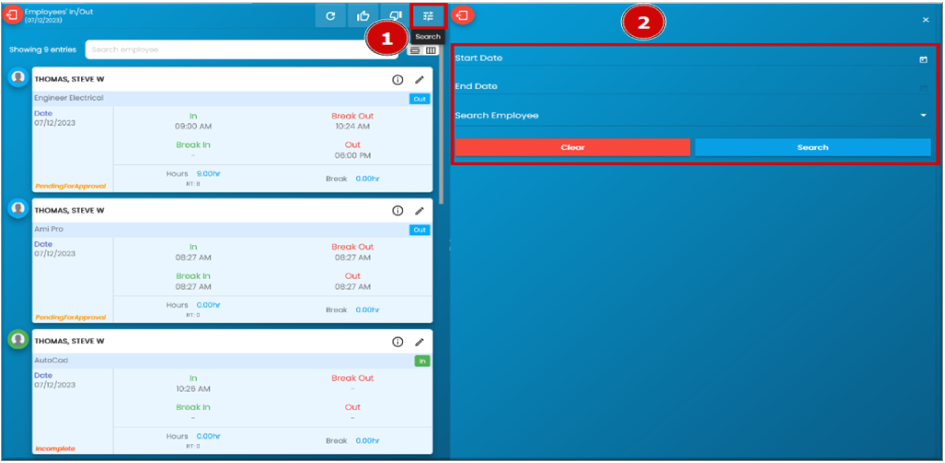
Users can enter the employees’ name on the search bar to find the specific employee’s timesheet information.
Users can click on the 'Daily' or 'Weekly' buttons to view the details of the employee likewise.
Once the employee punches in and submits the time clock entries, the status will change to ‘Pending for Approval.’
Users can view the detailed punch info on clicking the info action.
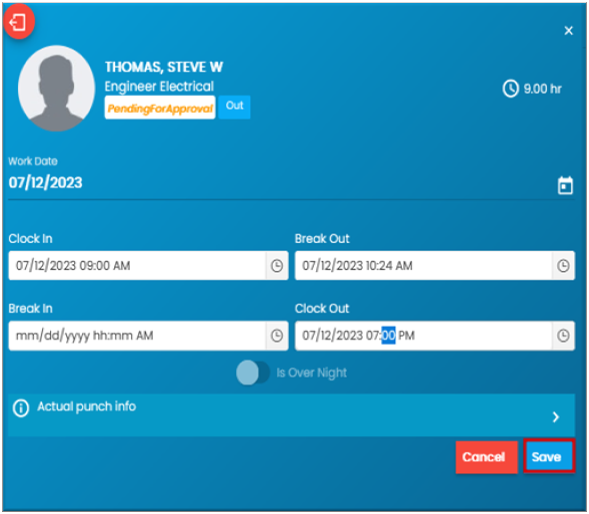
On clicking the edit action, users will be able to update the desired time entries of the employees and save it for further proceeding.
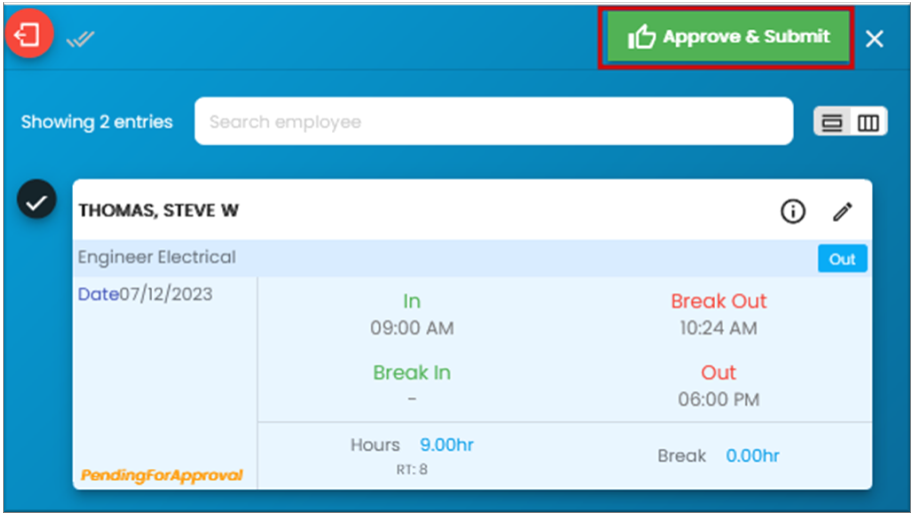
Further, the users can ‘Approve & Submit’ the time clock entries.

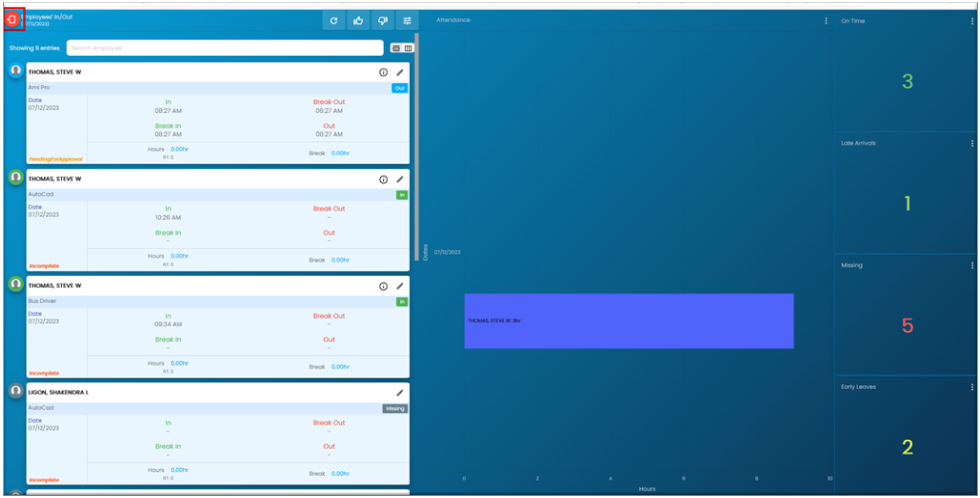
The 2nd compartment consists of the Attendance details of the employees.
Hourly attendance records of the employees can be seen here.
The vertical ellipsis button available on this section, helps to pull the timesheet entry on for today, this week and last week.
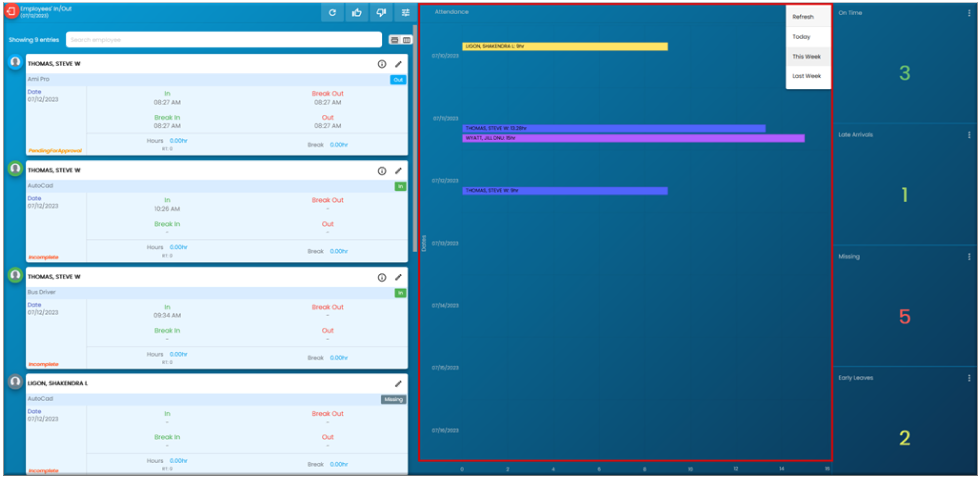
The 3rd Compartment basically delivers the information regarding the punctuality.
It is further divided into ‘On Time’, ’Late Arrivals’, ‘Missing’ and ‘Early Leaves’ which can be viewed for today, this week and last week based on the option selected from the vertical ellipsis action.
Attendance information here is being displayed on the basis of frequency.
Users can logout from the timeclock on pressing the logout action available on the top left corner of the time clock window.
Users can also use the same timeclock via Customer portal thereby selecting the particular set timeclock from the ‘Time Clock’ side navigation.
All the functionality from this navigation is analogous to the Timeclock described above.