Timesheet
Timesheet navigation gives an outline of a typical staffing company's time entering process. All setup must be completed before you proceed with the steps in this process.
This is used to enter the pay unit, bill unit, pay rate, and bill rate of the selected organization. Based on the time entered payroll and invoicing are done.

There are three ways to enter the timesheet:
- Manually enter the timesheet by creating the batch
- Auto batch will be created if you have entered timesheet in the employee portal and customer portal
- Auto batch will be created based on the time punch record when entered from 'Time Clock.'
Add Transaction Batch
Before adding the transaction batch, select the organization and accounting period from the dropdown to enter the timesheet. Add transaction batch is to include the transaction created for the company in a single unit.

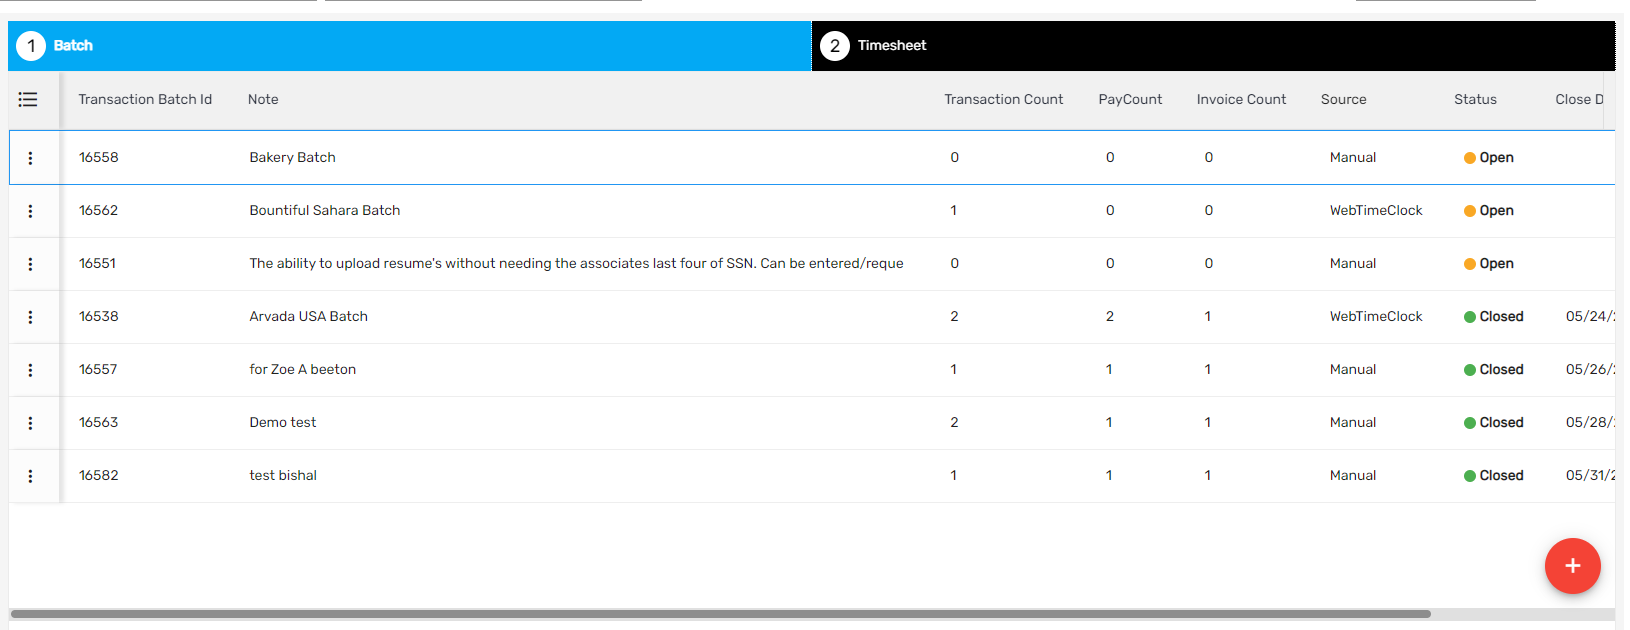
The timesheet navigation consists of two tabs, where each tab displays information on a different component of the batch. Each tab also provides users with the ability to perform particular actions on the batch.
Batch Tab
- Create transaction
- Add transaction batch
- Discard batch
- Edit batch
- View batch report
Timesheet Tab
- Time entry
- Enter pay unit, bill unit, pay rate, and bill rate
Create Transaction
There are multiple ways to create transactions in the 'Time Entry Batch.'
- Select an Accounting Period and create a transaction by clicking 'Create Transaction'
- Creating Transaction from Assignment
Creating Transactions From the Accounting Period
Transactions for selected companies can be created by clicking on the 'Add' button in the top right corner. ‘Create Transaction’ is used for an existing employee involved in an assignment to include in transactions for time entry.

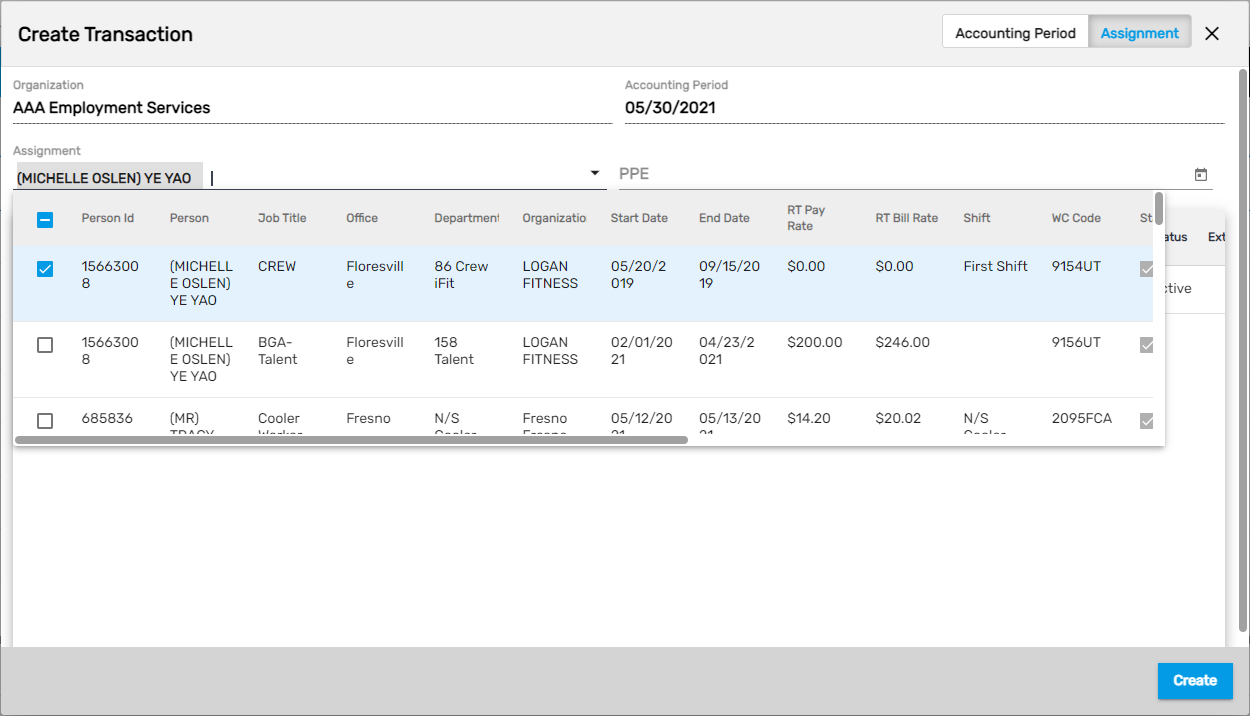
Creating Transaction From Assignment
Using this feature, users will be able to create transactions of the selected employee for the current accounting period as well as for the existing accounting period.
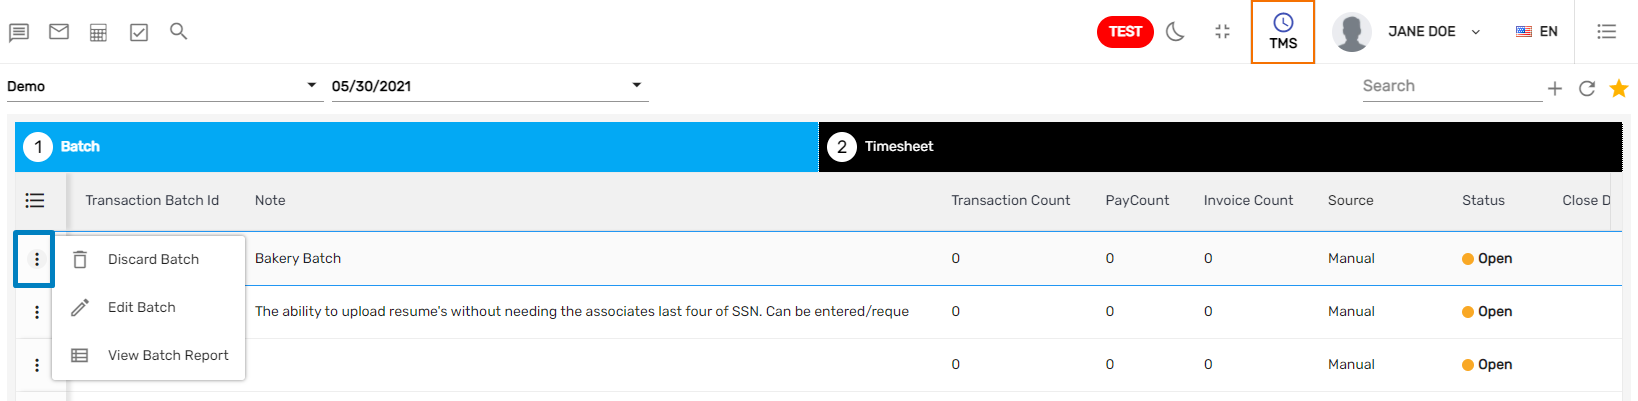
You can click on the vertical ellipsis button to discard the batch, edit the batch or view the batch report after the creation of the transaction batch.
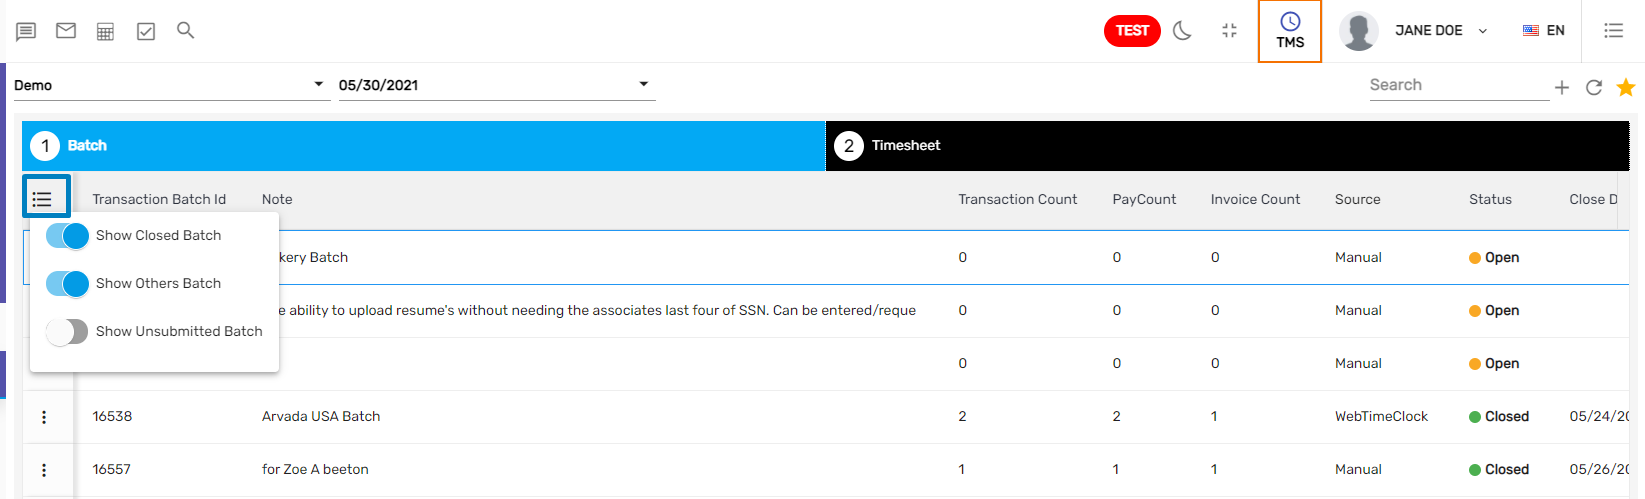
You can also view the closed batch, another batch, and unsubmitted batch from the hamburger icon.
Actions | Description |
|---|---|
| Show Closed Batch | If you enable 'Show Closed Batch' you can see the close batch of the selected organization and accounting period. |
Show Other Batch | If you enable the 'Show Others Batch' you can view the batch created by other users as well. |
| Show Unsubmitted Batch | If you enable the 'Show Unsubmitted Batch,' you can view the unsubmitted transaction batches. |
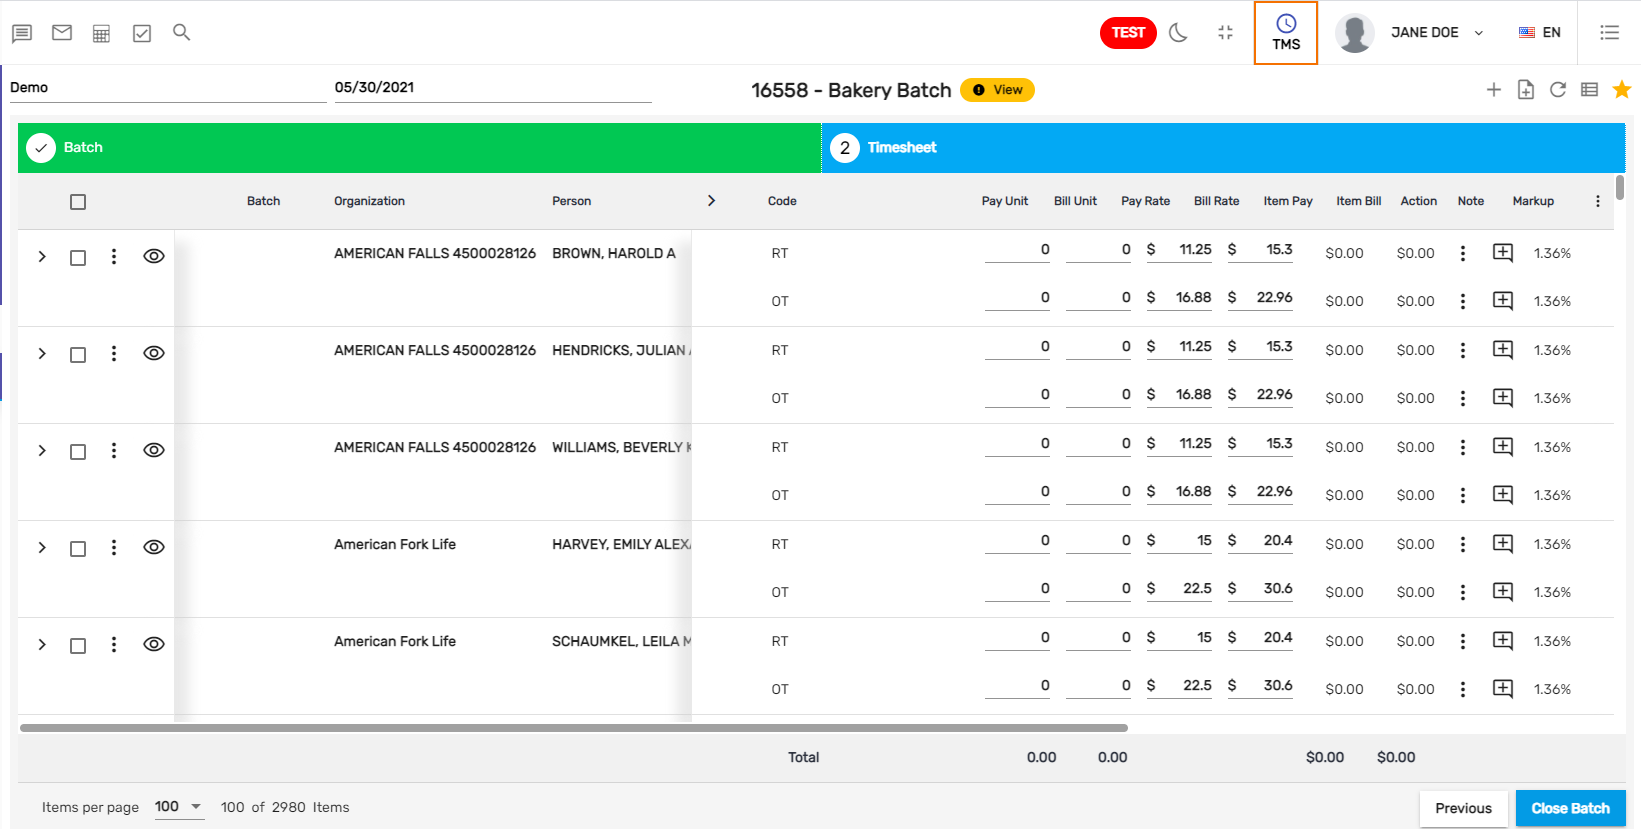
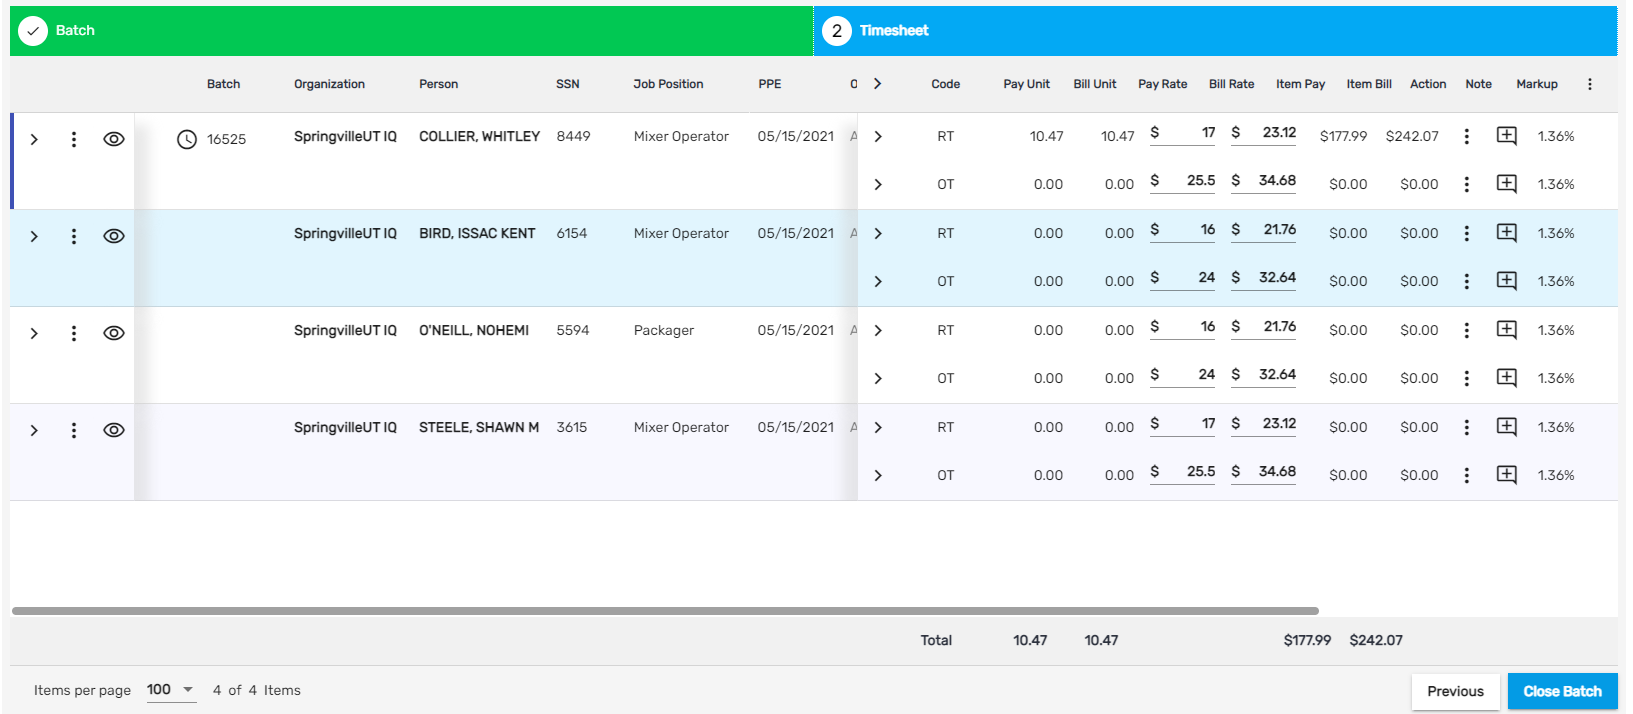
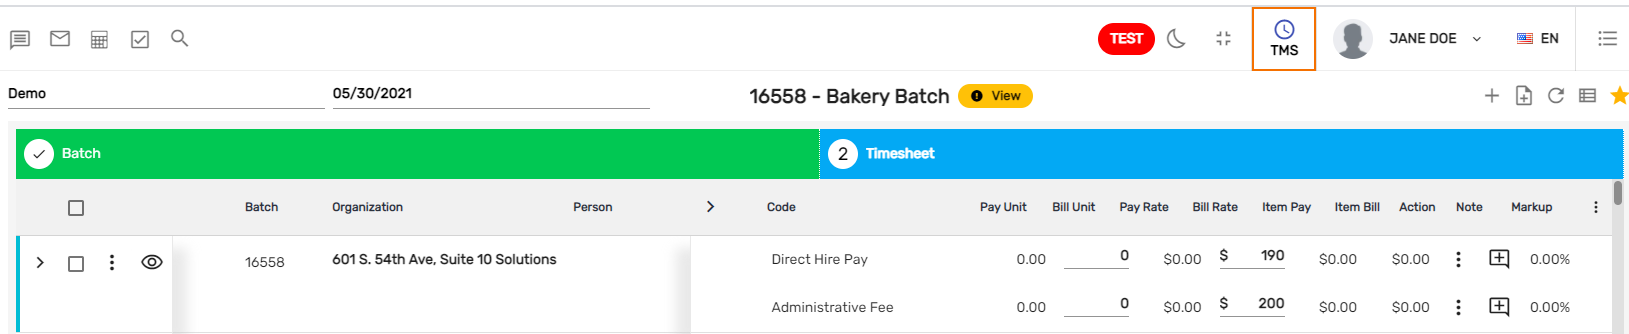
Fill Up the Timesheet
Fill up the timesheet for a given batch by entering the Pay Unit, Bill Unit, Pay Rate, and Bill Rate.
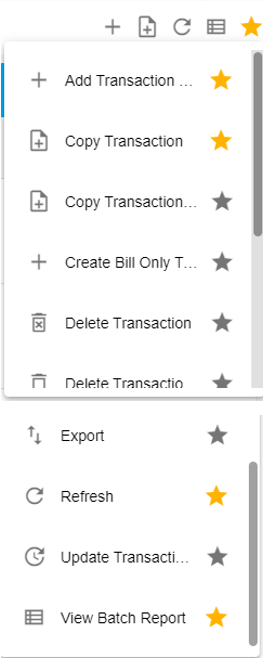
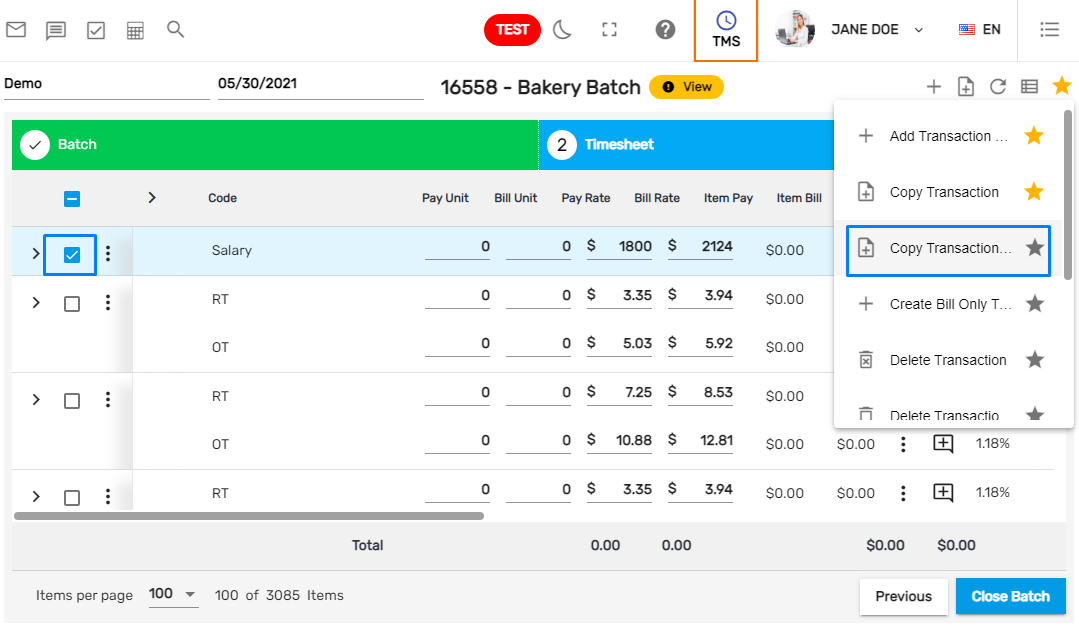
Favorite Action
Users can see the various actions by clicking on the star button in the top right corner. They are:
- Add Transaction Code
- Copy Transaction
- Copy Transaction with Selected Transaction Code
- Create Bill Only Transaction
- Delete Transaction
- Delete Transaction Code
- Export
- Refresh
- Update Transaction Information
- View Batch Report
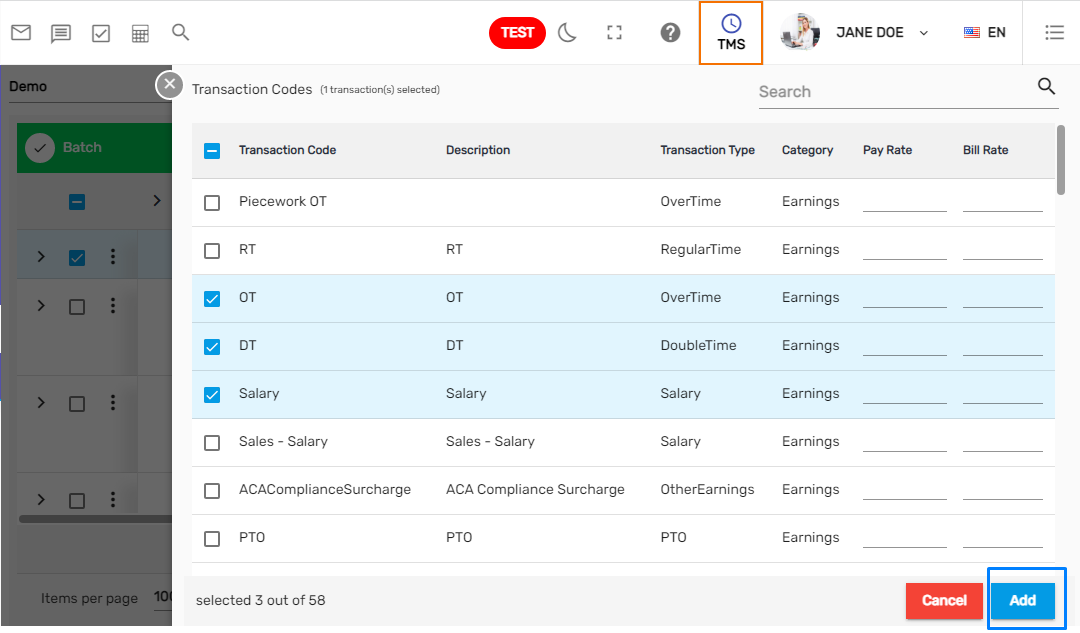
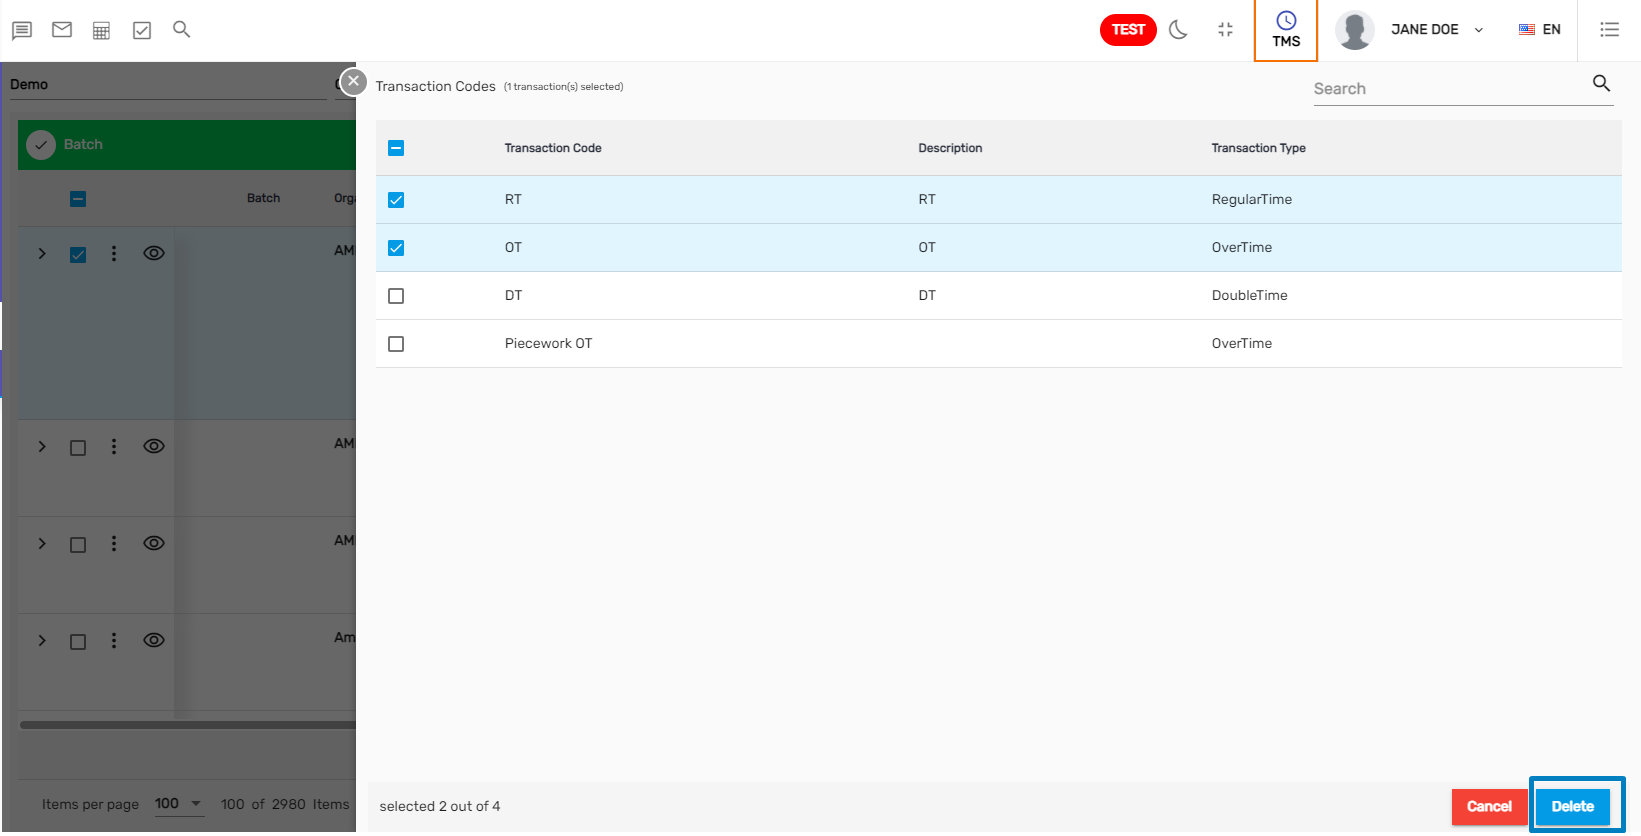
1. Add Transaction Code
First, users need to select the transaction and then select the multiple transaction codes from here to reflect it in the timesheet.
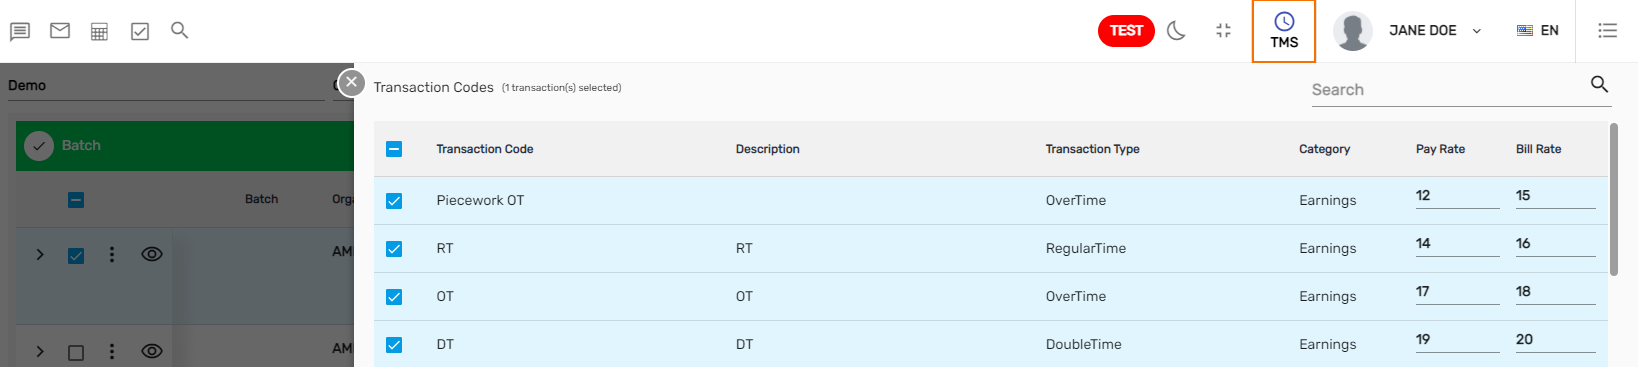
Added transaction code is reflected as,

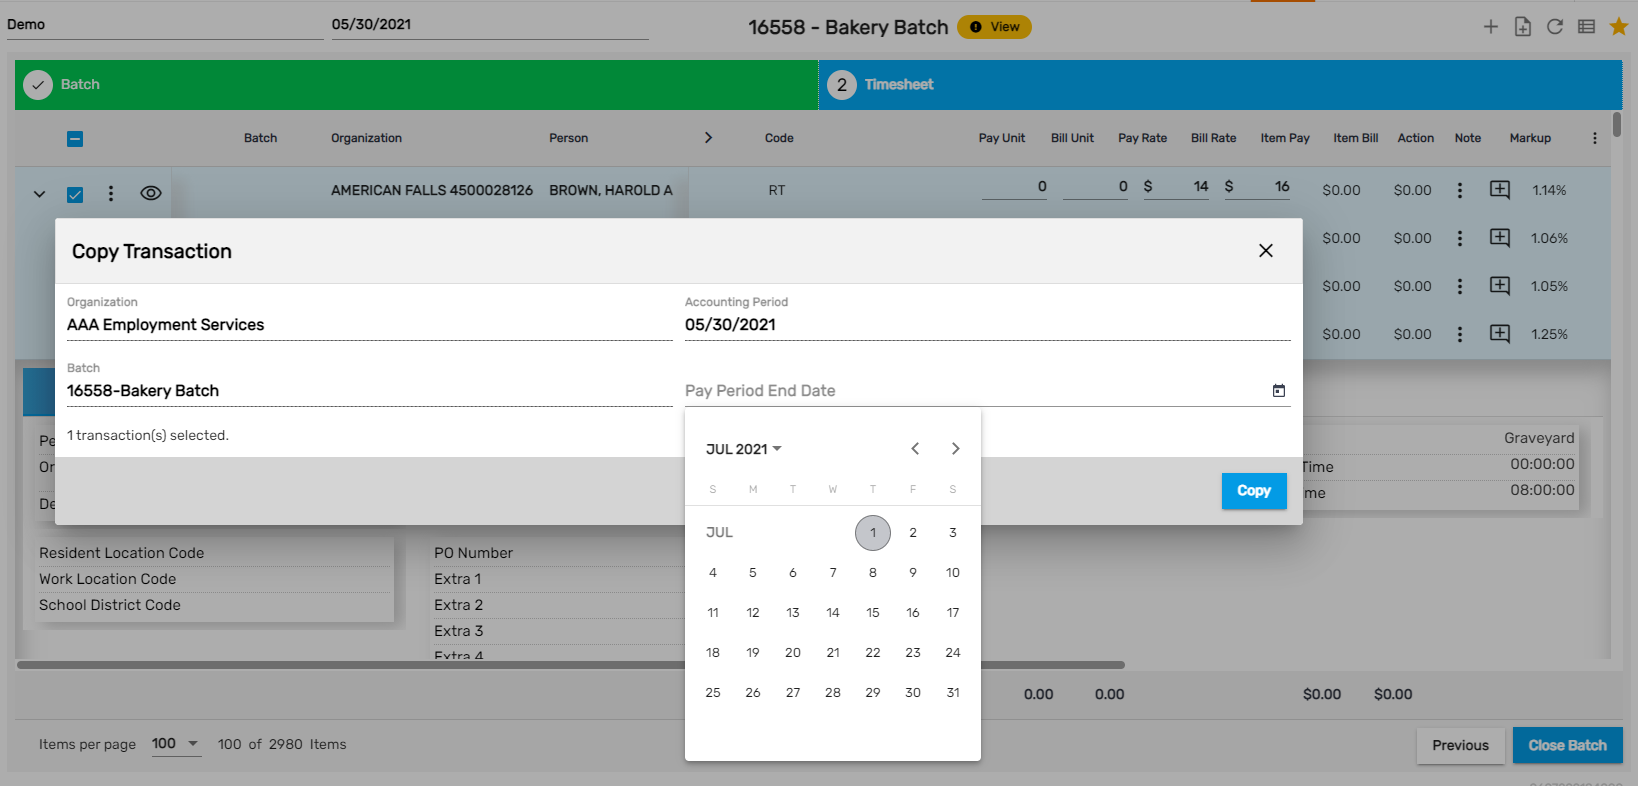
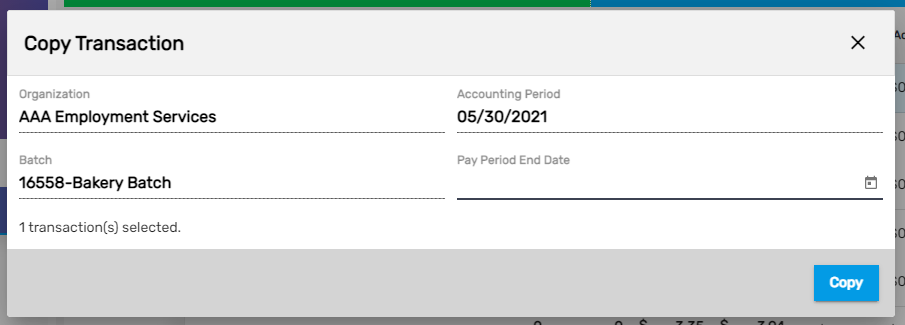
2. Copy Transaction
'Copy Transaction' will duplicate the transactions. Users can copy the selected transaction and update the 'Pay Period End Date.'
3. Copy Transaction with Selected Transaction Code
This action helps in making duplicate transactions along with the selected transaction codes. Users can copy the selected transaction and update the 'Pay Period End Date.'
Users have to select the transaction and use the action to copy the transaction with the selected transaction code.
On adding, a dialog box will appear.
Users can then copy the transaction with the selected transaction codes. Users will see a toaster message after it is copied.

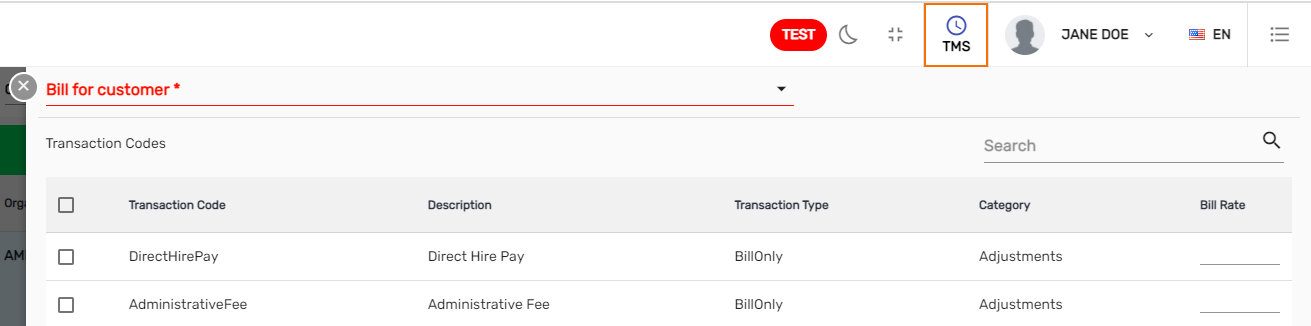
4. Create Bill Only Transaction
'Bill Only Transaction' will help to search the organizations and select bill-related transaction codes.
Bill Only Transaction can be used when a customer only has to pay an invoice. Users can continue from IMS after closing this batch, while the PAS process is escaped.
Users must first choose a 'Customer' and a 'Transaction Code' before entering a bill rate. Selected ones will be displayed on the timesheet.
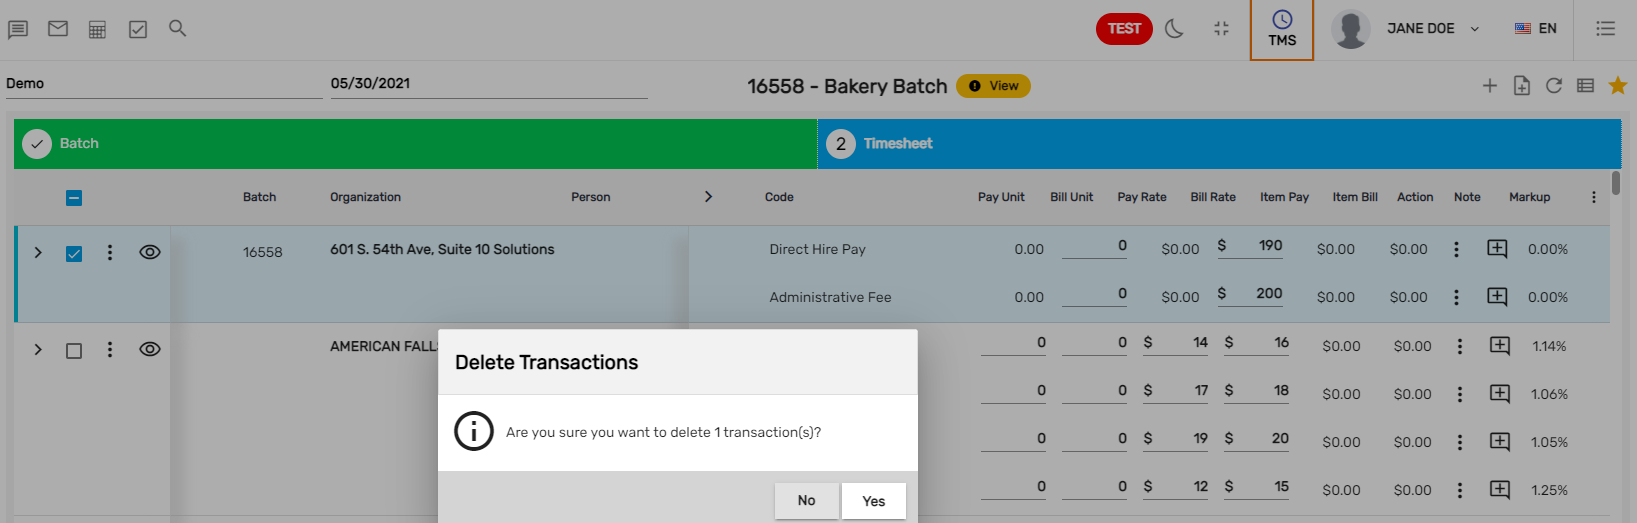
5. Delete Transaction
Selected transactions can be deleted using the 'Delete Transaction' action.
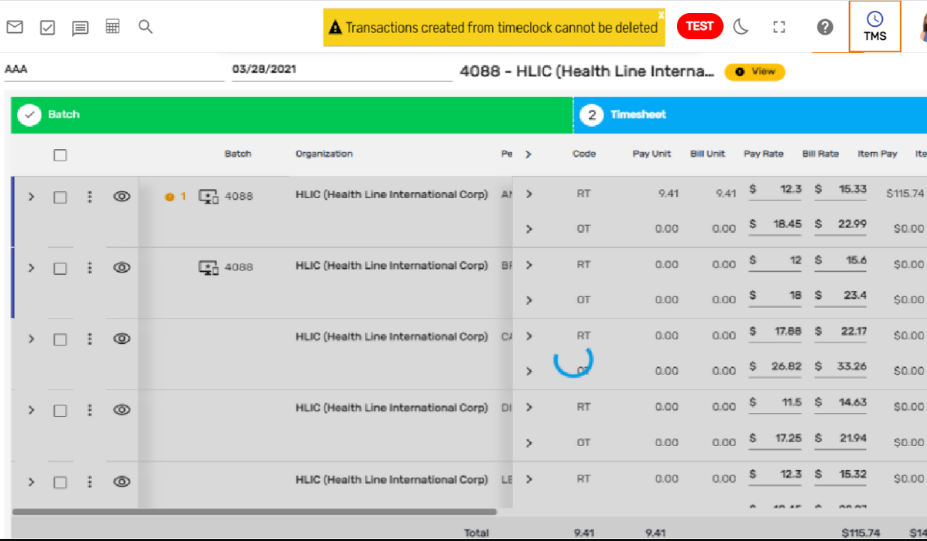
If the transactions are done from the timeclock and users try to delete the transaction then a warning message will be displayed.

6. Delete Transaction Code
It is possible to remove transaction codes from numerous transactions. Users must first select the transaction codes, then click on the 'Delete' transaction code button. The selected transaction codes will be removed from the transactions.
7. Export
Click on the export button to download the timesheet of the selected alias and accounting period.
8. Update Transaction Information
Users will be able to update information related to the organization and employees, and return to this screen to reflect the changes using ‘Update Transaction Information.’ Instead of deleting and reprocessing the batch, this functionality will be used when the information is wrong.
Select the transaction from the timesheet and click on 'Update Transaction Information.'
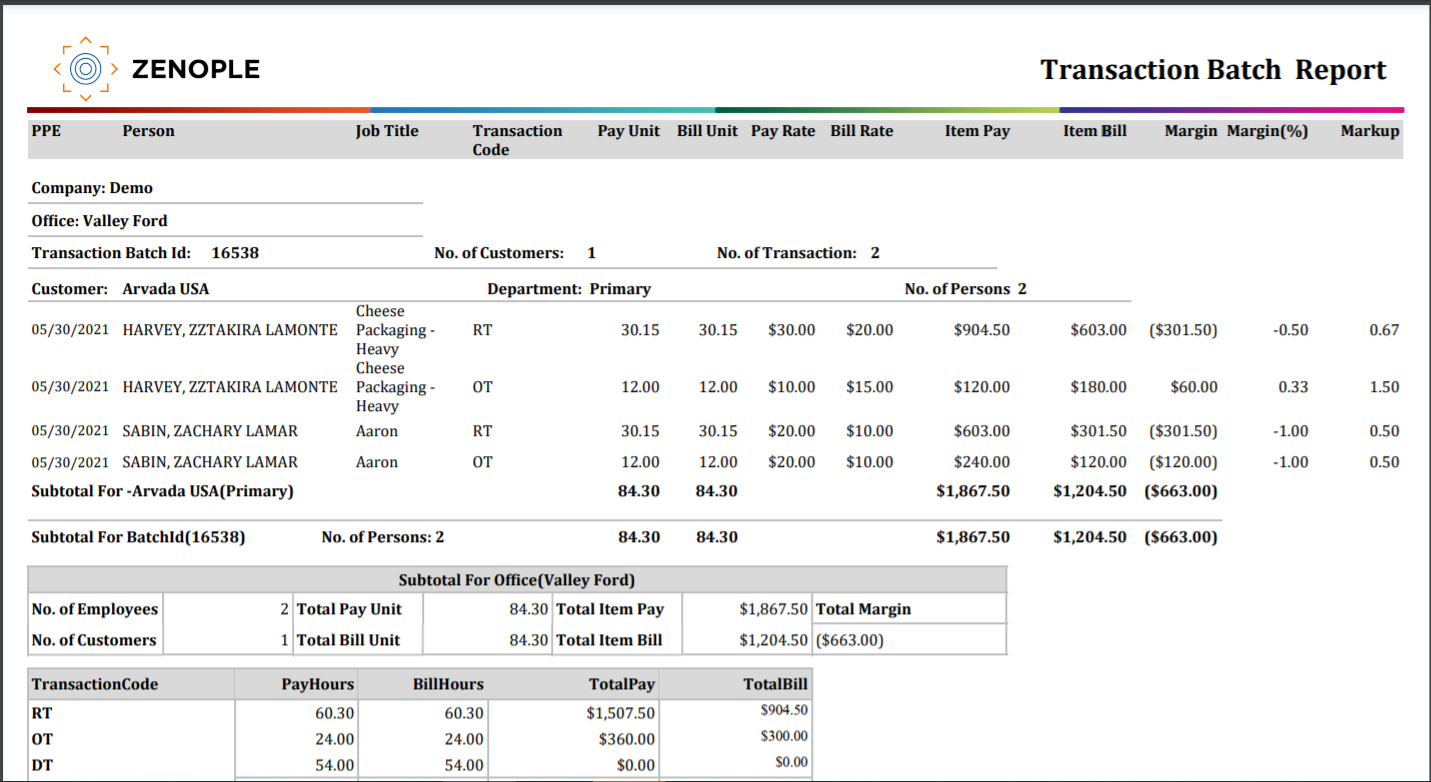
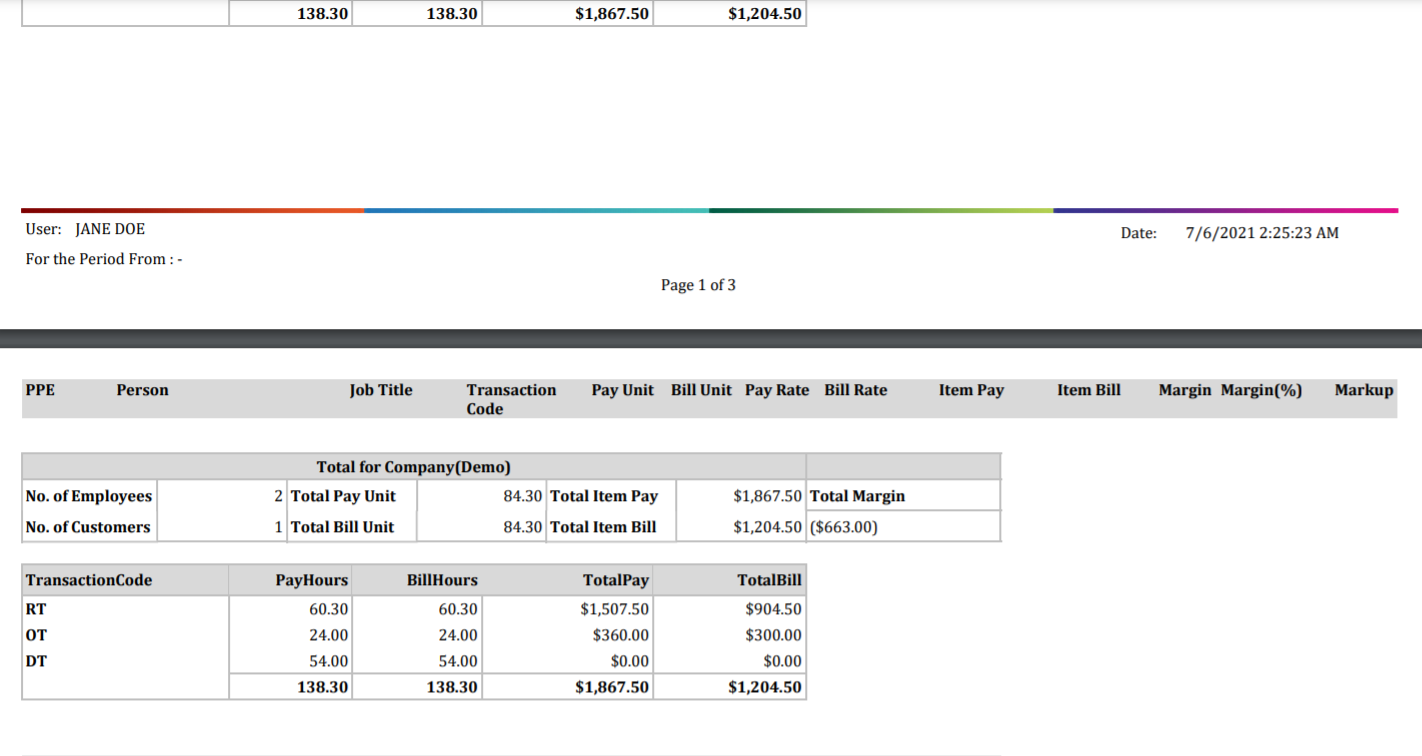
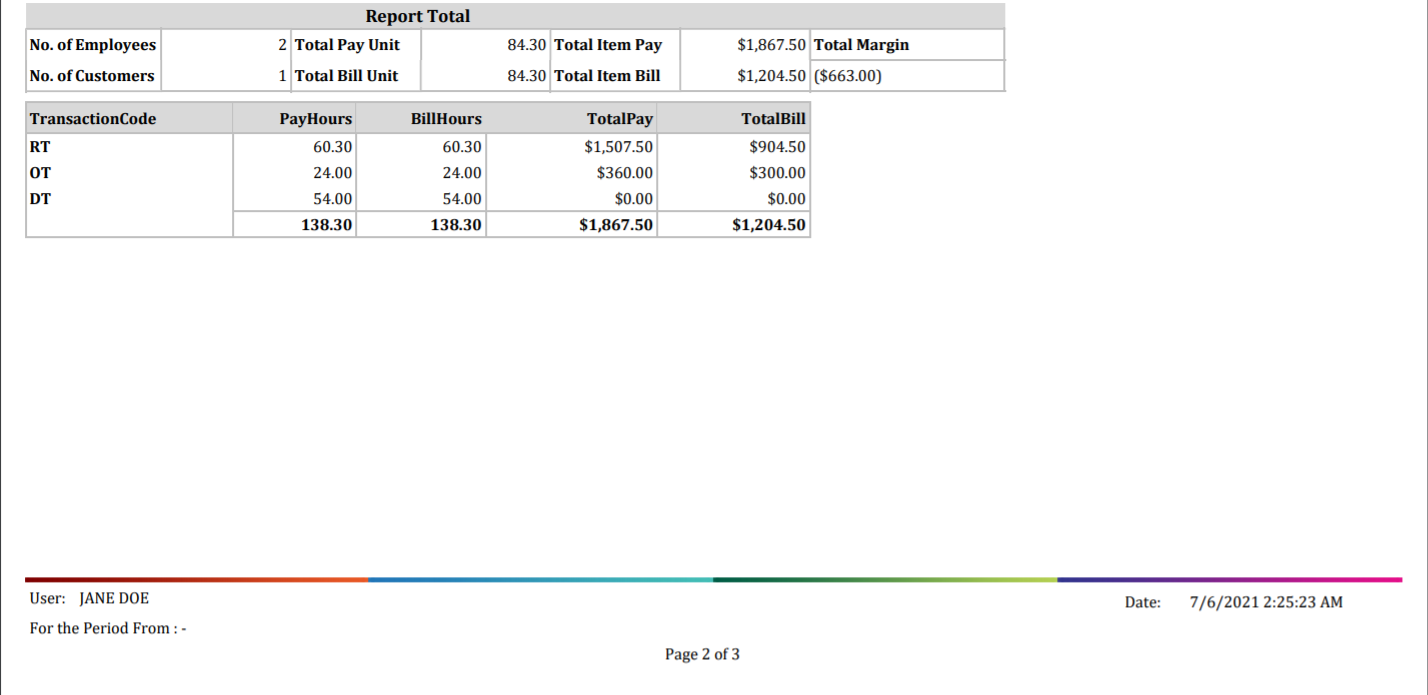
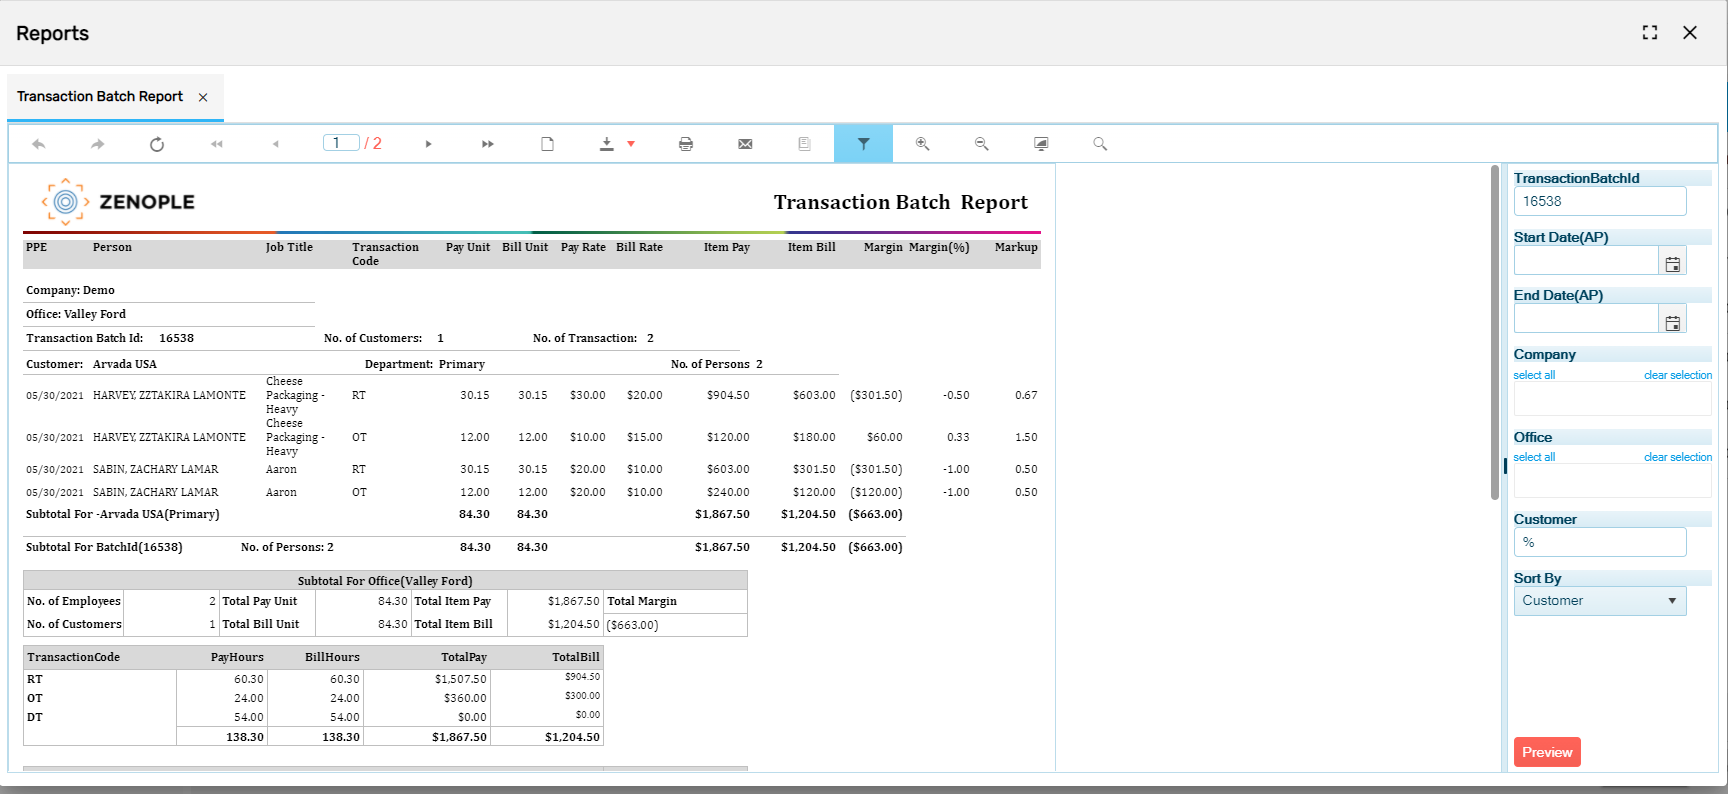
9. View Batch Report
The transaction batch report provides information specific to the selected batch.
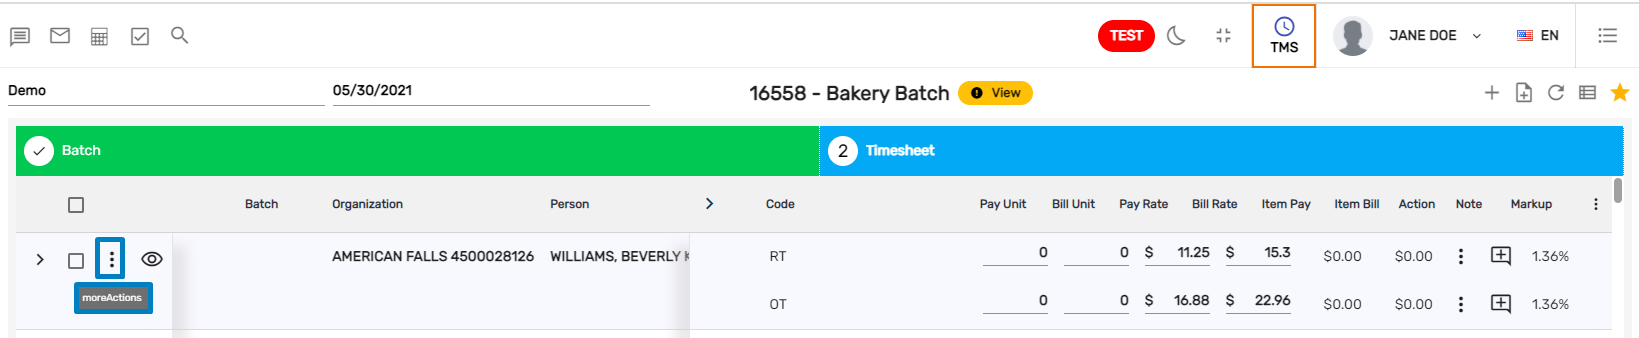
More Actions
Users can edit the transaction and attach the timesheet by using 'More Action' from the verticle ellipsis button. The actions are:
- Edit Transaction
- Timesheet Attachment
- Add Daily Timesheet
- Edit Timesheet Note

1. Edit Transaction
When you click on the 'Edit Transaction,' you will be redirected to the 'Edit Transaction' dialog box, where you can edit the transaction information and update it.
| Field | Description |
|---|---|
Office | Branches list |
| PPE | Pay Period End Date |
Pay period | Pay period dropdown includes weekly, daily, hourly, biweekly, monthly, and quarterly. This determines when to do the payroll. |
OT Plan | OT plan dropdown includes daily over 40 plans, daily over 8 weekly over 40. If you choose daily over 40 plans and you input RT value = 50, it splits as RT=40, OT =10. |
Job Position | The job position is determined from the job |
Shift | A Shift is also determined from the job |
Employee Type | Employee type can be Contractor and Employee, which is set from the EIS application |
Purchase Order | To overwrite the purchase order setup from the customer service profile or the job. |
PO Number | To overwrite the PO number setup from the customer service profile or from the job to display in the invoice. |
Extra 1 | Extra field display in the invoice. |
2. Timesheet Attachment
You can attach the timecard directly from this dialog box. This will be reflected in the invoice and it will show the employee timesheet details.
When you click on the more action button on the right side, you will get the following actions:

3. Add Daily Timesheet
You can set the timesheet from the service profile as weekly, daily, etc. You can just click on 'Add Daily Timesheet' and can manually enter the daily clock in, clock out, break-in, and break out for the selected transaction.
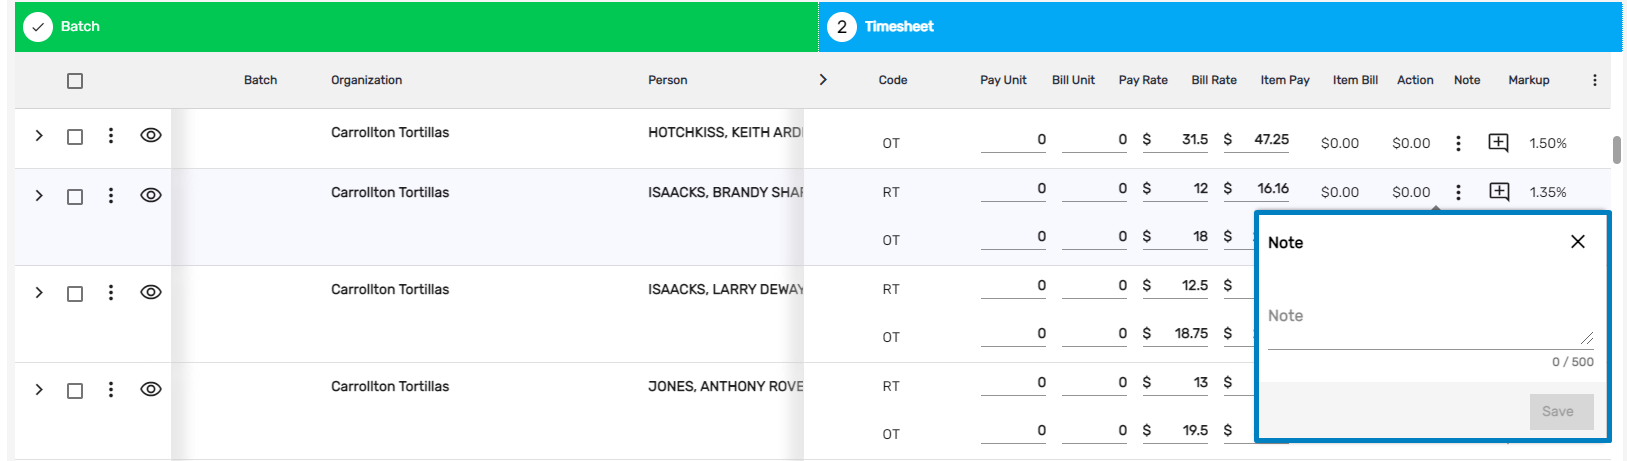
4. Edit Timesheet Note
The note entered in the 'Timesheet' will be reflected in the transaction batch report.
If you click on the right side menu following actions will display.

Table Menu Option | Description |
|---|---|
| Show/Hide detail handler | You can show/hide the details handler in the timesheet |
Show/ Hide selection checkboxes | You can show/hide the selection check boxes from the timesheet menu |
| View exception only | Click on view exception only to view the exception of the timesheet |
| Disable pay unit equals bill unit | You can disable/ enable the pay unit equals to the billing unit for the timesheet |
| Column option | This option is to show the selected field in the column. You can select only those fields they want to display in the timesheet column. You can also arrange the column by dragging and dropping the column. |
Expand Detail
You can view the 'Snapshot,' 'Finance,' 'Summary,' 'Exception,' 'Transaction Link' of the particular batch.
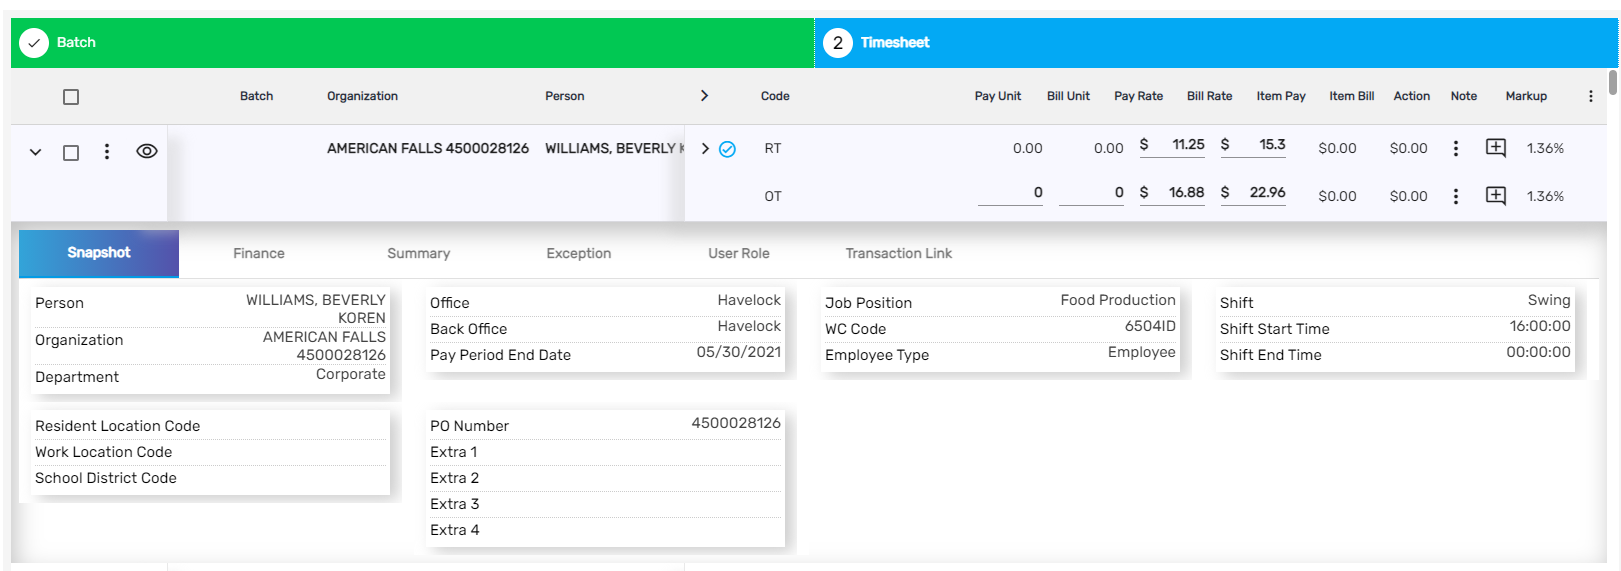
The 'Snapshot' shows the summary of the particular batch. In 'Finance,' the summarized financial transaction of the particular batch will be displayed. Whereas in the 'Summary' tab, the detailed summary of RT, OT, Pay Hours will be displayed. You can see the total at the end of the summary page. The 'Exception' tab shows the warning message in the transaction.
Eye View
You can redirect to the 'Assignment,' 'Customer,' 'Employee,' and 'Temp Job' from the eye view icon.

Close Batch
An exception will occur while the batch is being closed. Select the warnings and then click the 'Filter' button. Select the batch you want to approve and click on the 'Approve' button. Batch close should be confirmed only when the exceptions are approved. The batch report can be viewed once the batch is closed.


Transaction Batch Report