Productivity Board:
The productivity board allows users to create and track goals for office staff. The goals are created on "person" and "office" levels using various productivity templates, which include various parameters for the goal calculation.
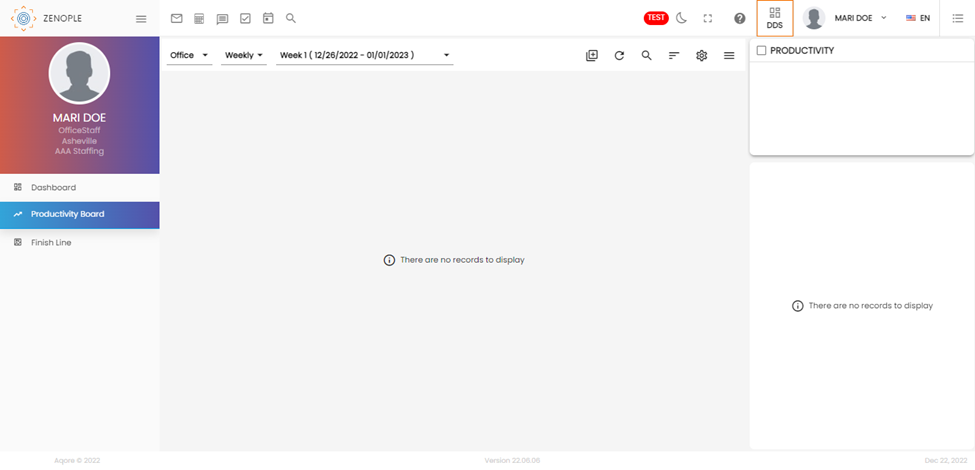
When a user has set up no goals, the Productivity Board Navigation will show a blank productivity board.
Adding Goals:
Users can add goals to the office staff/ company through the “settings-like” icon on the top right section.

Clicking on the settings icon leads to a screen with productivity details.
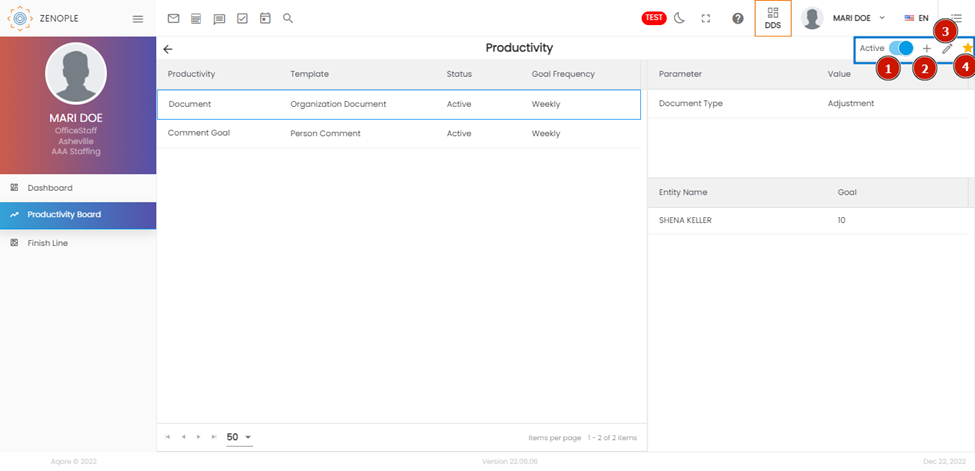
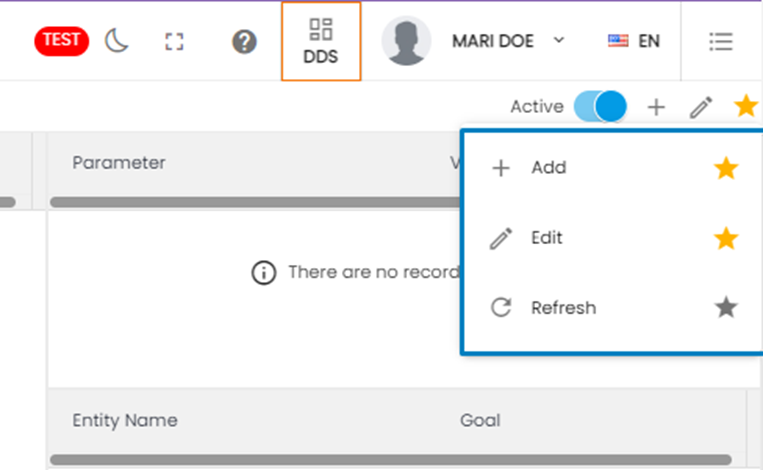
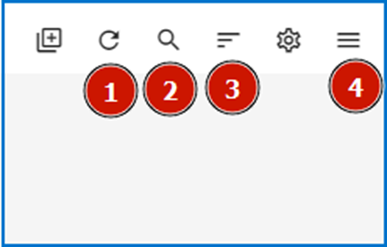
The four options in the top-right corner highlighted in the screenshot above are:
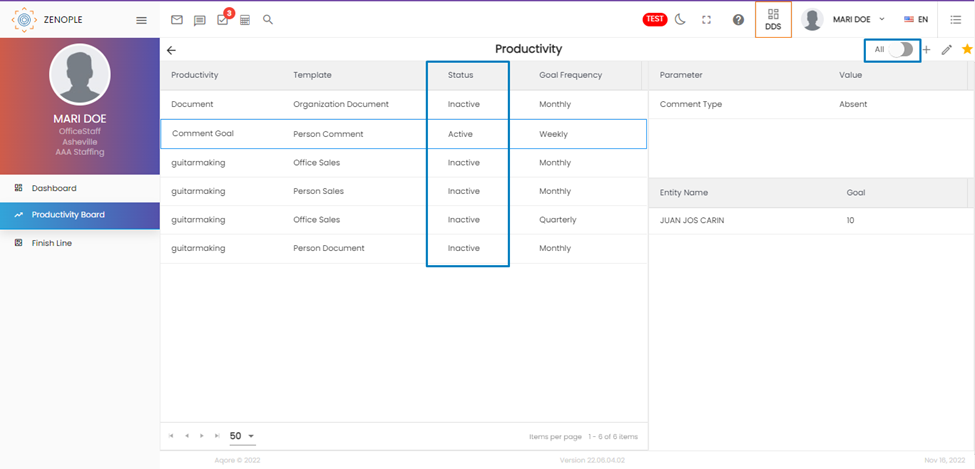
Number 1 => It shows the toggle that allows users to filter productivity goals based on statuses. Enabling the toggle will change it from Active to All, showing goals with both statuses.
Number 2 => It shows the add button from which we can assign goals to our office staff.
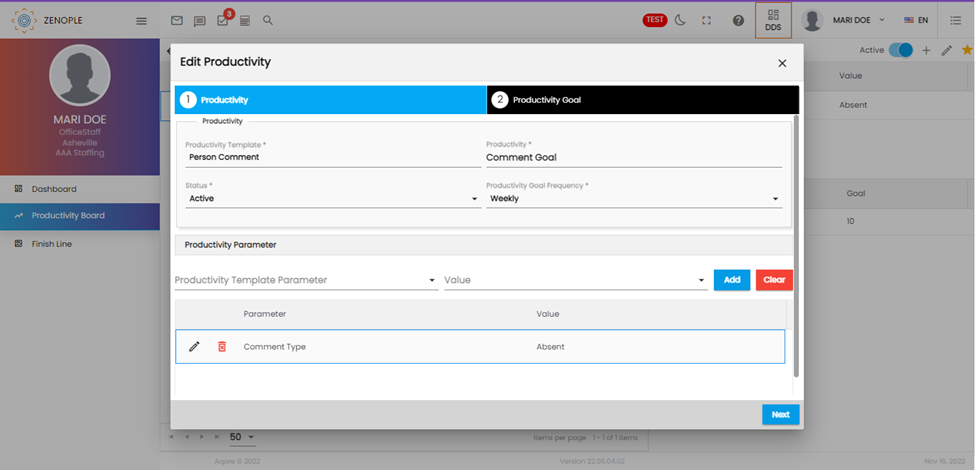
Number 3 => It shows the “Pen” button, which allows users to edit the goals. So, selecting an already set up goal and clicking on the edit option will redirect us to the “Edit Productivity” wizard.
Number 4 => It denotes the star icon. It allows users to pin and unpin features they want to see on the screen as default.
Users will use the “+” icon beside the status toggle to add productivity. Clicking on the plus button will show the following wizard:
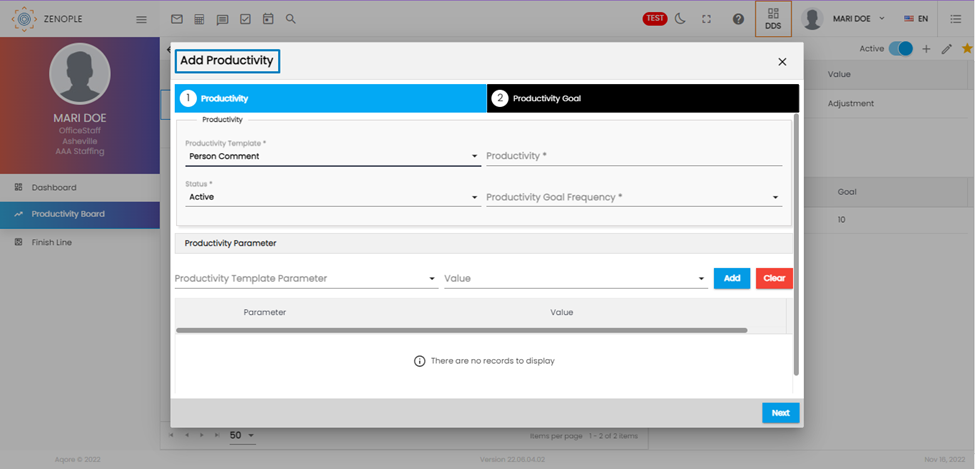
The first field, “Productivity Template,” allows users to choose the type of goal they can assign to the staff.
As soon as we select a value for the first field, the lower portion of the wizard “Productivity Parameter” gets revealed, which has two fields and two buttons: “Add” and “Clear.”
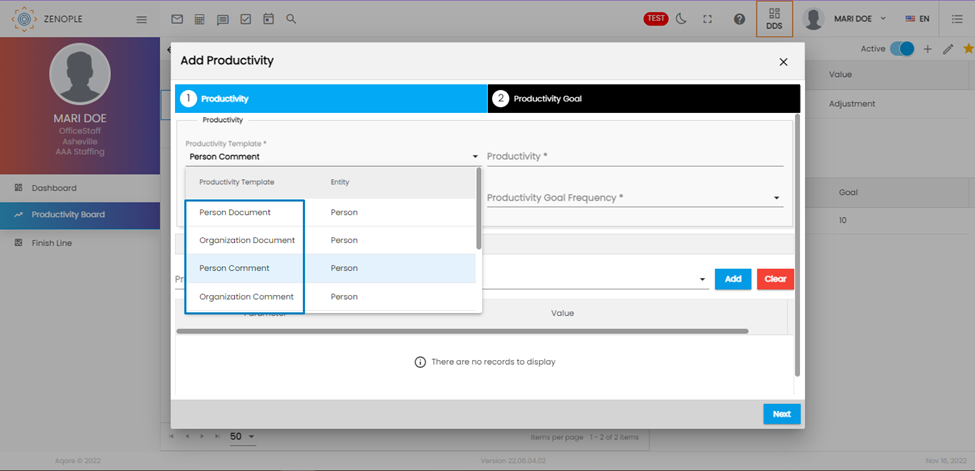
The Productivity template has the following options as field values:
- Person Document: Measures the total document count according to the document type parameter.
- Organization Document: Measures the total count of the organizational document according to the document type parameter.
- Person Comment: Measures the total number of comments related to a person based on the comment type parameter.
- Organization Comment: Measures the total number of comments related to the organization based on the comment type parameter.
- Employee Count: Measures the count of employees based on the user role parameter.
- Assignment Count: Measures the count of candidates based on the user role parameter.
- Person Sales: Measures the total transactional sales per user based on the user type parameters.
- Office Sales: Measures the total bill amount per office.
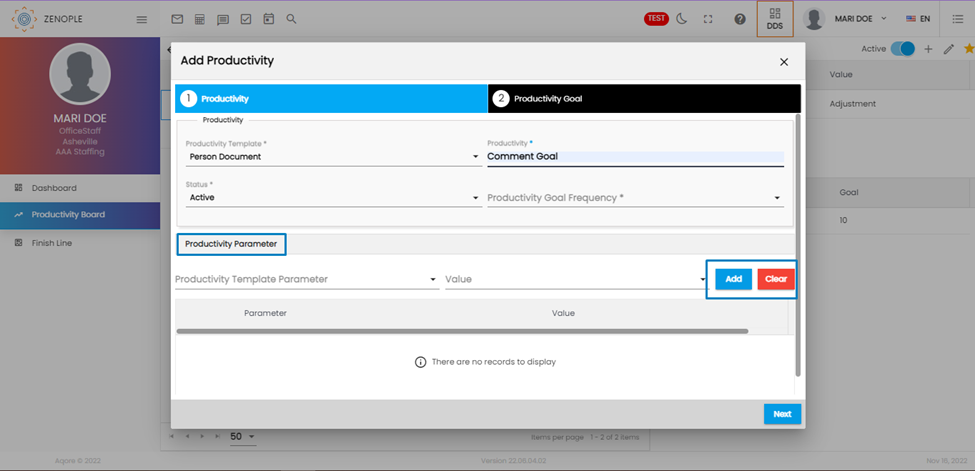
As seen in the above screenshot, the “Productivity” field lets us define the type of goal template we are setting for the staff and define the parameters for goal calculation.
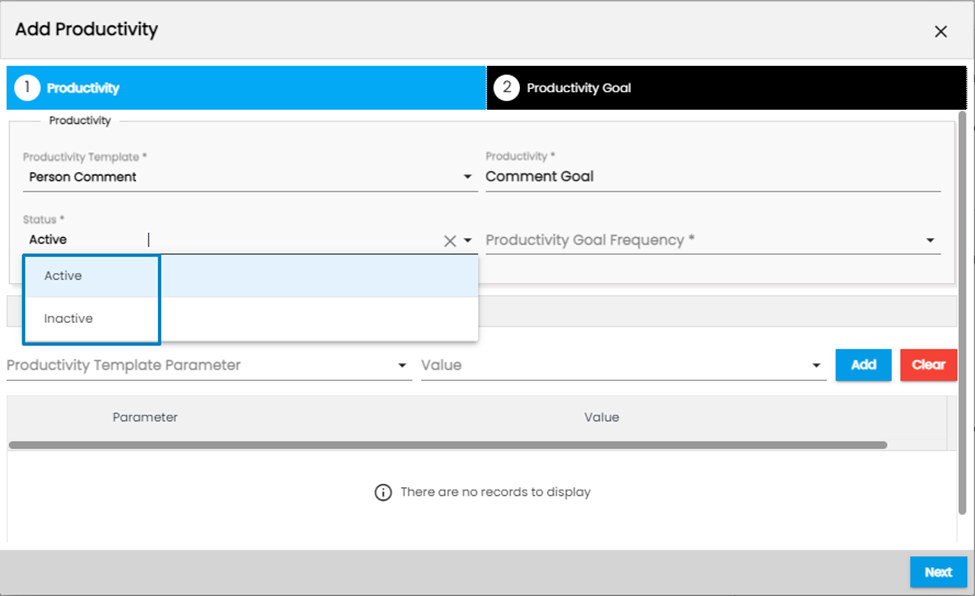
The “Status” field lets us choose “Active” and “Inactive” as Status for the goal.
Note: According to the status set here, the toggle button in the productivity dashboard will filter which goals to show and hide.
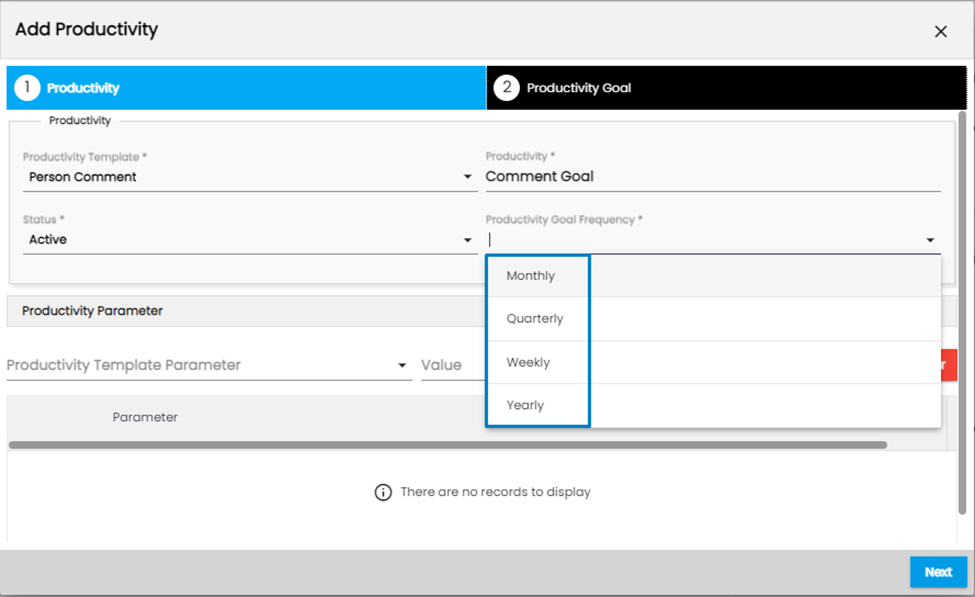
The “Productivity Goal Frequency” let us choose the frequency of the goals we set. Goals can be set monthly, quarterly, or any other time frame.
The “Productivity Template Parameter” is the field that works as the basis for tracking or measuring goals. Since we chose a comment-related template, the measuring parameter will also be related to the comment.
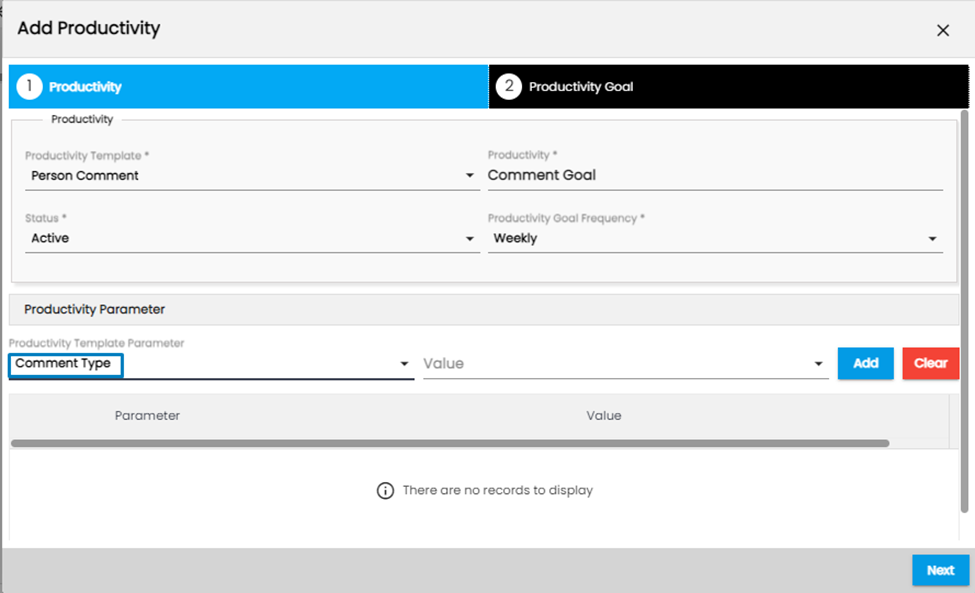
The “Value” field allows choosing the comment type the office staff needs to make to progress with their goals.
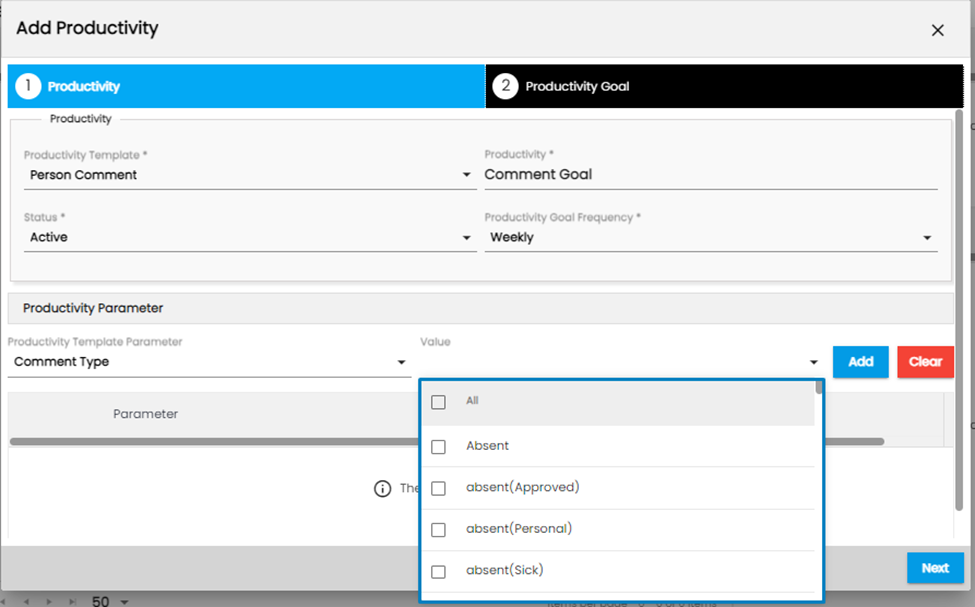
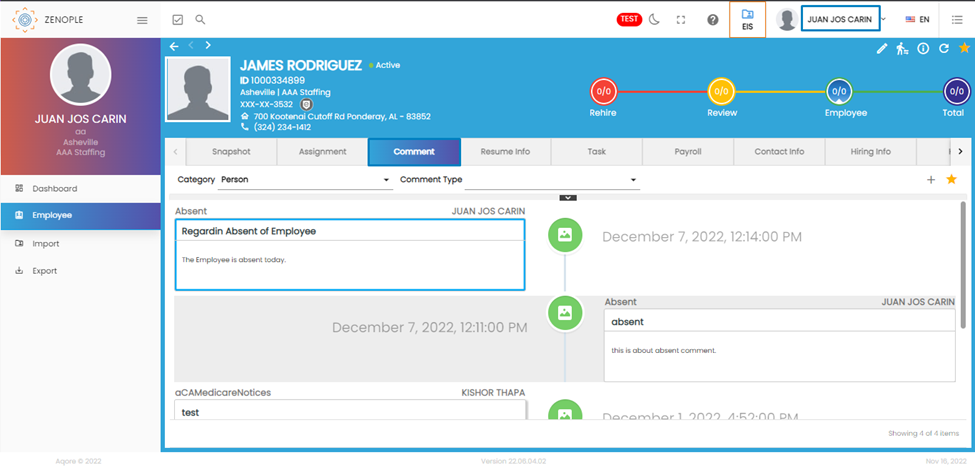
The staff to whom this goal will be assigned will have to make an absent-related comment on a weekly basis to complete his goal. Once the value has been selected, users add the selected parameter and its value using the “Add” button.
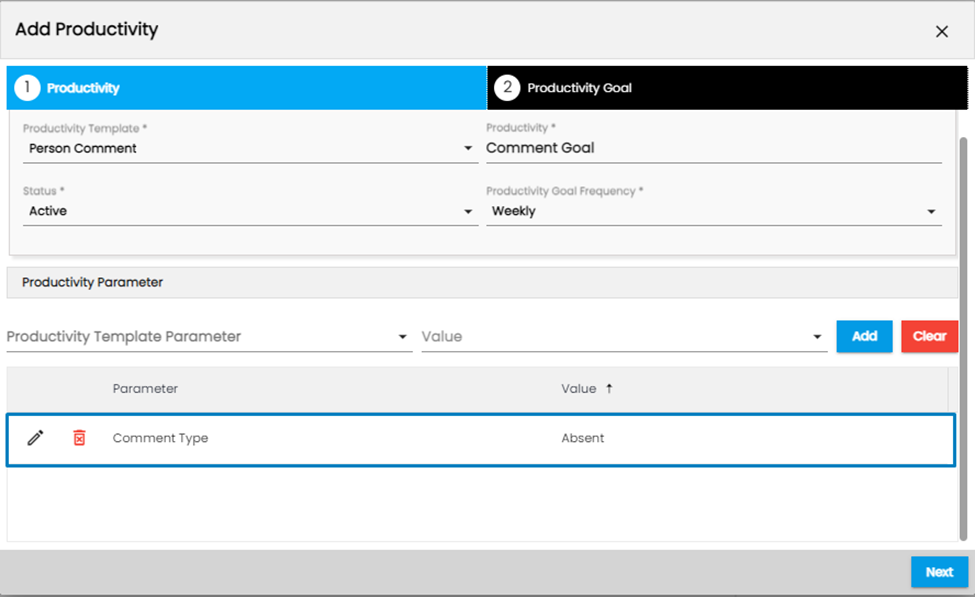
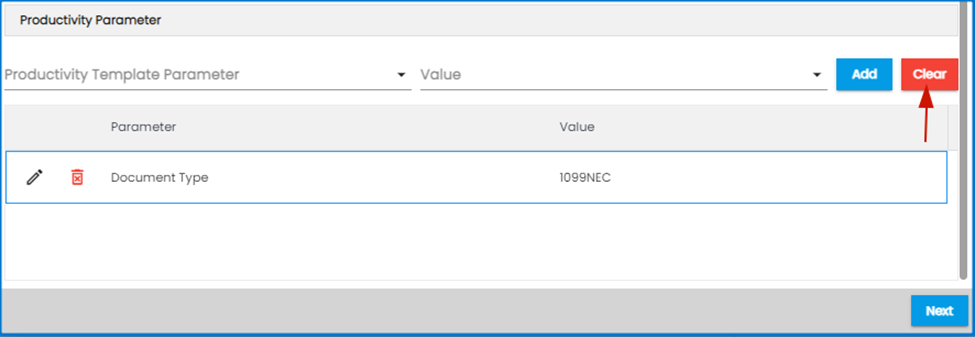
The “Clear” button is used to clear the added parameters.
Once the necessary fields are filled, users click on the “Next” button to continue.
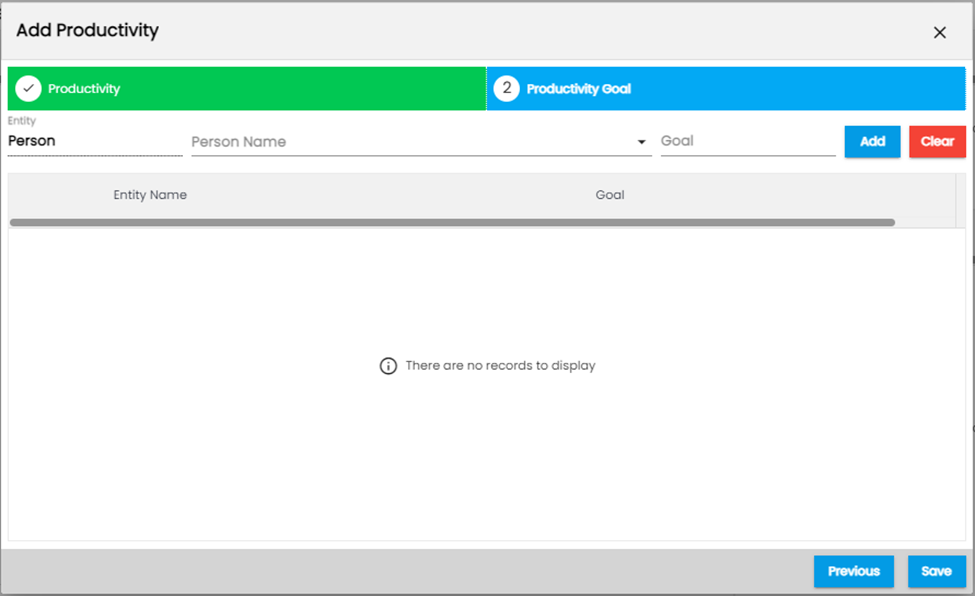
As seen in the screenshot above for the “Add Productivity” wizard, the Entity field gets auto-populated as “Person” because we have already selected to set up a goal for a person (and not an office) in the initial phase.
If we click on the “Person Name” dropdown, the list allows choosing office staff so that we can assign goals for them. Multi-selecting and selecting all staff with the “All” checkbox on the top is also allowed.
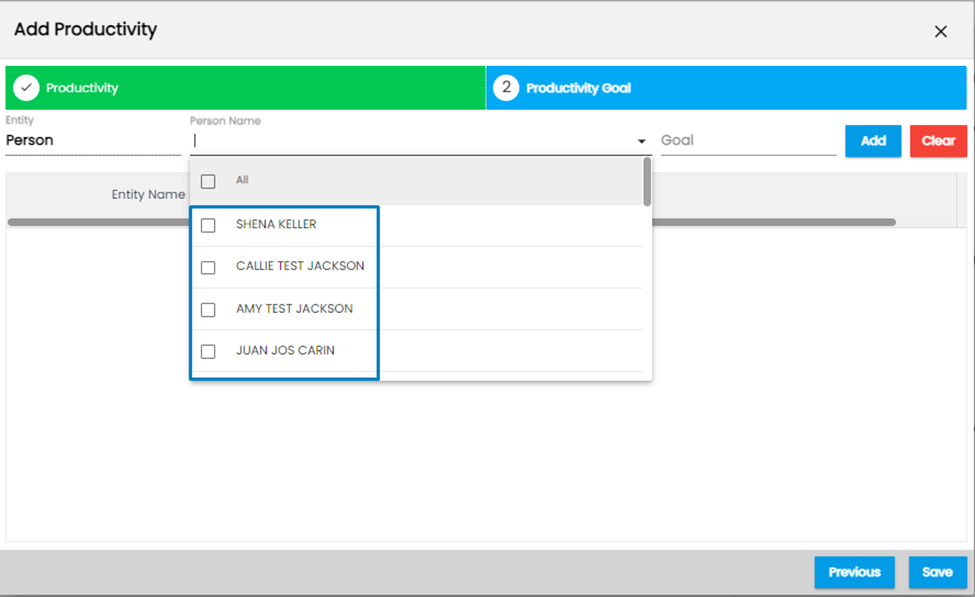
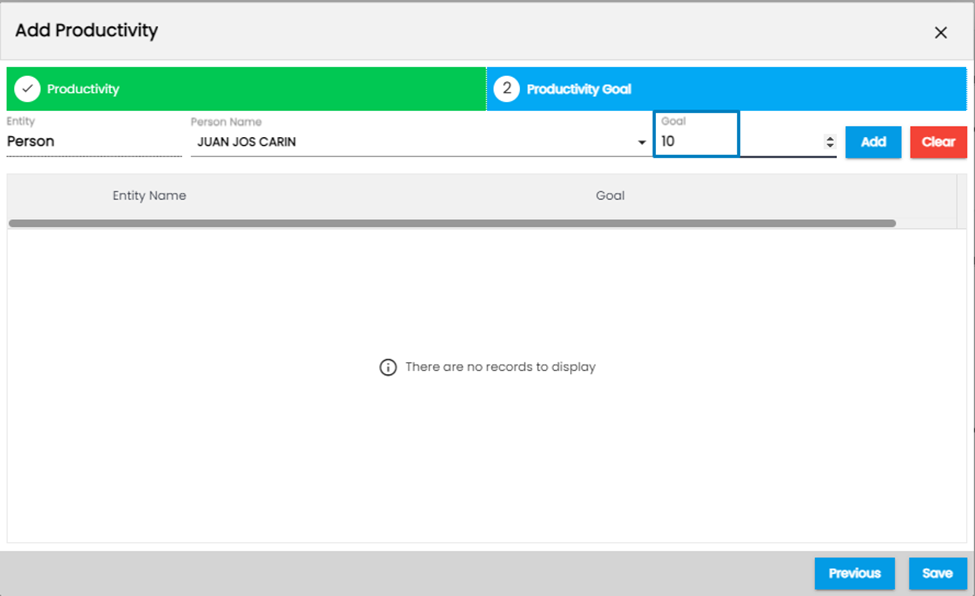
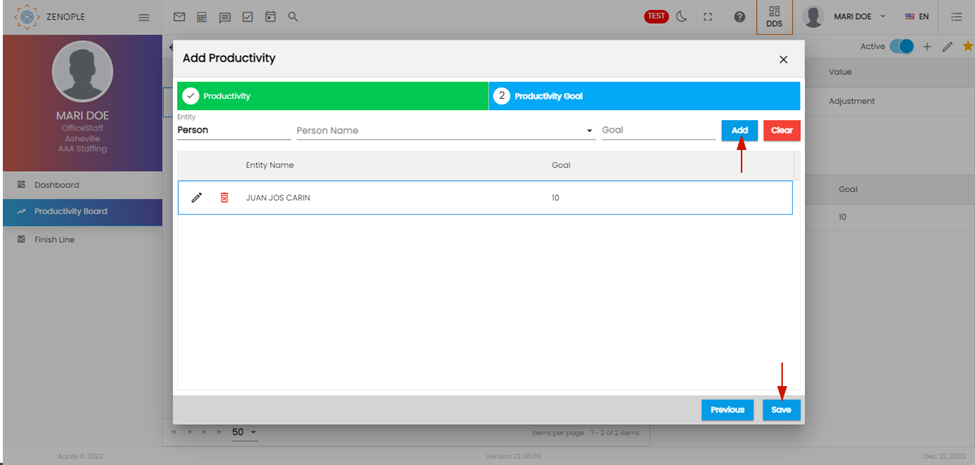
The “Goal” field allows users to set up the count of activities the staff has to perform within the selected time frame to commit to his/her goals. Users then click on the “Add” button to complete the goal setting and click on “Save.”
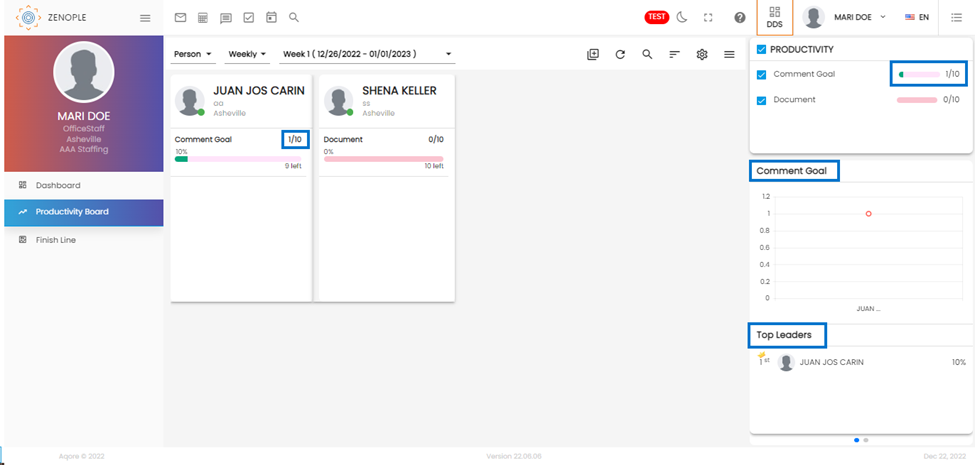
After users click save, the productivity goal will appear on the “Productivity Board” Main navigation page. Clicking on any productivity will show its details on the right side so that users can see what kind of goals have been set.
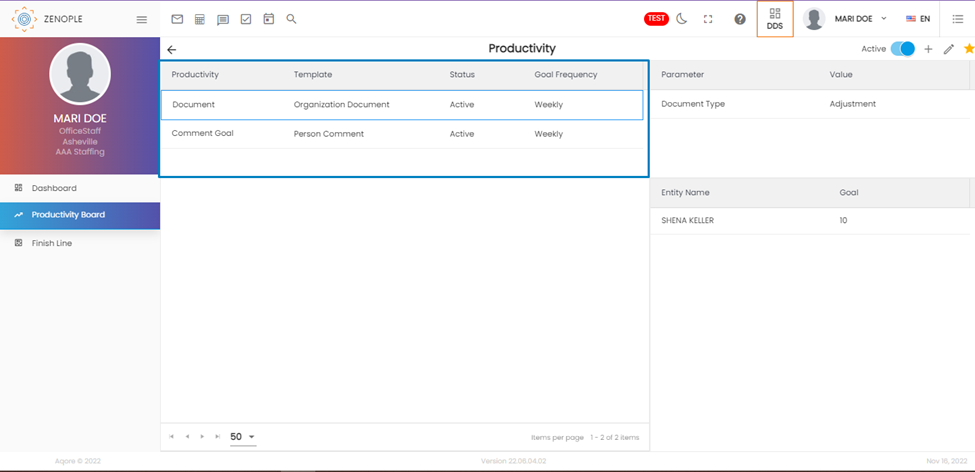
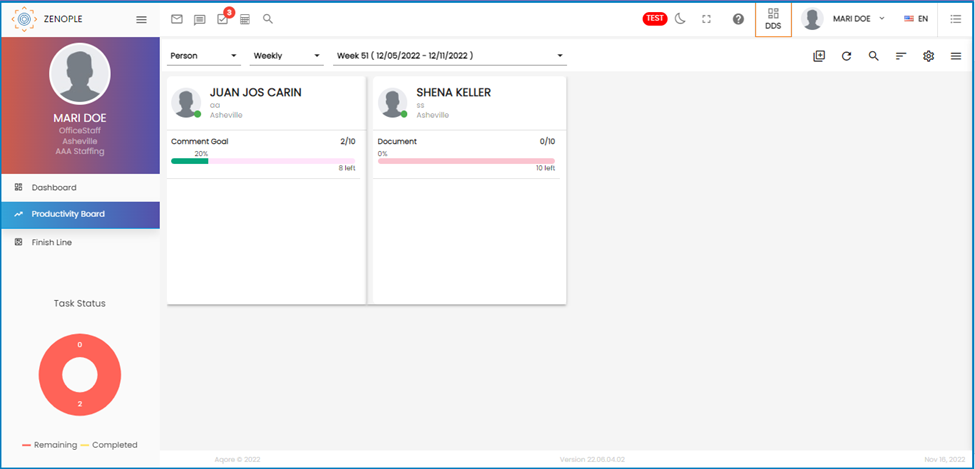
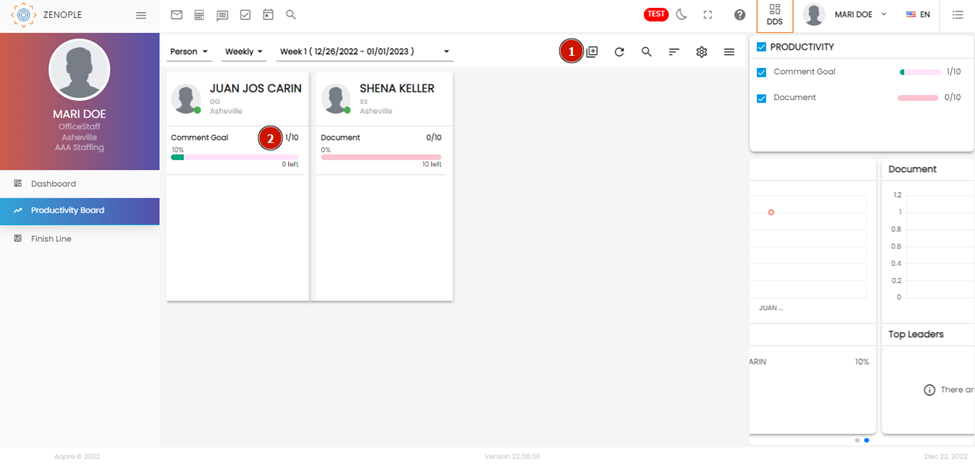
So if we go back to the main navigation of the Productivity Board, we get a miniature card-version of the goals we set up for the office staff and their details.
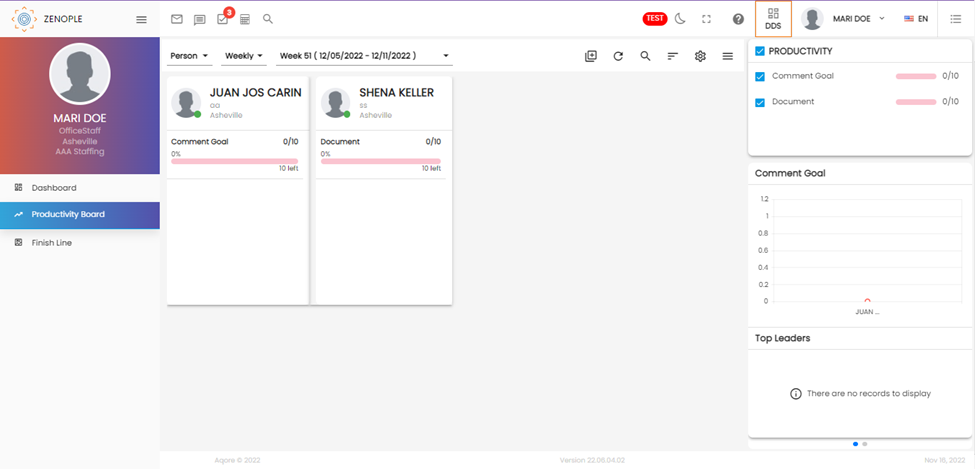
The three fields on the top of the cards are used to filter the goals. The three fields are:
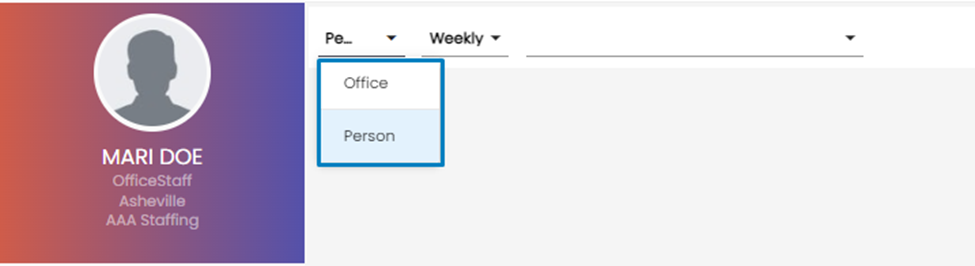
- The first field filters the cards based on whether they are assigned to a person or an office.
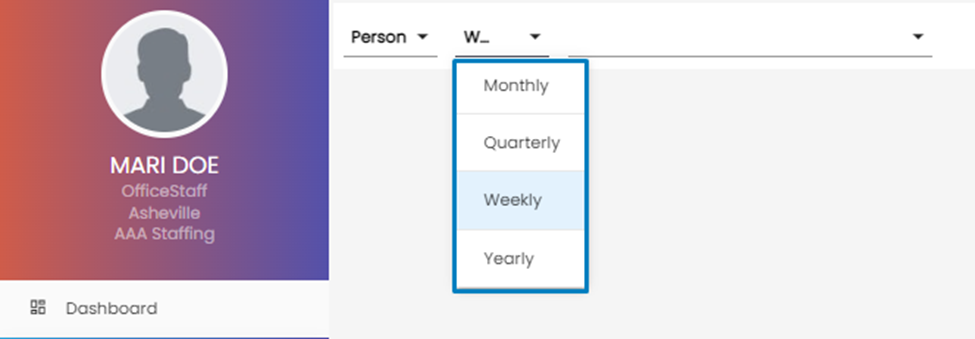
2. The second field filters the cards based on productivity goal frequency. (For example, monthly, yearly, quarterly, etc.)
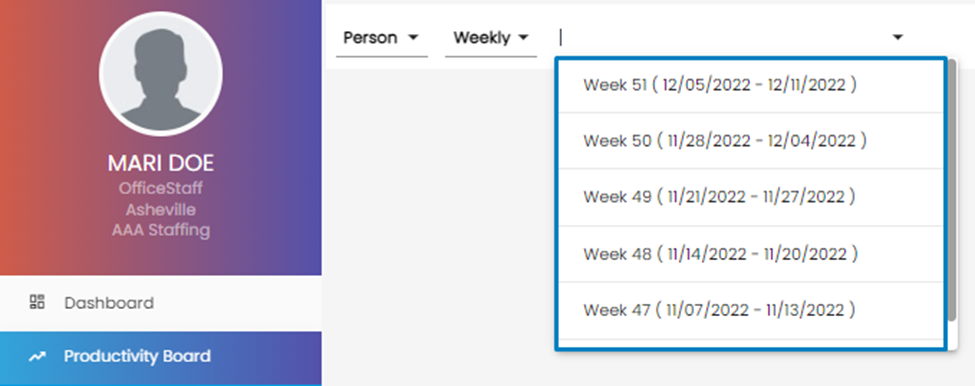
3. The third field filters the cards based on the timeframe of the productivity goal frequency. Also, the goals will only get reflected in the cards if they have been completed within the selected time category.
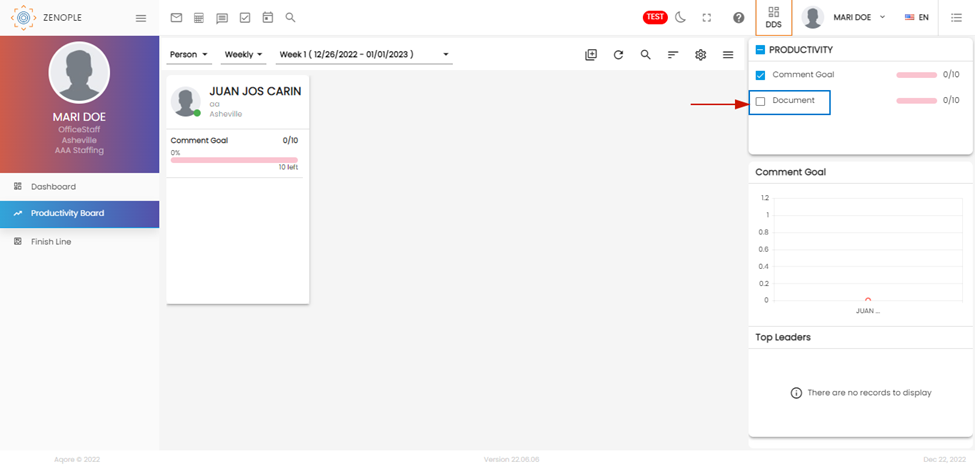
In the screenshot below, the Productivity section on the right side with the tick-boxes allows users to show and hide selected goals in case the dashboard gets too clustered.
Now, we log in as the office staff to whom we have assigned goals and complete the goal tasks on his behalf to observe the progress in the card. We will add two absent-type comments for the office staff as per his assigned goal.
An important thing to note is that the progress bar seen on the card view of the productivity only gets updated at the end of each day. So, any changes made within the day-time will only get reflected on the next day. However, users can click on the “Generate Goal Details” icon (Number 1) below to see the goal changes (Number 2) if necessary.
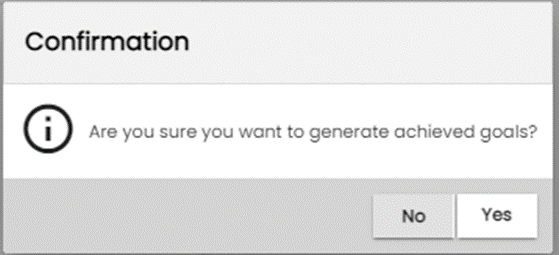
A confirmation message gets shown when users click on the “Generate Goal Details.” Click on “Yes” to update the goal progress, which is shown by “arrow 2” in the picture above.
After this, the changes will get reflected, which is visible in the highlighted sections.
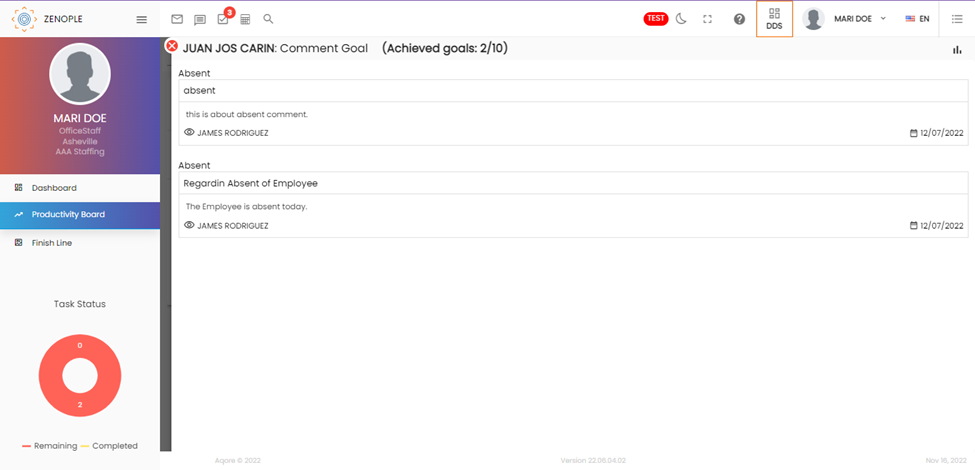
If we click on the progress bar, the details of the goal can be seen with the date it has been done.
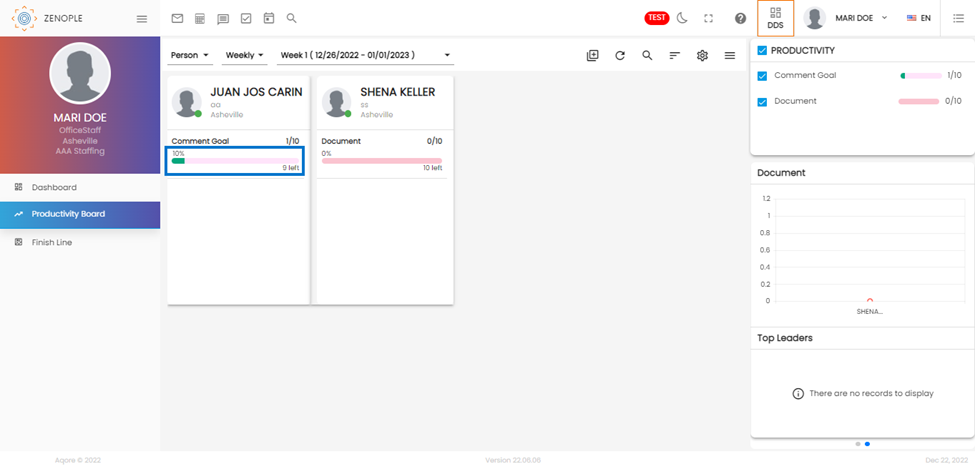
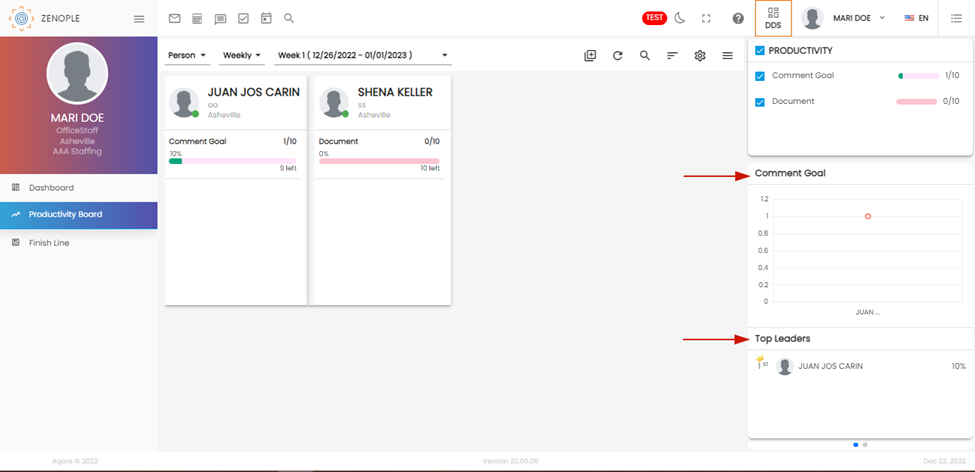
The right part of the productivity board shows the graphical representation of goals, and the Top Leaders section shows who is leading regarding goal completion. The number of productivity cards and the staff's progress will be reflected there.
The icons on the top-right side of the screen are:
Number 1: It shows the Refresh button. Users can use the refresh button if they need to reflect changes in entities or other minute details (not the goal progress).
Number 2: It shows the Search button. If multiple cards are on the Productivity board, users can search for their desired person or office through the name.
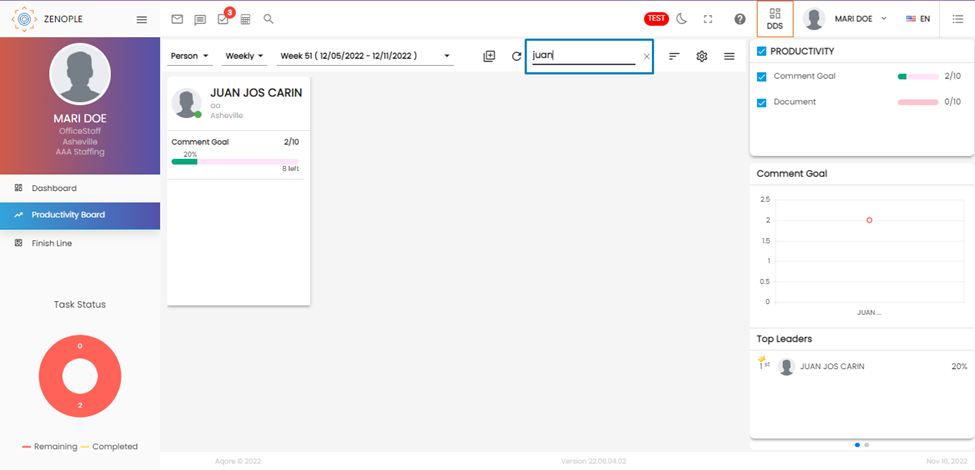
Number 3: The Sorting button helps users sort the cards based on name, i.e., Ascending or descending.
Number 4: The Hamburger icon on the last works as the show and hide option for the Productivity, Bar graph, and Top Leader section on the right. Clicking will hide these details.