Finish Line:
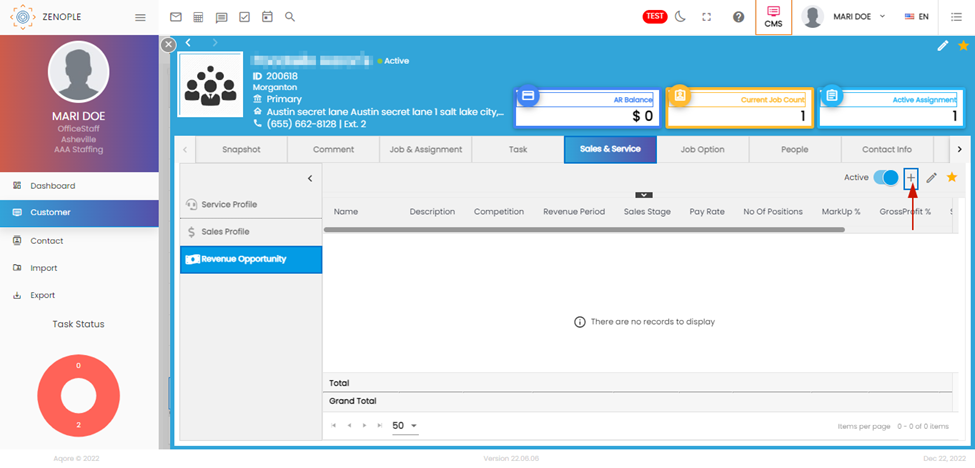
The Finish Line is a feature added to track or forecast multiple revenue opportunities that the sales team/representative uses. Users can decide whether to secure a deal or drop the prospects based on the estimated revenues. The Finish Line navigation has its prospects added from the “Revenue Opportunity” navigation of an organization's Sales & Service section. Please note that the revenue opportunity can be added from any organizational applications (LTS, SPM, NCO, and CMS).
Users can click on the “plus” icon to add a revenue opportunity.
Users will have to fill in the “Revenue Opportunity” wizard with the details of the prospect.
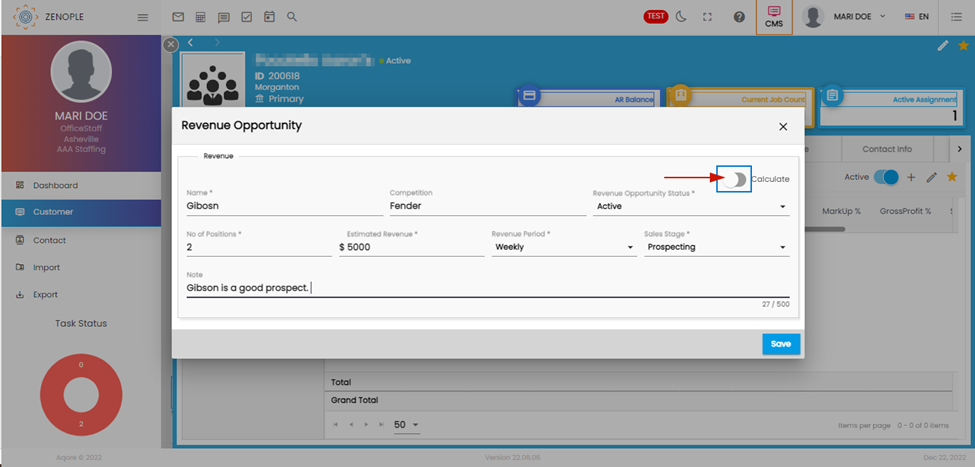
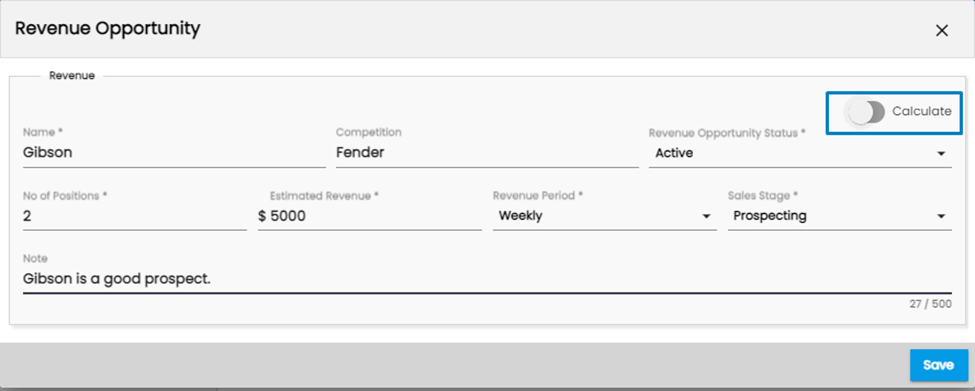
The Toggle button pointed by the arrow can be set up to have extended functions through an Options Property “calculateEstimatedRevenue” of ATM. According to the setup for the office, the customers under them will have some extra fields.
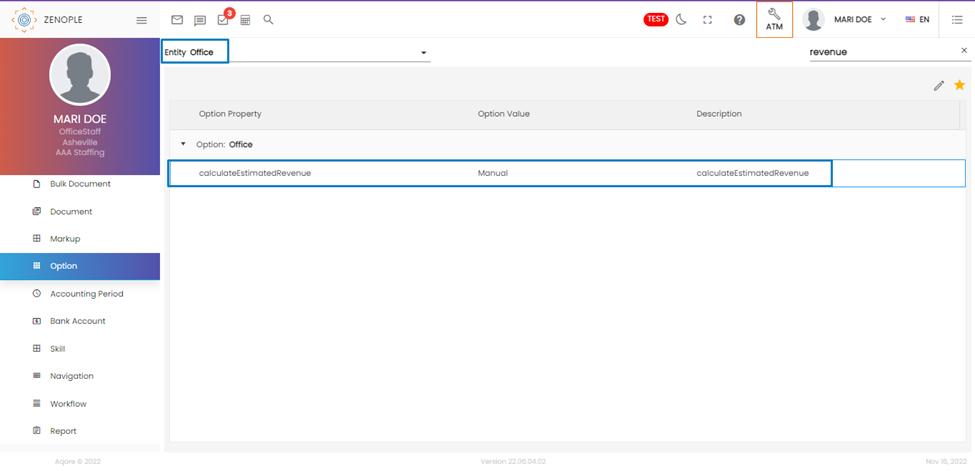
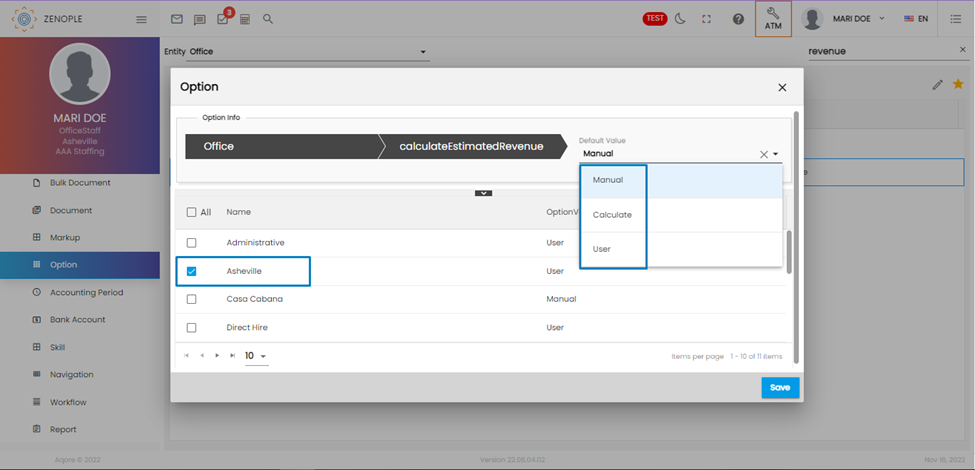
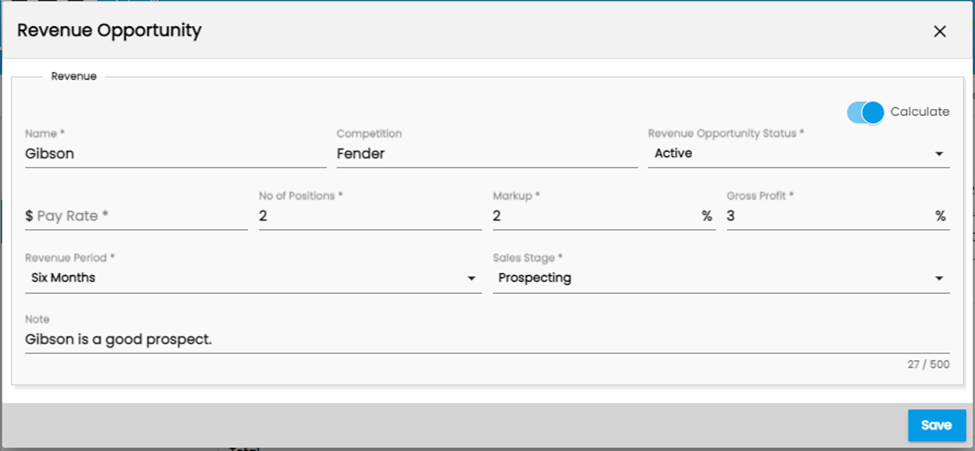
The customer under which we added a revenue opportunity falls under the Ashville office. If we change the default value for Ashville offices, the revenue opportunity window will change UI for the customers under that office.
Now, when we add a revenue opportunity for the customer under the Ashville office:
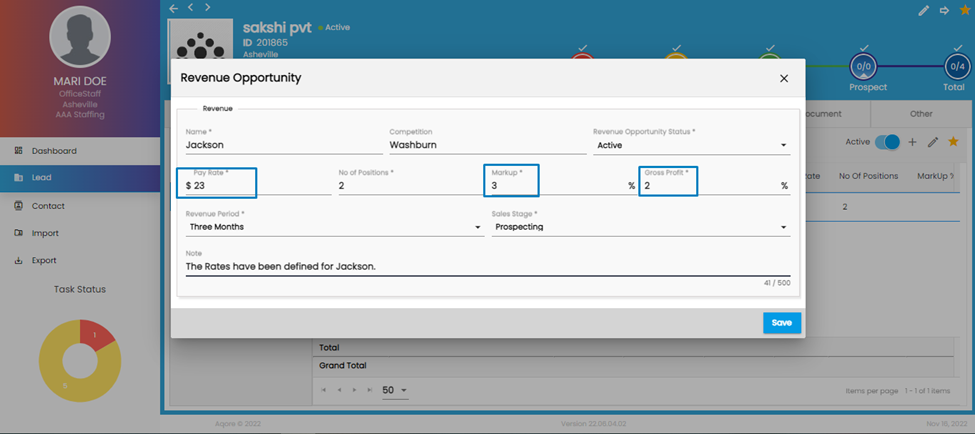
Since the default value for the revenue calculation option property is set to manual, users need to manually enter the data (pay rate, markup rate) that contribute to the calculation of revenue parameters like Gross Profit, Estimated Revenues, and others.
If users choose “User” as the default value, the “calculate” toggle will remain disabled while adding revenue opportunity. Users can choose to enable or keep the toggle disabled.
Let us look at the fields that are required for the above step:
- Name: The field is mandatory and requires the name of the revenue.
- Competition: Companies that are likely to recognize as competition to our prospect.
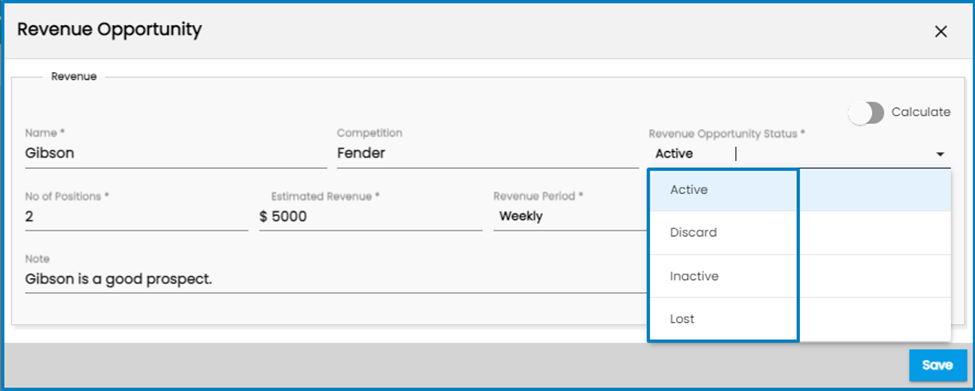
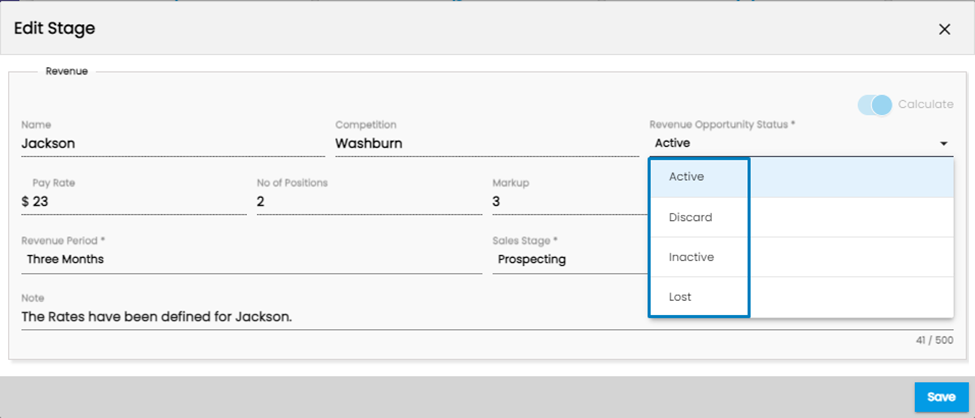
- Revenue Opportunity Status: As per the status of the prospect, users can add different statuses from this dropdown.
4. No of Positions: This shows the number of people coming for the company as prospects. Their pay rates, markups, and bill rates will eventually affect the total revenue calculation.
5. Estimated Revenue: The Estimated Revenue lets users insert an amount that can be estimated from this revenue.
6. Revenue Period: As the field name suggests, it allows choosing the revenue time period.
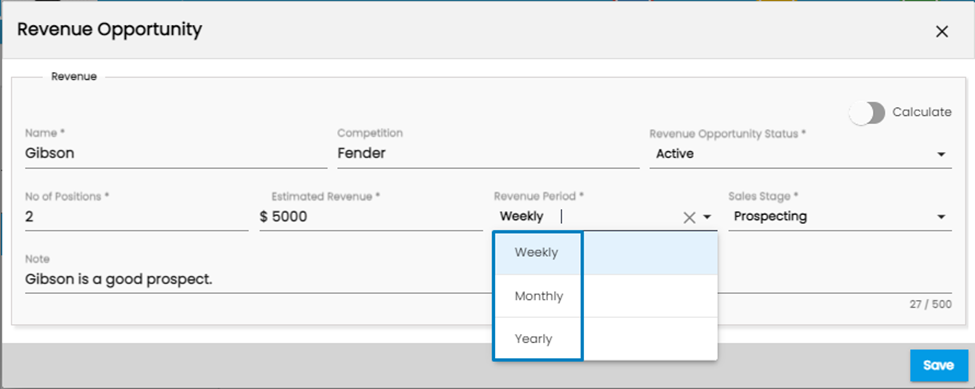
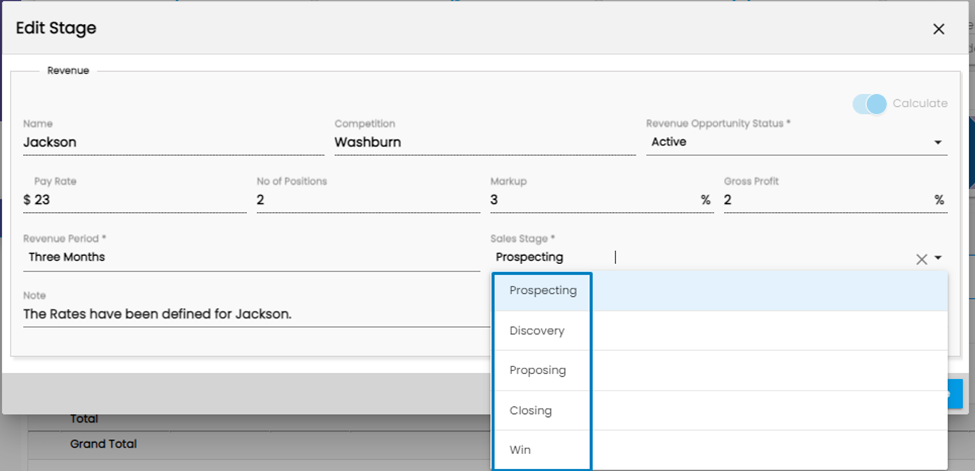
7. Sales Stage: The Sales stage defines the position the prospect holds in the prospect pipeline.
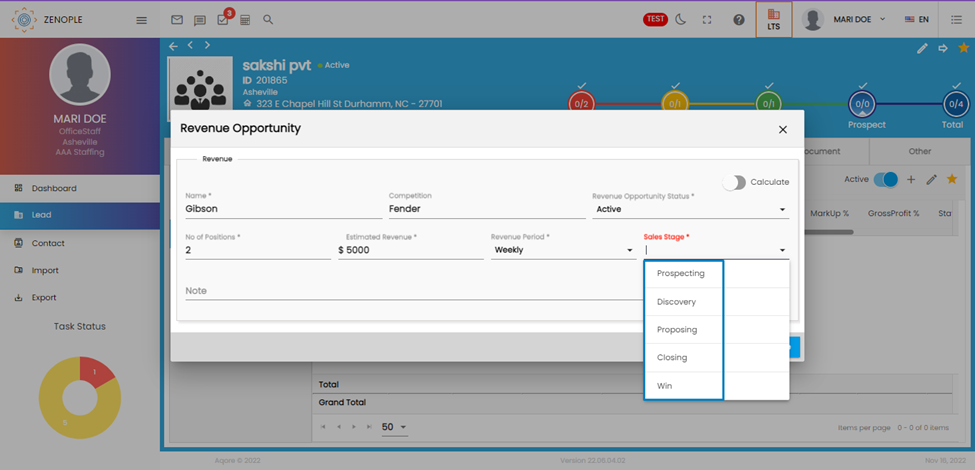
- Prospecting: Has potential targets as prospects. General meetings are scheduled through cold calls and the marketing team.
- Discovery: First meeting is scheduled, and the team will learn about the prospect to form a feasible plan.
- Proposing: Follow-up meetings to propose service plans, features, benefits, and a pricing model.
- Closing: The prospect agrees to the pricing terms and conditions. All the necessary documents have been signed and submitted to the team.
- Win: A deal can be done with the prospect.
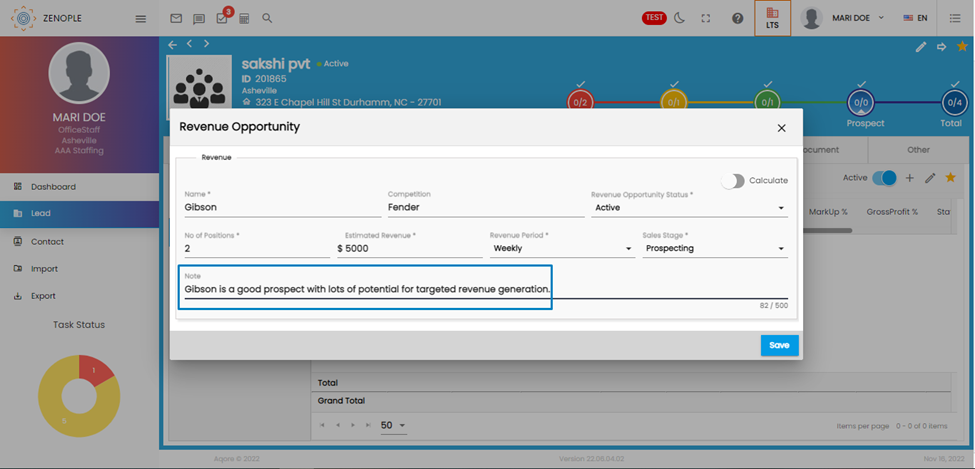
8. Note: The note section allows up to 500 characters so that users can add necessary additional information regarding the prospect.
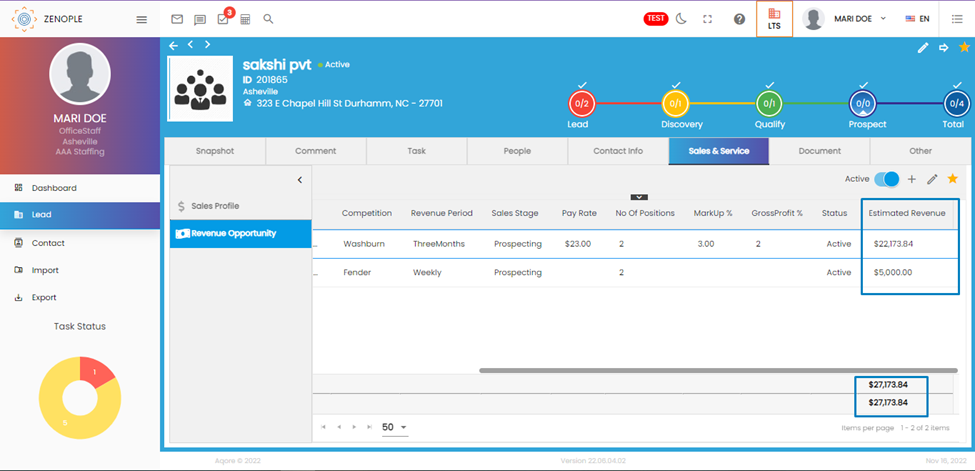
After the revenue opportunities have been added under the organization, they get reflected in both the” Revenue Opportunity” section and the “Finish Line” navigation of DDS.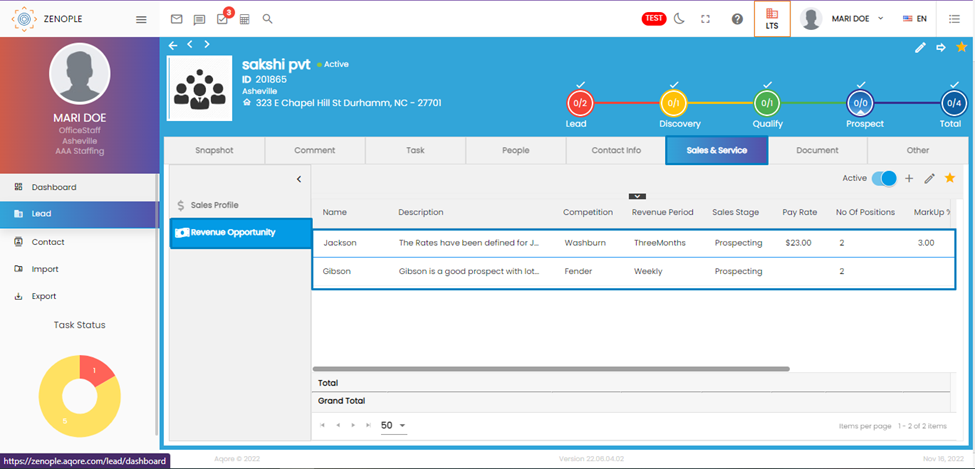 The added prospects' estimated revenue gets calculated and shown in the grid.
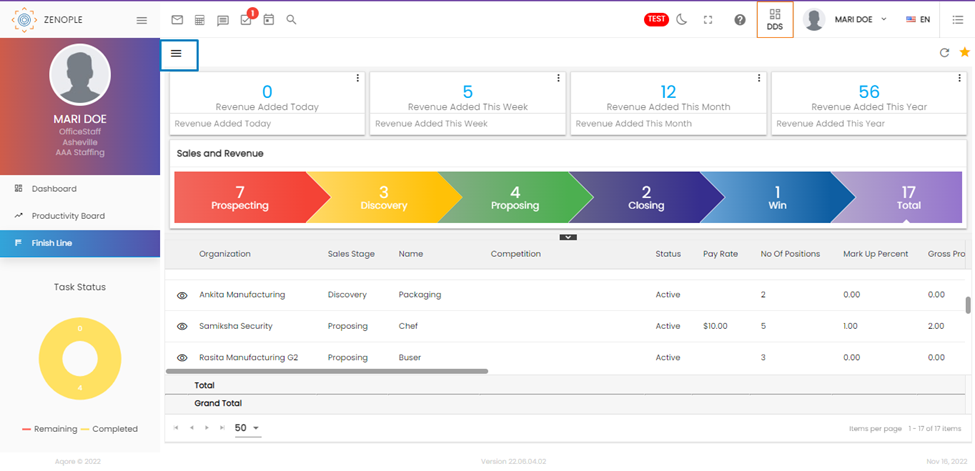
 The Finish Line dashboard:
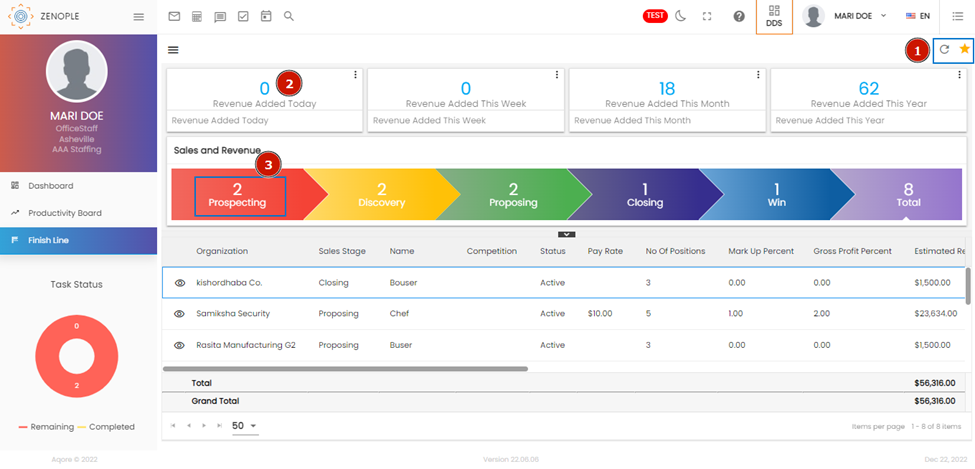
Number 1: This is the refresh button, which is common to all the applications inside Zenople. The refresh button refreshes the data in case changes have been made.
Also, the star icon has one other option, Edit for users. Users can choose to edit the revenue opportunities they have added. But the editing is limited from this portion of the application.
Number 2: Shows the revenues added for the organization on that day.
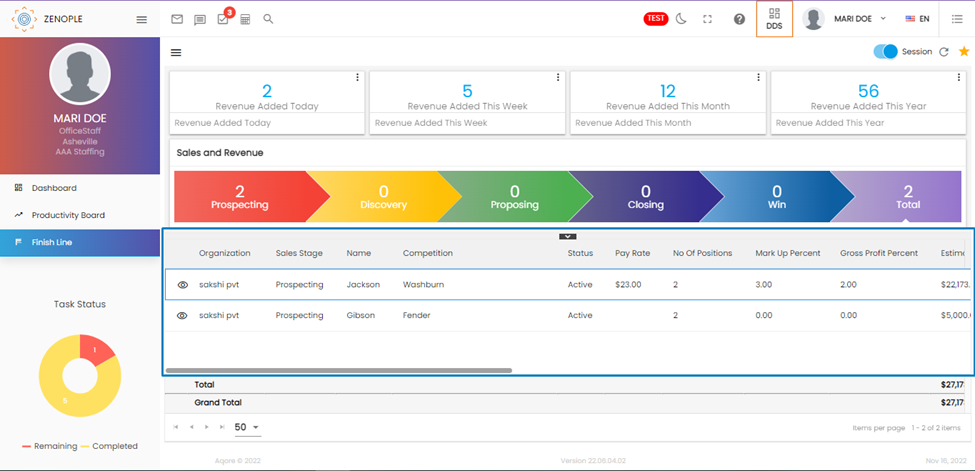
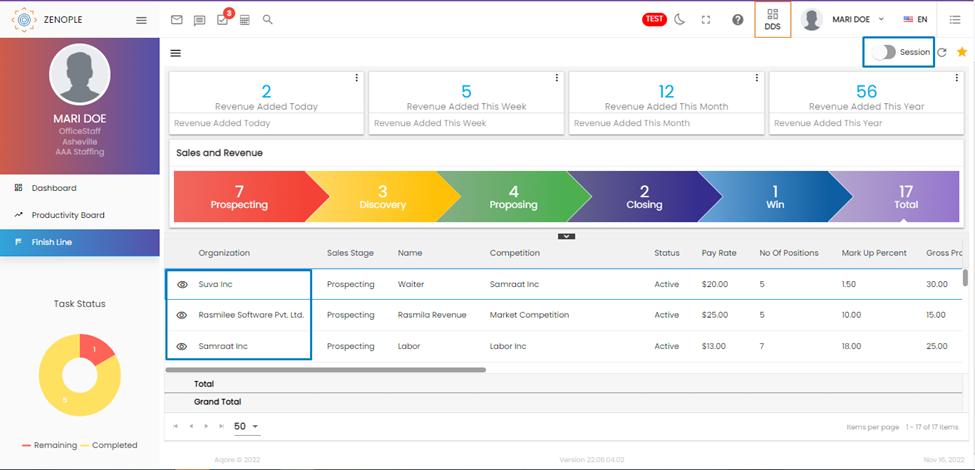
When users click on a particular tile to see the prospects, a new toggle called “Session” will appear in the top-right corner. Closing this toggle will remove the session filter and show us all the remaining revenue opportunities.
If we choose one and click on the edit option under the star icon, the Edit stage wizard will appear:
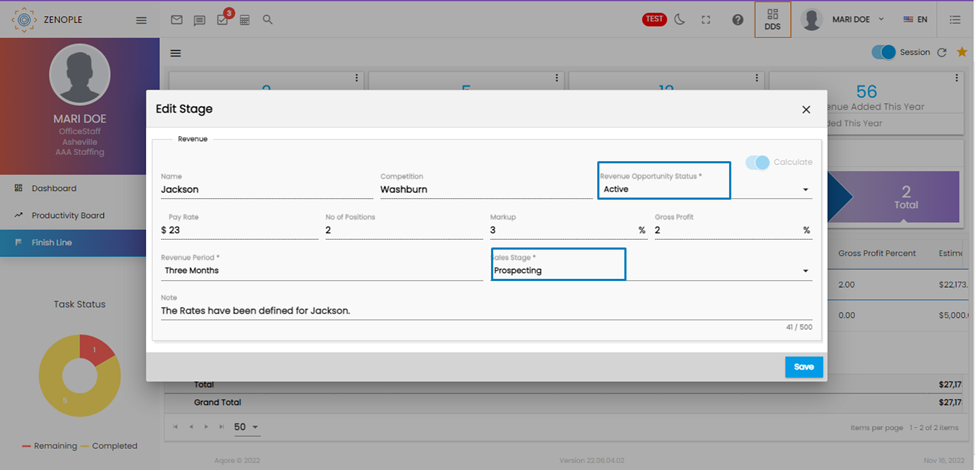
The only editable fields are the “Revenue Opportunity Status” and the “Sales Stage.” Status choosing helps users to decide whether to move forward or dismiss the opportunity.
Another editable field is the “Sales Stage,” which helps users take their opportunities to the next workflow stages.
When users choose to change the workflow stage, they get the following confirmation message.
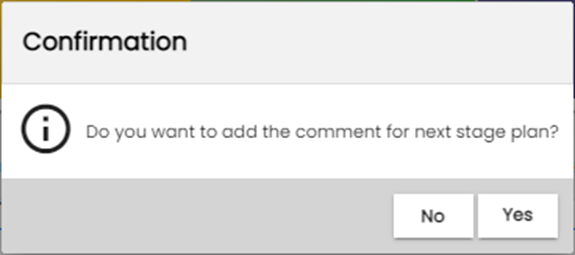
Clicking on Yes will allow them to add a comment regarding the status change.
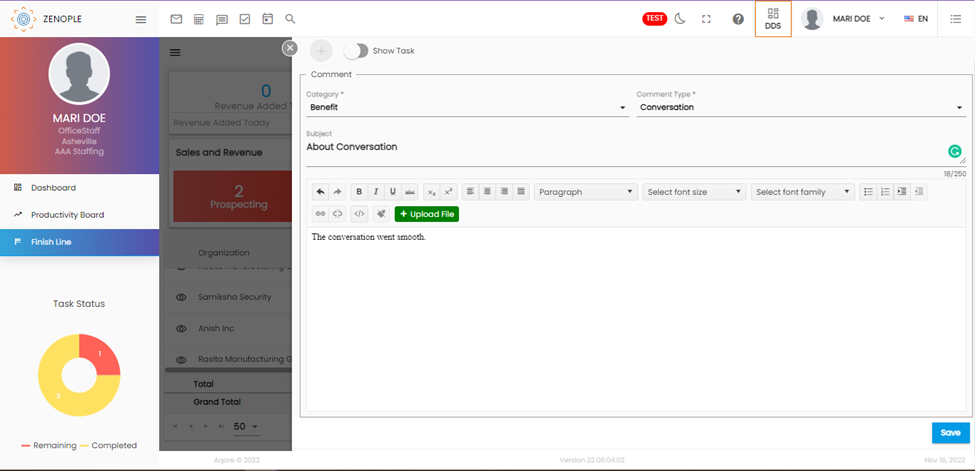
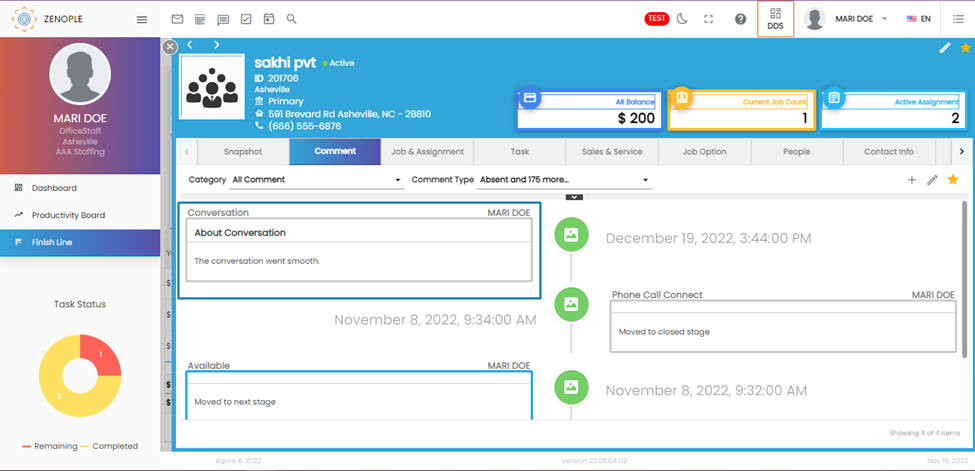
If users choose to add a comment, the comment will be reflected under the customer detail page where the revenue opportunity was added.
 The details of revenue opportunities and the calculations regarding the revenue will be shown in the grid.
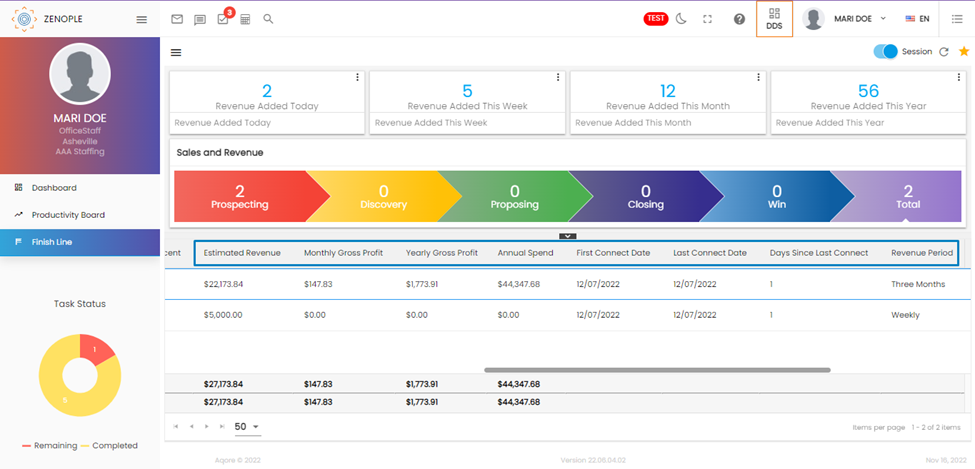
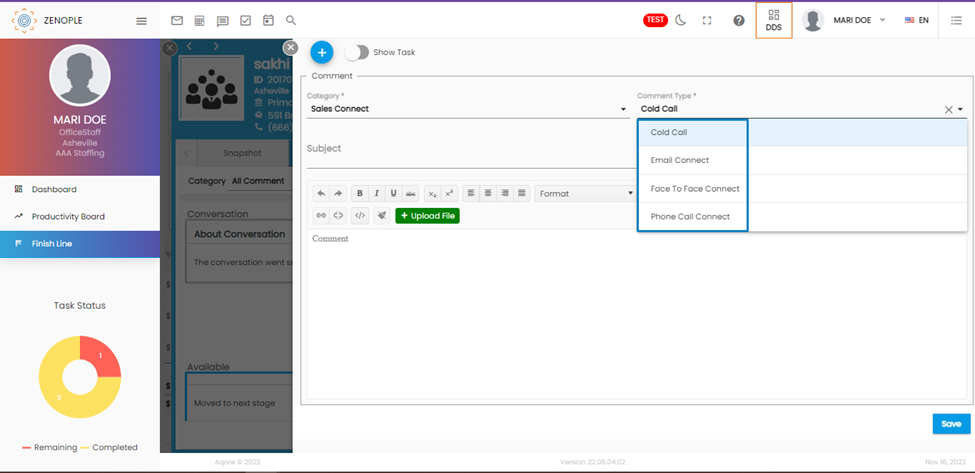
The First Connect Date is when the user comments under the organization with the comment category “Sales Connect.” There are four available comment-type fields for the sales connect category. Choosing any of the options and adding a comment will pull its date and display it in the first connect section of the Finish line dashboard. If not made, the section will display empty.
The last Connect Date will record the date of the last comment made under any comment category. The remaining fields, “Entered By” and “Entered Date,” show the user who entered the Revenue opportunity and its date. The “Days Since Connect” field shows the day count between the First Connect Date and the Last Connect Date.
Another important part of the Finish Line feature is the filter which is enabled through the Hamburger icon besides the user’s name.
Clicking on the icon views the filter section:
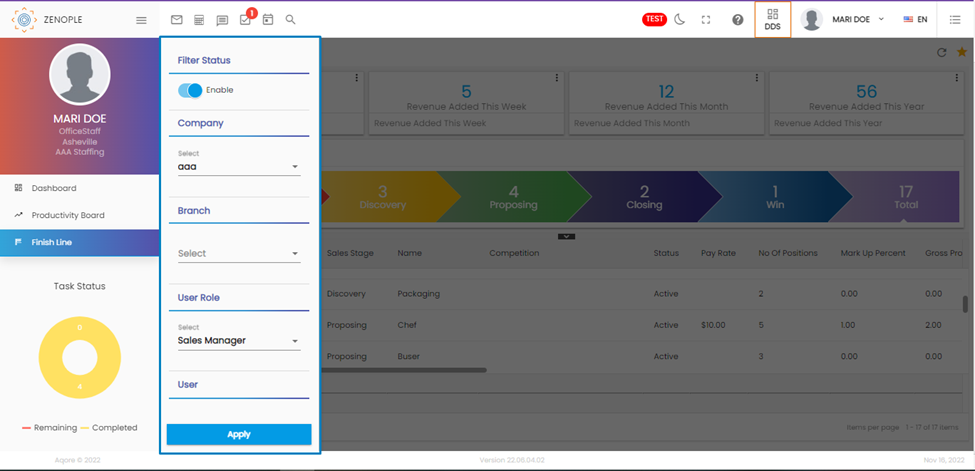
The filter toggle is on by default. The filtration can be done based on “Company,” “Branch,” “User role,” and “Status.” The Company filter filters the revenue opportunities based on the company, and the Branch section filters through the branch.