Overview
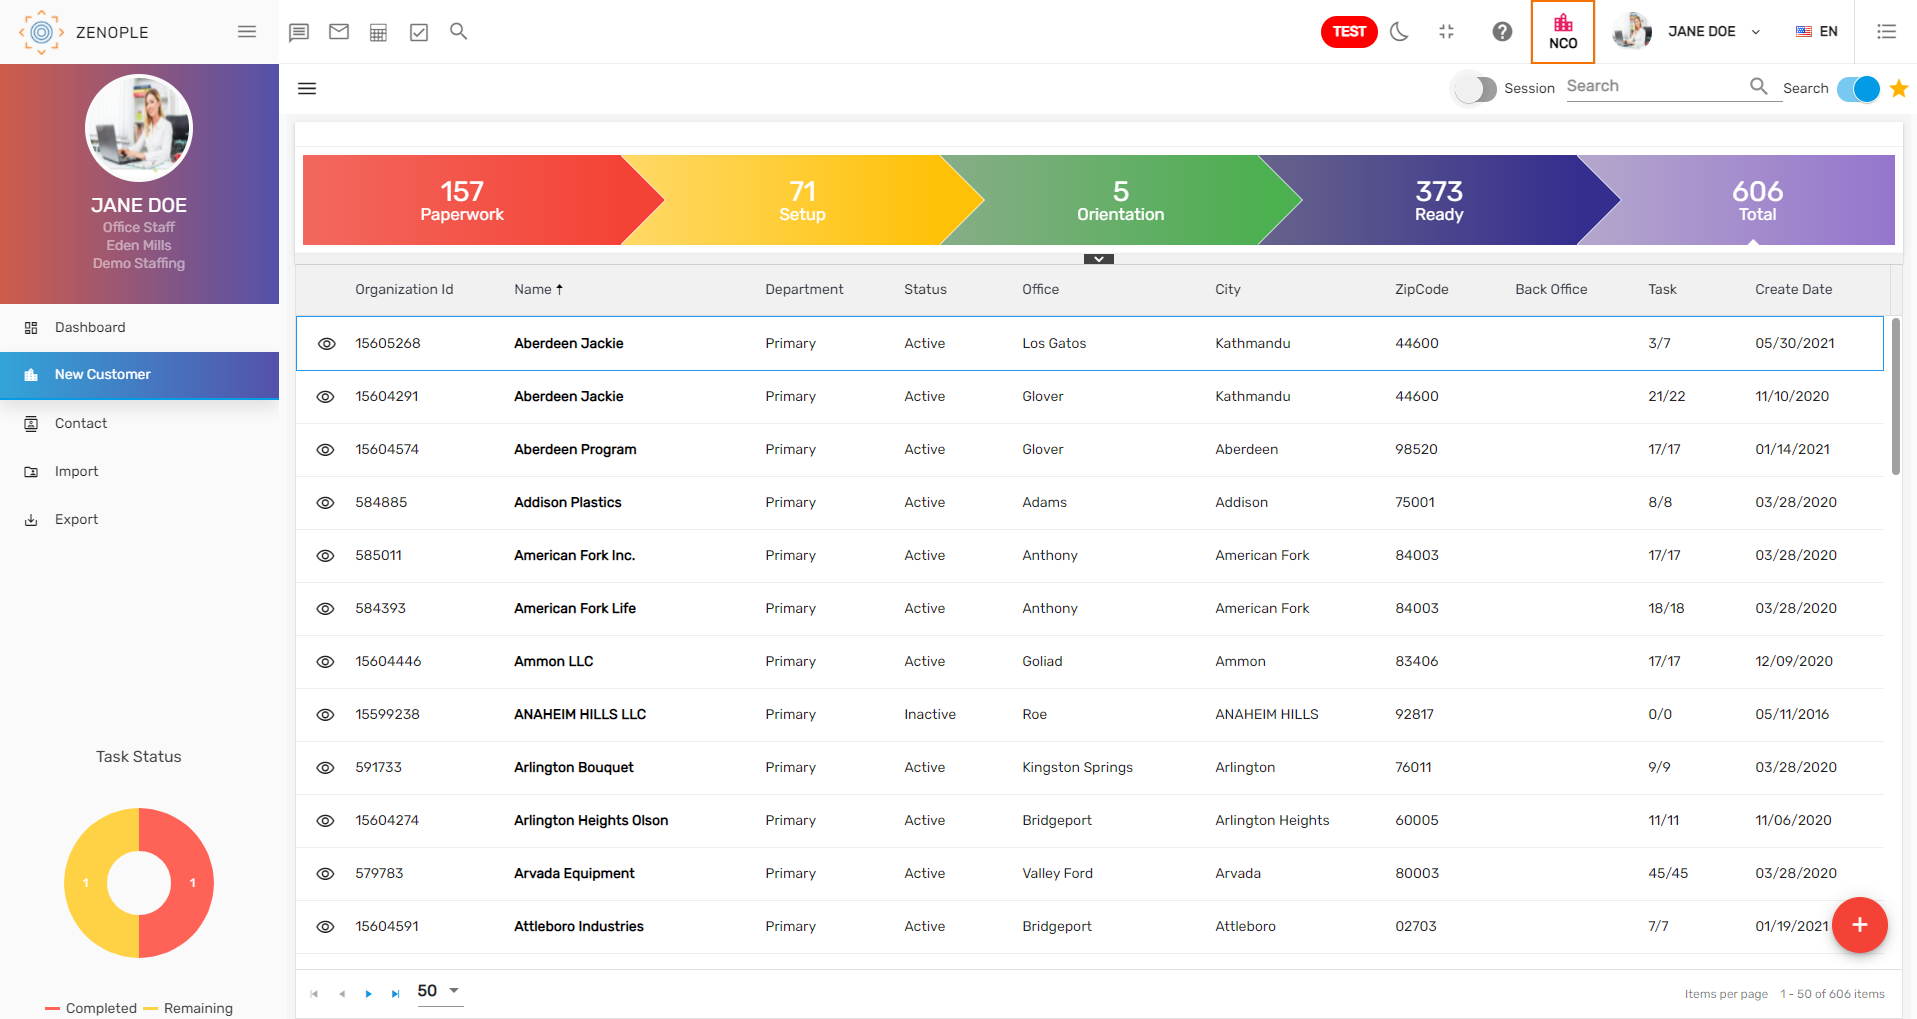
New Customers are potential customers. New Customer navigation displays the summary information for all new customers entered along with their department, status, office, back office, revenue, task, and creation date. It allows users to view all of the information for different new customers on the same page.
New Customer Directory
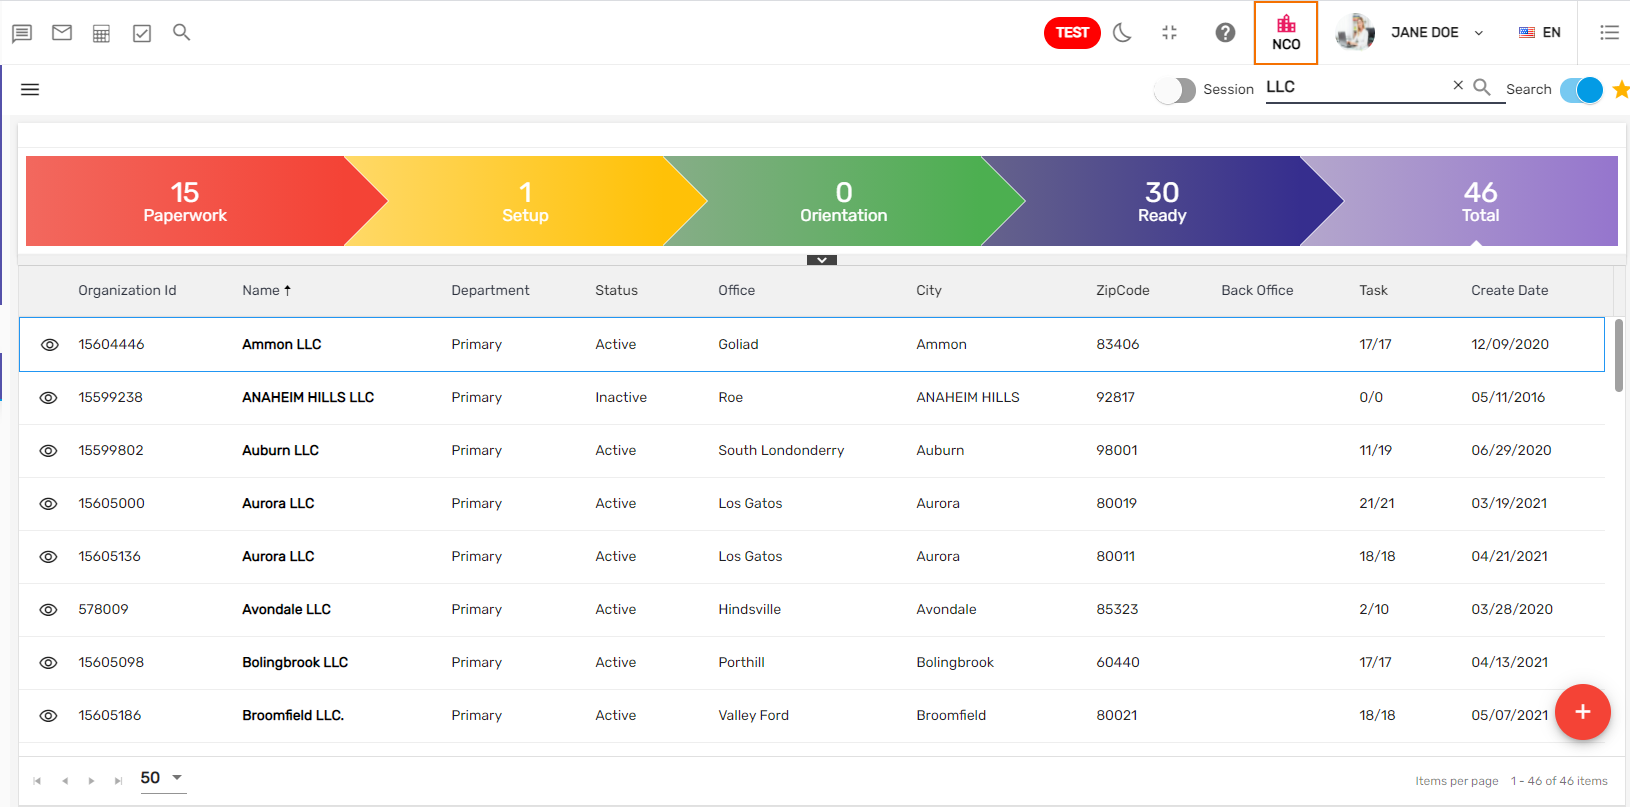
The list of new customers is displayed in the 'New Customer' directory. This page includes all the new customers with the 'Organization Id,' 'Department,' 'Status,' 'Office,' 'City,' 'Zip Code,' 'Contact Number,' and 'Created Date.' When you search for the new customer from the search box, the new customer directory displays the records accordingly. Users can also filter the records of the directory page from the column filter or sort the records in 'ASC' or 'DESC' order.
Filter
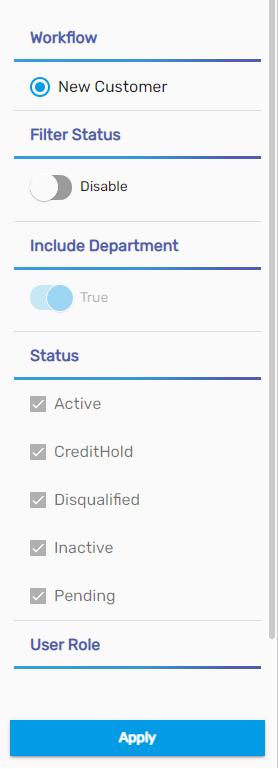
The filter allows users to filter records based on various options in the new customer directory such as workflow, various status, and user roles. The filter will sort the records and will display the filtered records based on the selected options. Users can use the filter feature from the hamburger icon.
Filter Parameter
Search/ Recent Toggle Button
'Search' toggle button allows you to search the new customer from the search box in the new customer directory whereas the 'Recent' toggle button displays the most recently searched and visited records.
Workflow
The New Customer workflow consists of several workflow stages that each new customer must pass through to progress in the Customer Workflow. Each workflow stage is composed of tasks that may be assigned to any business person.

There are five stages of workflow in NCO. They are:
- Paperwork
- SetUp
- Orientation
- Ready
- Total
1. Paperwork
This is the first step of NCO. All the new customers are recorded in this stage. And various paperwork related to customer is completed
2. SetUp
After completion of the paperwork stage, all the setups related to job options, sales, and service profiles are done in this stage.
3. Orientation
The qualified customers after all the setups have been done fall into this category. Reviewing office processes, Payroll processes, training web clock, and timeclock fall under this stage.
4. Ready
Now, In this stage, when all the qualifications and setups have been completed, the new customer becomes a customer.
5. Total
All the data of the above stages can be viewed in this stage.
New Customer Detail
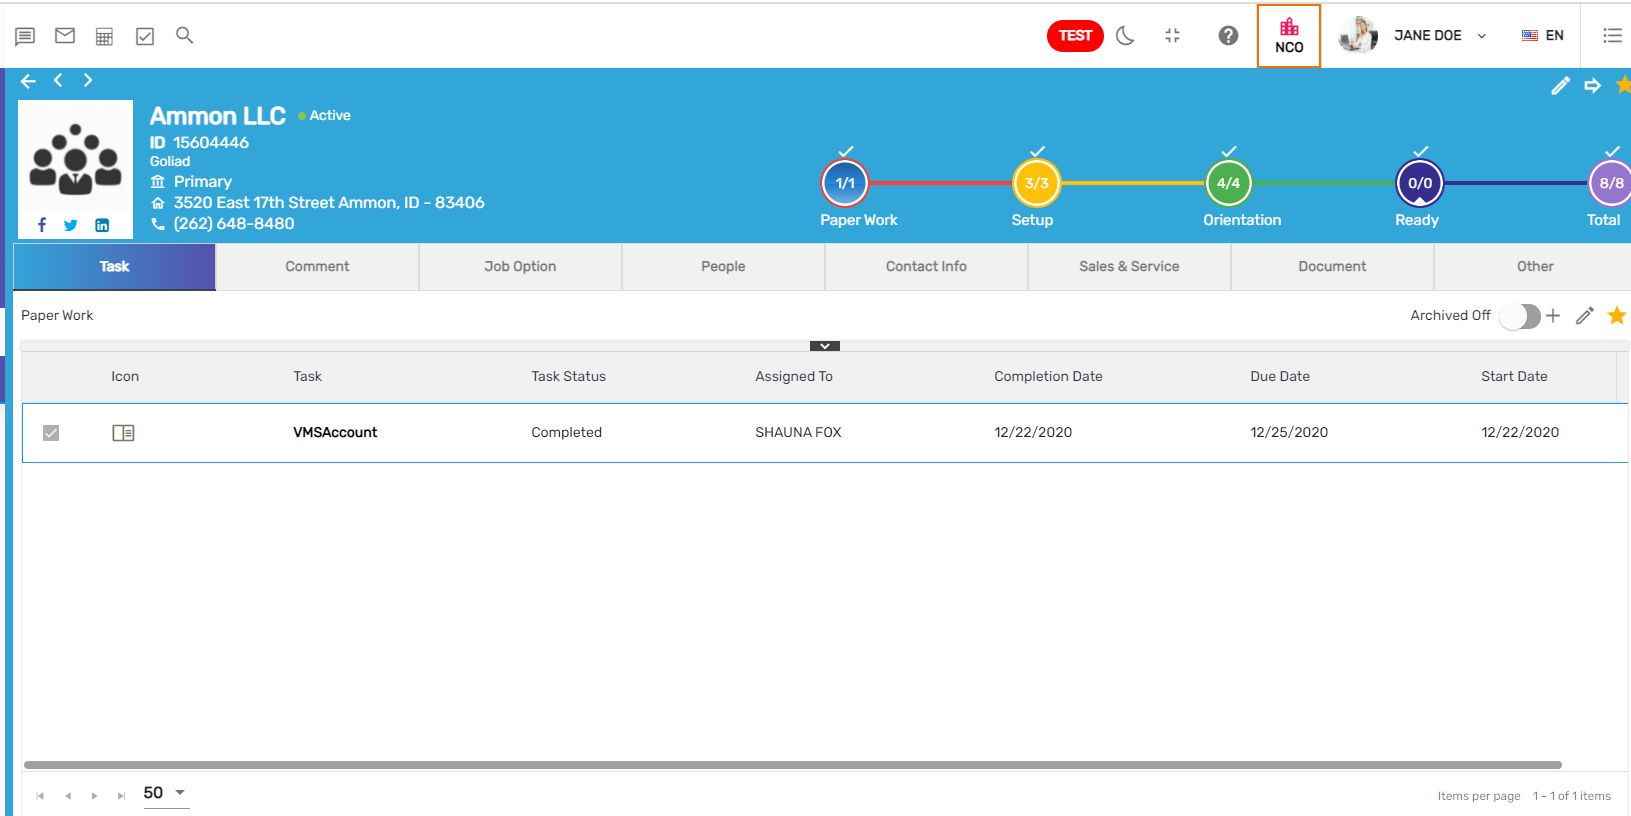
When users click on the eye view icon of the new customer in the new customer directory, it will redirect users to the new customer detail page. It consists of detailed information of the new customer such as Organization ID, primary address, contact info, and various other information in related navigations.
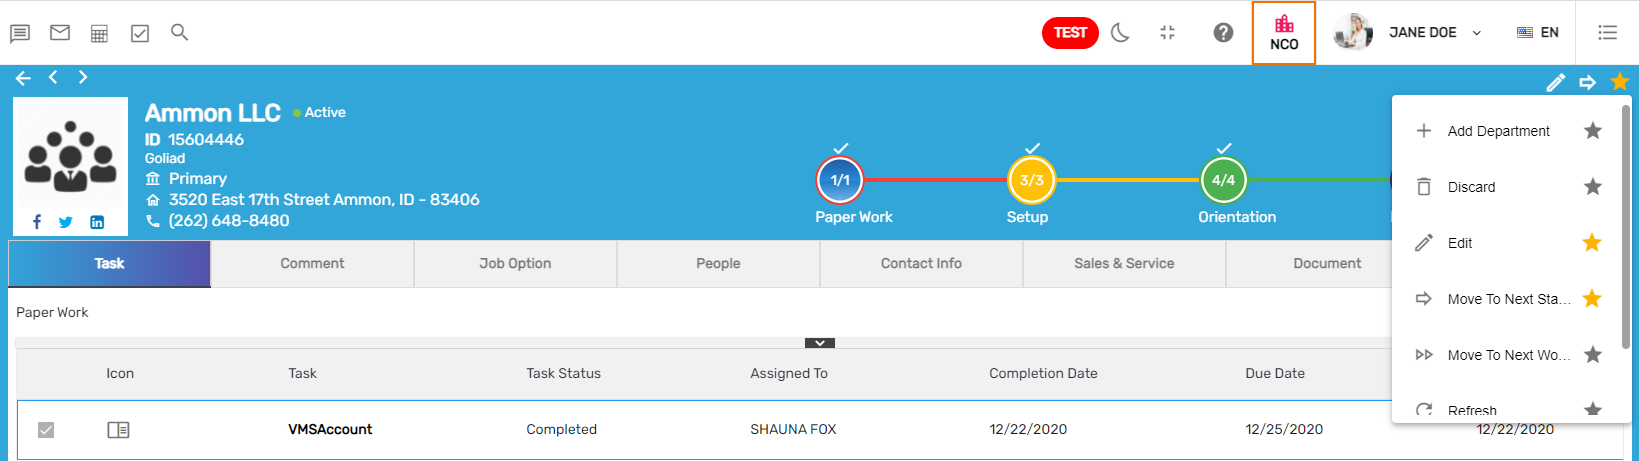
Favorite Action
The 'Favorite' icon of the New customer detail has various actions under them. They are:
- Add Department
- Discard
- Edit
- Refresh
- Move to Next Stage
- Move to Next Workflow
- View Department
1. Add Department
It allows users to 'Add' various departments for the same company as they may have multiple departments.
2. Discard
It allows users to disqualify the company as the new customer. Users can change the 'Disqualified' status of the new customer from the edit icon.
3. Edit
It allows users to edit the new customer's information such as 'Office', 'Department', 'Status', 'Address', 'Zip code', 'Contact info' and 'Website'.
4. Refresh
It allows users to refresh the 'Detail' if in case of any edited records are not being reflected.
5. Move to Next Stage
This action enables the user to forward the new customer to the next stage. Users can use this action to move the new customer from the current stage to the next stage.
6. Move to Next Workflow
This action enables the user to forward the new customers to the next workflow i.e. 'CMS'.
7. View Department
It allows users to view all the departments of the new customer in case of multiple departments.
Navigation
There are eight top navigations in the New customer detail. They are:
- Task
- Comment
- Job option
- People
- Contact Info
- Sales & Service
- Document
- Other
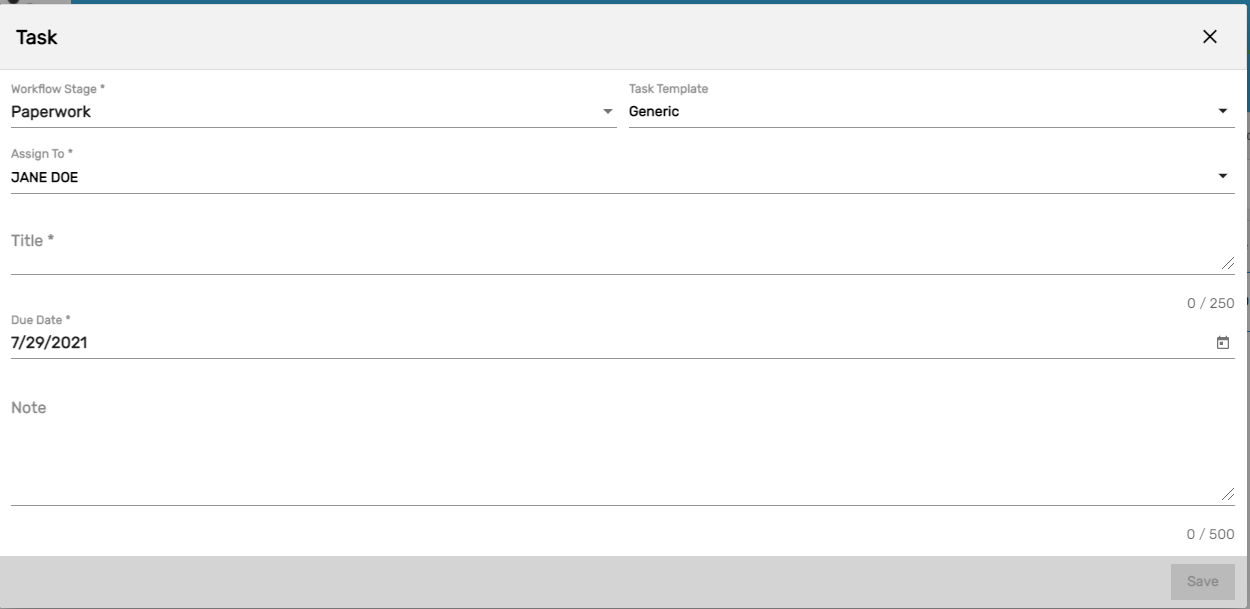
Task
It allows users to add and edit multiple tasks related to the new customer. Users can assign the 'Task', enter 'Due date' for the task, 'Titles', etc. If users need to reassign the task, users can open, archive the task and assign the task again to another user. Once assigned, the user who is ought to complete the task cannot be edited however, the user can forward the task to some other user.
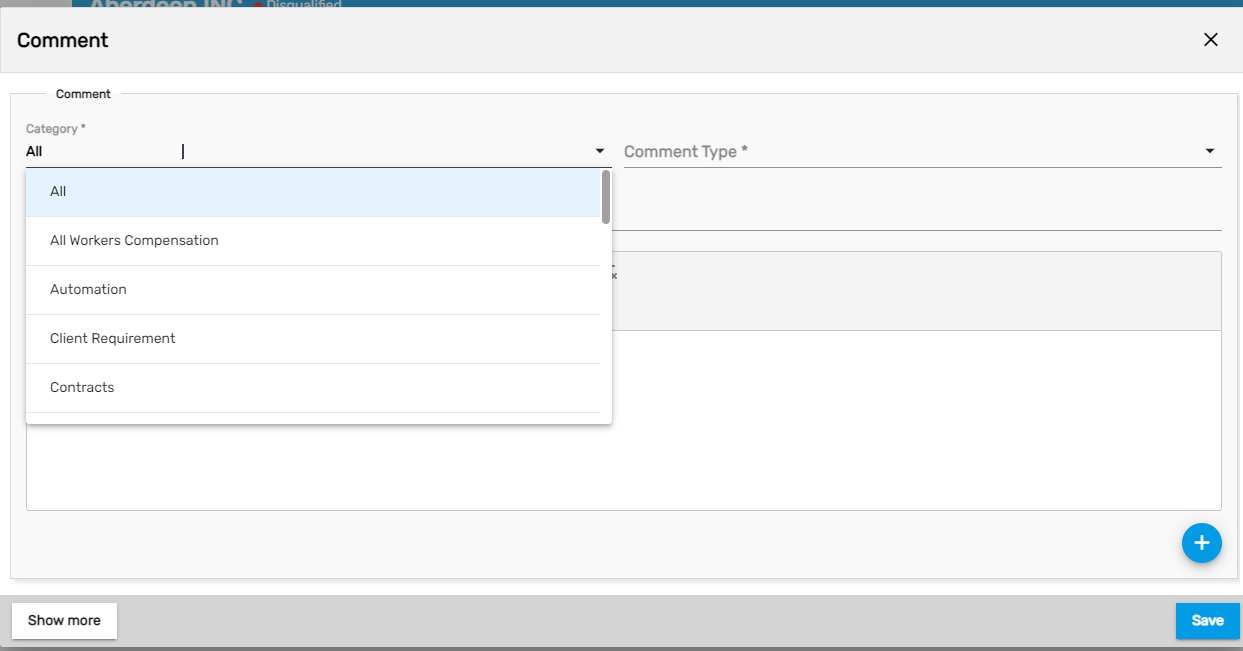
Comment
It allows users to write and update multiple comments associated with new customers under various categories. These comments are displayed in the new customer's profile with the name of the commenter and the date on which the comment was added.
Job Option
It consists of six side navigations related to the job. They are:
- WC Code
- Markup
- Shift
- Job Position
- Discount
- Charge
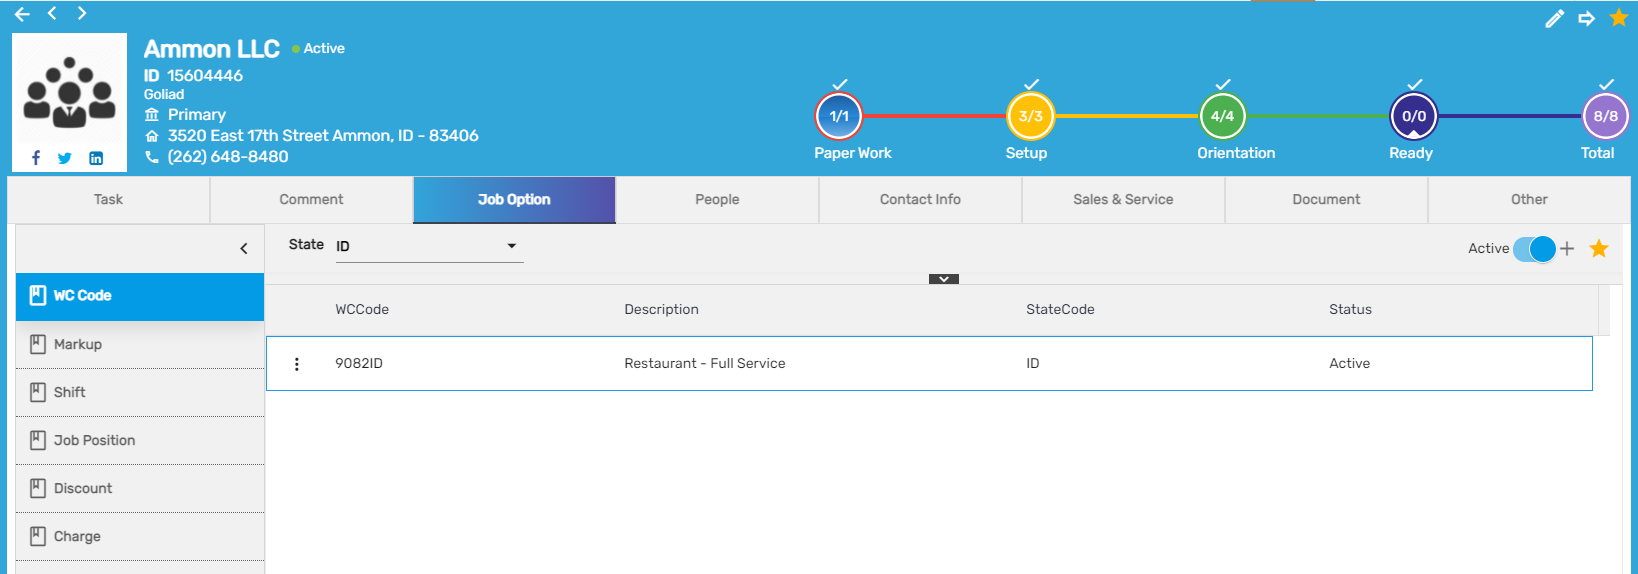
1. WC Code
'WC Codes' are codes that the insurance companies use to identify specific categories of work. Every organization has a different 'WC Code' depending on the nature of its work. 'WC Code' allows users to add and edit such information.
2. Markups
The company charges its customers based on the markup. It is the difference amount between the pay rate and bill rate. Mark up can be expressed in a fixed amount or a percentage. It is very important to enter the mark-up rate as it plays a vital role while billing. 'Mark up' allows users to add and edit markup details. Multiple markups can be added as well.
3. Shift
Shift refers to the duty hours that an employee follows. It allows you to add and edit multiple shifts. It is important for an organization as well as for employees to organize time schedules. Multiple shifts can be added.
4. Job Position
It allows users to add and edit various job positions with rates for the customer. Users can choose various 'Markups', 'WC code', and 'Shift' for the job from this side navigation. The markups, WC code, and shifts added from “WC code”, “Markup” and “Shift” side navigations are populated in the dropdown while adding a job position. The various types of rates available in the dropdown are:
- Markup Rate
All the markup rates added from the “Markup” navigation are displayed as dropdown options.
- Static rate
It allows users to add specific 'Regular Time Pay Rate', 'Regular Time Bill Rate. Over-Time Pay Pate', and 'Over Time Bill Rate'.
- Shift Markup
All the shifts added from the “Shift “navigation are displayed as dropdown options. It allows users to select the shifts and set up markups for that specific shift.
- Shift Rate
Such as static rate, it allows users to add specific 'Regular Time Pay Rate', 'Regular Time Bill Rate. Over-Time Pay Pate', and 'Over Time Bill Rate' for the selected shift.
5. Discount
It allows users to add and edit multiple discounts for the new customer with details such as 'Discount Value', 'Tier Based On', 'Discount' calculated on 'Percentage'or 'Amount'. This information is reflected while invoicing.
6. Charge
It allows the user to add and edit multiple charges for the new customer with details such as 'Charge Value', 'Tier Based On', 'Charge' calculated on 'Percentage'or 'Amount'. . This information is reflected while invoicing.
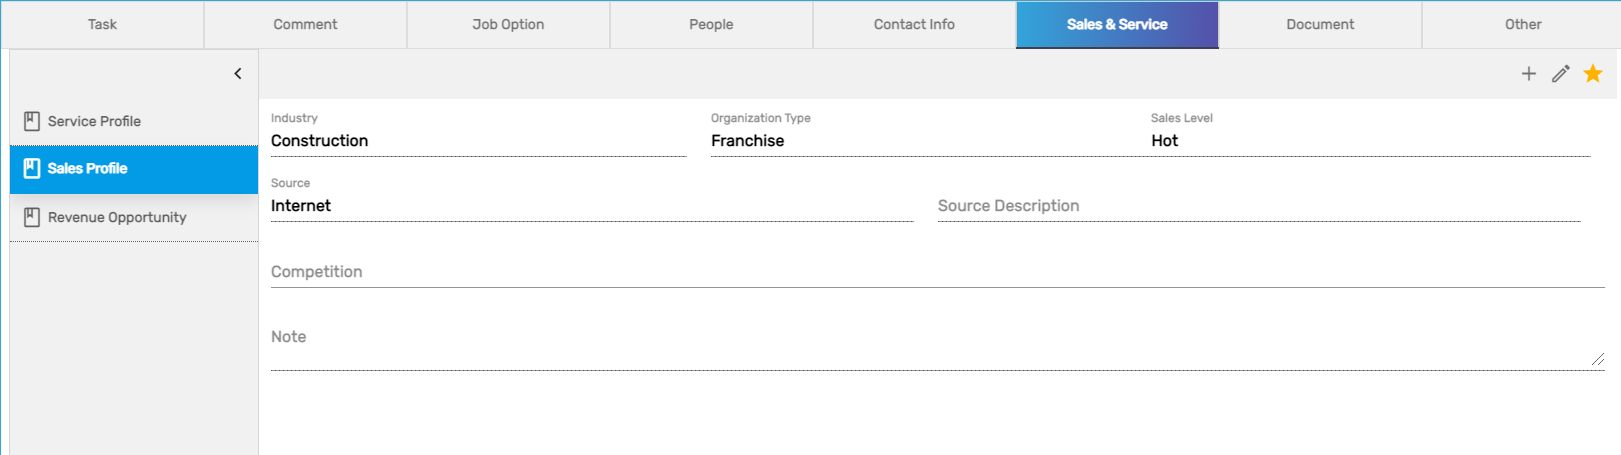
Sales & Service
'Sales & Service' has three side navigations. They are:
- Service Profile
- Sales Profile
- Revenue Opportunity
1. Service Profile
The Service profile is the most important navigation for the customer as it allows users to add and edit various details related to 'Credit terms', 'Invoicing', and 'Payroll'. Service Profile defines the different parameters for a customer which are required during payroll and invoicing. This profile cannot be added multiple times. Service details added in NCO will be copied automatically to CMS.
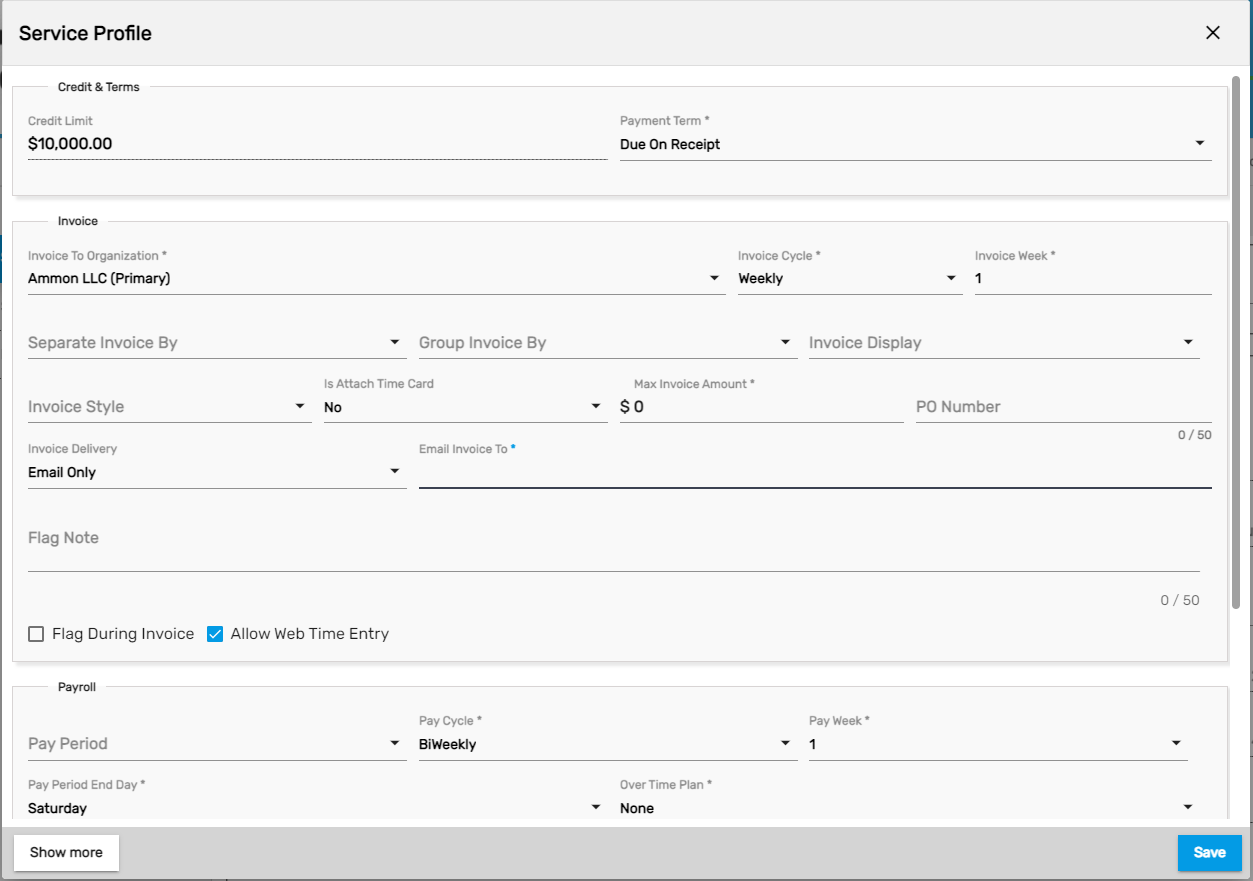
The various fields that must be added are as follows:
i) Credit terms
- Credit Limit: 'Credit Limit' is the maximum amount of credit the company extends. An exception is displayed if the credit limit is crossed during time entry.
- Payment Term: 'Payment Term' determines the due date of an invoice. If the payment term is set to ‘Net 15 Days’ and the invoice date is 4/1/2021 then the invoice will have a due date of 4/16/2020. The payment term is added according to the customer's requirement.
ii) Invoice
- Invoice to Organization: The company to whom the invoice is sent, the company may have multiple departments.
- Invoice Cycle: The time cycle on which the invoice is generated is the 'Invoice Cycle'. It can be monthly, weekly, biweekly, etc.
- Invoice Week: Timely week of the invoice is 'Invoice Week'. If the invoice cycle is monthly then the week in which the invoice is generated is the Invoice week.
- Separate Invoice by: Users can separate invoices by departments, person, shifts, pay period, supervisor, worksite, transaction batch, worksite, and various other options.
- Group Invoice by: Users can group invoices by various options as in the “separate invoice by” dropdown. It is how an invoice is grouped in the invoice report.
- Invoice display: Users can display invoices by various options such as in the group by and separate by fields.
- Invoice style: It is the format or template of the invoice.
- Attach Timecard: It is a dropdown option to attach the timesheet of the employees.
- Max Invoice Amount: The maximum limit of the invoice is the 'Max Invoice Amount'.
- PO Number: Purchase order number.
- Invoice Delivery: Dropdown option to choose ways to deliver invoice such as email or print etc.
- Email Invoice to It is the Email address for the invoices to be sent.
- Allow Web Time Entry: This allows the employees under this organization to use web time entry. Disabling this will not allow the employee to do web time entry.
iii) Payroll
- Pay Period: The recurring length of time over which the employee timesheet is recorded and paid accordingly is the pay period.
- Pay Cycle: It is the time cycle on which the employee is paid. It may be weekly, bi-weekly, monthly, etc.
- Pay Week: It means the Timely week of the pay. If the pay cycle is monthly then the week of a month on which the employees are to be is 'Pay Week'.
- Pay Period End Date: The last day of the pay period is the 'Pay Period End Date'.
- Over-Time Plan: It is a plan for overtime pay. For example: Selecting Over 40 plans for weekly time entry and daily over 8 for daily time entry.
- Mileage Rate: It refers to the travel allowance charge taken from the customer for transporting their employees to the worksite.
- Transaction Template: This template is important for the Timesheet entry.
- If 4 entry is selected, it refers to Clock In-Break In-Break Out-Clock Out.
- If 2 entry is selected, it refers to Clock In-Clock Out.
Note: To be able to enter daily time, make sure to select daily transactions templates.
2. Sales Profile
It allows users to add and edit various sales-related information such as 'Sales level', 'Organization type', 'Competition details', and 'Notes'.
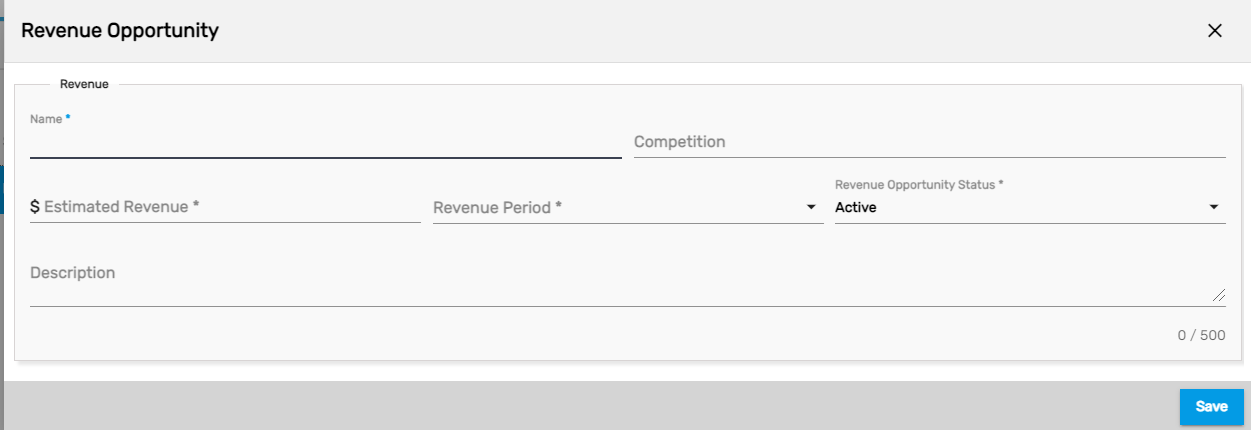
3. Revenue Opportunity
It allows users to add and edit various information related to 'Estimated Revenue Amounts', 'Revenue period', and so on.
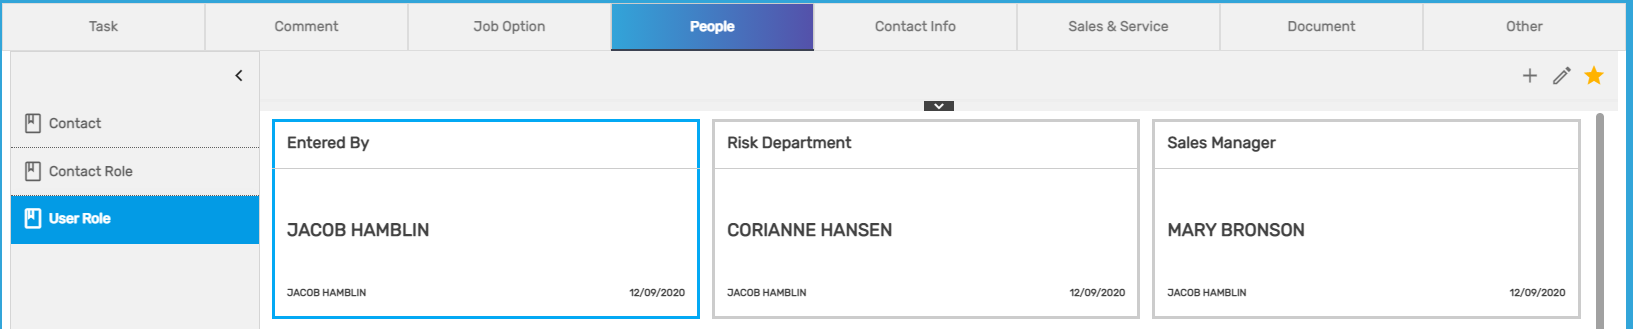
People
It has three side navigations. They are:
- Contact
- Contact Role
- User Role
1. Contact
It allows users to add and edit multiple contacts related to the new customer. The contact you entered while adding up a new customer is automatically displayed in this navigation. It allows you to add the Full 'Name' of the contact person, 'Job Title', 'Email address', 'Contact number', 'Address' details, etc.

2. Contact Role
It allows users to add and edit multiple contact roles for the same contact. The contact person added from the “contact” navigation is displayed in the dropdown for assigning various contact roles to this specific contact person.

3. User Role
It allows users to add and edit multiple user roles for the new customer with the user’s name with office details. You can add multiple user roles for the same user.
Contact Info
'Contact Info' has two side navigations. They are:
- Contact Information
- Address
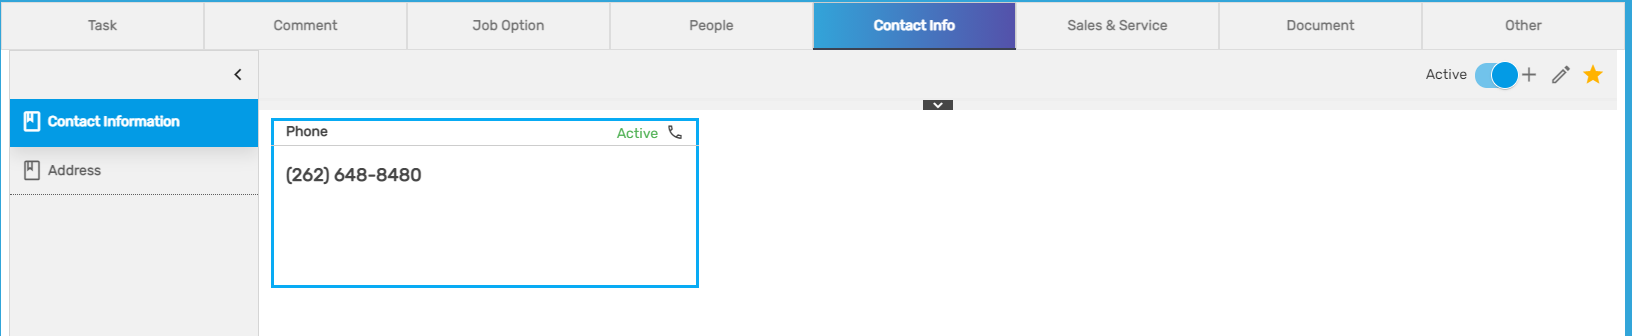
1. Contact Information
It allows users to add and edit multiple types of contact information such as phone numbers, fax numbers, email iD, website information, Twitter, Linked In, etc.
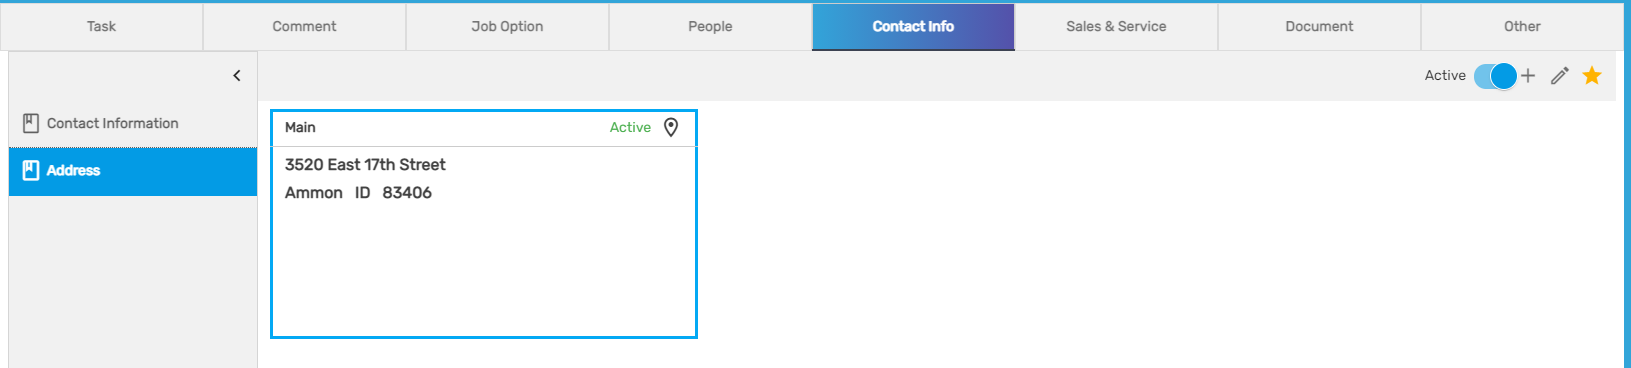
2. Address
It allows users to add and edit multiple addresses such as billing, mailing, job site, and main address. Users can also add sales tax and pay rate for that address. Multiple addresses of the same type cannot be added.
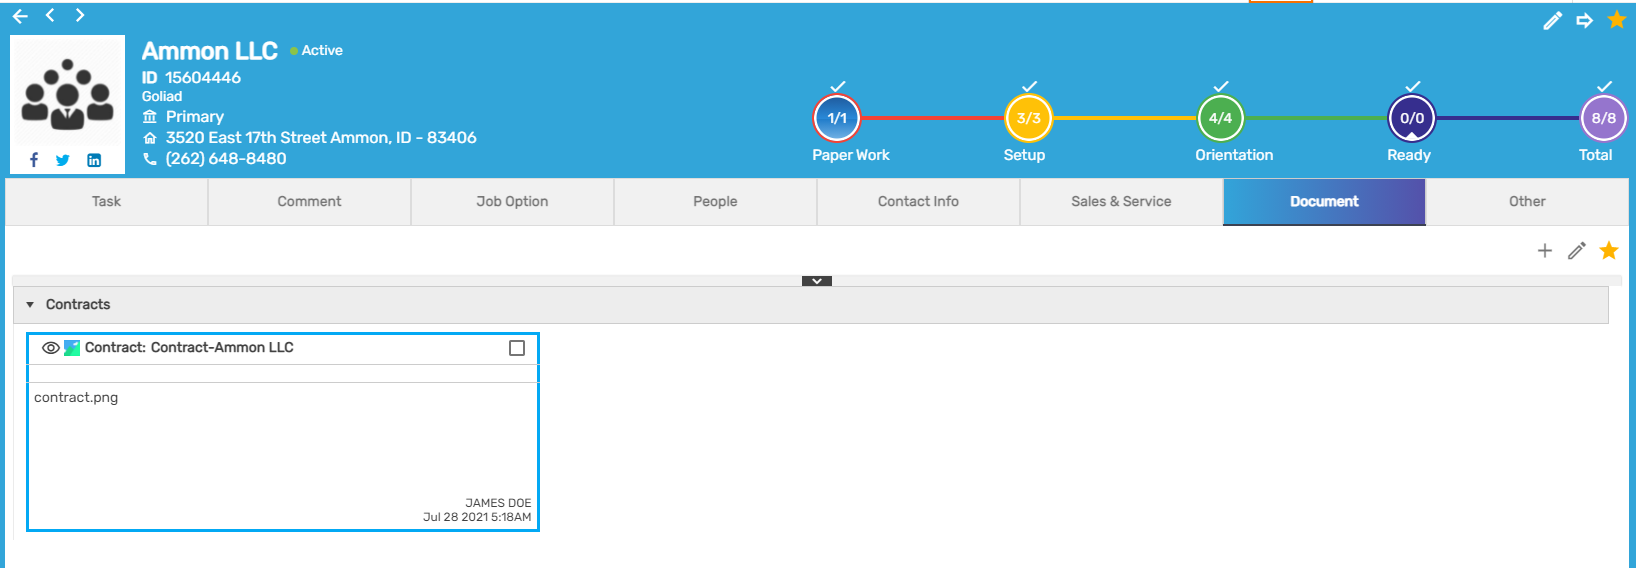
Document
It allows you to upload the related documents of the new customers, add and edit the document details which will be displayed in the new customer's profile. The document may be an image, word, excel, pdf, etc. We can keep documents for future reference as well.
 Other
Other
It has two side navigations. They are:
- Custom
- Date Type
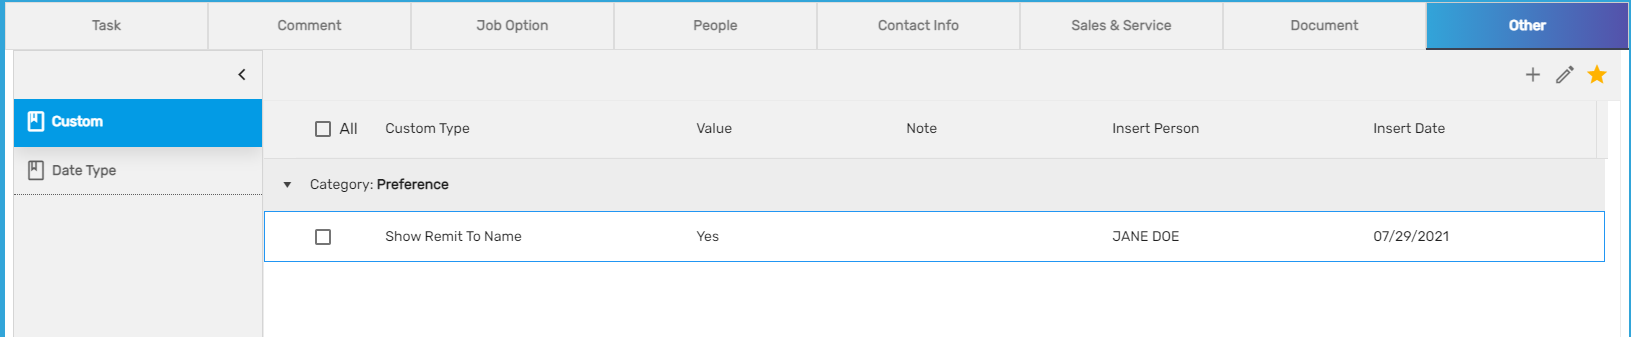
1. Custom
It allows users to add and edit various customized details related to the new customer such as 'Show Remit to Name', 'Attn', 'Source'. It is mostly the client’s specific request to handle. These details will reflect in reporting.
2. Date Type
It allows users to add and edit various date type details related to the new customer such as 'contract date' and 'entered date'. It is also customizable as per Company's requirements.