Overview
A contact in LTS consists of detailed information of the Lead's contact. Users can search the Lead's contact and redirect to the 'Contact' detail. The searched contact will be listed on the contact detail.
Users can apply the filter which helps to search the required contact quickly. The LTS contact contains features like filters, contact detail, favorite action, and navigations essential for contact information. Lead contact is a Lead representative having either of the roles like:
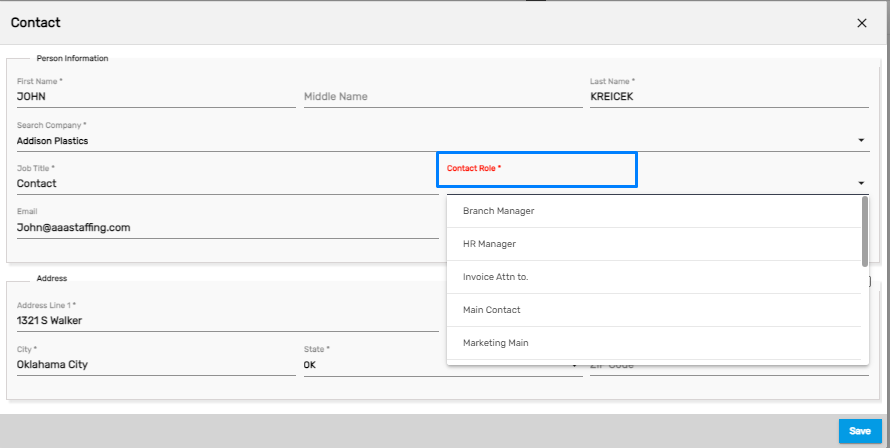
- Branch Manager
- HR Manager
- Invoice Attn to (i.e., the person to whom the invoice of the customer is sent)
- Main Contact
- Marketing Main
- Owner
- Payroll Contact
- Report to Person
- Supervisor
- Time Approver
- VP
- Other Roles
Note: These roles may depend upon the customer’s requirement.
A job is defined depending on the role of the contact. According to the role, access is provided to the contact. For example, the 'Time Approver' will have access to approve the time entry of the employee but the 'HR Manager' won’t have access to approve the time entry.
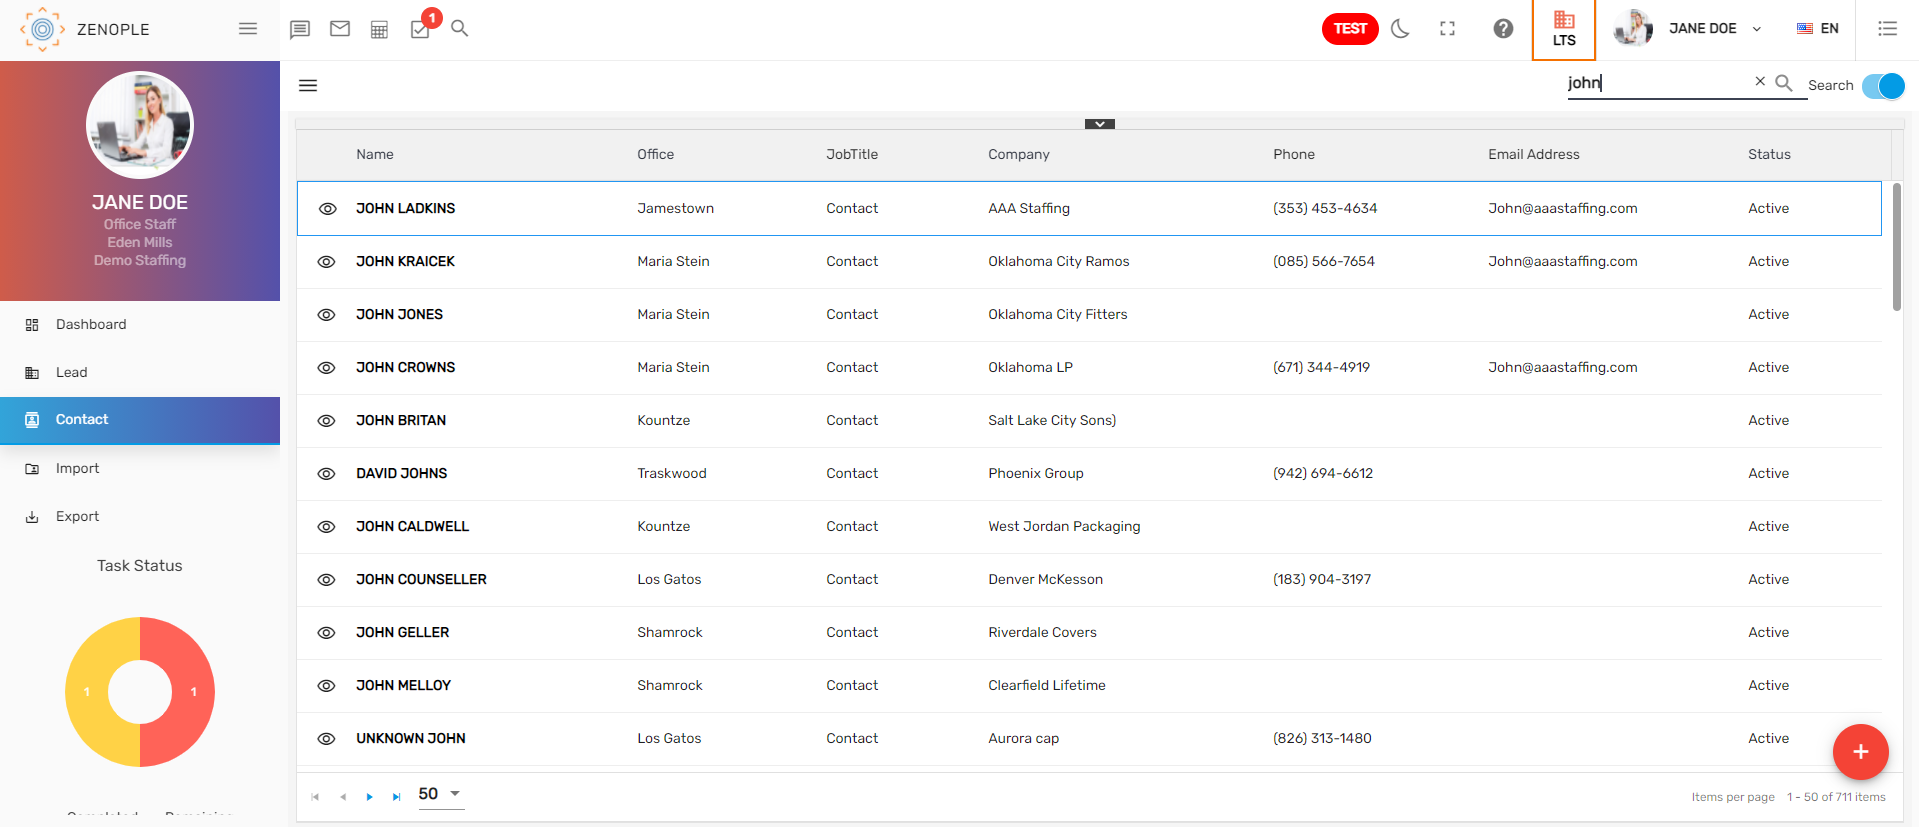
Contact Directory
The contact directory consists of a 'Filter,' 'Add' contact button, and a 'Search'/'Recent' toggle button.
Users can search for the Lead's contact from the 'Search'/'Recent toggle button that displays the list of Lead's contact. The filter helps to filter the required contact records. Users can also add contacts under required leads and redirect to the contact detail from the directory.
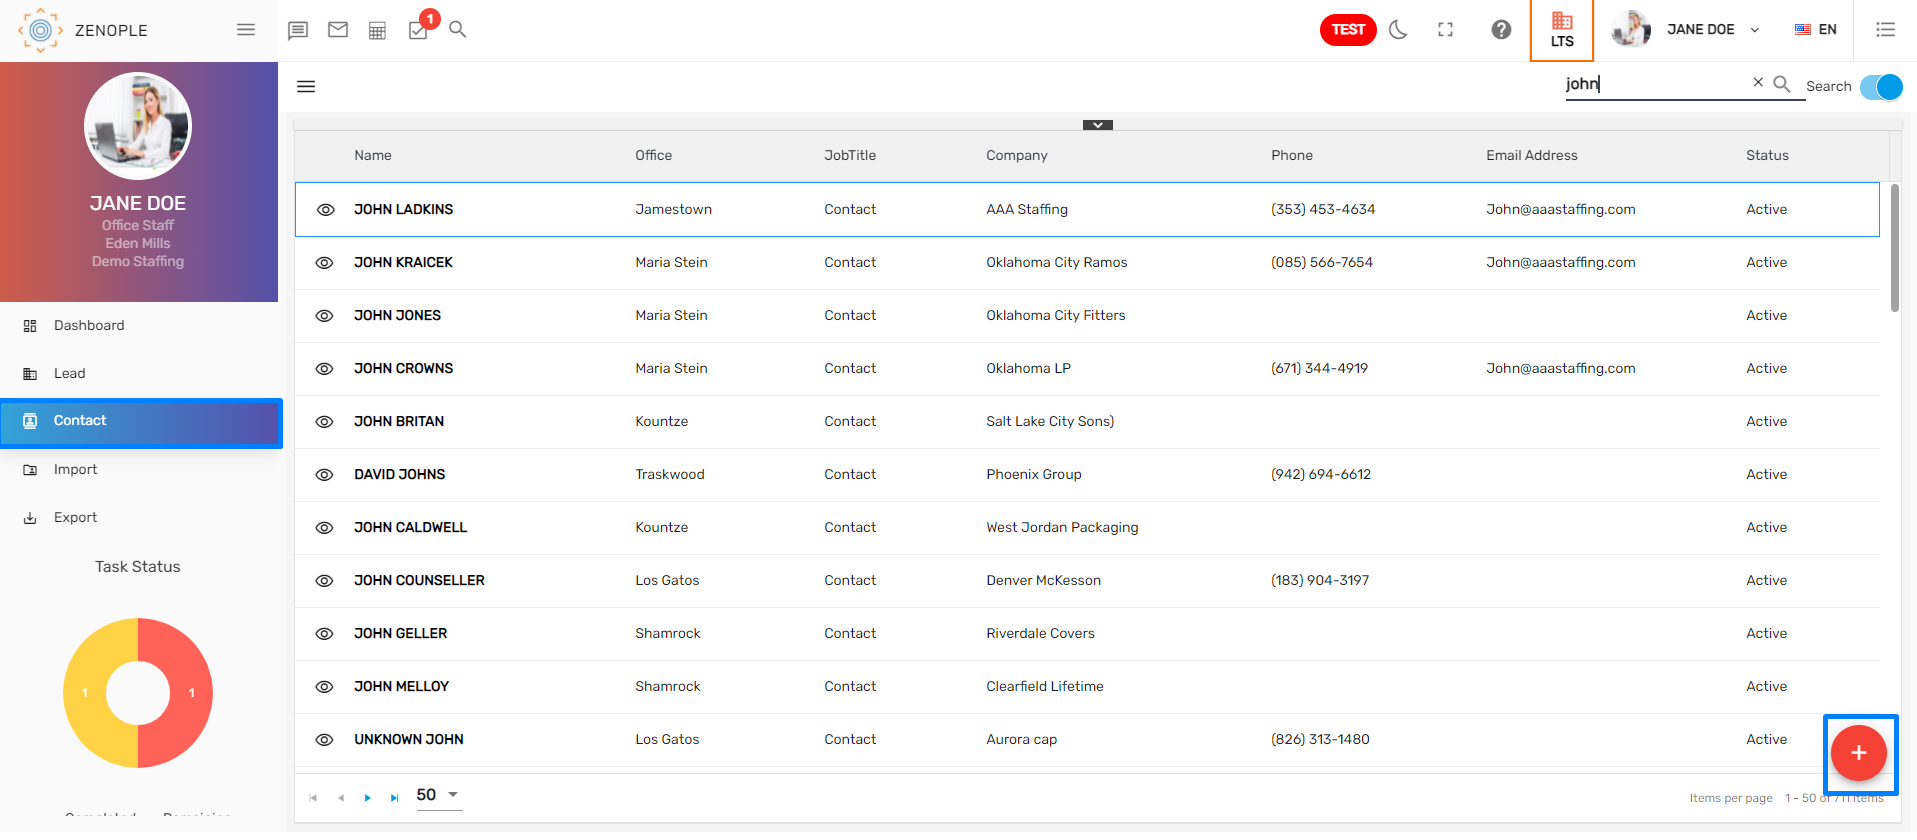
Add Contact
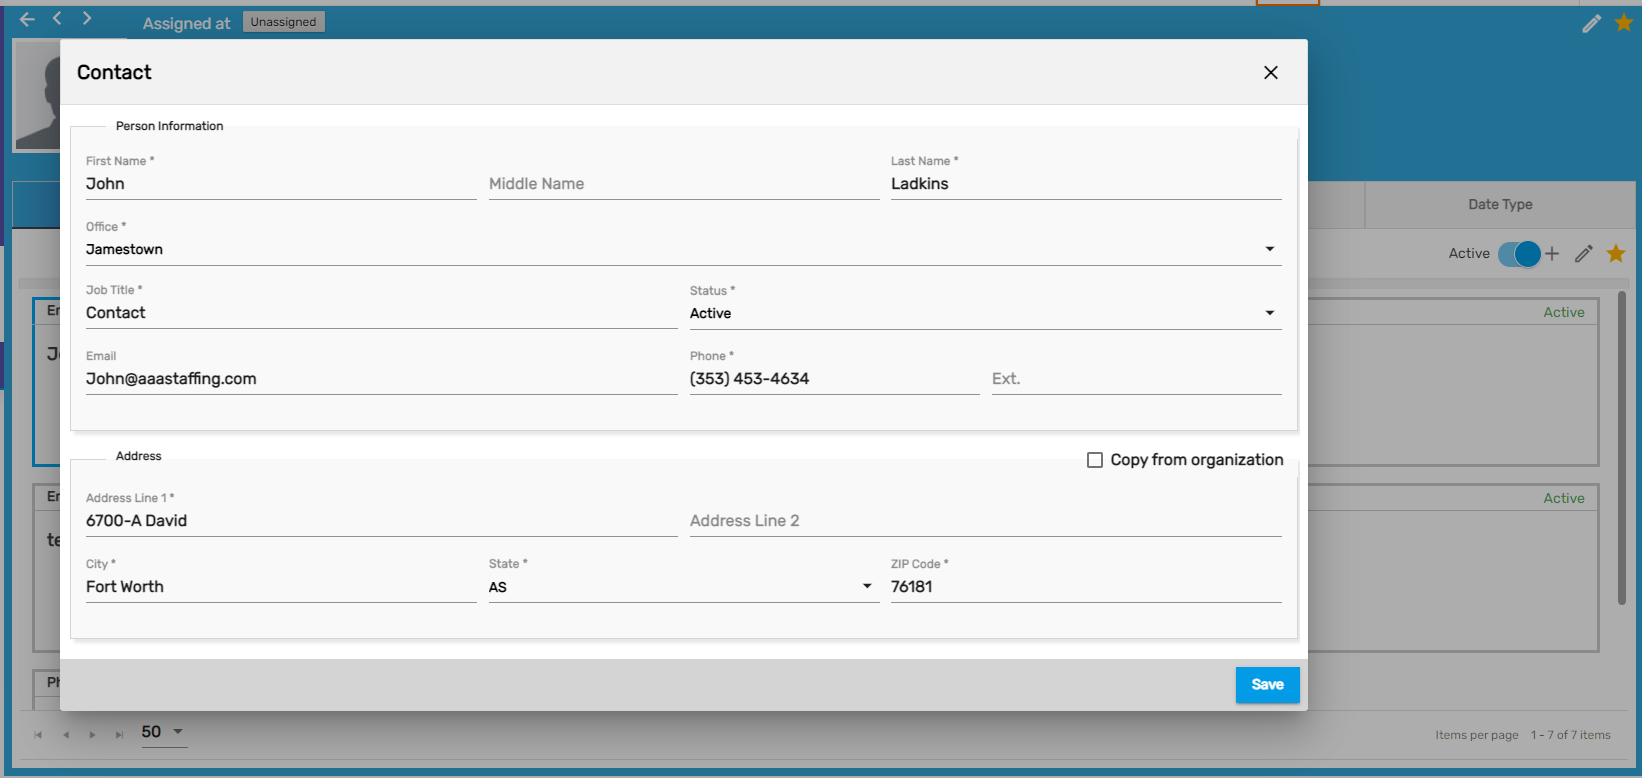
The 'Add' button allows the users to add a contact under a 'Lead.' Users can simply add a contact by clicking on the 'Add' icon and entering the contact detailed information.
A form to add 'Contact' will open and users need to provide the details to add a contact. Further, select a 'Contact Role' for the contact. Depending on the selected contact role, the task of the contact is defined. After filling in all the details, click on the 'Save' button to add a contact.
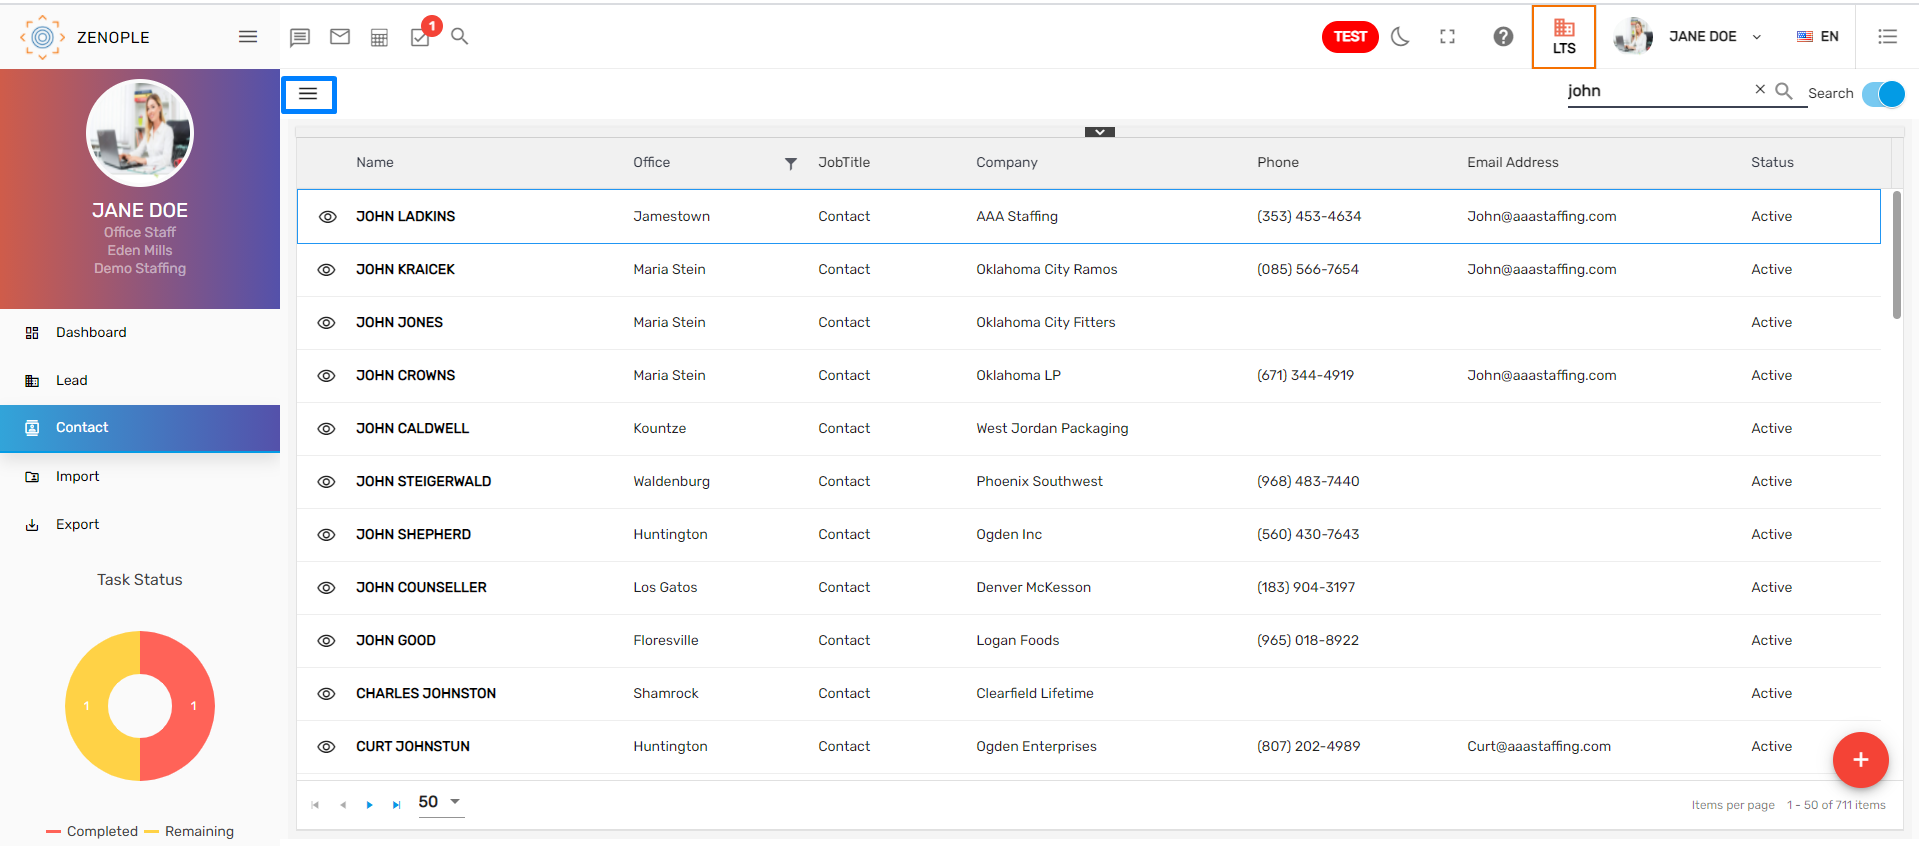
Filter
Contact includes a filter option that helps to search the required contact quickly. Using this filter will display the contact based on the selected options. This filter feature can be used from the hamburger icon.
The filter consists of different filter options like 'Filter Status,' 'Status,' 'User Role'. User needs to 'Enable' the filter status, to enable other filter options.
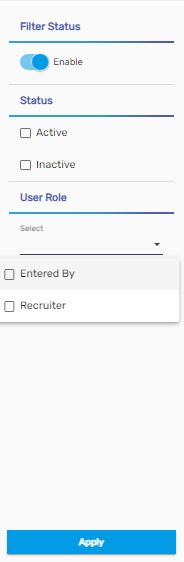
Note: The filter options can be customized as per the client's requirement.
Search/Recent Toggle Button
The 'Search' toggle button allows searching the contact from the contact directory, whereas the 'Recent' toggle button displays the most searched and visited contact records.
Contact Detail
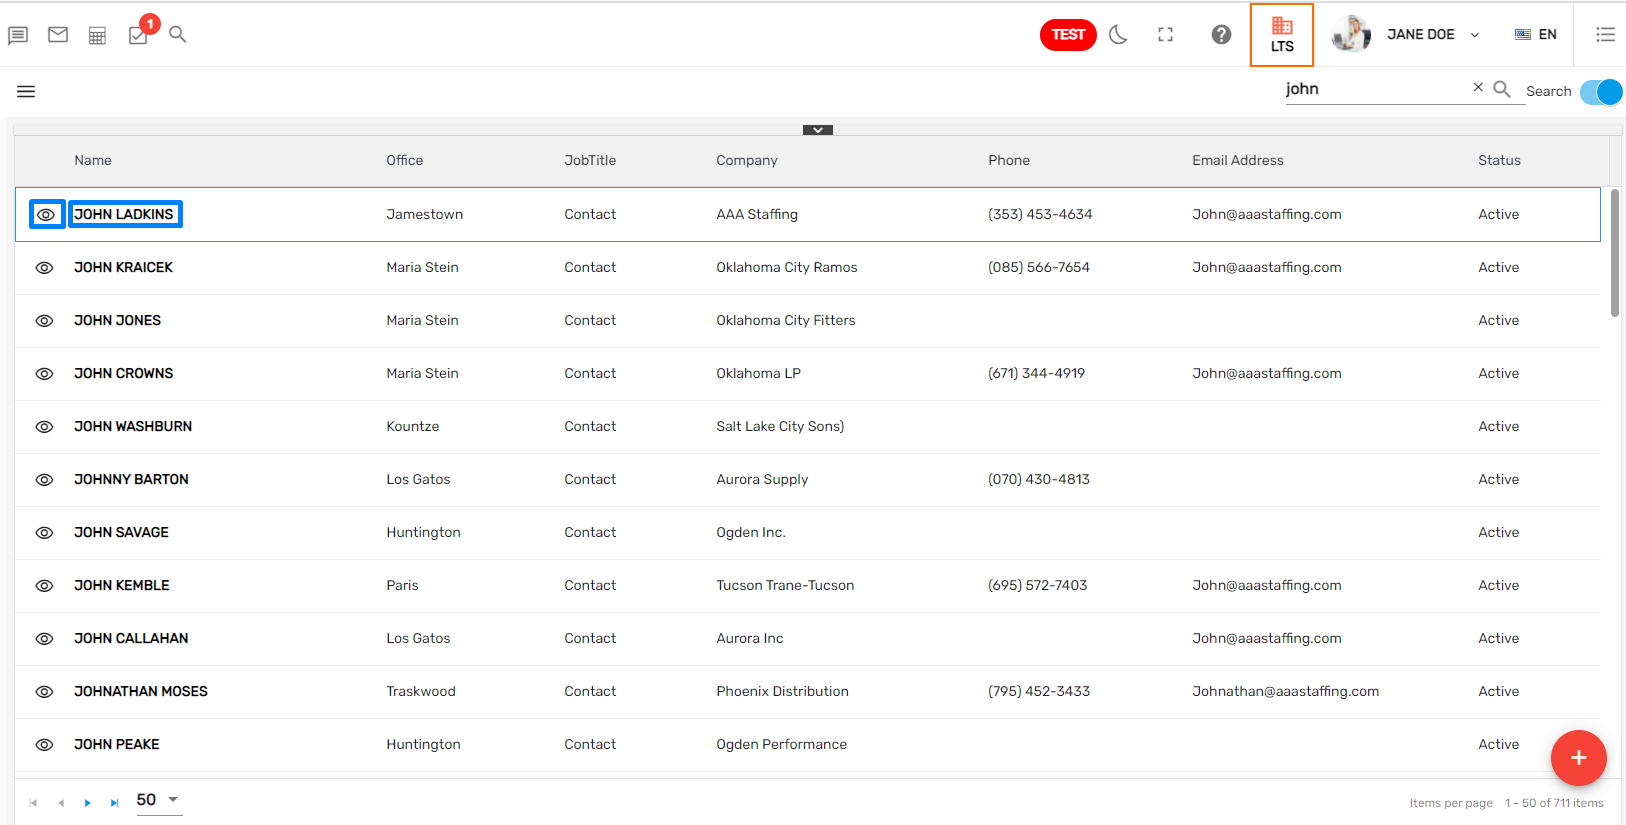
Contact detail features detailed information of all the contacts. Users can redirect to the 'Contact Detail', by searching contacts from the search bar. The most searched and recently viewed contact records can be filtered by turning off the 'Search' toggle button.
All the related search records will be listed and users can redirect to the contact detail by clicking on the eye view icon or clicking on the contact's name.
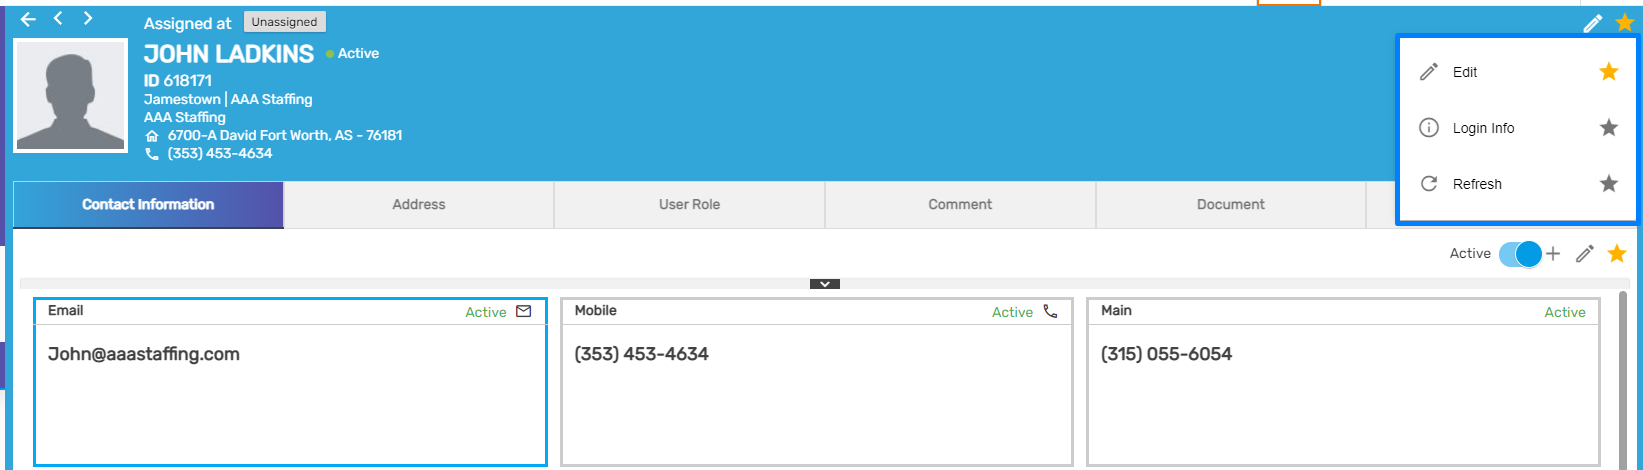
The contact detail consists of:
- The contact’s detail like the ID, the office and company under which the contact is created, the full address, and the phone number.
- Favorite Action
- Navigations

Favorite Actions
The contact detail consists of the various favorite actions. They are:
- Edit
- Login Info
- Refresh
1. Edit
This action allows the users to update the details of the contact. Clicking the 'Edit' action in the favorite icon and updating the details will edit the contact details.
2. Login Info
The login information of the contact can be viewed from this action. 'Login Info' action in the favorite icon allows users to view the login credential which is displayed below.
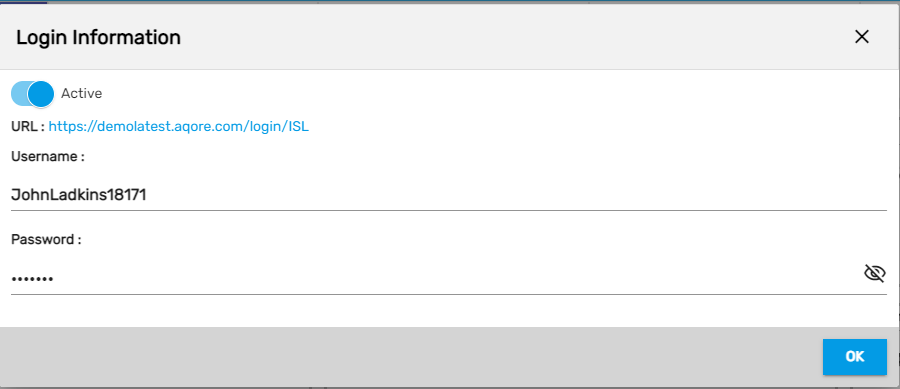
Users have access to the credential change option, they can also update the contact's username and password. View the password by clicking on the 'Eye View 'icon and turn off the 'Active' toggle button to disable the login of the contact.
3. Refresh
It allows users to refresh the contact detail if any records are not reflected. Similarly, there is a refresh action in each top and side navigation of contact to refresh the navigation records.
Navigation
The LTS contact has six main navigations. They are
- Contact Information
- Address
- User Role
- Comment
- Document
- Date Type
Contact Information
This top navigation shows the contact information like the address, email of the contact, etc. It allows users to add, edit and set the contact information as primary contact information. The contact information type depends upon the client's requirements.
The contact information filled while adding the contact will be displayed in this top navigation.
 One of the contact information needs to be primary contact information. The primary contact information will be updated on the detail of contact. Only one record can be set as primary contact information under the same contact information type.
The process of adding and editing the contact information is similar across all applications.
Address
This top navigation shows the address of the contact. Depending upon the customer’s requirement the contact address type will differ. It allows the users to add and edit multiple addresses of the contact.
The address entered while adding the contact will be displayed in this top navigation.
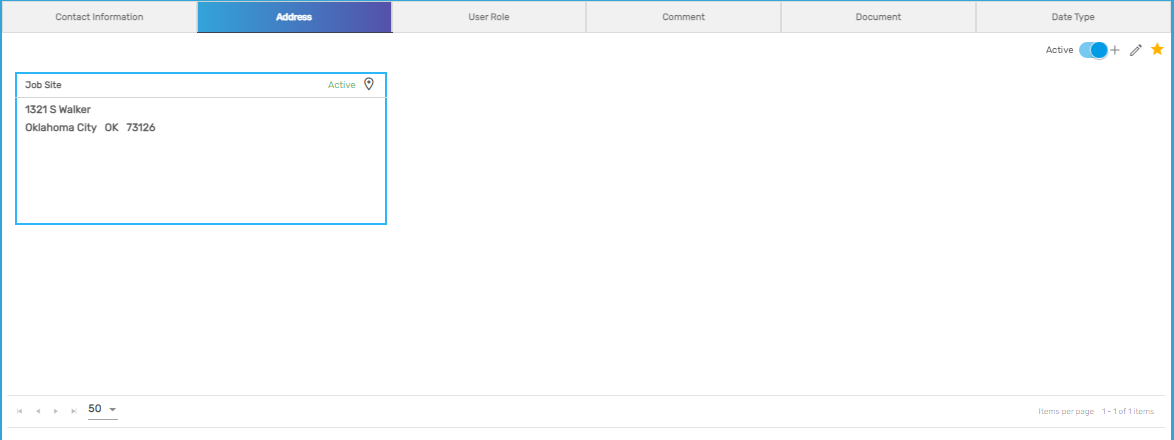
'Set As Primary' action will set an address as a primary address. Only one of the addresses can be set as a primary address. The primary address will be updated on the detail of contact.
The process of adding and editing the contact information is similar across all applications.
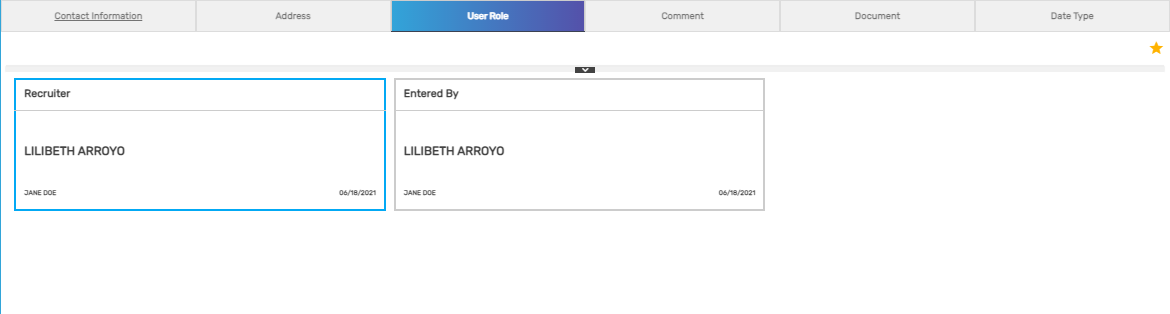
User Role
This top navigation shows the directly involved users of the contact like users who entered the contact ('Entered By') or users who recruit the contact ('Recruiter'). It allows users to add, edit multiple user roles of the contact.
The standard user roles are 'Entered By' and 'Recruiter' but these roles can be customized as per the organization's requirement.
The process of adding and editing the contact information is similar across all applications.
Comment
This top navigation shows all the comments of the contact for different comment types under different categories. It allows users to write multiple comments associated with the contact and also update them. The comment type and comment category can be customized based on the customer’s requirement. Users can view, add, edit the comments of contact under various categories and types. These comments are displayed in the contact's profile with the name of the comment adder and the date on which the comment was added.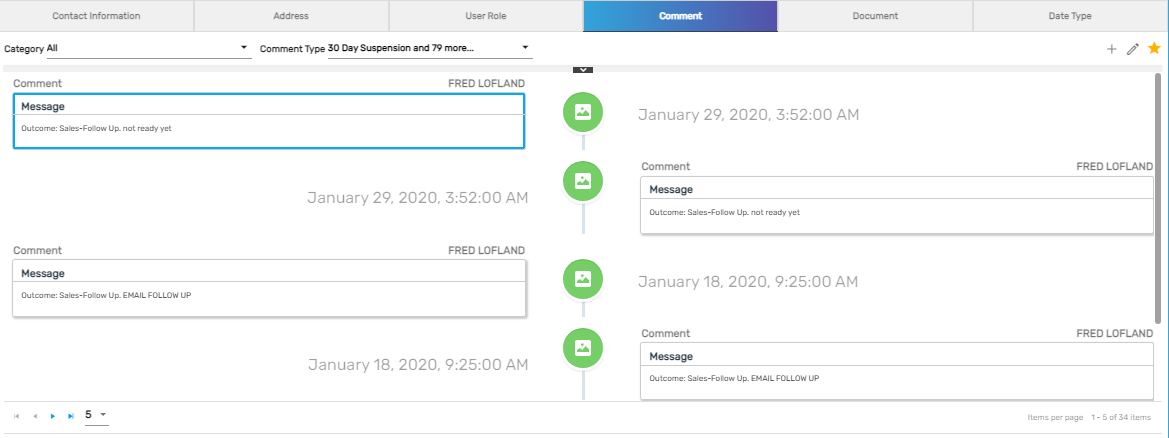
The process of adding and editing the contact information is similar across all applications.
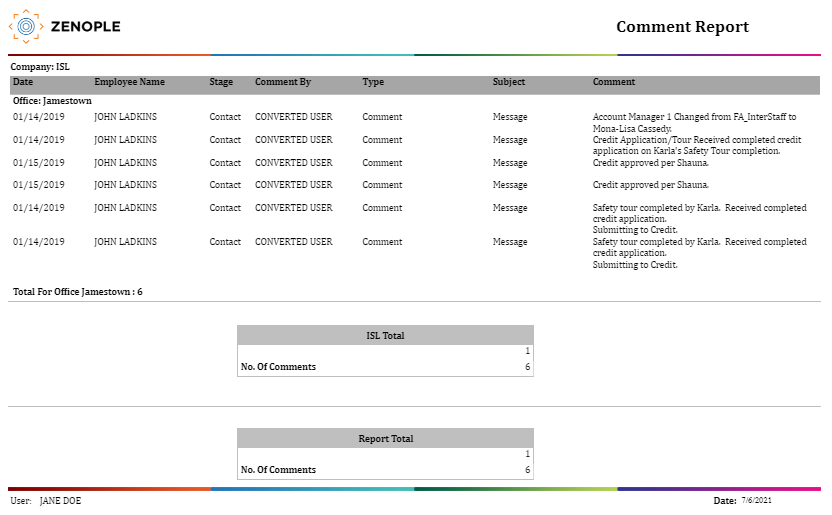
Users can view the comment report by clicking on the 'View' action. This report shows the comment added by users for the contact.
Document
This top navigation shows the contact’s document like the contract or any other related documents. It allows users to view and download the document. Also, users can 'Add' and 'Edit' the contact’s document. The documents will be displayed in the contact's profile. The document may be an image, word file, excel, pdf, etc. Users have access to the document. Moreover, users can view the document by clicking on the eye view and can also download the document by clicking on the download button.
.png)
The process to view, download, add and edit a document, is similar across all the applications.
Date Type
This top navigation shows the directly involved users of the contact like the date on which users hired the contact (Hired Date) or the date on which users updated the password (Last Password Change Date). It allows users to add, edit multiple date types of the contact. The standard date type is hired date and the last password change date. These 'Date Types' can be customized as per the organization's requirements.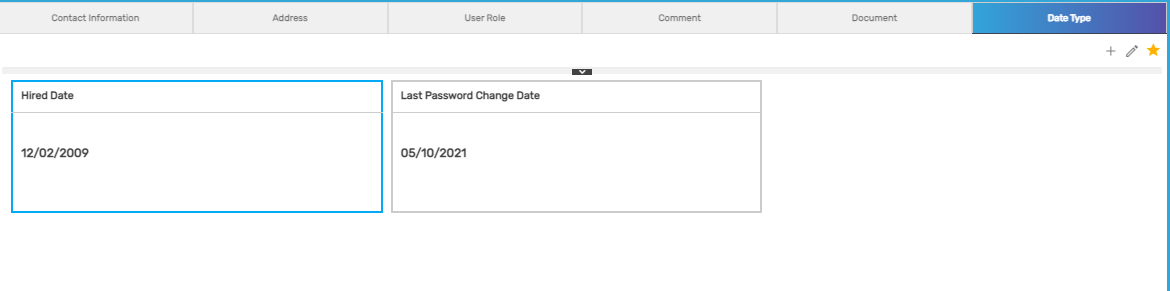 The process of adding and editing the 'Date Type' is similar across all the applications.