Overview
Bill Payment allows users to create a new batch for processing the bill transaction forward. The batch is created based on the company and accounting period. Bill will be paid to Agency through 'Bill Payment.'
Add Batch
Firstly, users need to create a transaction by clicking on 'Create Transaction' available in the top right corner. 
Then, users must select the organization and accounting period under which the payment batch is to be created. Further, users need to click on the 'Add' icon to add the batch. Batches can only be added in an open accounting period.
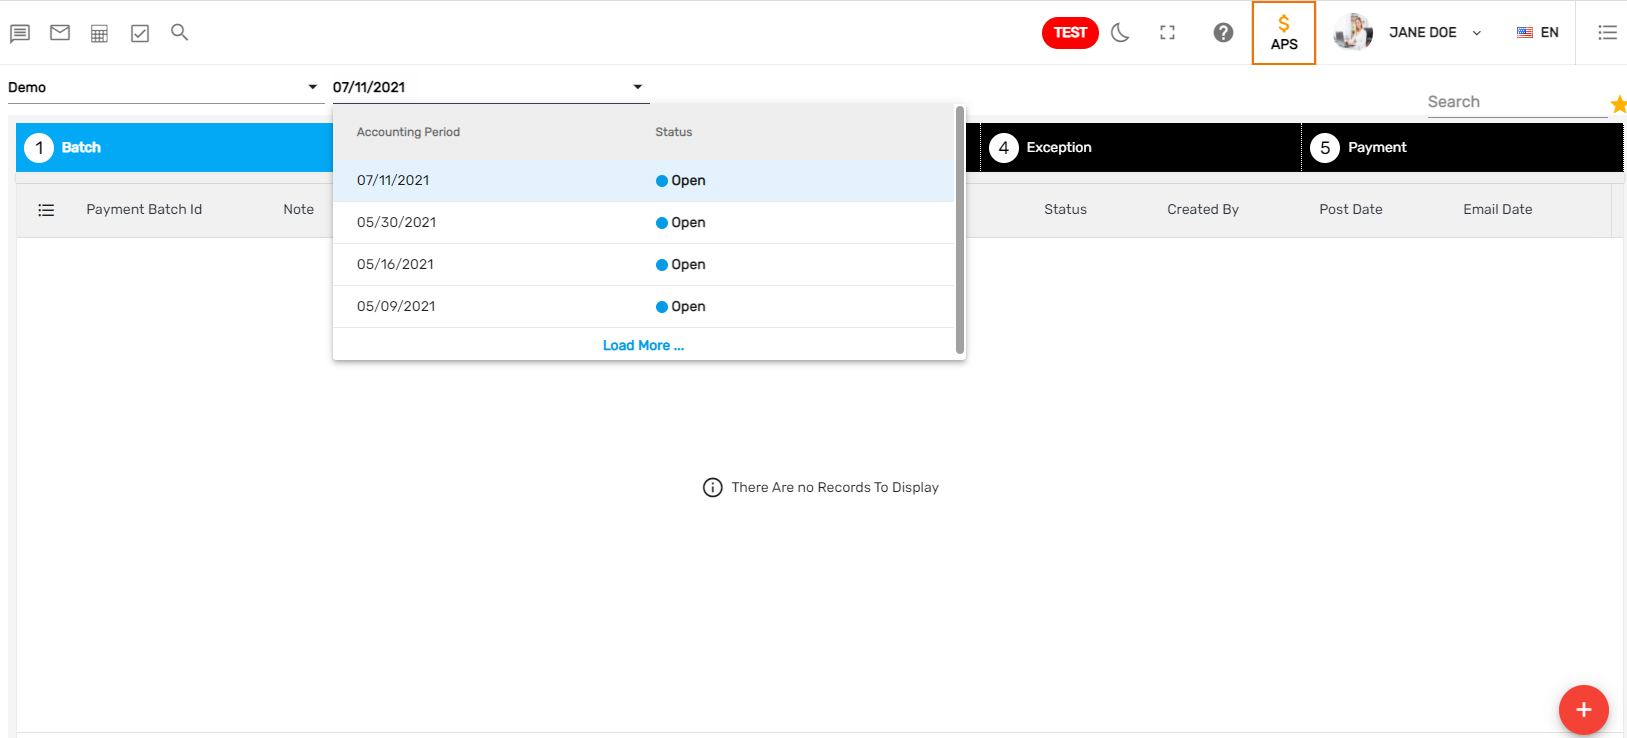
The 'Grid' option in the verticle ellipsis has toggle buttons for 'Show Posted' and 'Show Others.' 'Show Posted' will display batches that have been already posted while 'Show Others' will display the batches created by other users when enabled.

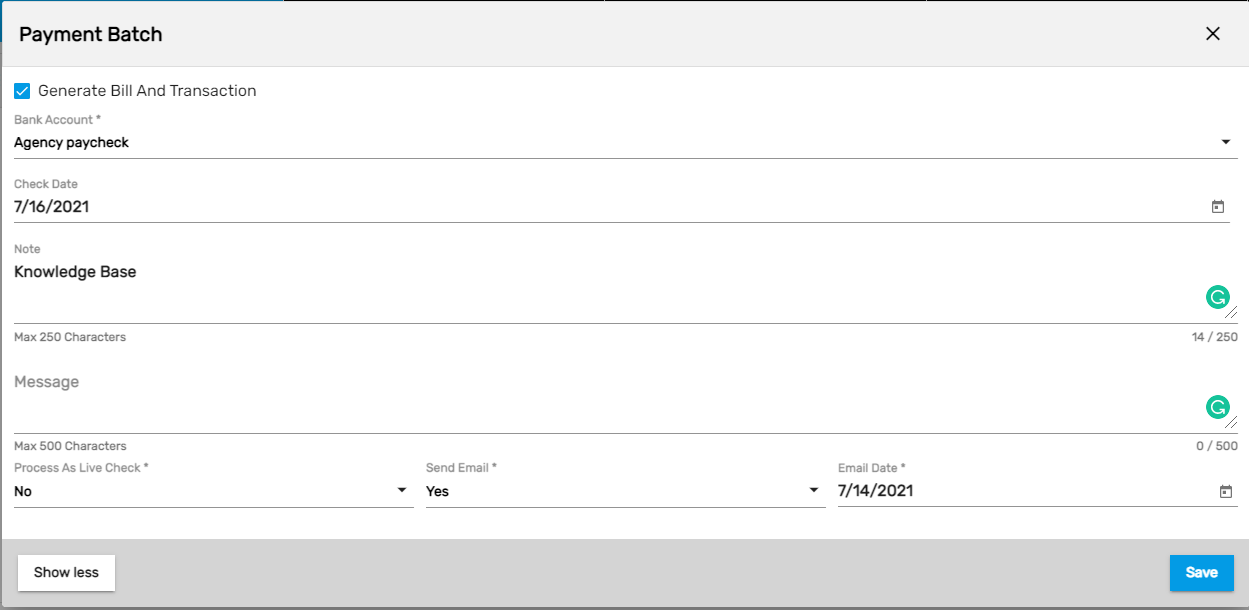
Add the 'Payment Batch' details as required.
Groupings
Grouping is done to select the transactions for each batch.
The grouping can be done based on various categories such as,
- Accounting Period
- Agency
The transactions will be displayed based on these selected grouping options.
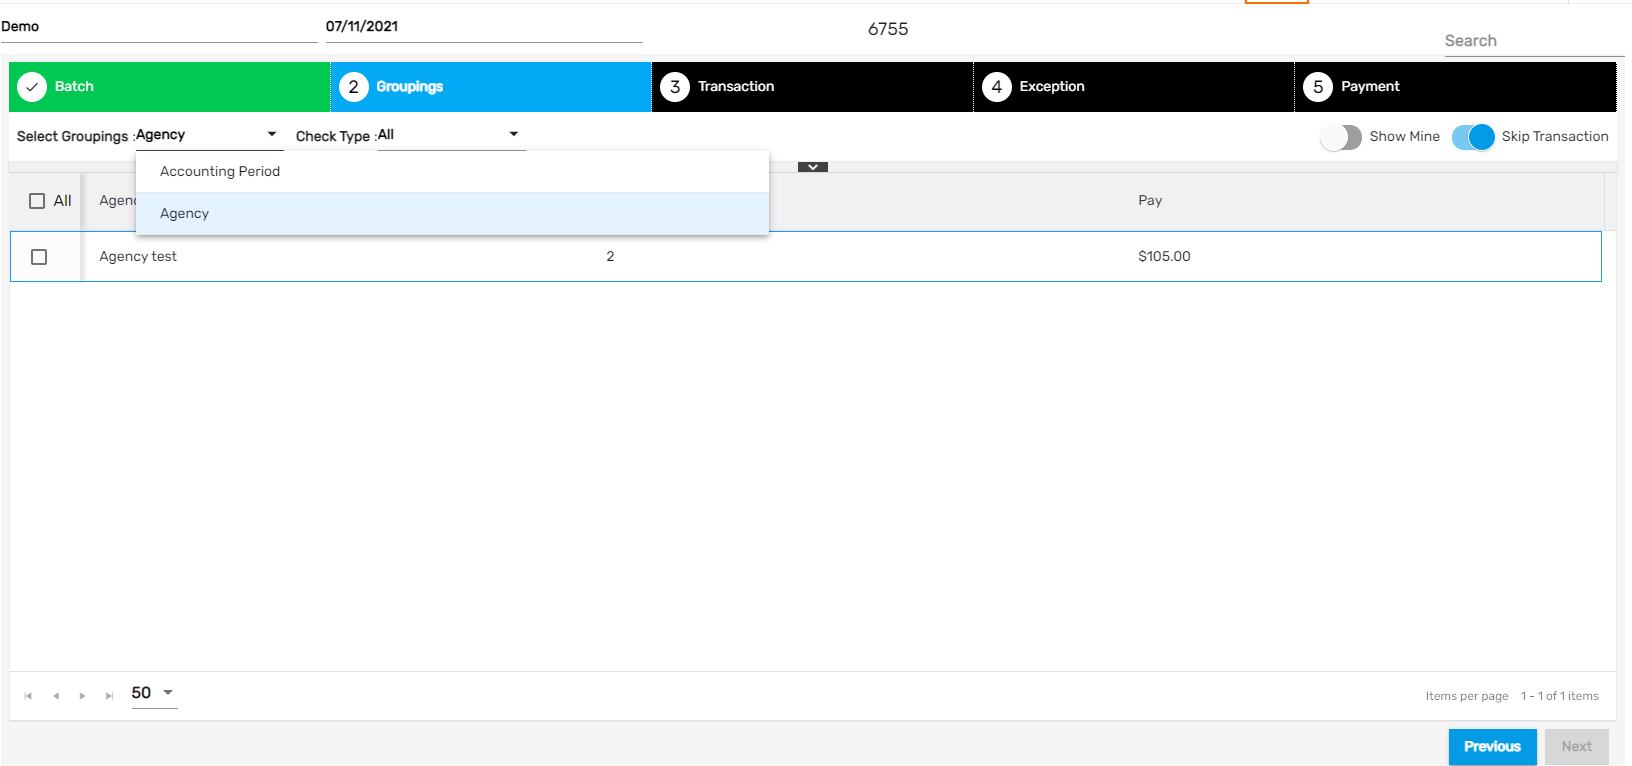
The grid options in 'Groupings' are similar to that of 'Batch.' The grid option has the toggle button 'Show Mine' which will display the transactions created by users in TMS. Select the transaction to include in bill pay processing.

Grouping is selecting the common things. We do groups based on the common type and filter.
- Grouping of the batch is done by Agency and Accounting Period.
- Check Types are either 'Direct Deposit' or 'Live Check.' In order to select check type as direct deposit, users need to go to agency navigation and set up the bank account. If users have not set up any bank account, the live check option can be chosen.
- Users can filter the batch by benefit and deduction.
- If users toggle on 'Show Mine,' transactions will show up accordingly.
- If users toggle on 'Skip Transaction,' it will redirect the user to the 'Payment' navigation.
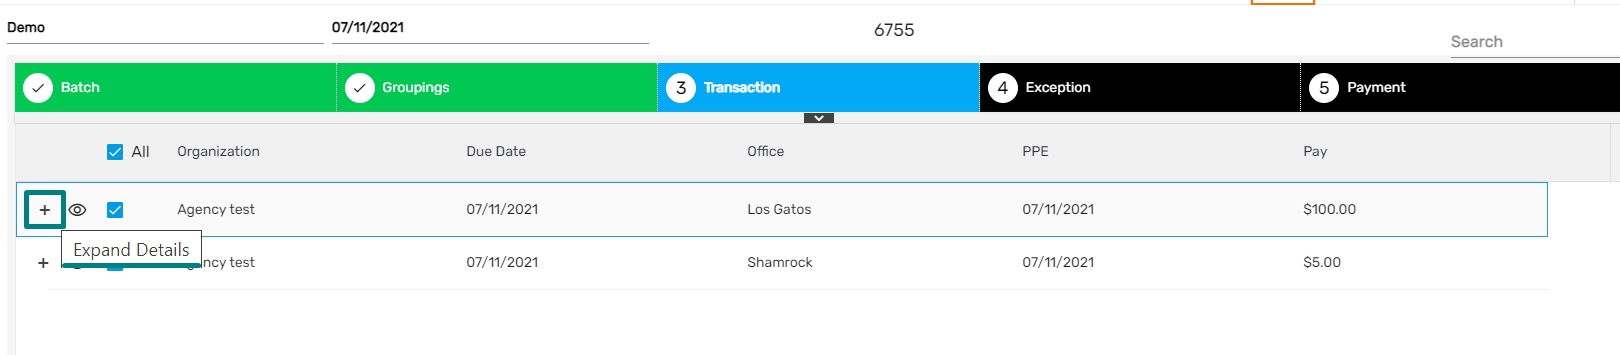
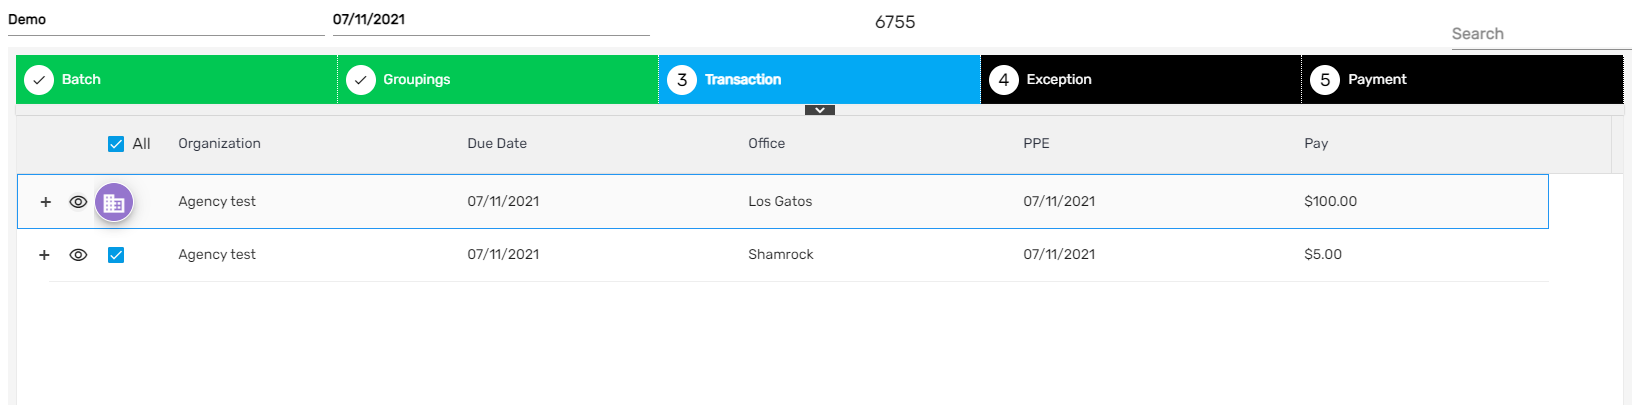
Transaction
This will display the selected transactions to be processed for the bill payment in detail and will further calculate the total bill amount. Select the required transactions and click on the 'Next 'button to move forward.

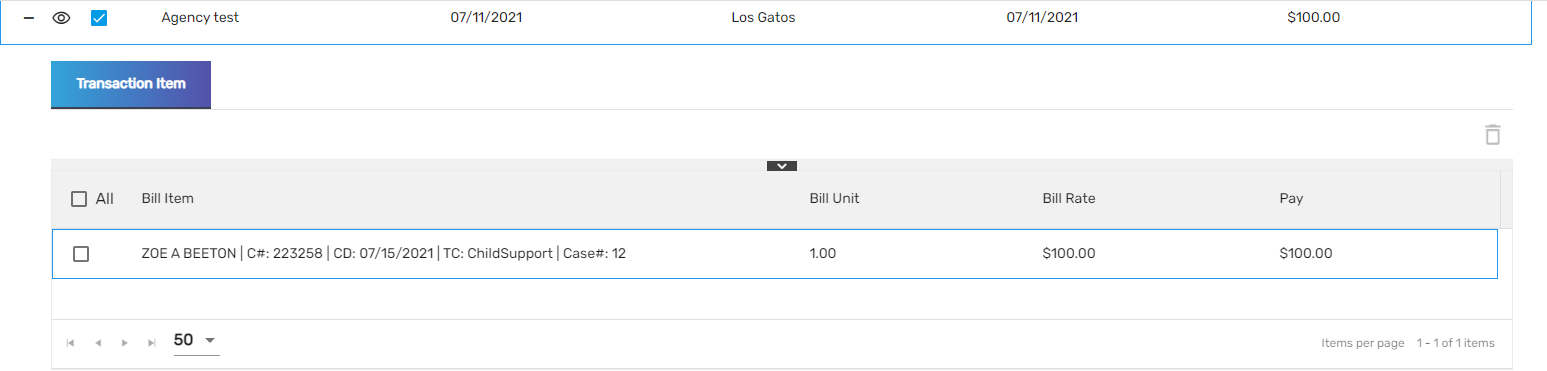
Users can view the transactions and bill item details by clicking on the '+' button.
Users can redirect to the customer detail related to a specific transaction by hovering the cursor on the eye view icon and clicking on the Customer icon among icons of different transactions.
Exception
The exceptions are disclaimers called during a process. It may be a warning or a severe exception. Users cannot ignore a severe exception and users have to fix the records based on the disclaimer to move forward. Likewise, various exceptions get tested while completing this process.
- If no exception is called, users can move forward.
- If a warning exception is called, users may fix the records as per the exception or ignore the exception and move forward.
- If a severe exception is called, users must fix the records based on the exception called to move forward.

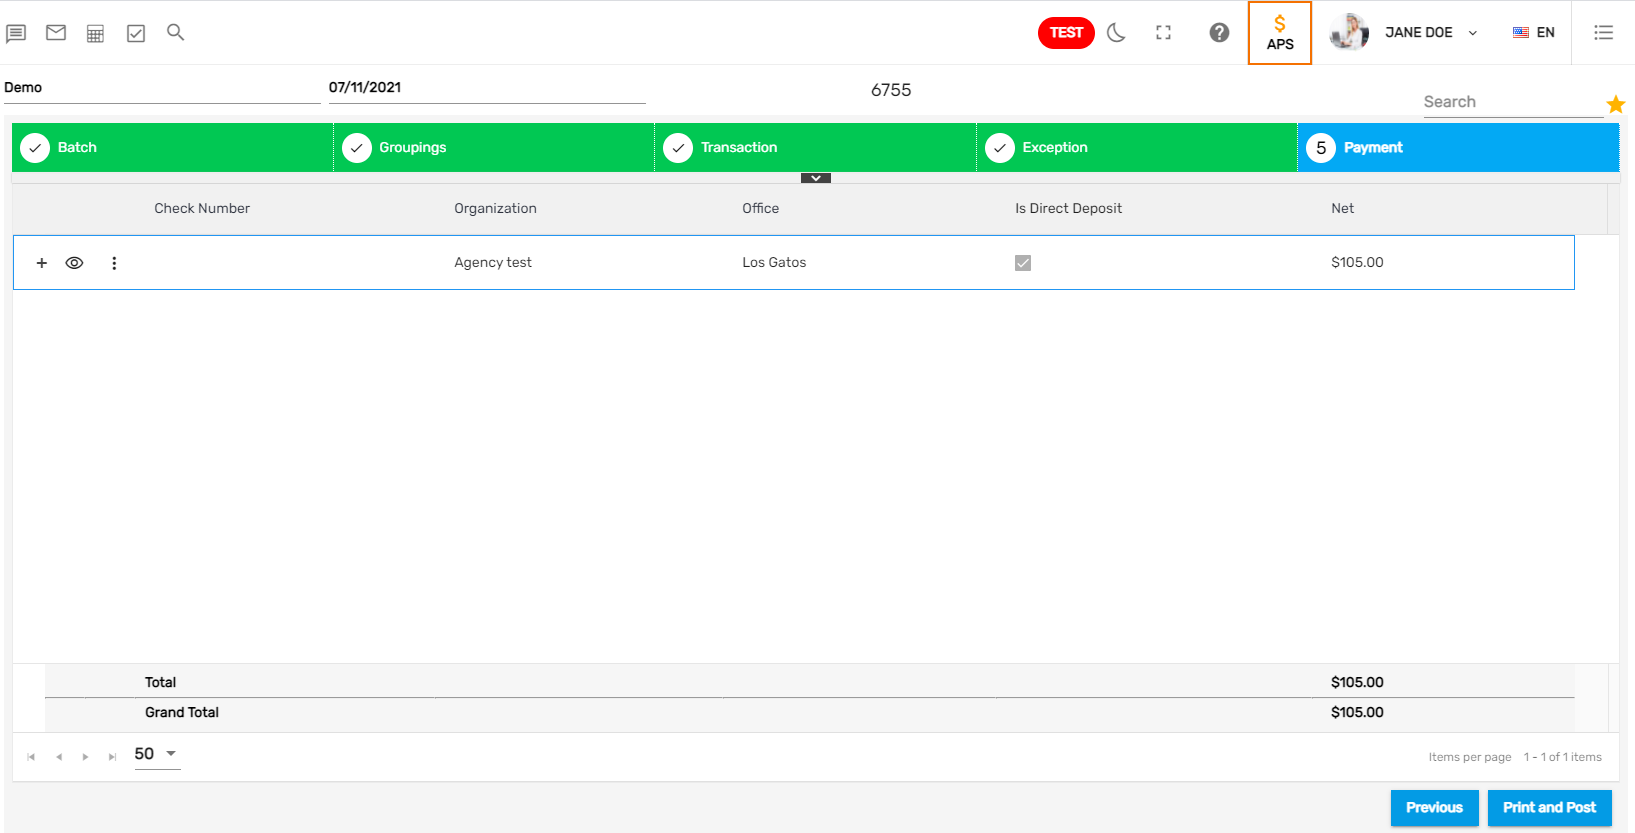
Payment
The last wizard to complete the payment batch before posting is the 'Payment.' Payment navigation contains 'Check Number,' 'Organization,' 'Office' (shows agency’s office) if it's 'Direct Deposit' or not, and the net amount of the batch. Users must click on 'Print and Post' for the Payment to be seen in the Bill directory.
Clicking on eye view will redirect to the Customer's detail page.
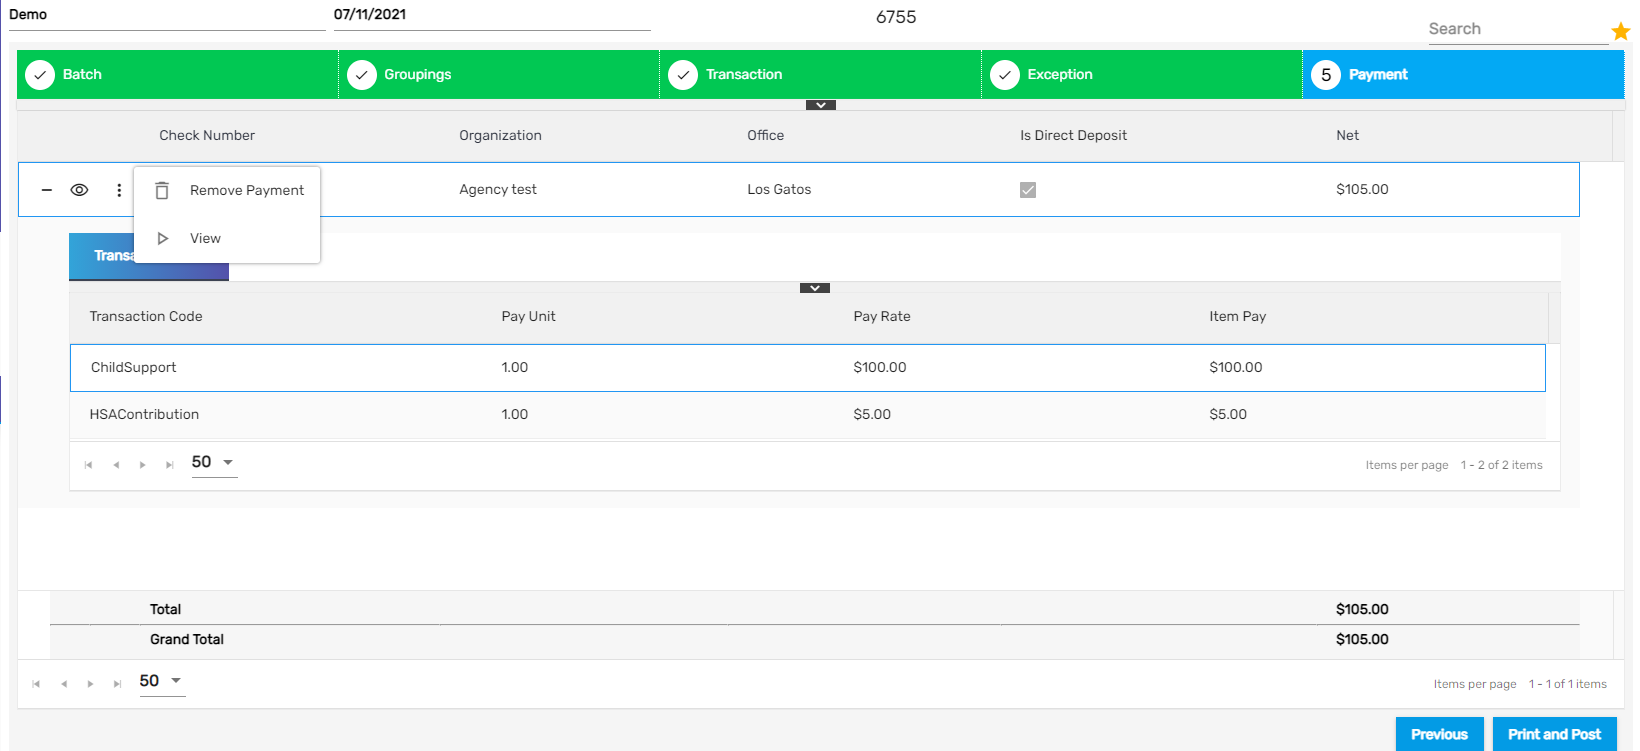
Clicking on the add icon will show the transaction item. Users cannot edit the transaction item but can only view it.

The vertical ellipsis button has two actions. They are,
- Remove payment
- View
1. Remove Payment
It allows users to remove specific payments before posting.
2. View
It allows users to view the bills in document slider view where users can download and print the bills as required.
Clicking on 'Print and Post' will post the batch and asks to view the 'Submittal Report'.
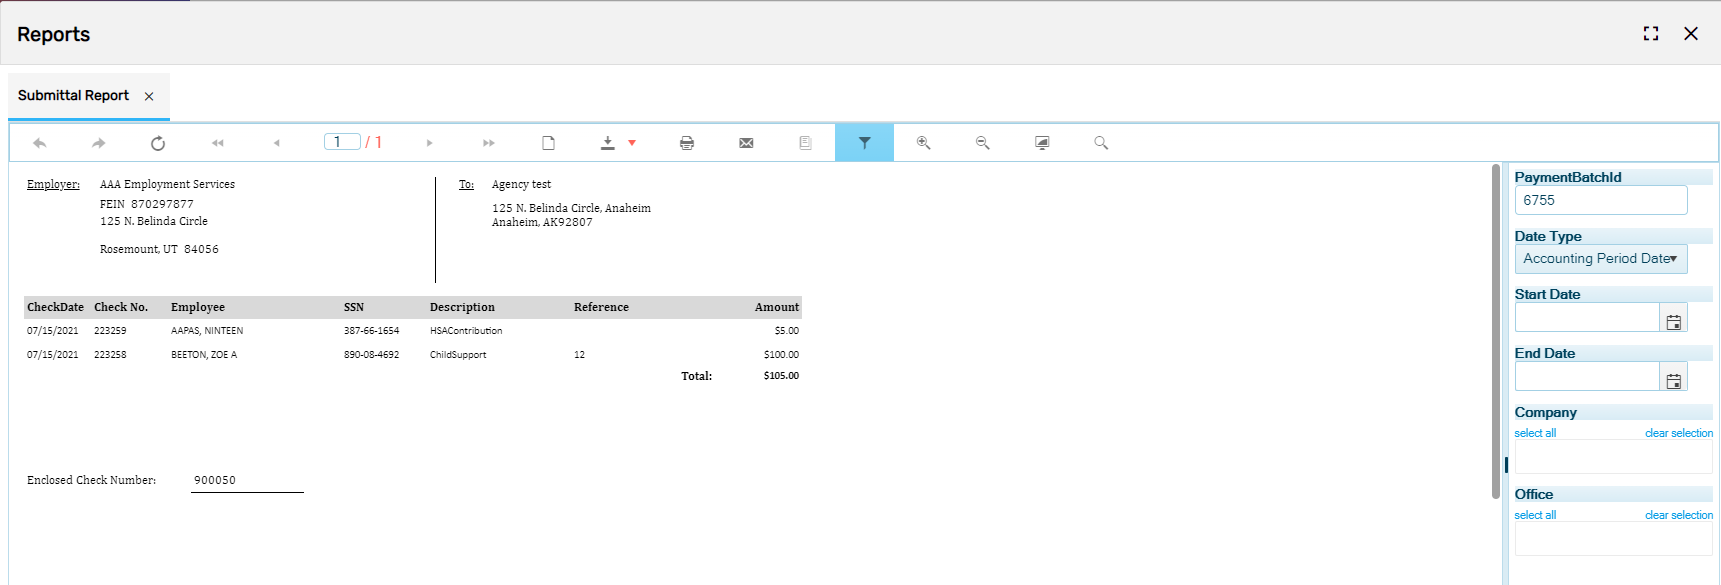
Also, users may enter the parameter details as required and view other 'Submittal Report' from the right-side parameter section.
Once the payment gets posted, it is will be displayed as below,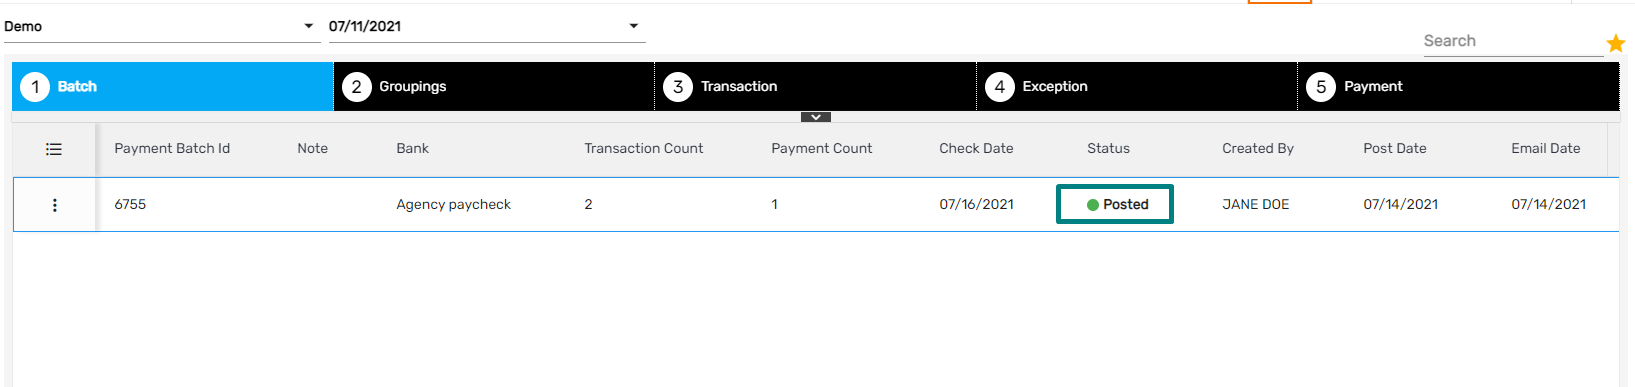 Favorite Action
The favorite icon in invoicing has three actions. They are,
- Discard
- Reprocess Payment
- Submittal Report
1. Discard
It allows users to discard the payment before posting.
2. Reprocess Payment
It allows users to reprocess the payment batch. When changes are made in items related to the 'Transactions,' 'Employees,' and 'Customers,' reprocess should be done to update these changes and reflect them in the current batch.
3. Submittal Report
It allows users to view the summarized 'Invoice Batch Report' with all the invoice details. The user may print, email, or download the invoice batch report.
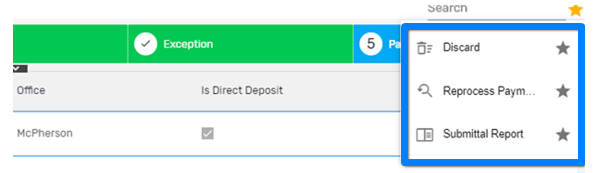
The posted batch consists of four actions under the vertical ellipsis button. They are,
- Discard
- Move to Payment
- Submittal Report
- View Checks

1. Discard
This allows users to discard the batch.
2. Move to Payment
This allows users to redirect to the Payment tab without clicking on various 'Next' buttons.
3. Submittal Report
It allows users to view the summarized payment batch report with bill details.
4. View Checks
It allows users to view the agency paycheck report.