Overview
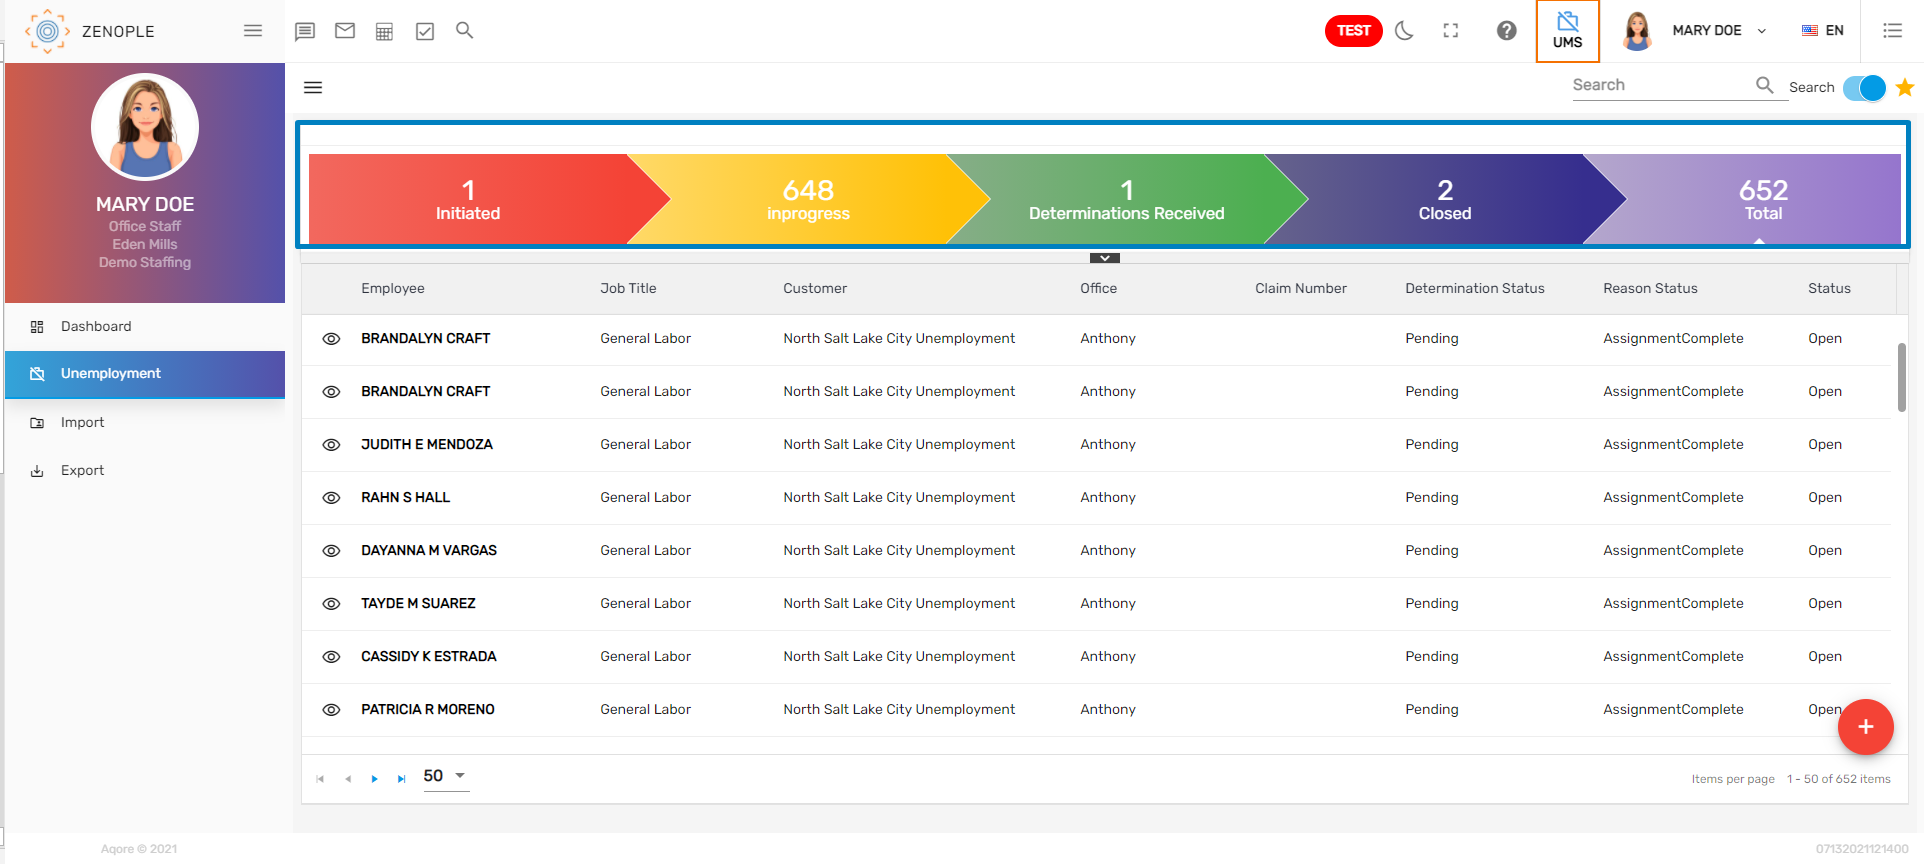
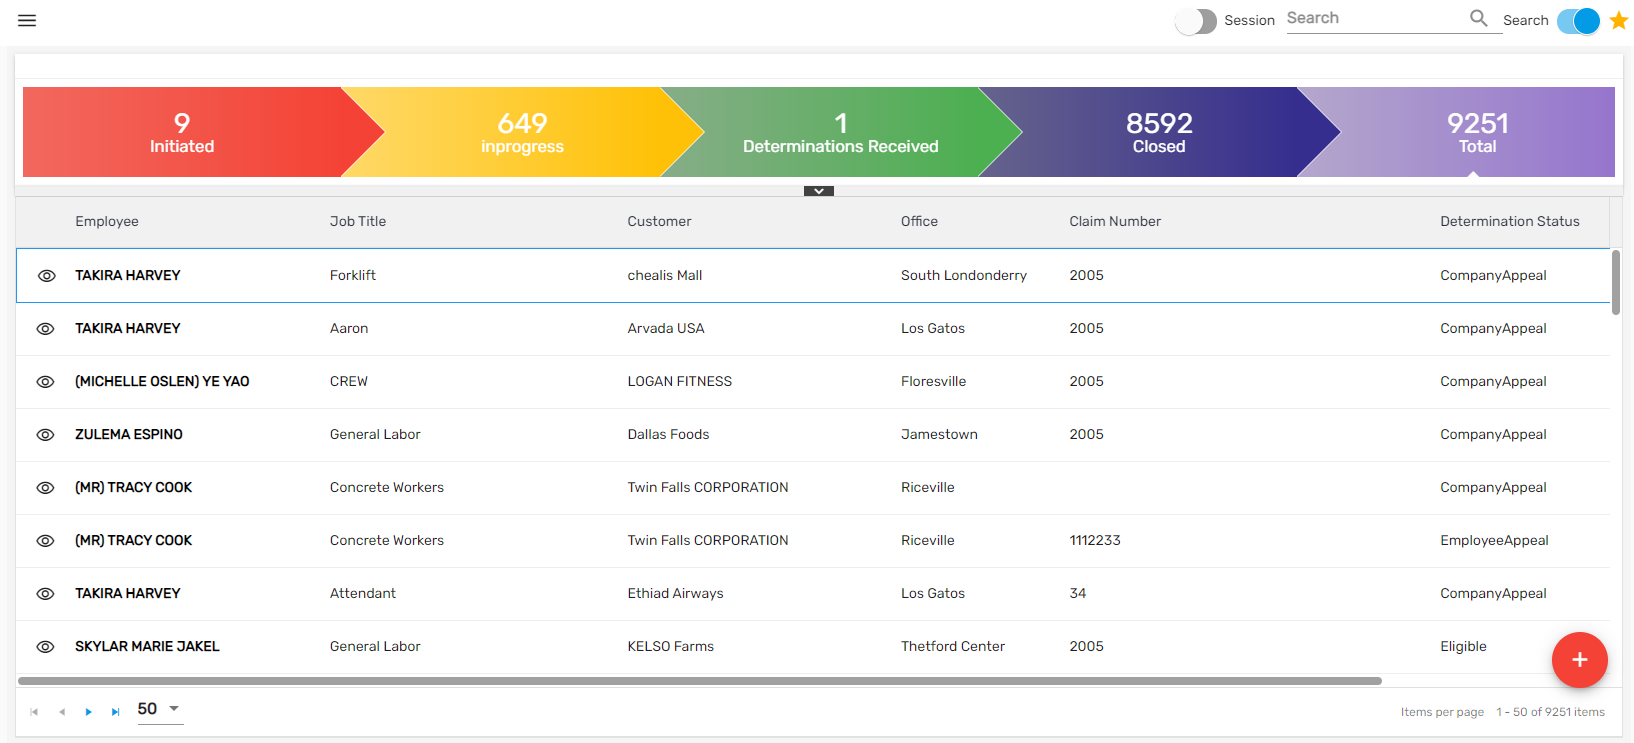
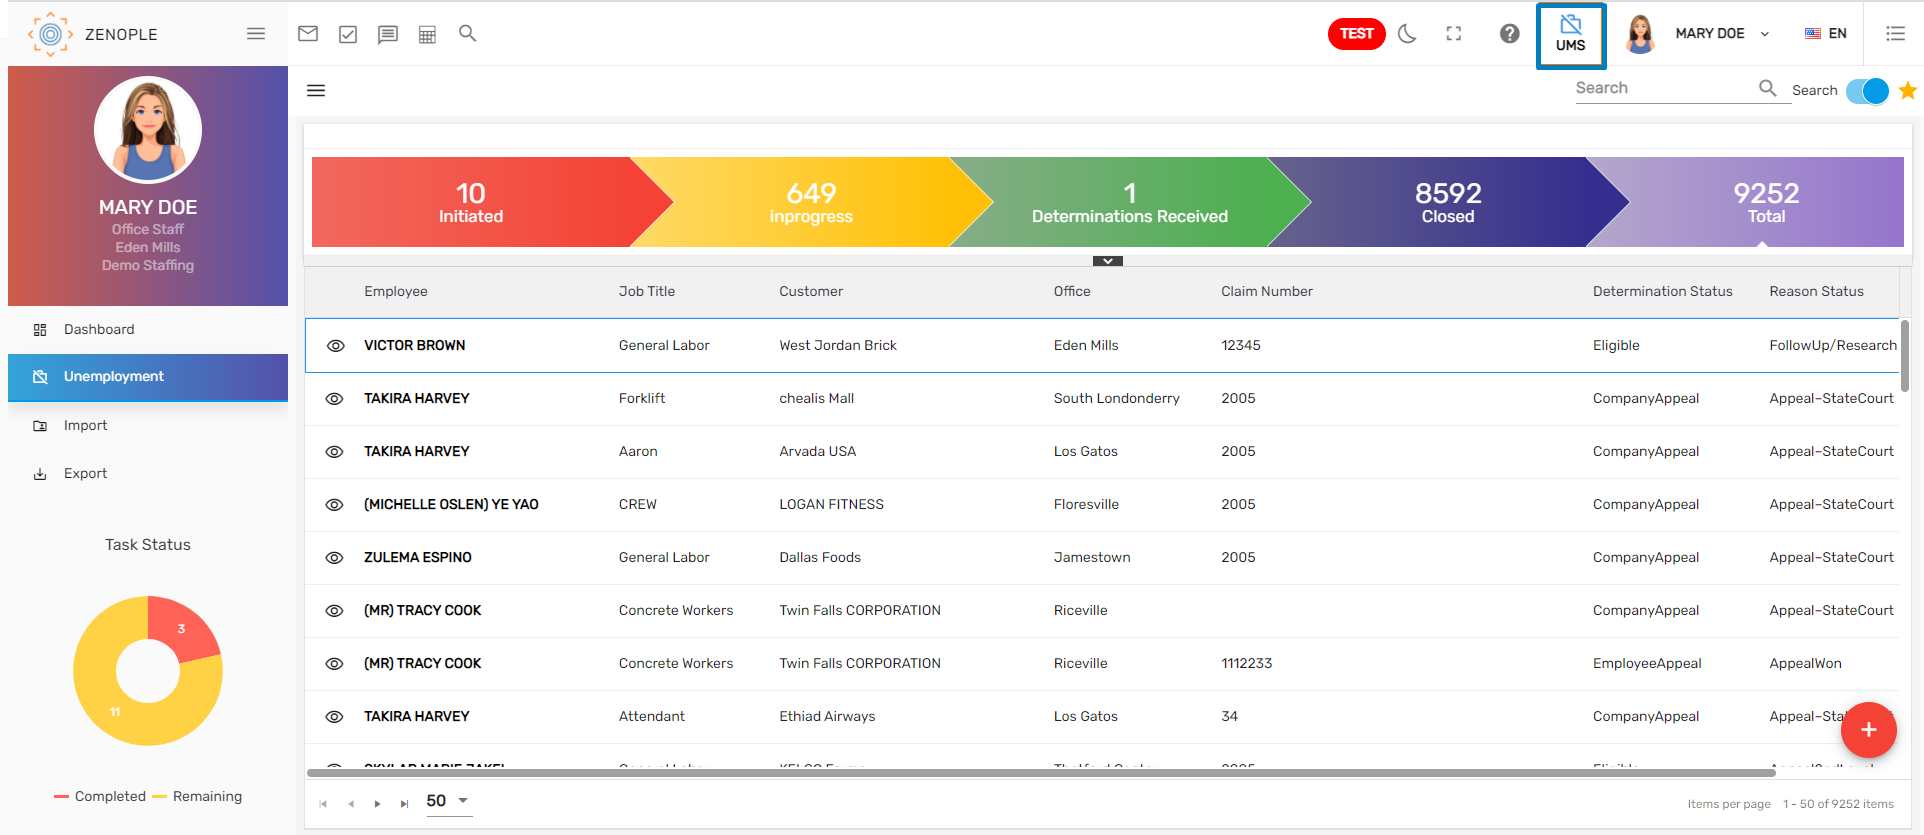
‘Unemployment’ navigation displays the detailed information of the employees. Users can view the workflow and redirect to the respective detail page by clicking on each stage.
If the users hover on the ‘Eye View’ icon they can view the ‘Unemployment,’ ‘Assignment,’ ‘Employee,’ ‘Customer,’ and ‘Temp Job’ icons. Clicking on the respective icon will redirect users to the detailed page. Moreover, clicking on the employee’s name will redirect users to the detail page of the unemployment directory.
Along with the employee, job title, customer, office, claim number, determination status, reason status, and status, users will also be able to see the claim date records.
Unemployment Directory
The unemployment directory consists of favorite actions, filter, toggle button, search, and add icon.
Users can search for the unemployment details from the search bar, 'Search'/'Recent' toggle button, and 'Session' toggle button that will display the list of employees based on the search. The filter helps to sort out the required unemployment records throughout the application. Users can also add employees' unemployment and redirect to the unemployment detail from the directory. The favorite action in the directory contains the 'Refresh' button which is used to refresh the records in the directory if any issue arises while loading the records.
The 'Search' toggle button allows users to search for all the unemployed employees or only the recently searched unemployment records. The 'Session' toggle button allows users to view the unemployment details added in the current session.
Slider View
The slider view feature will appear when users hover on the eye view icon. While hovering on the eye view icon, users can view the ‘Unemployment,’ ‘Assignment,’ ‘Employee,’ ‘Customer,’ and ‘Temp Job’ icons. Users can click on each icon in order to get redirected to a specific detail page.
Add New Unemployment
This action allows users to add new unemployment. Users need to search for an employee whose unemployment has to be filed. Further, users need to choose an assignment associated with an employee to file a claim. Users can view the slider summary of the respective employee as they select the assignment of the employee.
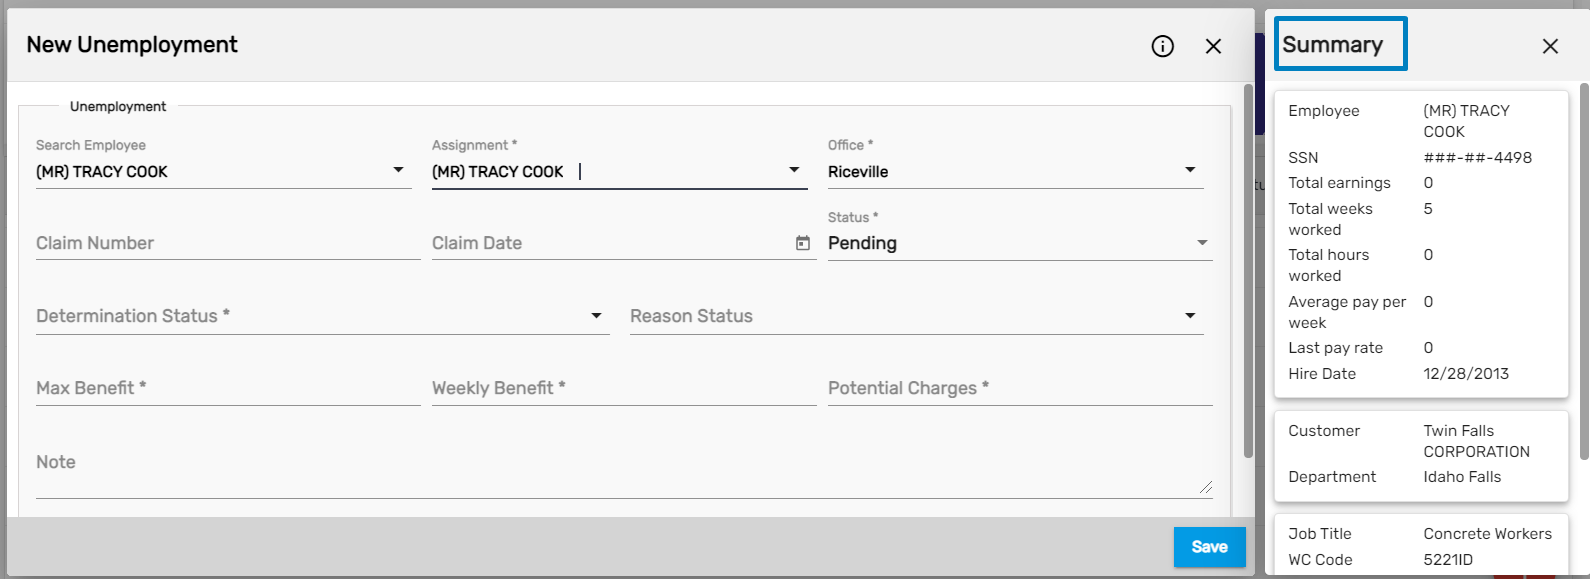
If the claim number has already been assigned, the users should add the claim number and the claim date while adding unemployment. Users need to fill out the respective information and save it. Clicking on save redirects the user to unemployment detail.
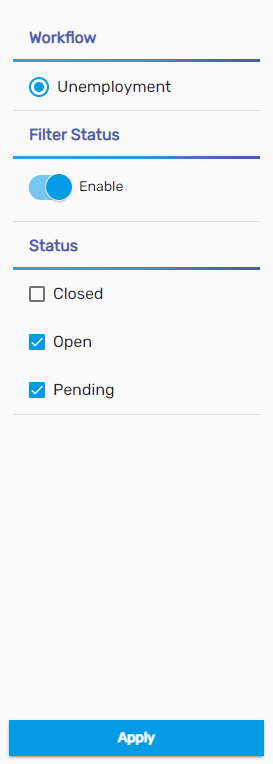
Filter
The filter in the unemployment directory allows users to filter the unemployment-related records by selecting various options. Users can use the filter feature by clicking on the hamburger icon. As per the selected option, users can display the filtered records throughout the ‘UMS’ application.
Search/ Recent Toggle Button
The 'Search' toggle button allows searching the unemployment records from the directory, while the 'Recent' toggle button displays the recently searched and visited unemployment records 7 days before today's date. By default, search is selected in toggle.

Session Toggle Button
The 'Session' button allows searching the unemployment records added in the current session from the unemployment directory. As the user clicks on the search toggle button session toggle button appears in the directory page.

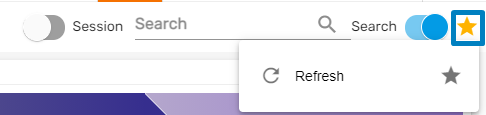
Favorite Action
The unemployment directory has a refresh action in the favorite action. Users can refresh the entire directory page by clicking on the ‘Refresh’ action.
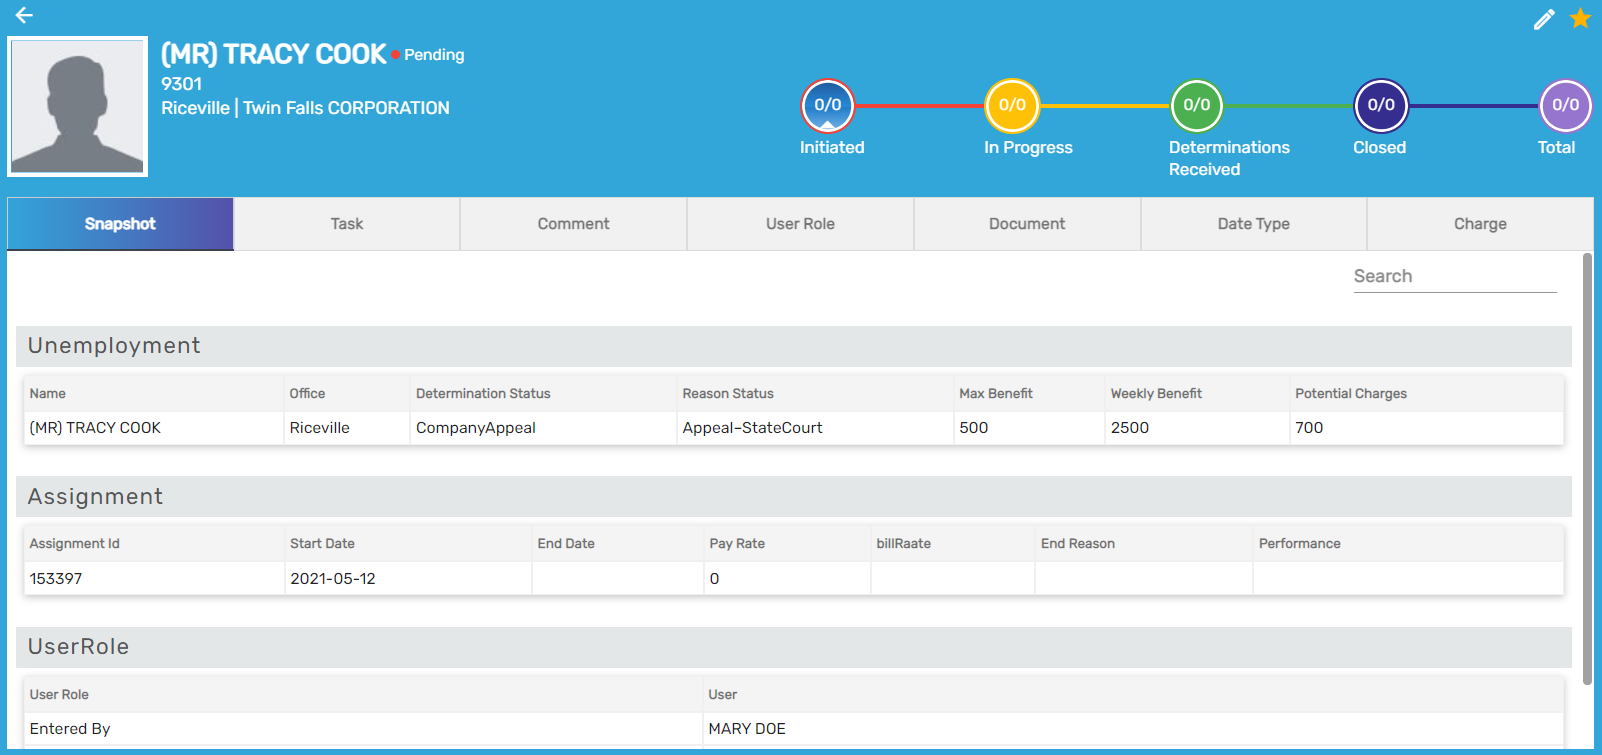
Unemployment Detail
Users can redirect to the detailed page by clicking on the searched result of the respective employee or adding new unemployment. The unemployment detail page consists of:
- Employee detail (name, address, office, company, SSN, claim number, and unemployment ID)
- Favorite Action
- Workflow
- Navigations
Favorite Action
There are 5 different actions under the unemployment detail favorite icon. They are:
- Edit
- Move to the last stage
- Move to the next stage
- Refresh
- Request separation information form
1. Edit
Users can click on the Edit action which reopens the edit unemployment dialog box and allows them to edit the required information.
2. Move to Last Stage
‘Move to Last Stage’ action takes users to the last stage of the claim which is ‘Closed’, regardless of the stage of the claim at the moment.
3. Move to Next stage
Clicking on ‘Move to Next Stage’ takes users to the subsequent stage from the present stage of the claim.
4. Request Separation Information Form
Users can request the separation form by clicking on ‘Request Separation Information Form’. Users can create a task and it can be assigned to a recruiter or any other user.

Navigation
The 'Unemployment Detail' consists of the following top navigations. They are:
- Snapshot
- Task
- Comment
- User Role
- Document
- Date Type
- Charge
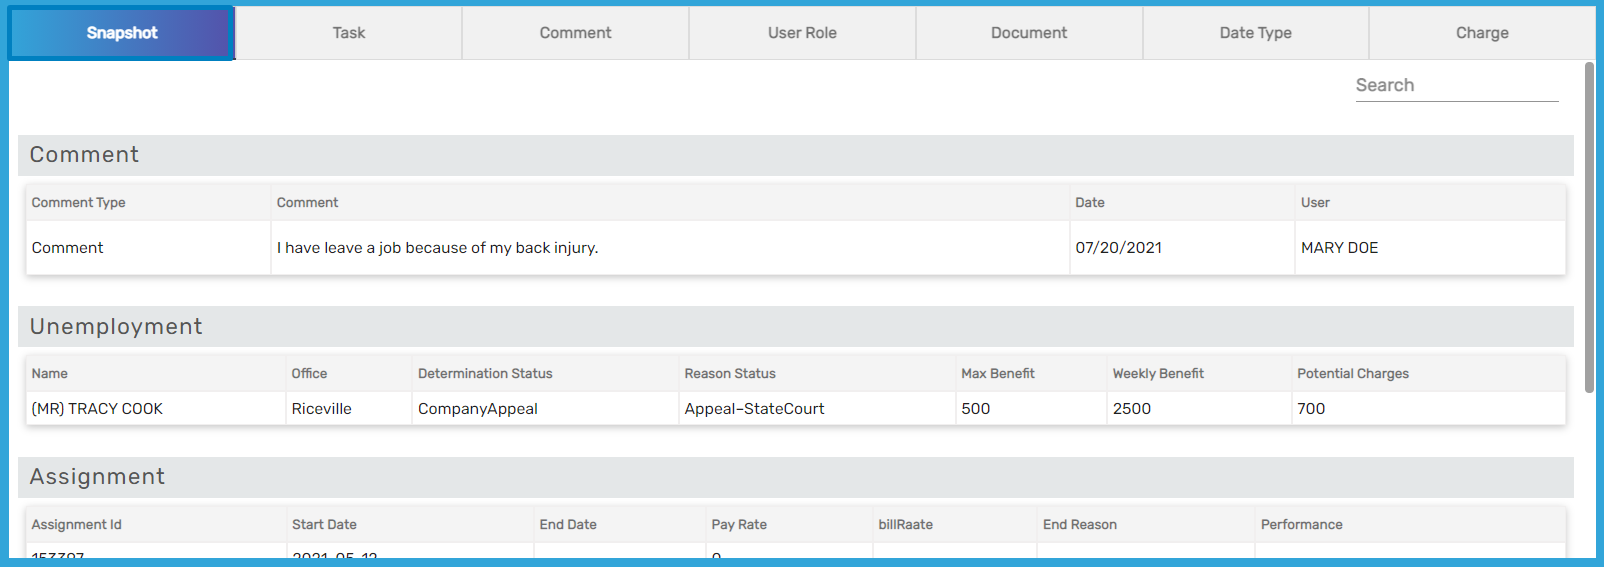
Snapshot
This navigation displays all the summarized information about the employee. Users can view unemployment, assignment, comment, user role, and so on.
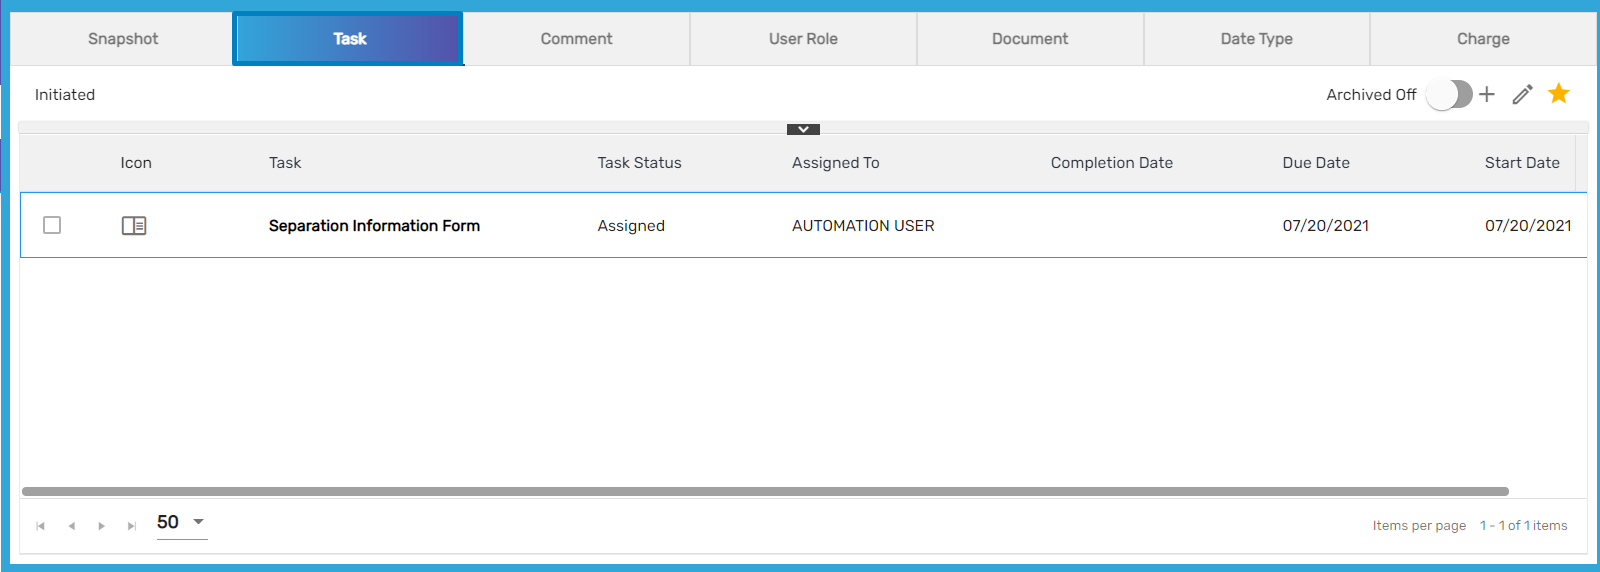
Task
This navigation allows users to add/edit the task to an employee. Users can select different workflow stages and assign the task respectively. Users can view ‘Separation Information Form’ only on the ‘Initiated’ stage. The form is generally assigned to the recruiter by the office staff and will be notified accordingly. Users can add, edit, print, and refresh the task from the 'Favorite' icon of the 'Task' top navigation.
Comment
Users can add comments with different comment categories and types. It allows users to write multiple comments associated with employees. Moreover, users can add, edit, refresh and view comment reports from the ‘Favorite' icon of Comment.

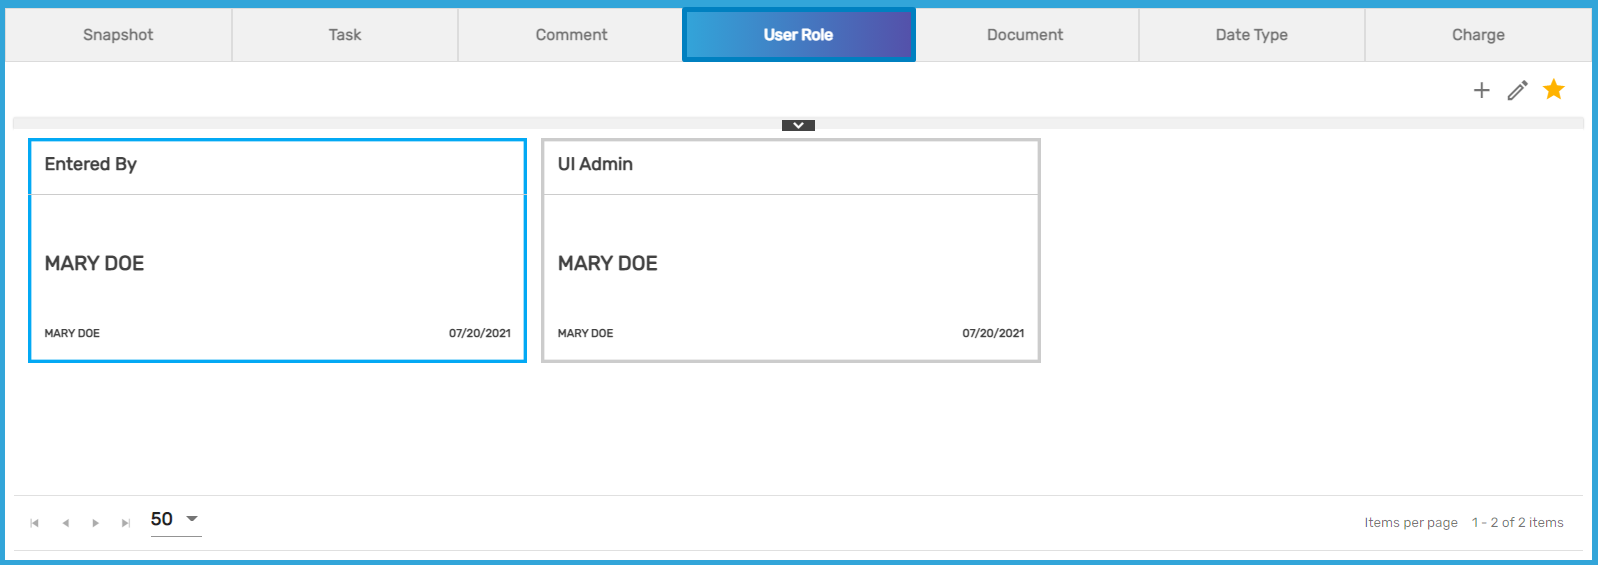
User Role
Users can add/ edit multiple user roles of the employee with the user’s name and office detail. Users can add multiple user roles for the same user. The ‘Favorite' icon of the 'User Role' top navigation allows users can add, edit, and refresh user roles.
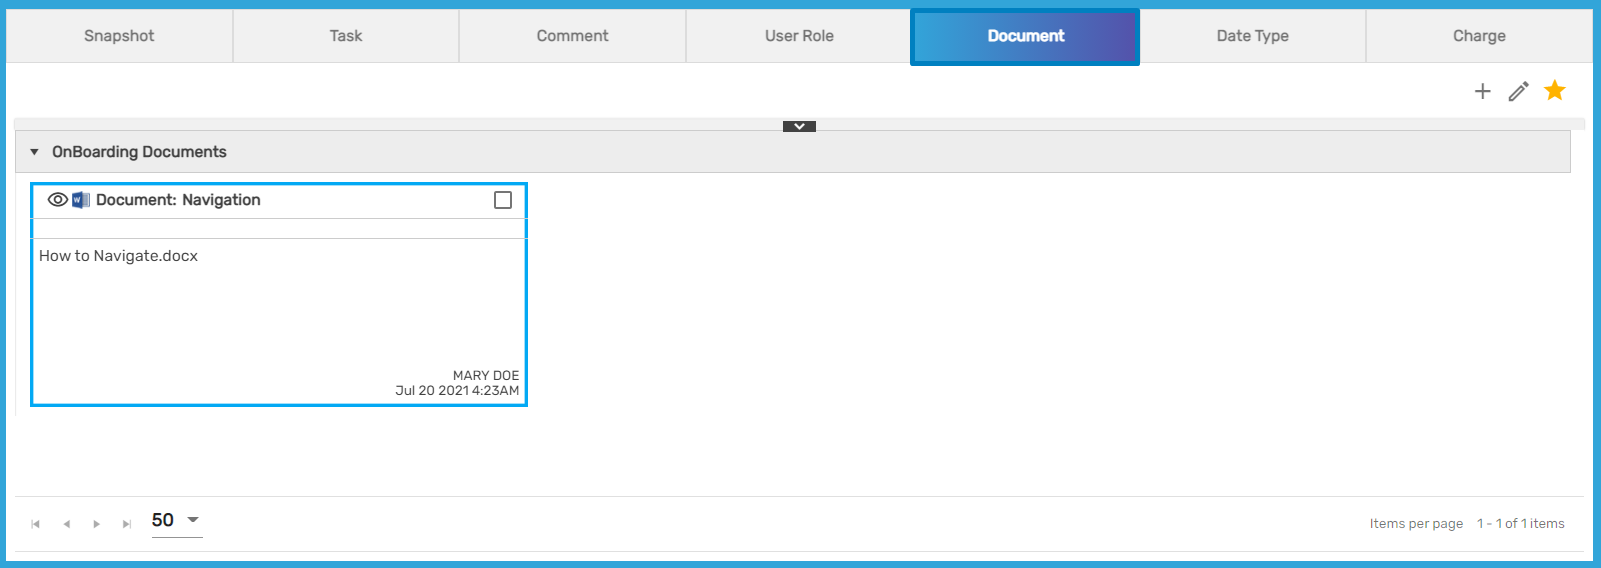
Document
Users can add documents of the employee and unemployment-related documents in this navigation. Users can select a document type, enter a name, and upload files. The ‘Favorite' icon of this navigation allows users can add, edit, refresh, and download the documents. Users can click on the ‘Eye View’ icon to preview the document. The file type of the document can be text, pdf, excel, Docx, RTF, etc.
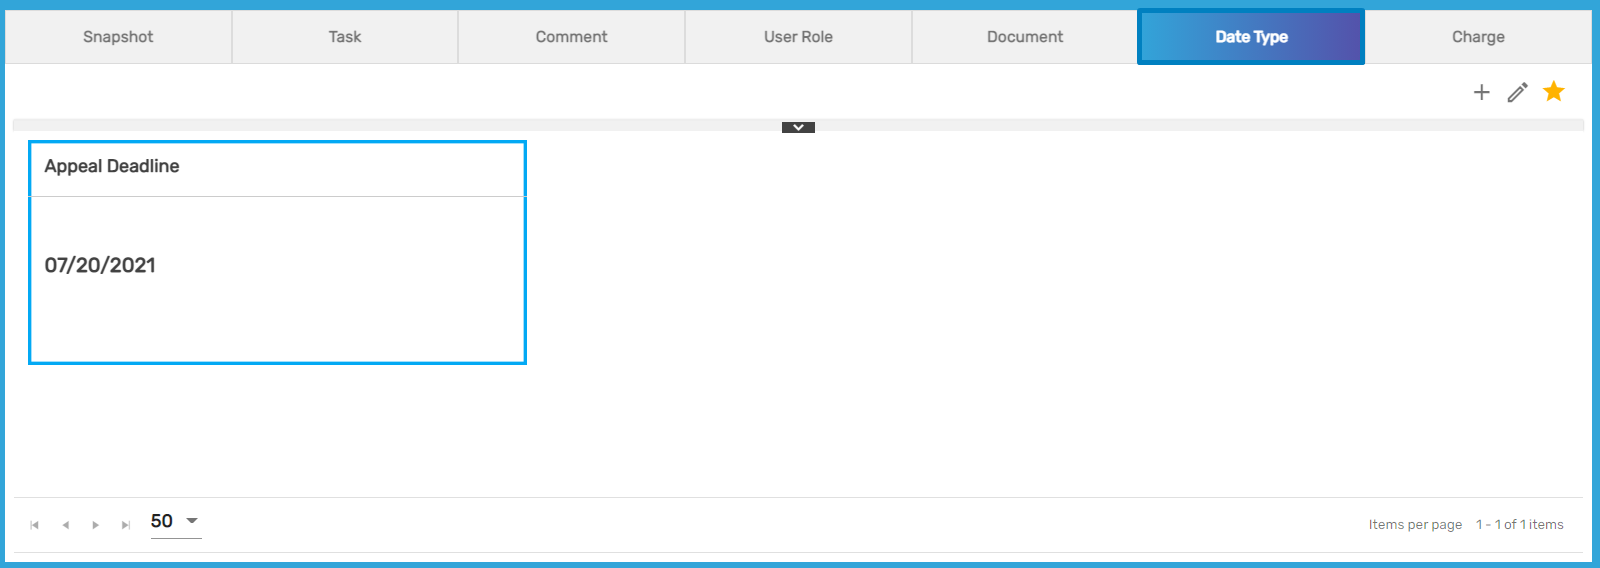
Date Type
The unemployment claim is a long process that is followed by various appointments so, the unemployment date type is used to track the different dates related to the unemployment. Users can add, edit, delete and refresh date type from the ‘Favorite' icon of this navigation. The list item of the 'Date Type' can be updated upon the user's request.
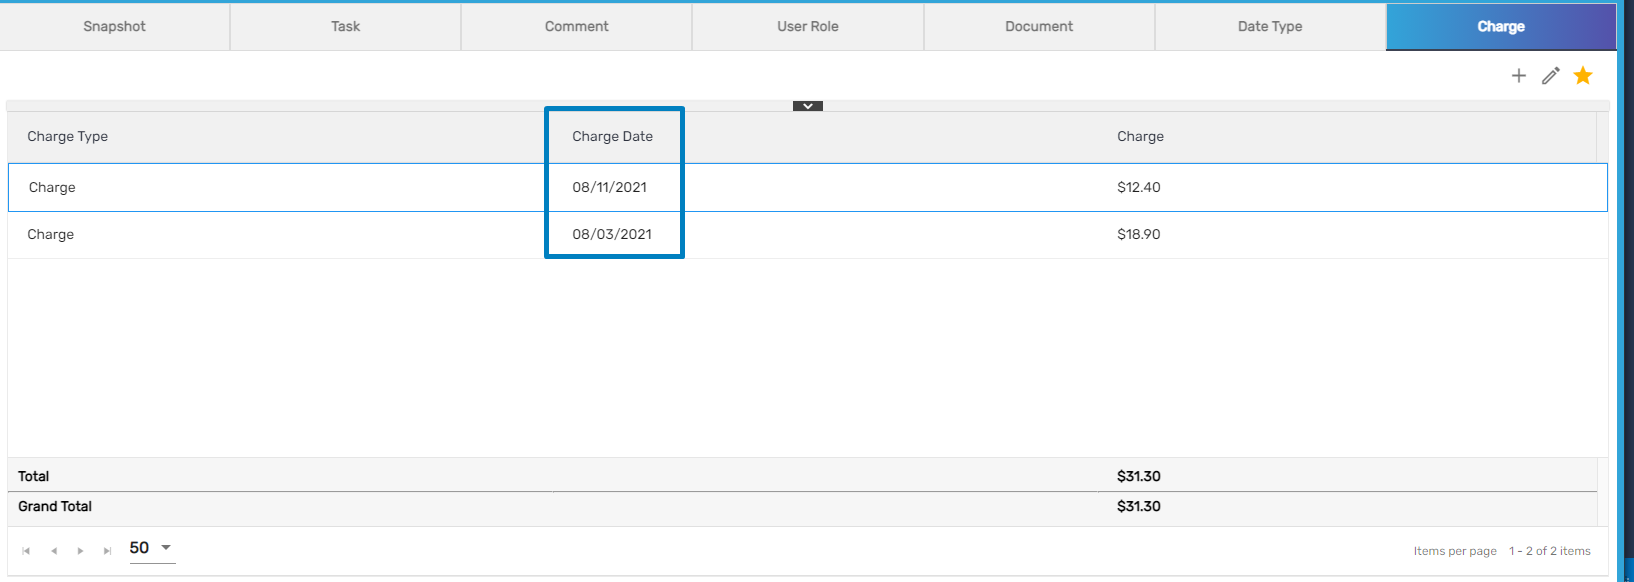
Charge
This navigation allows users to track all the charge details that occurred during the unemployment claim process. Users can select the charge type, charge date, and enter the charge amount. The ‘Favorite' icon in this navigation allows users to add, edit, and refresh the charge.
By default, the charge records are in descending order of charge date. However, the users can change the sort order by clicking on the column header.
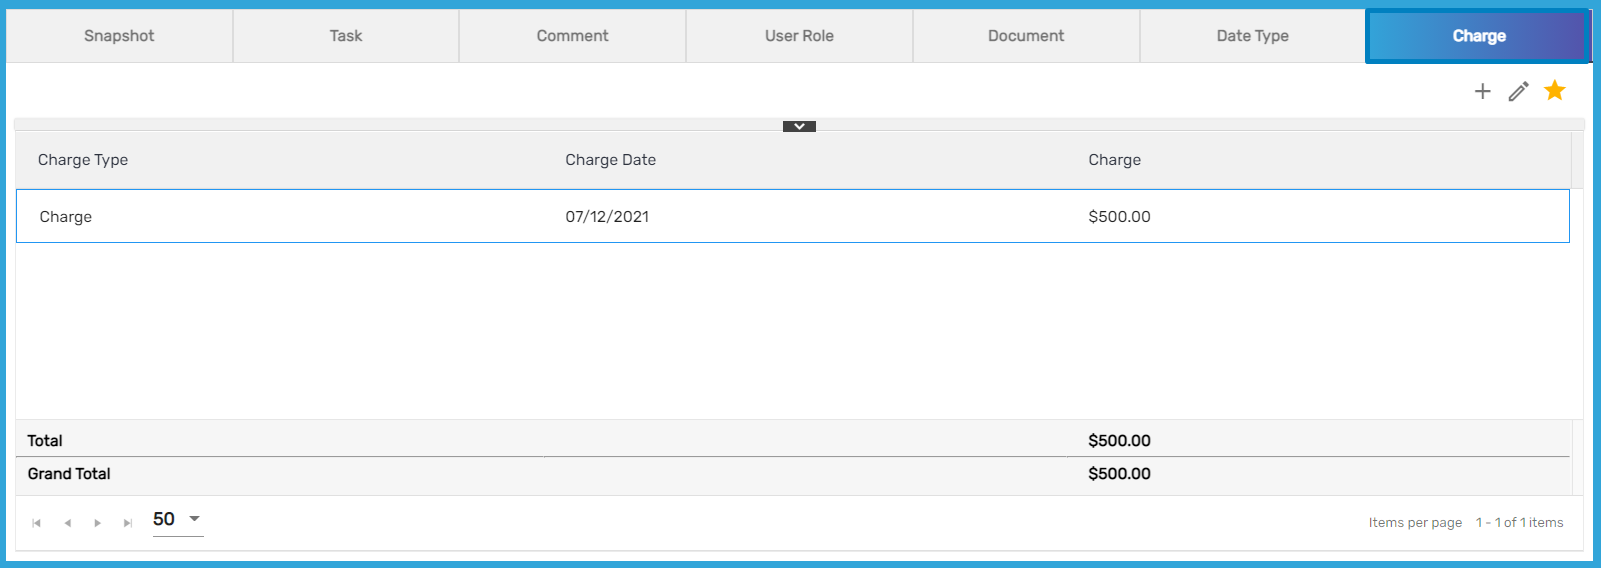
When the users add multiple charges the records are ordered in descending order.