Overview
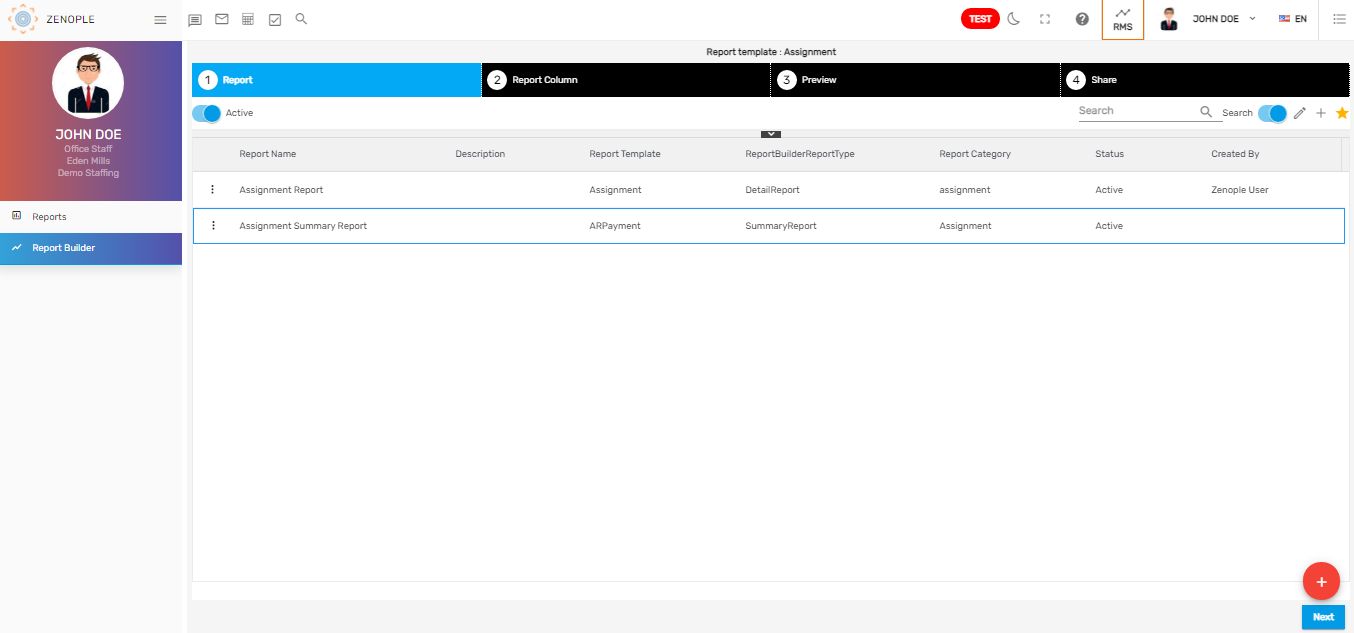
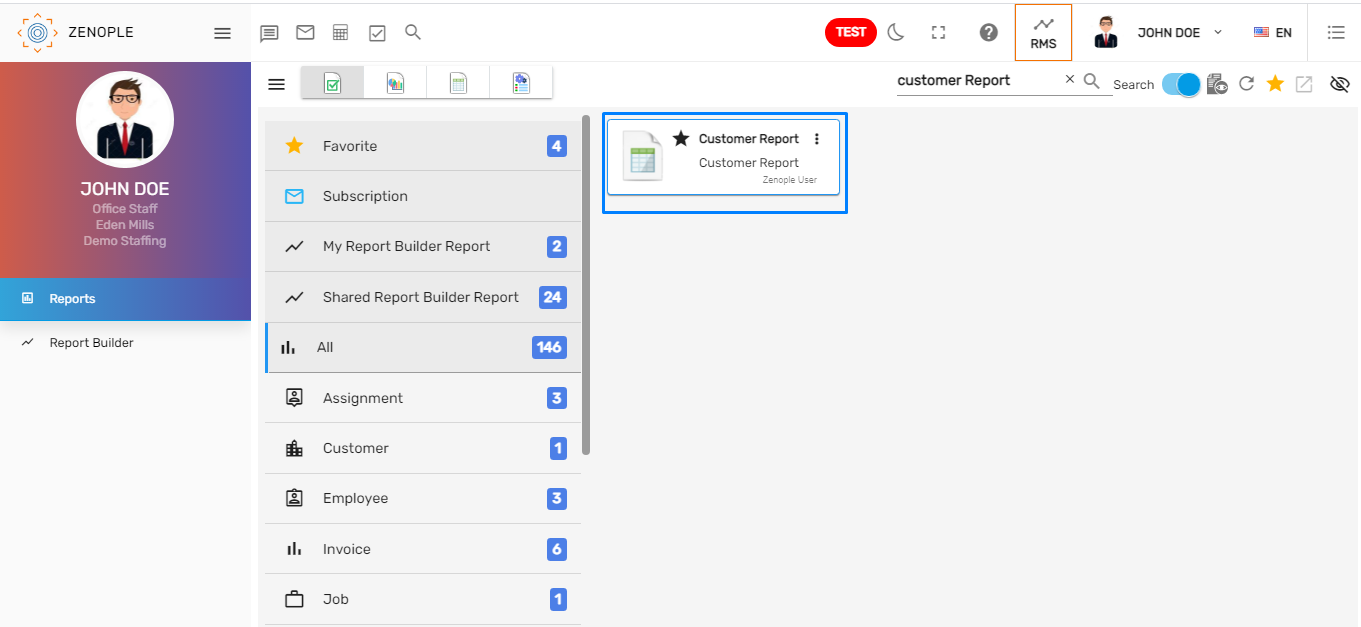
Report Builder main navigation allows users to create reports by themself and the report created is the report builder report. All the reports created and saved by the users with 'Active' status will be listed on the 'Report' tab. The search bar makes it easy for the users to search for the report. They can provide report access to other users while creating the report.
Report Builder Directory
Report Builder directory of the report builder main navigation shows the list of reports created by the users. The main feature of it is to allow users to create a report. It has four main tabs under it. They are:
- Report
- Report Column
- Preview
- Share
Users can create a report on the Reports tab and then select the report columns for the report on the 'Report Column' tab. After selecting values in the report column users will move on to the 'Preview' tab that allows them to preview the report and test it before saving it. The 'Share' tab allows users to share the report created with other users.
Users can search the required report using the search bar and also filter the reports using the 'Active'/ 'All' toggle button. It also has a Favorite action and 'Search'/ 'Recent' toggle button.
Create Report Builder Report
The 'Report Builder' main navigation has several tabs with unique features. They are:
- Report
- Report Column
- Preview
- Share
1. Report Tab
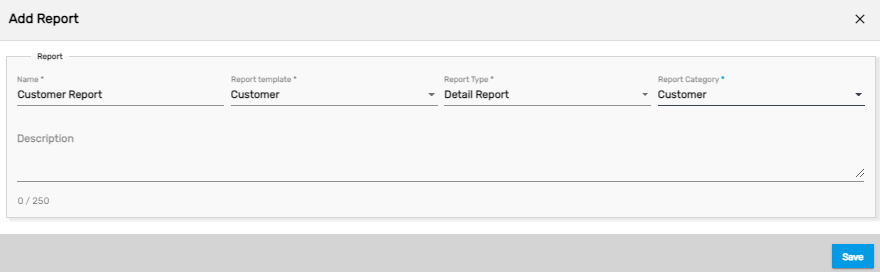
'Create Report Builder Report' feature is available in the 'Report' tab and the users can create the reports based on their requirements. The created report is called a report builder report. They can select the report template, report type, and category based on the requirement.
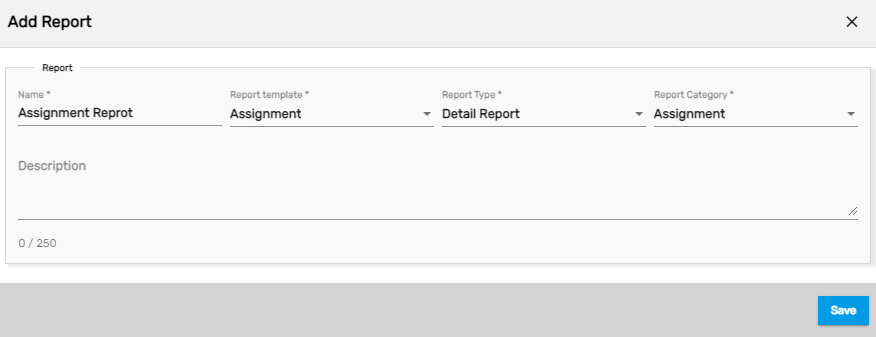
Clicking on 'Create Report Builder Report' will open a dialog box 'Add Report'. Users will have to select one of the report template based on their requirement. There are standard report templates and based on the selected report template, users will be able to select the columns on the 'Report Column' tab.
The standard report templates are 'Applicant,' 'AR Payment,' 'Assignment,' 'Customer,' 'Employee,' 'Invoice,' 'Invoice Filter,' 'New Hire,' 'Payment,' 'Payment Accrual,' 'Payment Bank,' 'Payment Benefit,' 'Payment Deduction,' 'Payment Taxes,' 'Transaction,' 'Transaction Item,' 'Transaction Item Sales Tax.'
Users also have to select the report type as 'Detail Report' or 'Summary Report.' Based on the selected report type, the report records will be displayed. The category for the report type needs to be set for the report. There is a list of standard report categories. They are 'Assignment,' 'Customer,' 'Employee,' 'Invoice,' 'Job,' 'Payroll,' 'Profit Report,' 'Tax,' 'Timesheet,' 'Uncategorized,' and 'Utility.' Based on the Report template users can select the report category. The description field will allow users to add report descriptions.
| Fields | Description |
|---|---|
| Name | Name of the report |
| Report Template | Report Template based on which the report columns will be listed on the Report Column tab. |
| Report Type | Detail or Summary report type; based on the selected option the records on the report will be displayed. |
| Report Category | Category for the report based on the selected template |
| Description | Report description |
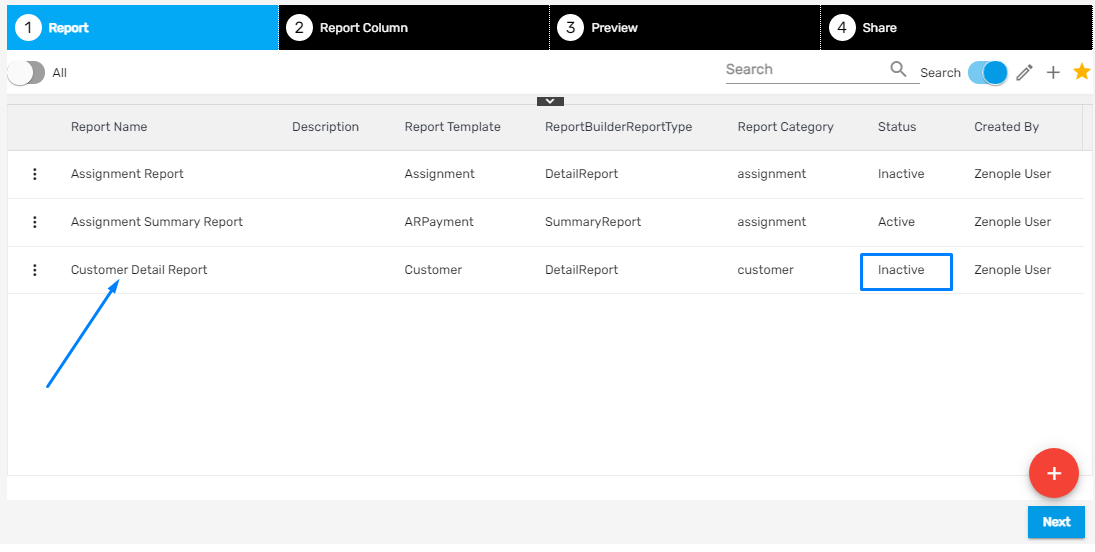
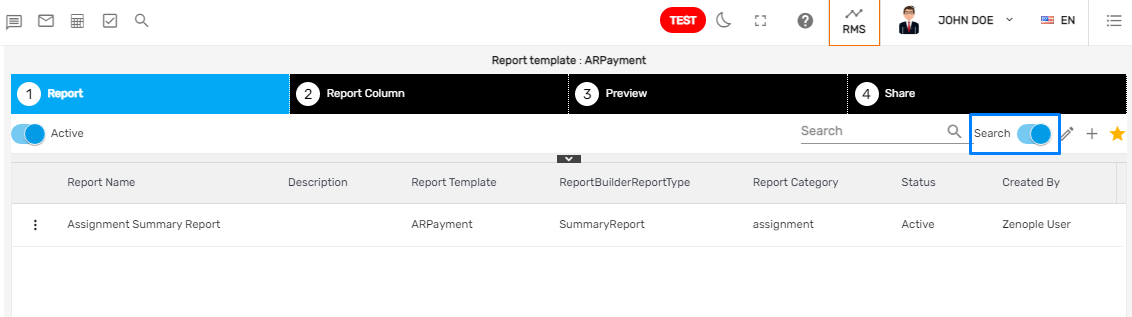
After adding, a toaster message 'Report added successfully' will be displayed. The report added will be listed under the 'Report' tab as,
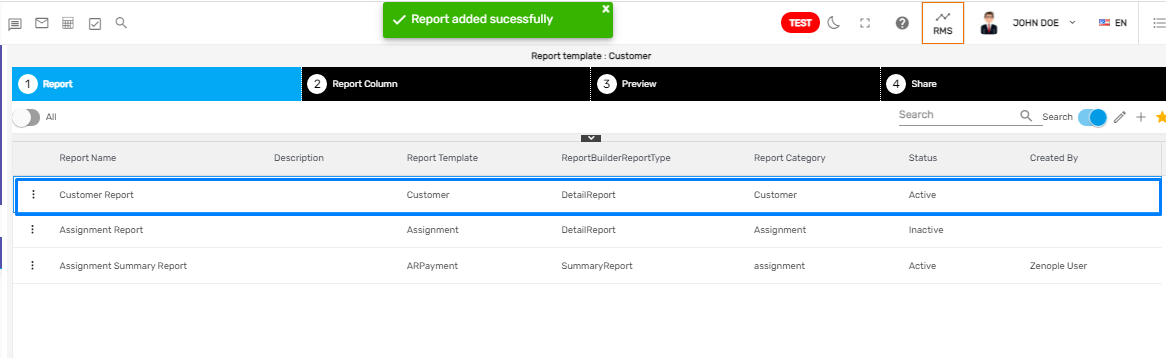
Users can edit the report details using the 'Edit' action from the Favorite action or the 'Edit' action in the verticle ellipsis. The search bar will allow users to search the reports. If the report created is not as per the requirement then they can delete the report using the 'Delete' action on the verticle ellipsis.
2. Report Column Tab
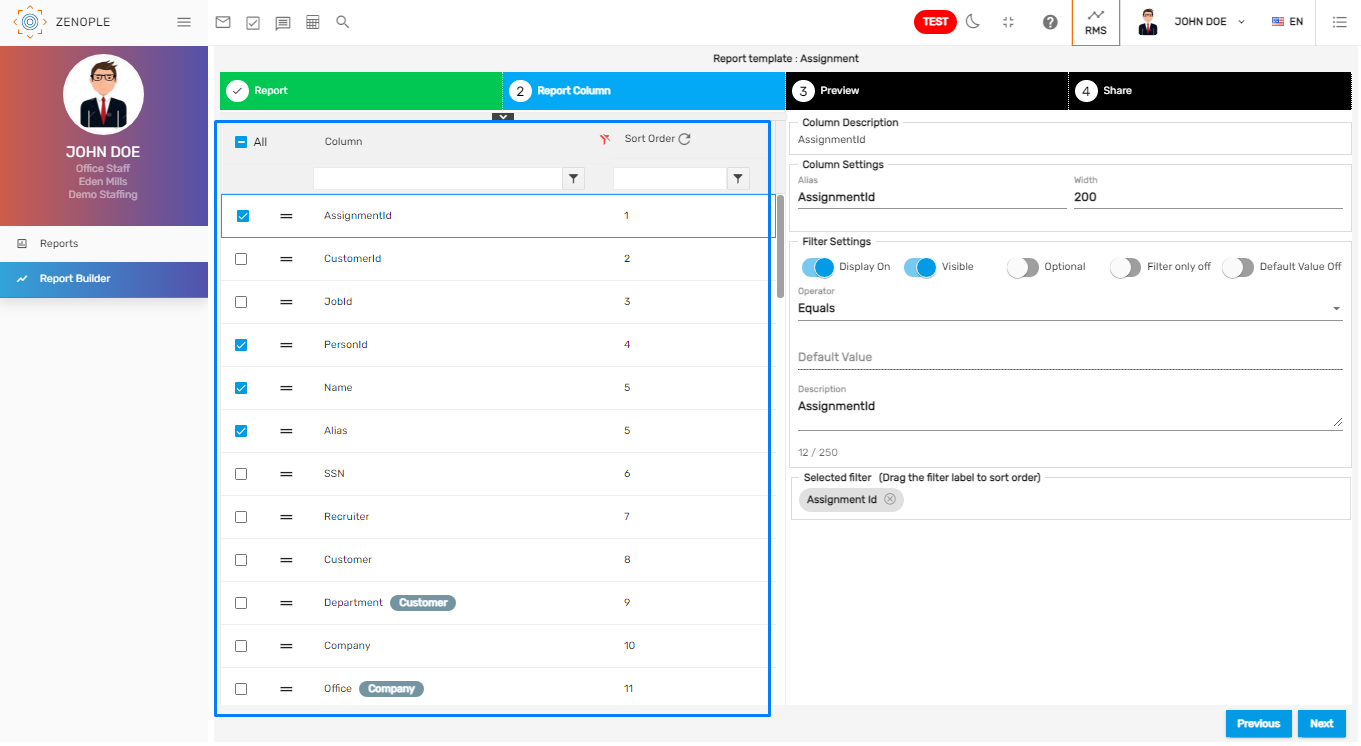
The 'Report Column' tab allows users to select the columns and filter/parameters for the report. Users will be able to customize the width, filter settings, and other various filter settings for the selected report columns. There are multiple features under 'Report Column.' They are:
1. Column List
2. Column Description
3. Filter Settings
4. Selected Filter
1. Column List
The left side of the report column tab shows the report column lists for the selected report template with the sort order. To reorder the columns, users can drag and drop the column.
The filter option for the column and the sort order is also available. Users can select the required columns for the report.
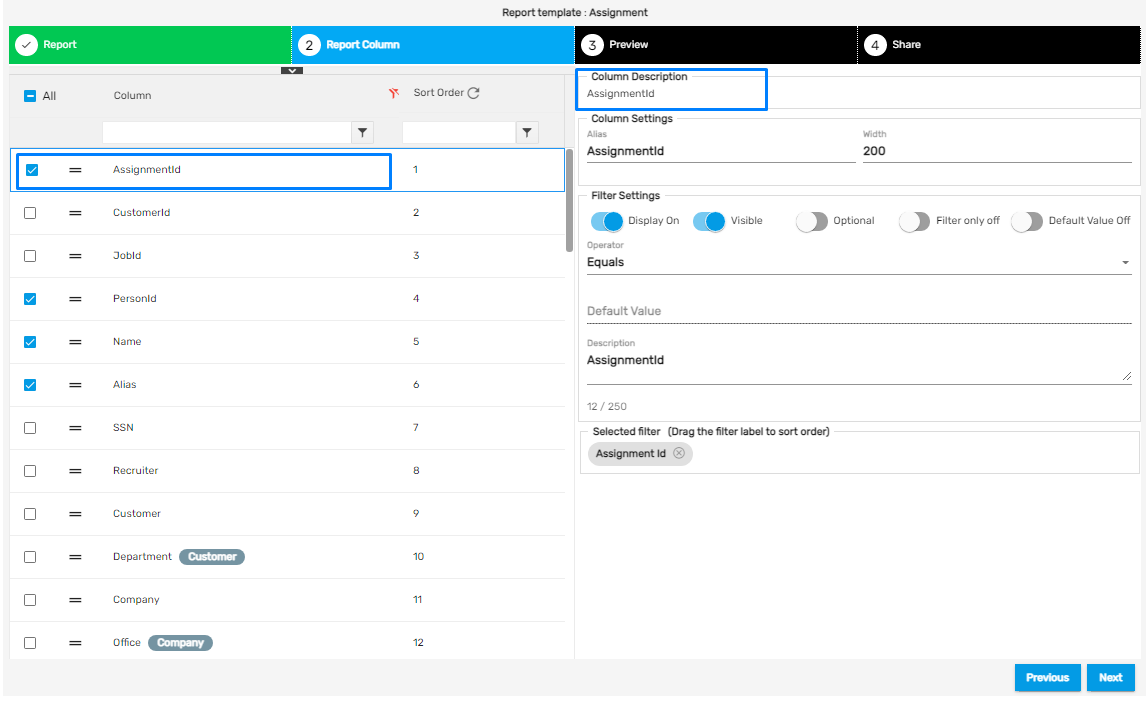
2. Column Description
The column description will show the description of the column selected.
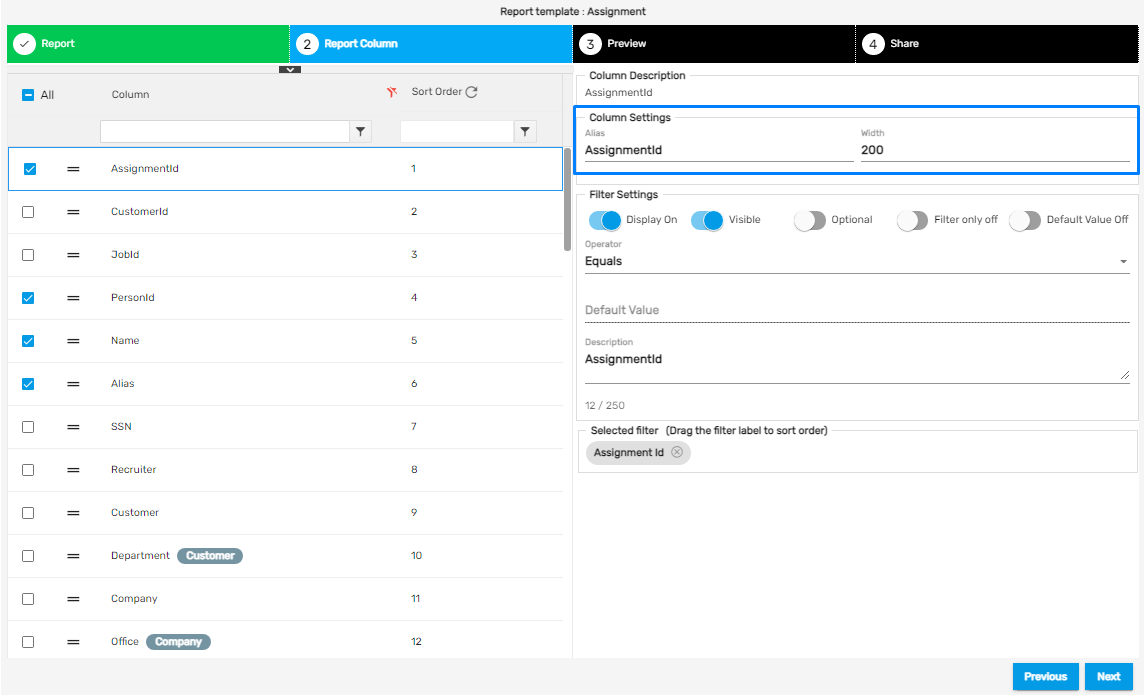
3. Column Settings
Column settings allow users to set the alias which is the name of the column to appear on the report and define width for the report column.
4. Filter Settings
Filter settings allow users to set different filter options for the report column selected.
| Field | Description |
|---|---|
| Display On/Off | Turn on to set the selected column as a filter/parameter. After it is set on, it allows setting other filter settings. |
| Visible/Hidden | Turn on to set the filter/parameter visible and 'off' to hide. |
| Optional/Required | Turn on to make the filter/parameter mandatory. Set it off to make it optional. |
| Filter only off/on | Turn on to make the filter/parameter only as a filter/parameter and not to show the column as a report column when preview. |
| Default Value Off/On | Turn on to set the default value for the filter/parameter. |
| Operator | List of operators for the filter/parameter. Depending on the column there will be an operator list and depending on the operator selected the filter/parameter value will be calculated. |
| Default Value | The default value for the filter/parameter. Only after setting the 'Default Value Off/On' to'On', it will allow setting the default value. |
| Description | Description of the report column. |
| Selected Filter(Drag the filter label to sort the order) | All the selected filters will appear here. Users will be able to set the order for the filter/parameter by dragging it. |

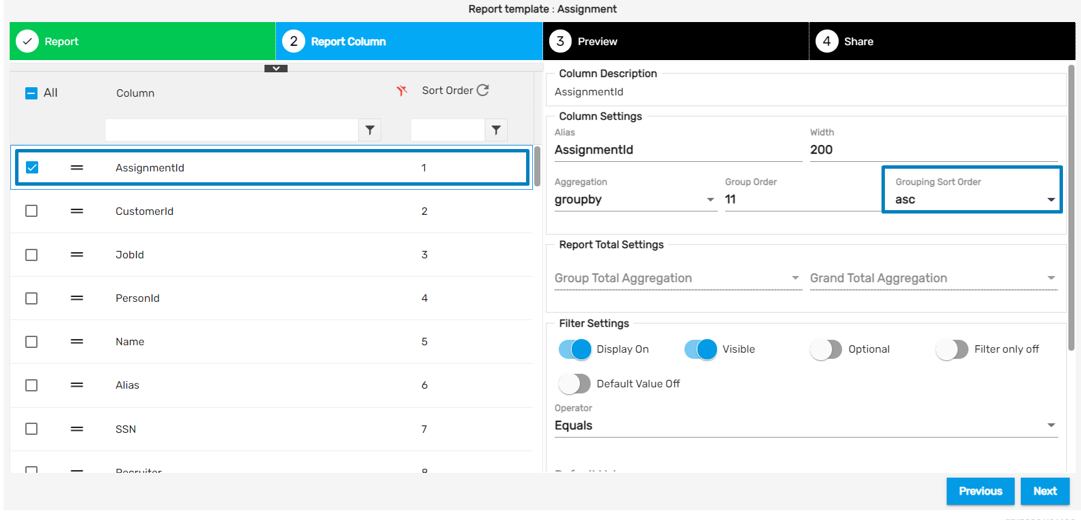
Users can set the sort order for the column records by 'Ascending' or 'Descending' using the 'Grouping Sort Order' options either 'ASC' or 'DESC'. For the user's convenience, it allows to sort and view the detailed records by ascending or descending order while viewing the report by setting the column as a group. This feature is applicable only for the 'Summary' report type. Once the columns to be displayed in the report are selected, users can select the particular column to be sorted. They can choose 'ACS' to sort in ascending order or 'DSC' to sort in descending order.
3. Preview Tab
Preview Tab allows users to preview the report before saving it. If any changes are required or any properties are missing in the report then the users can pre-set the properties of the column by switching to the 'Report Column' tab. The 'Previous' button will allow users to switch to the 'Report Column' tab.
The report filters selected on the Report Column tab will be displayed here. Users need to set the values for the mandatory/ required filter and run/ preview the report.
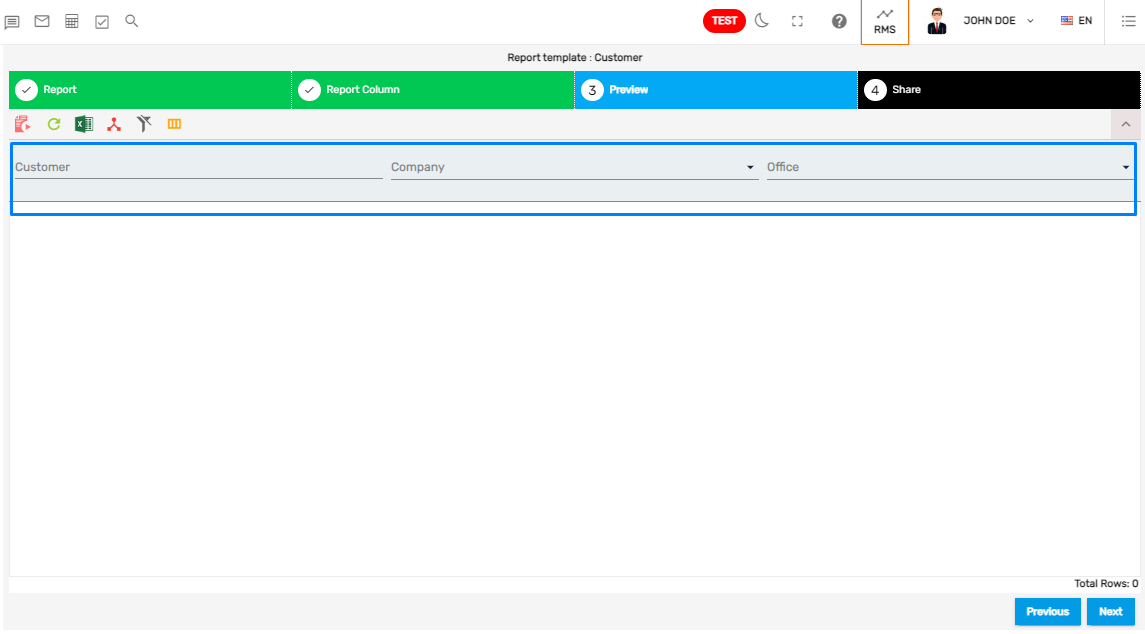
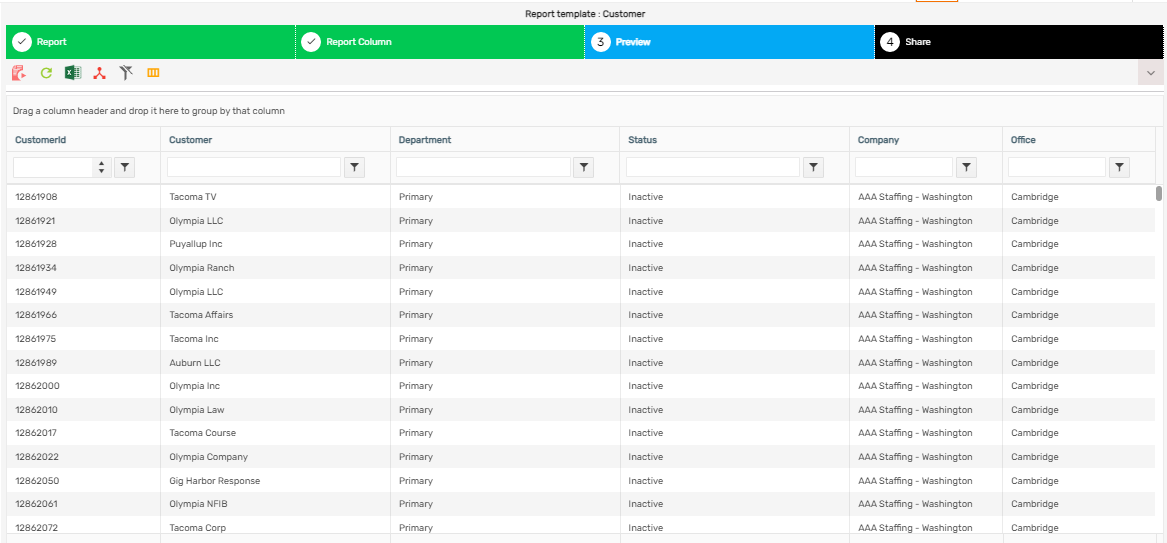
The selected report columns will be displayed as report records.
There are various functionalities on the 'Preview' tab. They are:
- Run Report
- Clear Filter
- Save as Excel
- Group
- Clear Grid Filter
- Toggle Hidden Report Columns
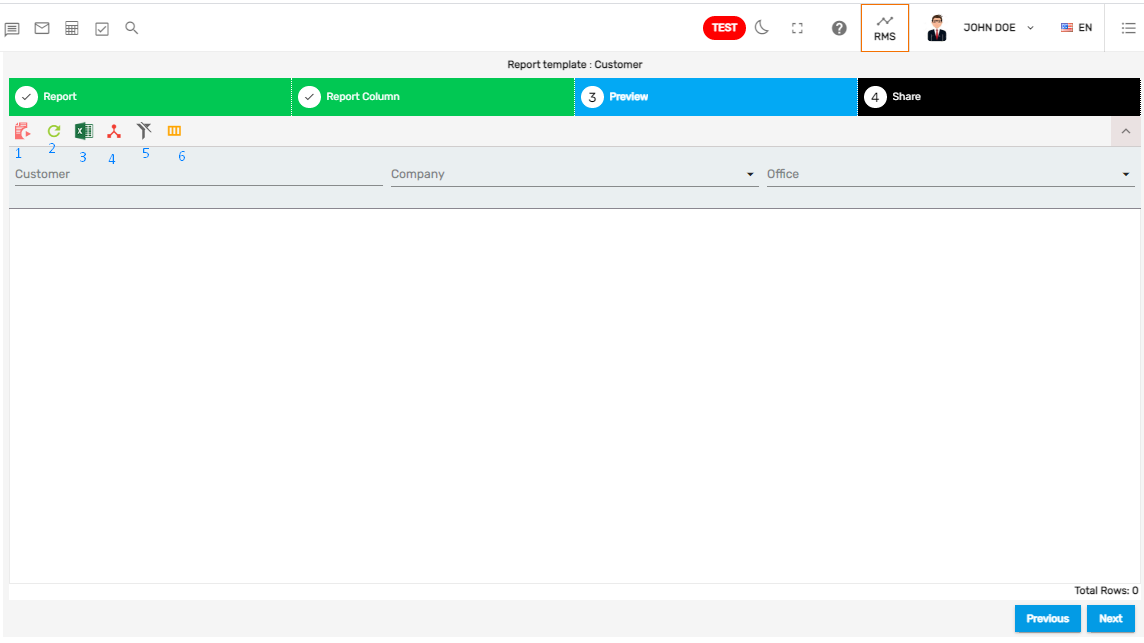
1. Run Report
It is used to preview/run reports.
2. Clear Filter
It is used to clear the selected values for the filter.
3. Save as Excel
It is used to download the report on an excel file.
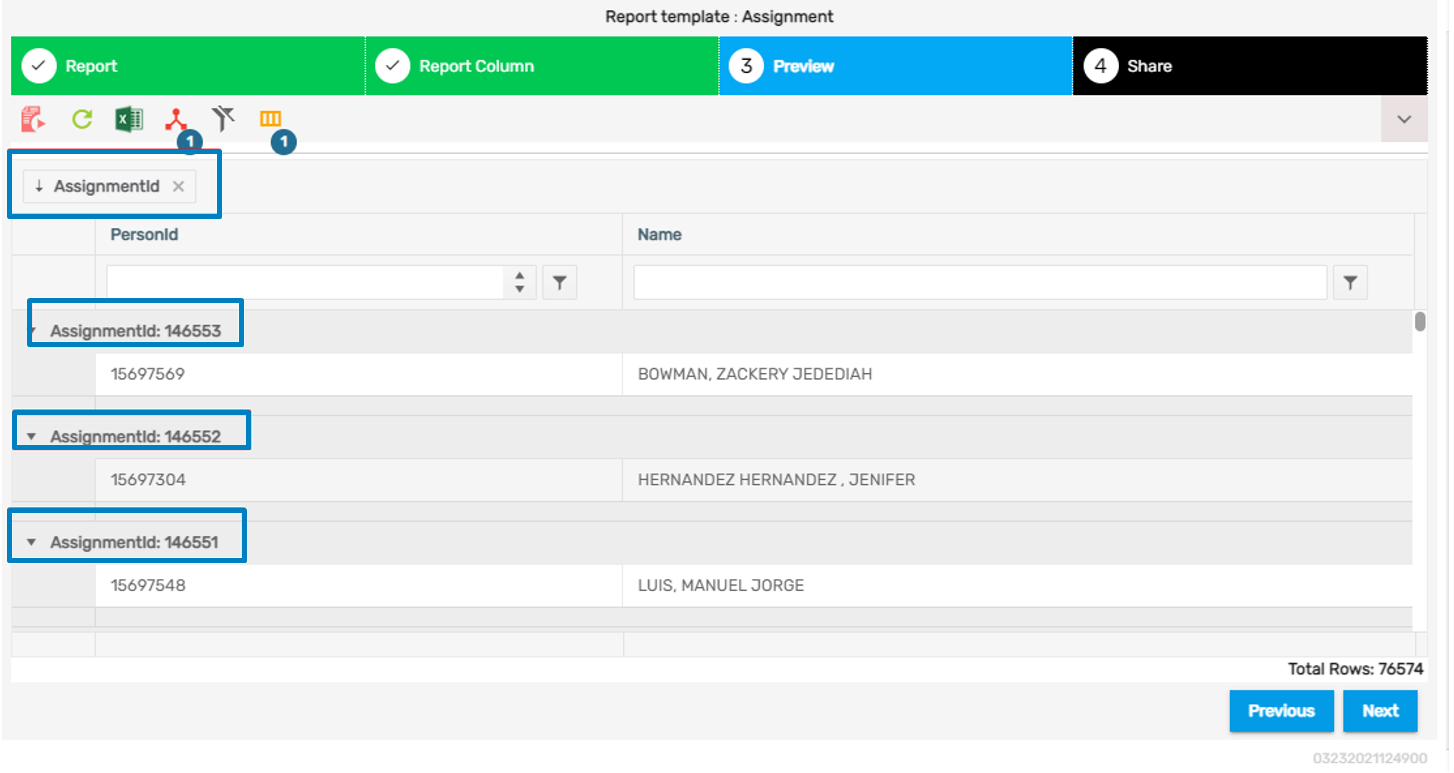
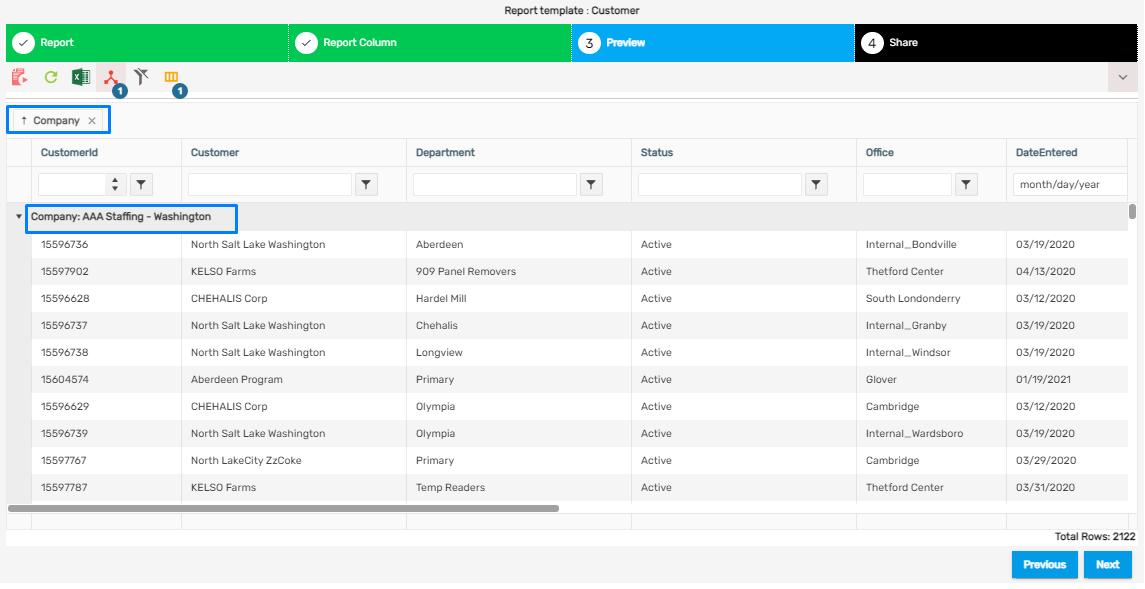
4. Group
It is used to group the report by required columns. Users can drag and drop the columns that need to be grouped.
The column that is grouped by will be displayed on the top as the column header and the report records will be grouped accordingly. Users can add multiple groups and remove the unrequited groups as per their requirements.
The number count shows the total number of the report columns that are grouped.
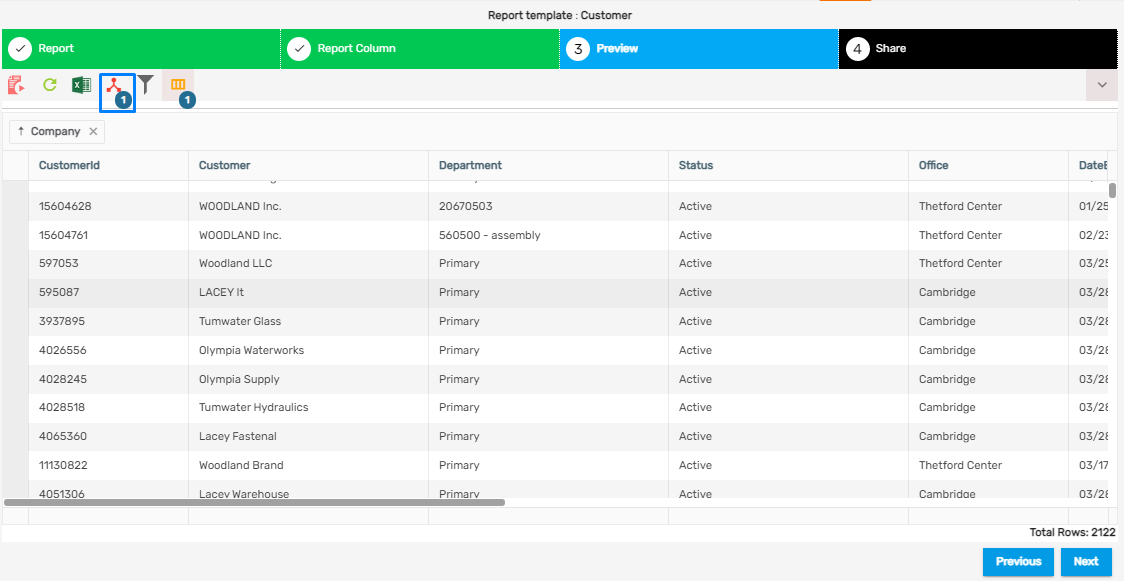
Note: The cross icon will allow users to remove the group.
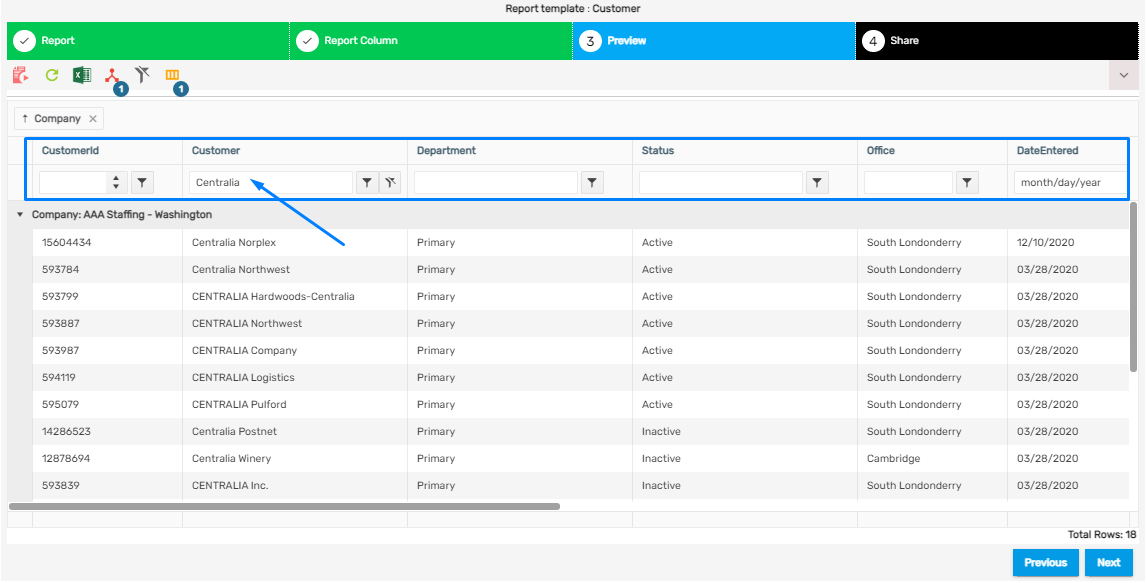
5. Clear Grid Filter
It will allow users to clear the filter applied on the grid column records.
The filter is applied to the customer column.
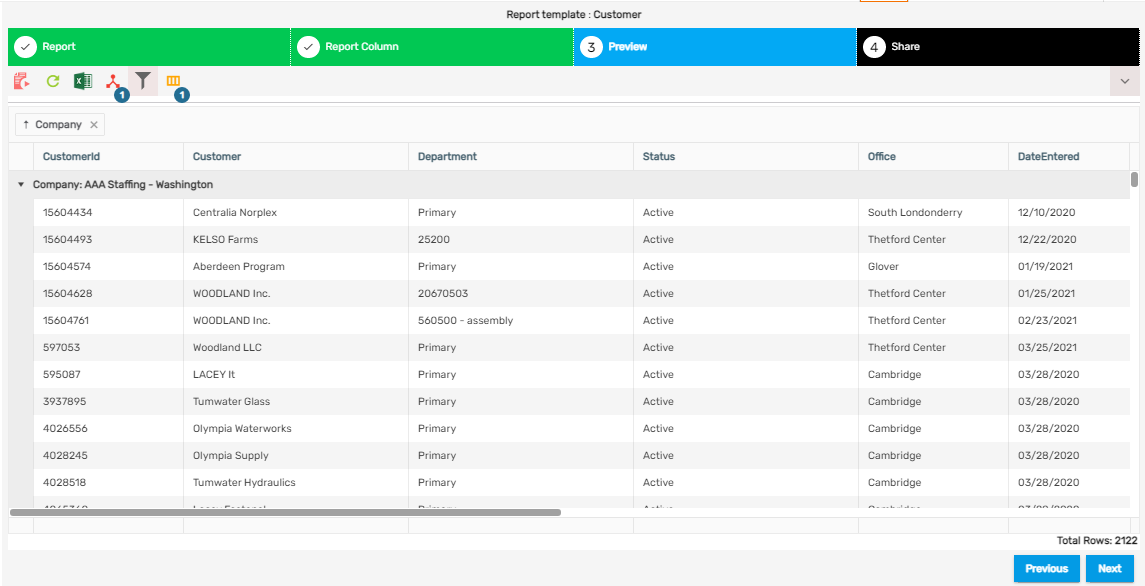
After the clear grid filter is used, it clears all the filters. The report records will be displayed based on the report filter only.
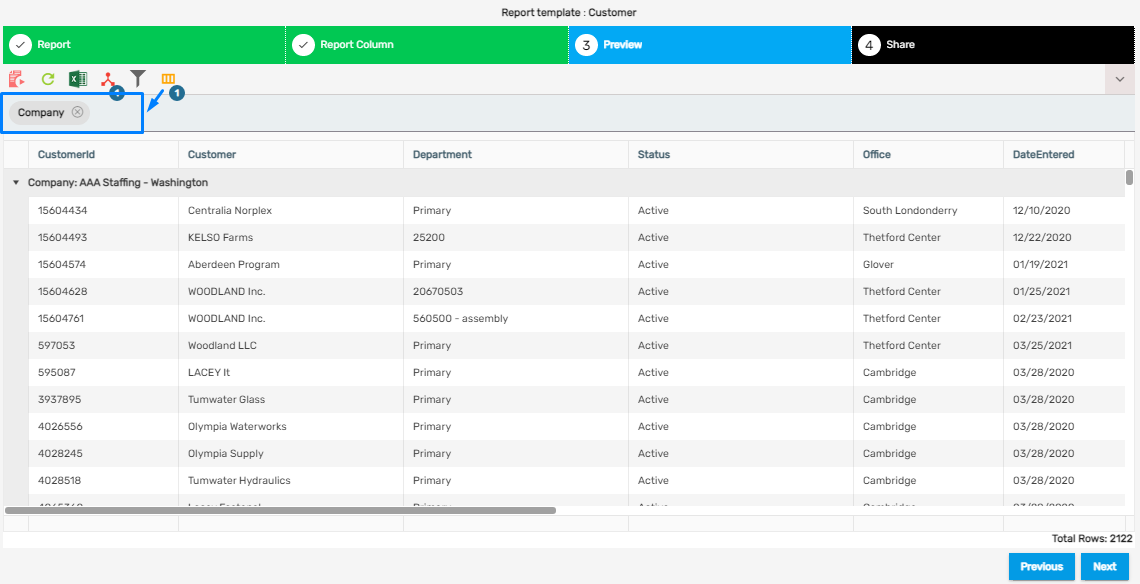
6. Toggle Hidden Report Column
It is used to see the report columns that are hidden while previewing the report. The report columns that are grouped will also be listed under it.
The number count shows the total number of the report columns that are hidden.
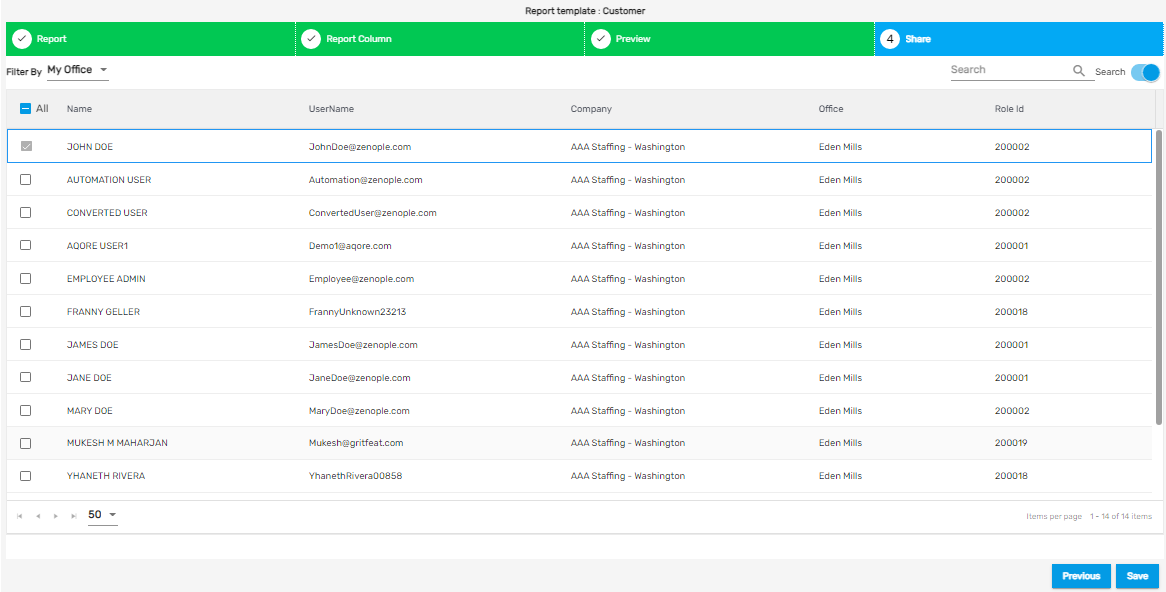
4. Share Tab
The 'Share' tab allows users to share the report created with other users. Users can filter the other user's list by 'My Company,' 'My Office,' or 'All.'
The list shows the user's details like the 'Name' of the user, 'Username,' 'Company,' 'Office,' and 'Role Id.'
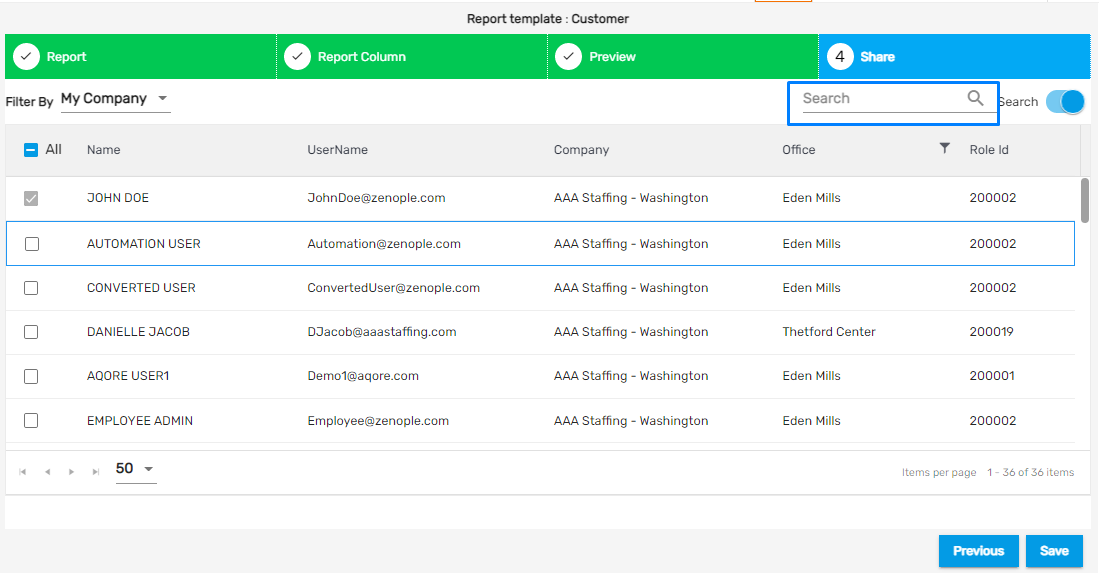
The search bar will allow users to search for other users to share the report.
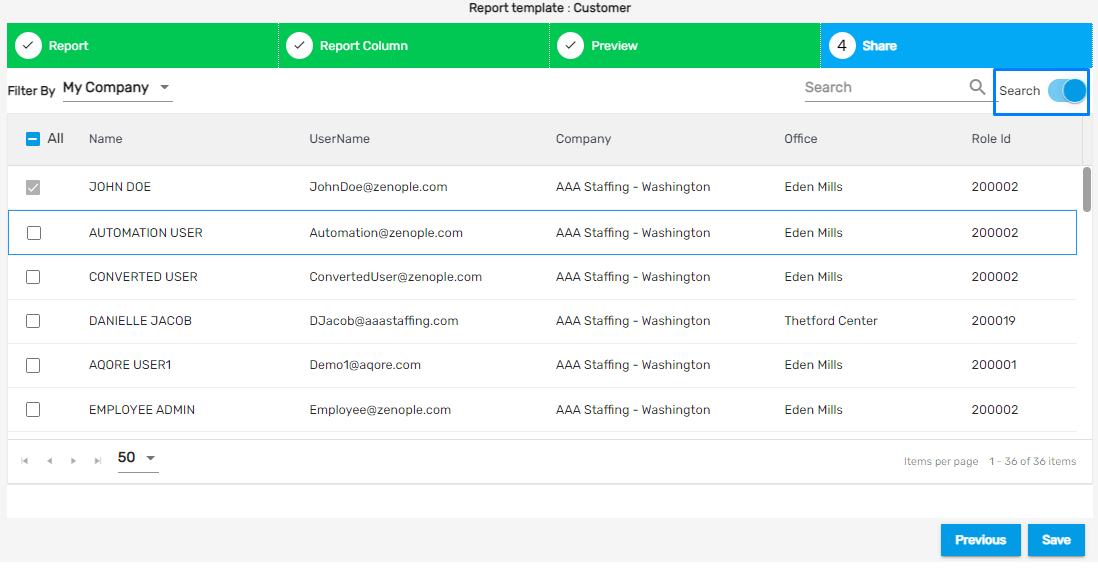
Search
The 'Search'/ 'Recent' toggle button allows users to search the users based on the entire lists or only the recently searched users list. By default, the toggle button will be set 'On'. When the 'Search'/ 'Recent' toggle button is set 'On', it will list all the user's lists based on the selected filter, and users are allowed to provide access to users from all the user's lists. When the 'Search' / 'Recent' toggle button is set 'Off', it will list only the recently searched users' list based on the filter selected. Users will be able to provide access to users from the recently searched users.
After the report access is provided, all the steps to create the report will be completed. Users can save the report and it will be listed on the 'Reports' main navigation.
Note: Only the 'Active' status reports will be listed on the 'Reports' main navigation
Report Vertical Ellipsis Action
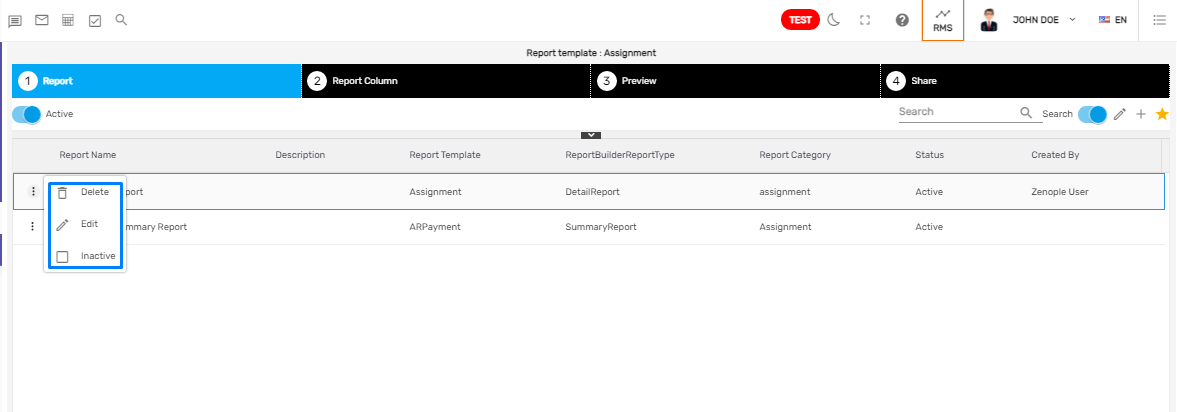
The reports on the 'Report' tab will have multiple actions under the vertical ellipsis. They are:
- Delete
- Edit
- Inactive
1. Delete
If the report is not required, the 'Delete' action allows users to delete the report. The report will be removed from the report list.
2. Edit
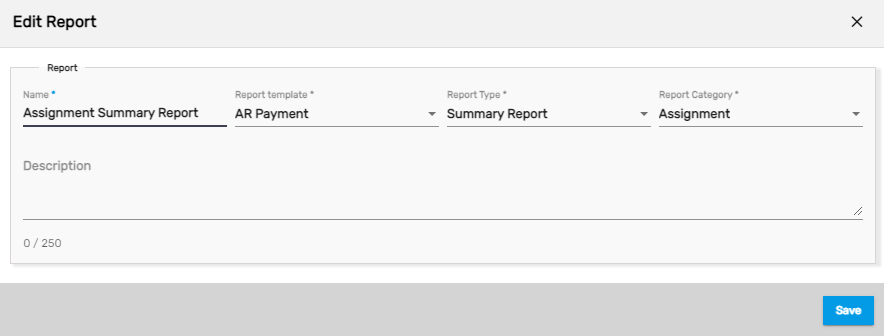
'Edit' action allows users to edit the details of the report. Users are allowed to edit the name, report template, report type, report category, and description.
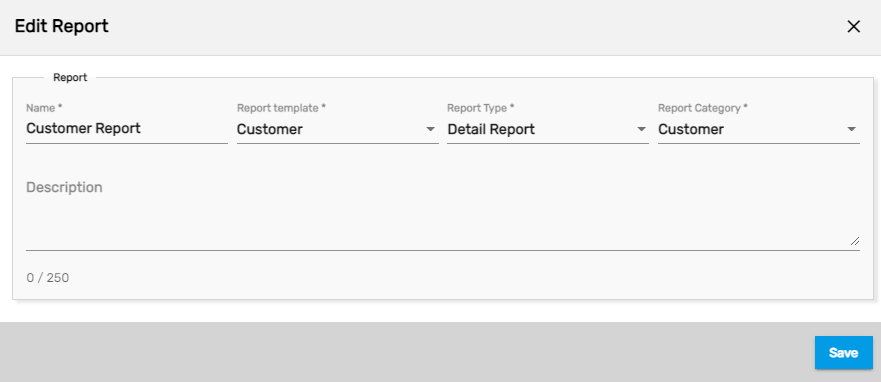
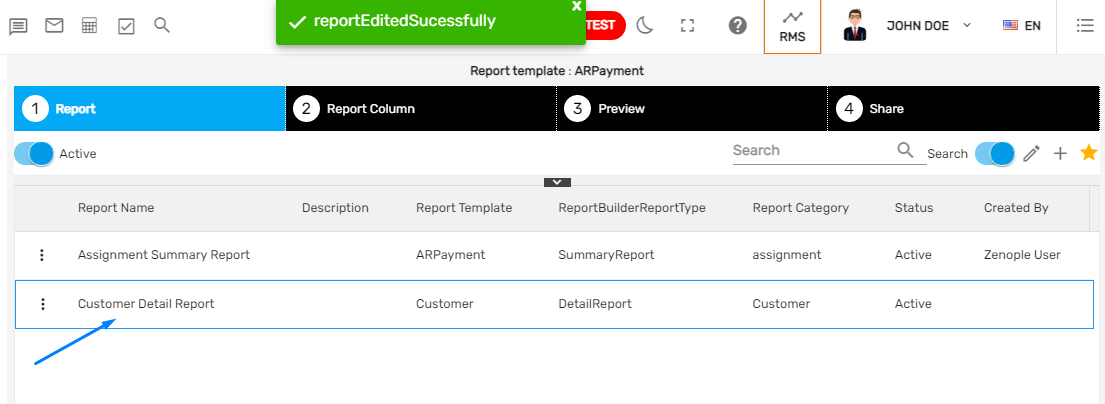
After the report details are edited, a 'Report Edited Successfully' message will be displayed. The updates on the report details will be seen on the report list accordingly.
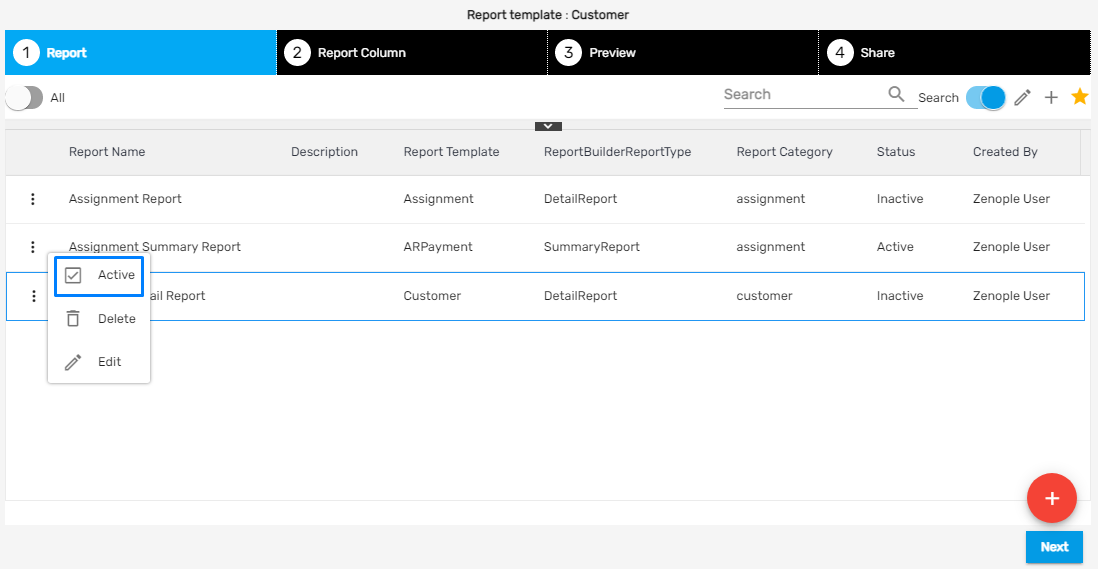
3. Inactive
'Inactive' action allows users to deactivate the report.
A confirmation message asking, 'Are you sure about deactivating this report?' will be displayed on the screen. If users click on 'Yes,' the report status will be changed to 'Inactive.'
Further, a message saying 'Report status updated' will be displayed and the report list will be moved from the active list to the all report list.
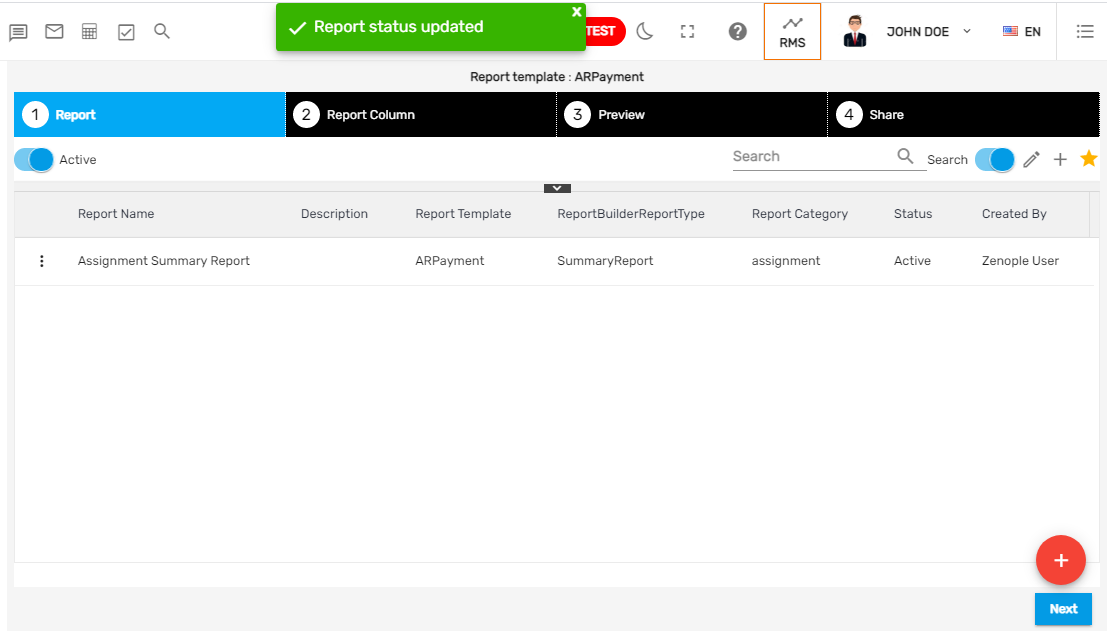
Users have to set 'Off' the 'Active'/ 'All' toggle button to view the report.
Note: Users can change the status of the Inactive report into an Active report by using the 'Active' action under the verticle ellipsis.
Active/ All Toggle Button
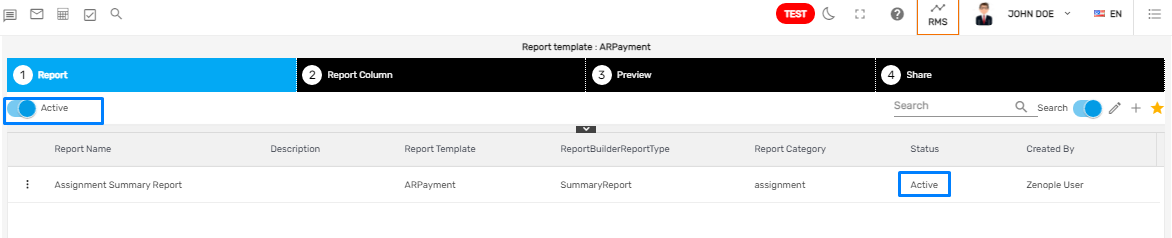
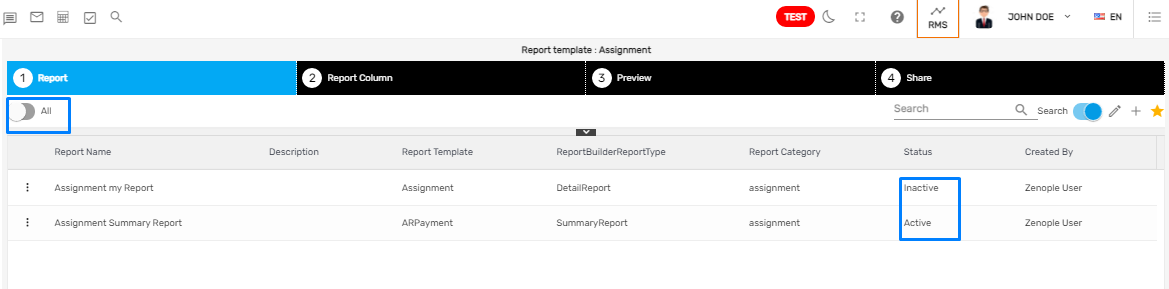
'Active'/ 'All' toggle button allows users to filter the report based on the status. By default, the toggle button will be set 'On'. When the toggle button is set 'On,' it will filter and list the active reports on the 'Report' tab. When it is set 'Off', it will list all the reports will all status.
- 'Active'/ 'All' toggle button set 'On'
- 'Active'/ 'All' toggle button set 'Off'
Search/ Recent Toggle Button
'Search'/ 'Recent' toggle button allows users to search all the report list or only the recently searched report lists. By default, the toggle button will be set 'On'. When the 'Search'/ 'Recent' toggle button is set 'On,' it will list all the reports and users will be able to search the reports from all the lists. When it is set 'Off,' it will list the recently searched report list between today's date and 7 days before today's date.
Favorite Action
The actions under the star icon are the favorite actions. The report builder directory consists of three actions. They are:
- Edit Report Builder Report
- New Report Builder Report
- Refresh
1. Edit Report Builder Report
'Edit Report Builder Report' action allows users to edit the report details. Users can edit the report name, report template, report type, report category, and note.
2. New Report Builder Report
'New Report Builder Report' action allows users to create a new report. Clicking on it will open a dialog box, 'Add Report.' Users have to select one of the report template based on the requirement. There are standard report templates and based on the selected report template, users will be able to select the columns on the 'Report Column' tab.
The standard report templates are 'Applicant,' 'AR Payment,' 'Assignment,' 'Customer,' 'Employee,' 'Invoice,' 'Invoice Filter,' 'New Hire,' 'Payment,' 'Payment Accrual,' 'Payment Bank,' 'Payment Benefit,' 'Payment Deduction,' 'Payment Taxes,' 'Transaction,' 'Transaction Item,' 'Transaction Item Sales Tax.'
Users also have to select the report type as 'Detail Report' or 'Summary Report.' Based on the selected report type, the report data will be displayed. The category for the report type needs to be set for the report. There is a list of standard report categories. They are 'Assignment,' 'Customer,' 'Employee,' 'Invoice,' 'Job,' 'Payroll,' 'Profit Report,' 'Tax,' 'Timesheet,' 'Uncategorized,' 'Utility.' Based on the Report template users can select the report category.
3. Refresh
'Refresh' action allows users to refresh the report builder records and users can use this action to reload the records.