Overview
New Hire navigation allows you to redirect to the detailed page of new hires and consists of various navigations and features that are essential for new hire information. It also has a list of the new hires on a directory page allowing the user to use a directory filter for the entire list of the new hires available. The directory displays the details of the new hire including full name, status, contact number, office, recruiter, job applied to, apply date, no. of a task, stages, etc. Other than the online new hires, the User can also add new hires. This feature can be customized as per the organization’s requirements.
There are six stages in NHO workflow that a new hire has to go through for completing the workflow.
- New Hire
Every one of the fresh hires is shown in this stage. This is the primary phase of NHO.
- Paperwork
All the paperwork needs to be completed by the new hire at this stage.
- Review
New hires are reviewed in this stage.
- Orientation
The new hires will go through an orientation program in this stage.
- Employee
The new hires after all the paperwork, review and orientation will become an employee in this stage.
- Total
All the records of the above stages can be viewed in this stage.
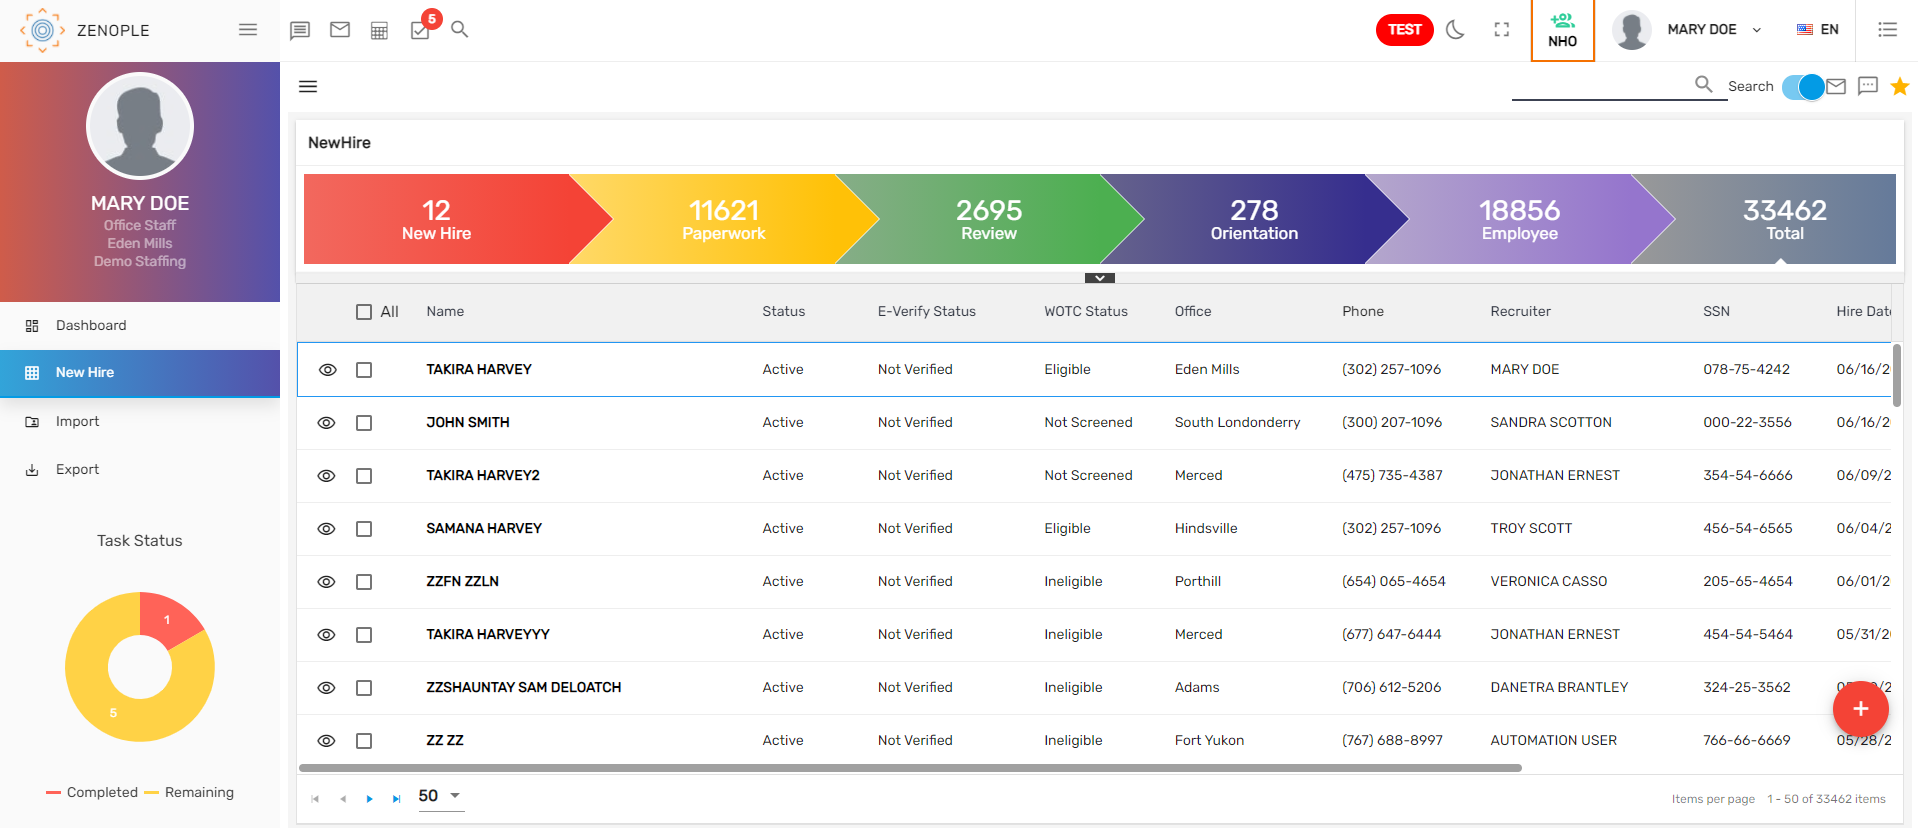
Note: For now, there are the tasks that are set up under the stages but these tasks can be customized as per requirements.
New Hire Directory
The new hire directory page consists of favorite actions, advanced filter, add new hire feature, a search /Recent toggle button, new hire detail page with favorite actions and navigations under it.
The user can search for the new hire from the search/recent toggle button, session toggle button, the list of new hires will be displayed. The advanced filter helps to filter the needed new hire record. Users can also add new hires and redirect to the new hire detail page from the directory page. The user can apply different actions like add the new hire as a candidate, send SMS, send an email.
- Click on each workflow stage to view the respective information.
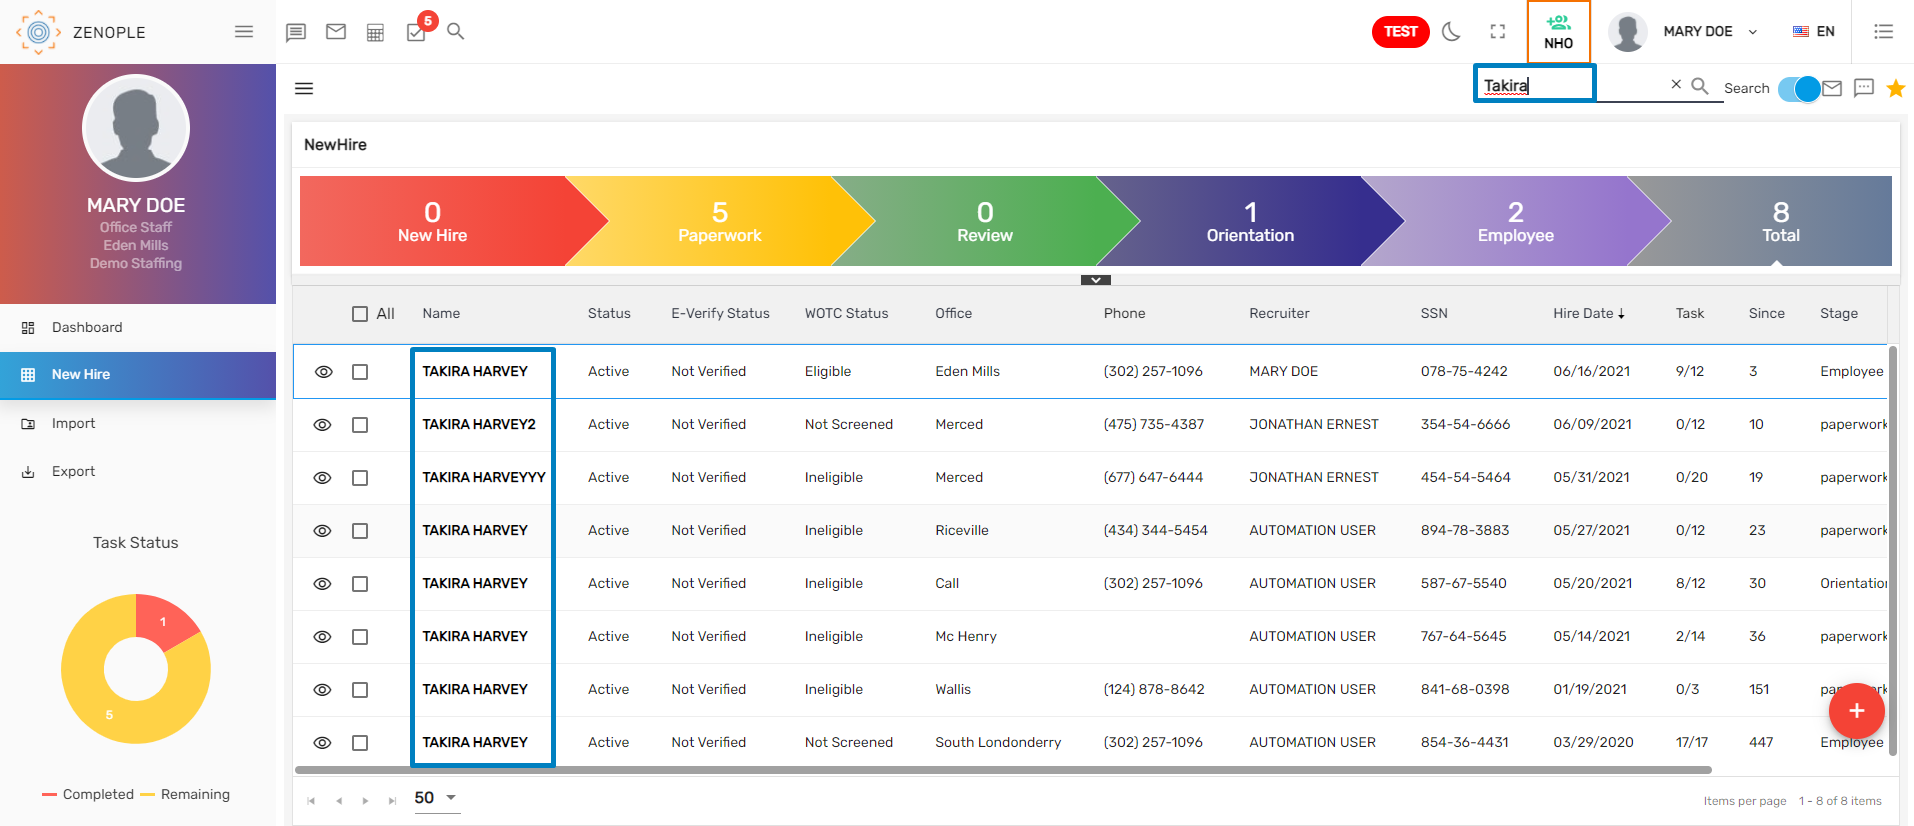
- You can also search the new hires from the search box.
- The search toggle button allows the user to enable and disable the search for the new hire.
- A session toggle button allows the user to view the new hire details added in the current session.
- Also, click on the particular tiles to view the related details.
- Search for the new hire from the search box.
Filter
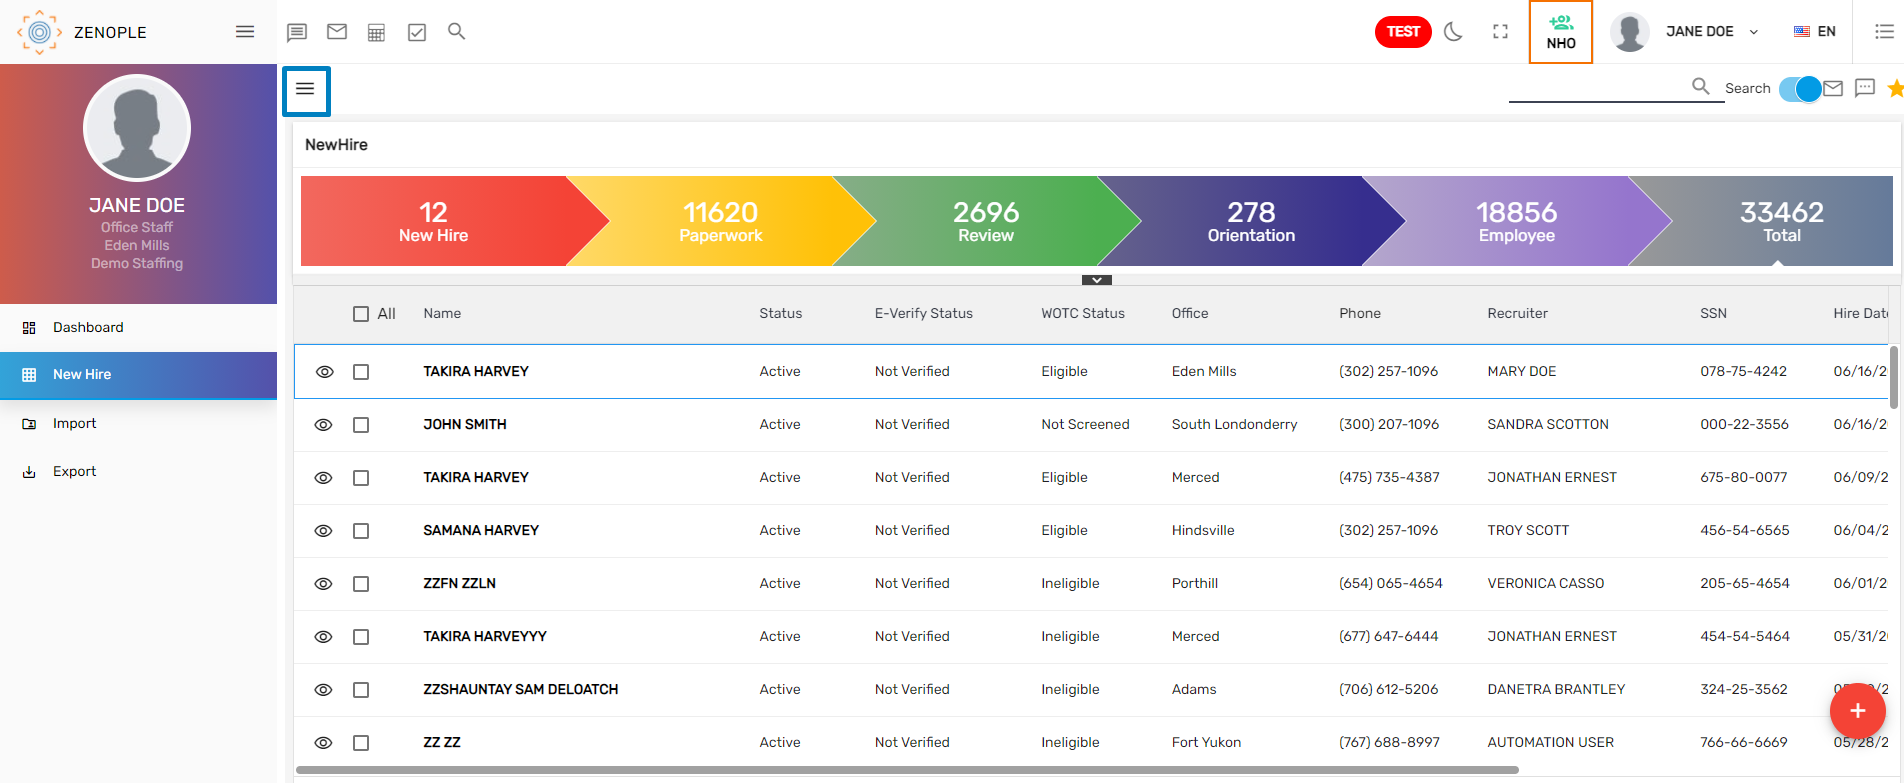
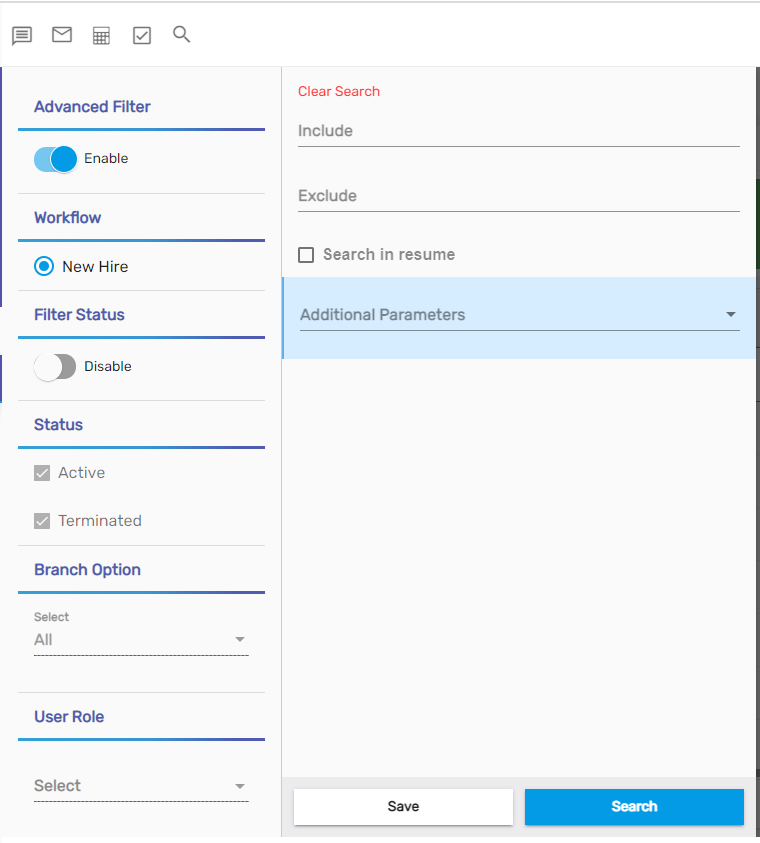
NHO includes an advanced filter option that assists you in searching for a new hire quickly. It allows the user to filter records based on various categories in the new hire directory pages such as workflow, various status, branch options, and user roles. Using this filter will display the filtered record based on the selected parameters and values. This filter feature can be used from the hamburger icon.
Favorite Actions
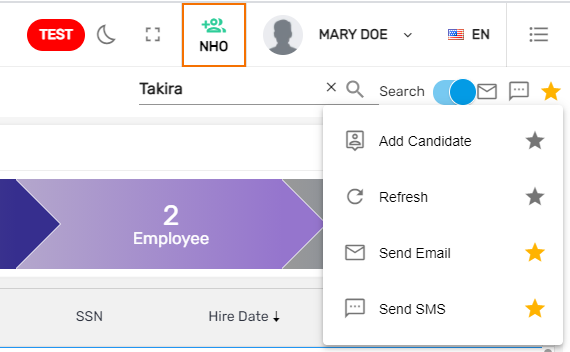
A favorite icon is a star-like icon that consists of other actions under it. There are four actions under the favorite icon of New Hire navigation.
- Add candidate
- Refresh
- Send email
- Send SMS
Add Candidate
This action allows the user to add certain candidates for the job. Select the New Hire and click on “Add Candidate” under the favorite icon.
Refresh
This action refreshes the new hire directory page. Similar refresh actions are found within the navigations which are used in refreshing the records in the grid.
Send Email
This action allows users to send emails to selected new hires from the directory page.
Send SMS
This action allows users to send SMS to selected new hires from the directory page.
New Hire Detail
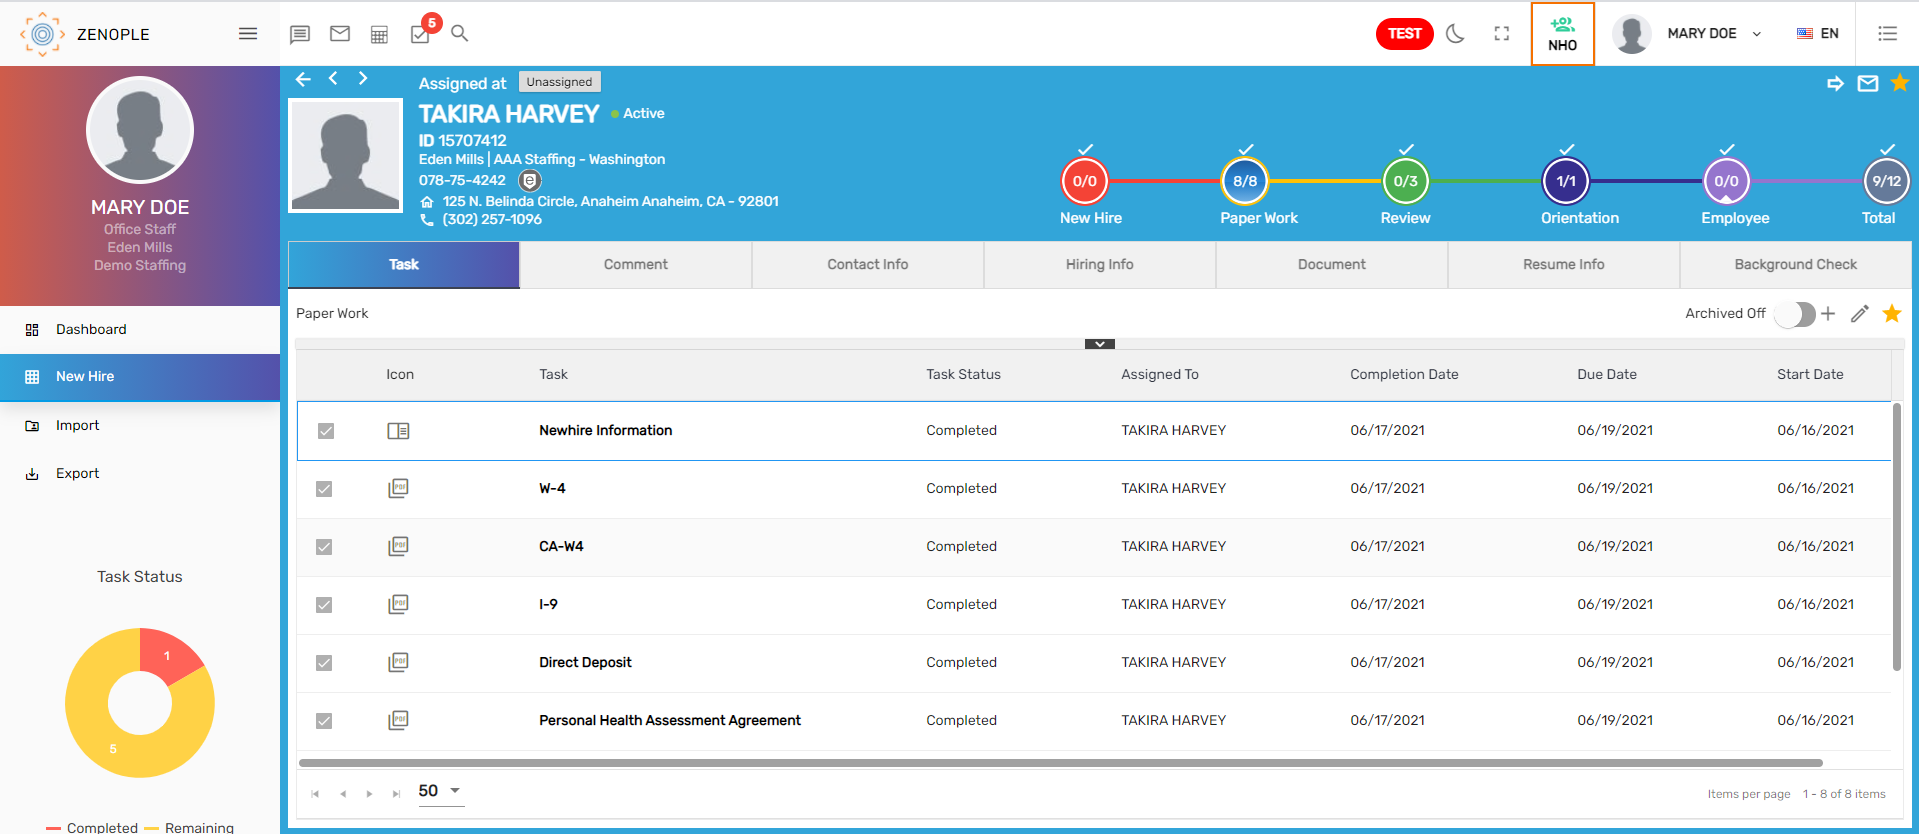
The new hire detail page is accessed by clicking on the eye view icon on the new hire directory page. It contains detailed information on the new hire, such as full name, address, phone number, job history, previous education, skills, and other details, all of which are organized under related navigations.
New Hire Detail Page
Add/ Edit New Hire
This is used to add and edit the new hire’s details. It allows you to add and edit the new hire’s information along with their full name, SSN, full address, email ID, phone number.
Favorite Action
The Favorite icons of the detail page have various actions under them. They are :
- Discard
- Edit
- Login info
- Move to the Next stage
- Refresh
- Resume
- Send Email
- Send SMS
.png)
1. Discard
When a new hire fails to fulfill the essential requirements and must be rejected, this action is used. The disqualified status will be assigned to the new hire who was discarded.
Note: You can always change the status of the new hire by editing the status from the edit icon.
2. Edit
This action allows the user to update the details of the new hires.
3. Login Info
The login information related to the selected new hire appears upon clicking the Login Info. If users have access to the Credential Change option, they can alter the new hire's username and password.
4. Move to the Next stage
This step enables the users to move the new hire to the next stage. As new hires and users have a list of tasks given to them, if they are unable to accomplish these tasks, this step is used by users to move new hires to the next stage.
5. Resume
This action generates the resume as per the record in the Zenople tables. It includes basic information with skill, employment, education, and interview. Each user record will be displayed in the report on a separate page.
.png)
6. Send SMS
This action allows the user to send the SMS to the applicant.
7. Send Email
This action allows the user to send an email to the new hire.
Navigation
The new hire consists of the following navigation.
- Task
- Comment
- Resume Info
- Contact Info
- Hiring Info
- Document
- Background Check
Task
This navigation consists of the standard tasks under the stages of NHO that are supposed to be completed by the new hire and users as well. These tasks can be customized as per the company's requirements. Click on the stage to see the tasks associated with each stage. Tasks can be added to users and new hire on each of the stages as well.
.png)
Task assigned to new hires should be completed by New Hire logging into the portal using their previous credential. Once the tasks are completed by new hires, task status will be updated as 'Completed.'
- The task can be completed.
- The task can be archived.
- The task can be forwarded to another office staff.
Resume Info
This navigation consists of four sub-navigations and displays the information for the same. The navigations are:
- Resume
- Skill
- Employment
- Education
1. Resume
This navigation allows the user to view and download the resume of the new hire.
2. Skill
Likewise in ATS, this navigation allows users to add and edit multiple skills of the new hire and also includes the skills filled up by the new hire through the tasks assigned.
3. Employment
Similar to ATS, this navigation allows the user to add and edit previous employment-related information of the new hire such as employer name, title, last payment amount, etc.
4. Education
This navigation consists of the education details of the new hire and allows the user to add and edit other education details of the new hire.
Comment
This navigation allows the user to write multiple comments associated with the new hire and also update them. The comments will be displayed in the new hire’s profile with the name of the commenter and its date.
Contact Info
This navigation consists of four sub-navigations and displays the information for the same. The navigations are:
- Contact Information
- Address
- SMS
1. Contact Information
This navigation includes contact numbers and email id information of the new hire. It allows the user to add and edit contact information.
2. Address
This navigation includes the full address of the new hire. It allows the user to add and edit the address details of the new hire.
3. Email
This navigation allows the user to send emails to the new hires. All the emails sent to the new hire are saved here.
4. SMS
This navigation includes the history of messages sent to the applicant. It allows the user to send SMS to the new hire.
Hiring Info
This navigation consists of five other sub navigations and displays the details for the same. The navigations are:
- Interview
- User Role
- Date Type
- Additional Information
- Conviction
1. Interview
This navigation allows the user to add and edit multiple interview details related to the new hire. These interview questions can be customized as per the company's requirements.
2. User Role
This navigation allows the user to add and edit multiple user role details for the new hire. The standard user roles are Entered by, Recruiter, Hiring Manager, interviewed by but these roles can be customized as per the company's requirement.
3. Date Type
This navigation allows users to add and edit multiple data types for the new hire. Data types such as I-9 Expiry date, Hired date, etc are tracked here. Various date types can be added upon the company's requirement.
4. Additional Information
This navigation allows users to add and edit various additional information related to the new hire followed by the interview such as the desired rate for the job, desired shift for work, referral source, eligibility ratings for the new hire.
5. Conviction
This navigation allows users to add and edit various conviction details related to the new hire such as drug tests, other medical tests, felonies, injuries of the new hire. Conviction in NHO can be added and altered likewise as we do in ATS. Kindly click this link for additional information.
Document
Users can view and download all the documents related to the new hire. The new hire task document can also be seen here. Only the documents related to new hires can be added and edited.
Background Check
The background check is often a step taken by employers to help ensure a sound hiring decision and protect the employer from several potential risks. Background Check internal navigation is available within ATS, NHO, EIS, and Job Candidate.
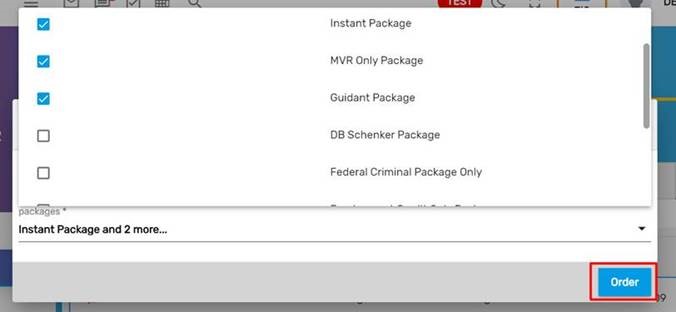
To add a background Check form, The user can select one of the locations you have access to and the list of packages is fetched based on the selected location.
The user can select multiple packages and order at once. However, although we have allowed users to select multiple packages, different orders are placed for each package. Asurint doesn’t allow for multiple packages to be placed under a single order request. Therefore, this is simply for convenience.
Once the orders are placed, the user will see a sidebar with a report if a “Complete” or “Pending” status is returned. And since multiple packages were ordered in this case, a couple of buttons will appear to navigate to the previous or next order
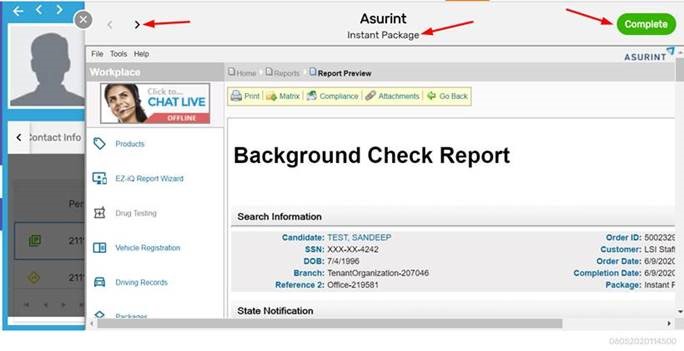
The user will see Asurint’s portal to complete the rest of the order and understand that some records are missing if the “Redirect” status appears.
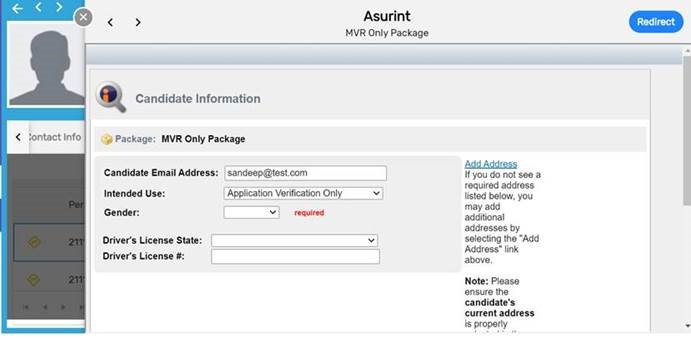
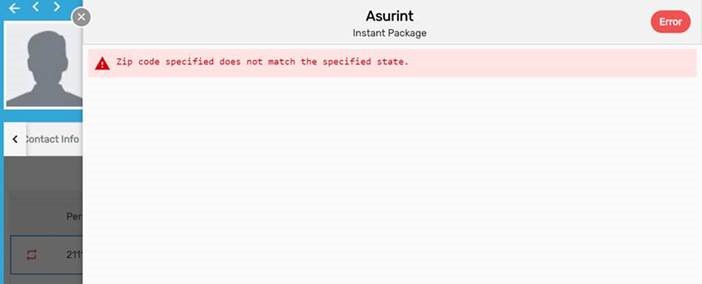
There are also cases where the user will see an exception message. In such cases, the user has to go to the related page to fix the validation error. In this case, the user will have to go to the address page to fix the Zip code.
The user can click on the icons to take action based on the current status of the order.

The status gets updated when the user takes necessary action and closes the sidebar, or in case of pending status, the grid will refresh whenever Asurint sends a complete status.