Overview
Invoice allows users to filter and view the invoices created in detail, edit them, and redirect to the 'Invoice' detail. The invoices created and posted from the ‘Invoicing' main navigation are displayed here.
.png)
Invoice Directory
When users complete creating an invoice batch from 'Invoicing,' the invoice will be displayed in the directory. Search for the invoice from the search box and the invoice will be displayed with invoice details such as 'Invoice Number,' 'Customer,' 'Department,' 'Accounting Period,' 'Invoice Date,' 'Total Bill,' and so on. .png)
Filter
The filter feature in the directory allows users to filter the invoice records based on various options selected. The filter can be accessed from the hamburger icon. The standard options are 'Funding Filter,' 'Invoice Due Filter,' and 'Invoice Balance Filter.' These options can be added based on the users' requirements.
.png)
Filter Parameter
.png)
Search/ Recent Toggle Button
'Search' toggle button allows you to search the invoice from the search box in the invoice directory whereas the 'Recent' toggle button displays the most recent searched and visited records. By default, the search toggle is enabled.
Users can redirect to the invoice and customer detail by hovering the cursor over the specific invoice eye view icon.
.png) The vertical ellipsis button has also five actions under it. They are:
The vertical ellipsis button has also five actions under it. They are:
- Edit
- Regenerate Document
- Resend Email
- View
- View Report
.png)
1. Edit
It allows users to edit the invoice details such as invoice 'Styles,' 'Payment Terms,' 'Funding Organizations,' 'Billing Address,' and 'Office.'
.png)
2. Regenerate Document
It allows users to regenerate the document in case of any changes from the backend. After regenerating the old document of the invoice is disable and override by the new updated one.
3. Resend Email
This allows users to resend the invoice email to the customer.
4. View
It allows users to view the invoices in the document slider view.
.png)
5. View Report
It allows users to view the invoice report.
.png)
Favorite Action
There is an action 'Invoice PDF' under the favorite icon.
.png) Invoice PDF: It allows users to individually download the invoice or merge multiple invoices into one file as PDF and download it. Users can also email the invoice accordingly.
Invoice PDF: It allows users to individually download the invoice or merge multiple invoices into one file as PDF and download it. Users can also email the invoice accordingly.
.png)
Invoice Detail
The invoice detail allows users to edit various invoice details that consist of details like 'Invoice Number,' 'Customer,' 'Batch ID, 'Invoice Date' and 'Due Date,' 'Payment Terms,' 'Balance.'
Favorite Action
There are five actions under the favorite icon of the invoice detail. These actions are similar to the actions available in the vertical ellipsis button of the invoice in the directory. They are:
- Edit
- Regenerate Document
- Resend Email
- View
- View Report
.png)
Navigation
There are six top navigations in the invoice detail. They are:
- Transaction
- Transaction Item
- Invoice Payment
- Correction
- Merge
- Comment
.png)
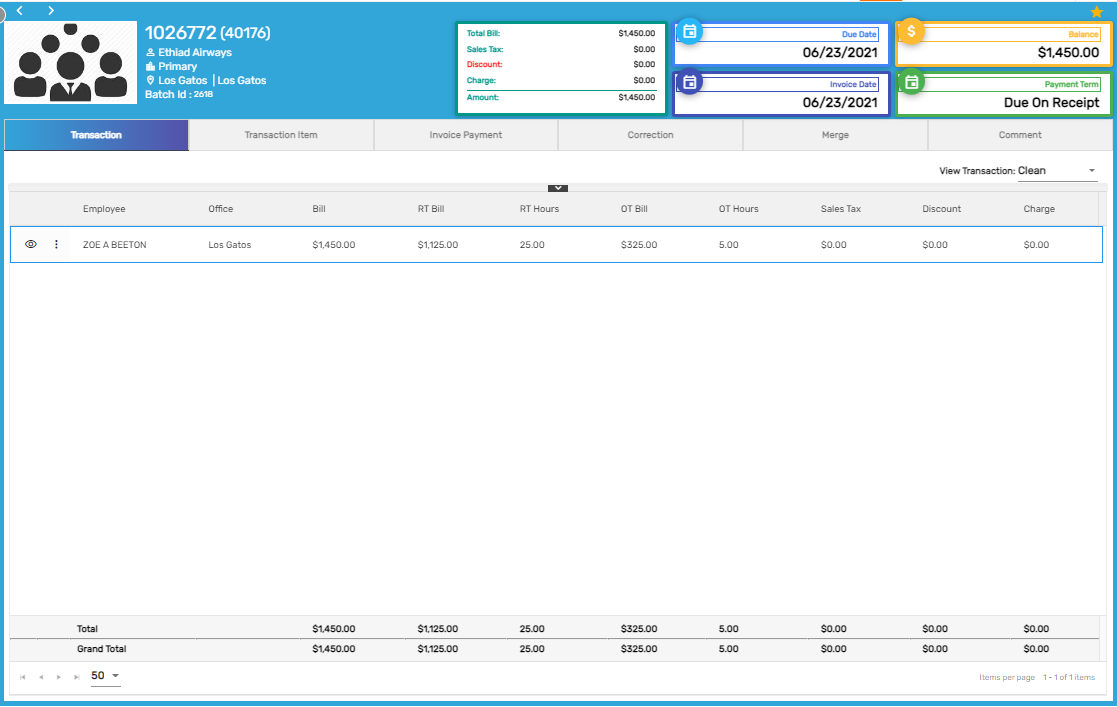
Transaction
It consists of the total invoice transaction details with the employee and office details, bill amount, RT/OT bill amount and hours, sales tax, discount, and charges details. When users hover over the eye view icon, users can redirect to the customer detail or the employee detail accordingly.
.png)
It consists of filters for viewing transactions such as:
- Actual
- Clean
- All
1. Actual
In case of transaction correction, it allows users to view the exact transactions before they were corrected,
2. Clean
In case of transaction correction, It allows users to view the corrected transaction
3. All
It allows users to view all the transactions of the invoice.
.png)
Transaction Item
It consists of the details of individual transactions involved in the invoice such as RT transaction and OT transaction with the total item bill, PPE period, employee, bill unit, bill rate, and so on.
.png)
It also has filters similar to the transaction top navigation and the eye view icon allows users to redirect to the customer detail and employee detail.
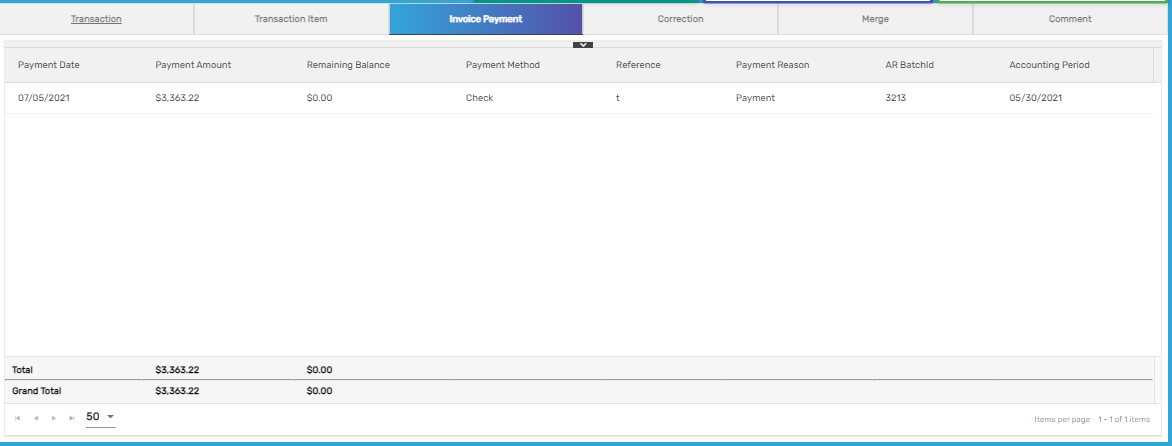
Invoice Payment
When the invoice amount is paid by the customer, users stores this information with the invoice number and the payment details in the Account Receivable System (ARS) application. Once, the payment is entered in the ARS, the payment detail is reflected in the invoice payment top navigation of Invoice detail.
Correction
It allows users to make corrections for the invoice after it has been posted. There are three steps to complete the correction. They are:
- Correction
- Transaction
- Invoice
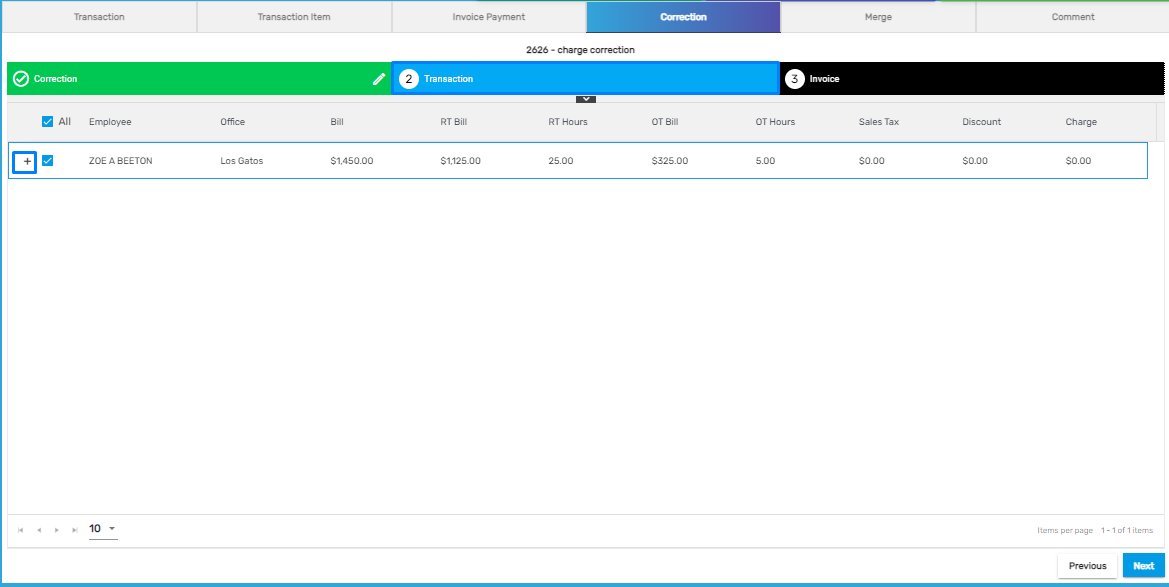
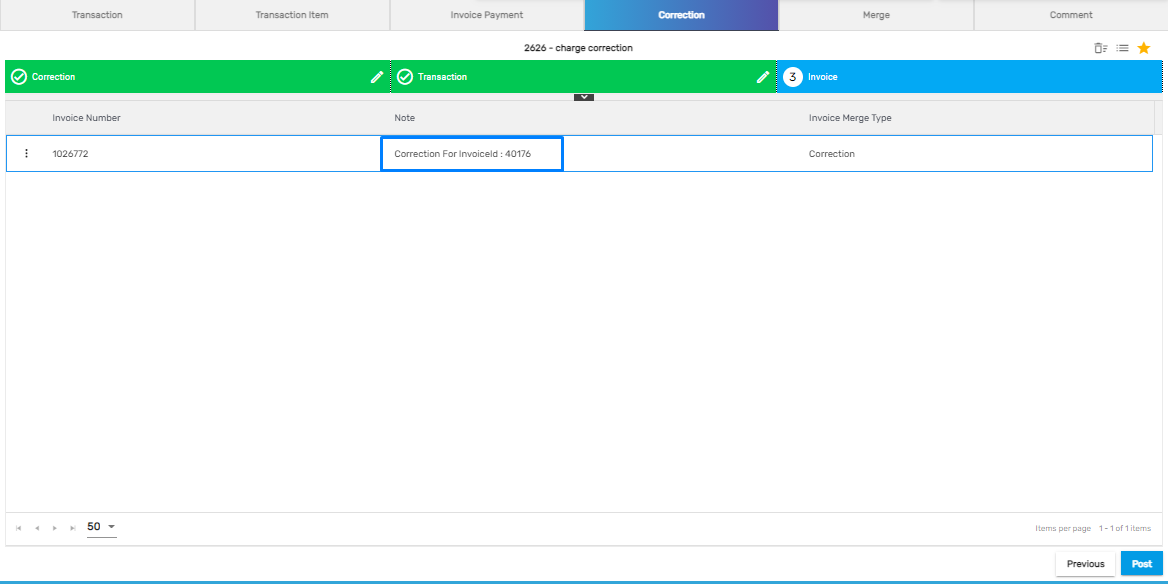
1. Correction
Users add the correction batch with correction types, invoice date, accounting period, and so on.
2. Transaction
Users edit the transaction as required.
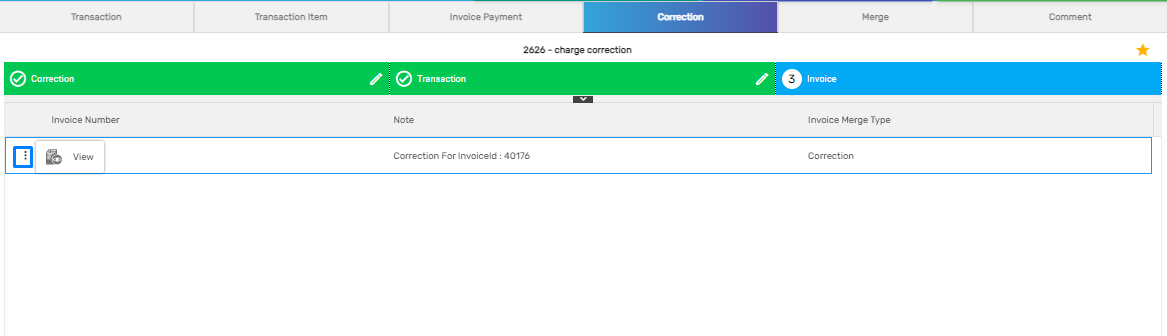
3. Invoice
The updated invoice is displayed.
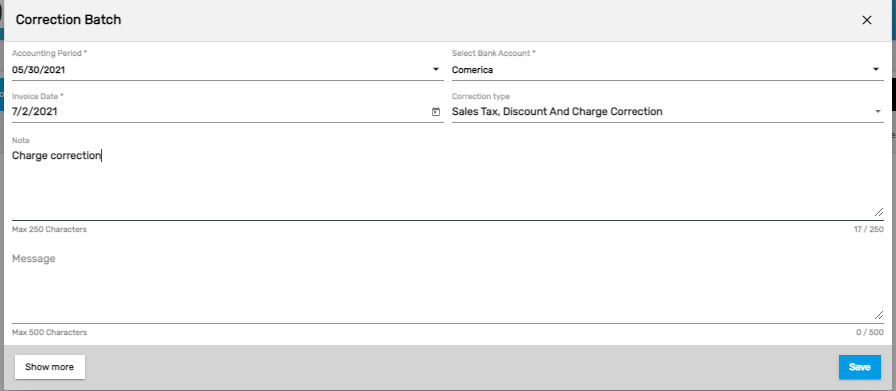
.png) Users must add a 'Correction Batch' to start the correction from the 'Add' icon.
Users must add a 'Correction Batch' to start the correction from the 'Add' icon.
Select the 'Accounting Period,' 'Invoice Date,' 'Correction Type,' and 'Bank Account' as required.
.png)
Note: The bank account for invoice purposes is set up from the ATM application.
Users are allowed to make three types of corrections. They are:
- Sales Tax and Discount Correction
- Transaction Correction
- Void Correction
.png) Sales Tax, Discount, and Charge Correction come in handy when users have to make corrections related to sales tax, charge, and discount of the customer.
Sales Tax, Discount, and Charge Correction come in handy when users have to make corrections related to sales tax, charge, and discount of the customer.
1. If the customer’s address is changed, then sales tax is changed accordingly and these corrections are made for updating such taxes after the invoice has been posted.
2. In cases where the customer’s charges and discounts are updated in the customer’s profile and job accordingly, these corrections are made for reflecting such changes in the current invoice.
Note: Once the changes are made for charges, sales tax, and discounts, users must regenerate the transaction to reflect these changes.
The Process to Make Corrections for Sales Tax, Charge, and Discount
Example 1: Correction for the charge
Fill up the 'Correction Batch' details from the 'Add' icon.
Users should select 'Sales Tax, 'Discount and Charge Correction' from the correction type dropdown options, fill in other details as required, and save them.
 The next button will allow the user to move to the 'Transaction' tab.
Users can expand the transaction details and view them from the '+' icon.
Select the transaction and click on the 'Next' button to move to the 'Invoice.'
The correction batch and the correction are completed.
Users can view the invoice report with the updated corrections from the vertical ellipsis button.
The report will display the invoice report with the earlier total amount and the total amount after adjusting or correcting charges.
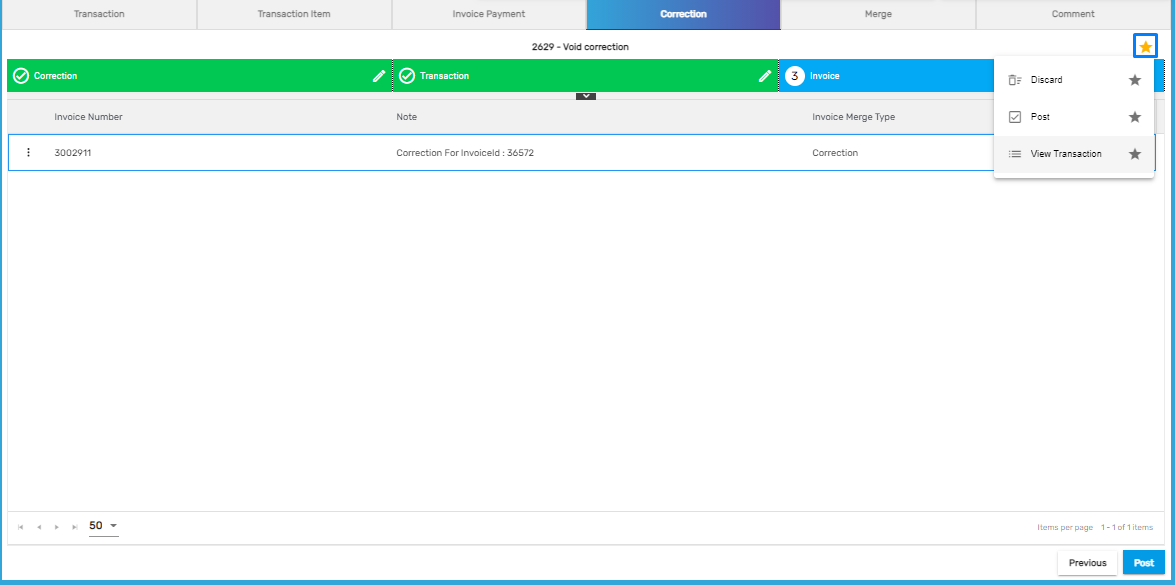
.png) The favorite icon of 'Correction' top navigation consists of three actions. They are:
The favorite icon of 'Correction' top navigation consists of three actions. They are:
- Discard
- Post
- View Transaction
1. Discard
It allows users to discard or cancel the correction.
2. Post
It allows users to post the correction. Users may view the report before posting the correction to verify.
3. View Transaction
It allows users to view each transaction item such as corrected RT/OT.

'Transaction Correction' simply allows users to correct each transaction of the invoice as required. Users may correct the RT/OT or any other specific transactions of the invoice as required.
The process to correct the transaction
Add batch and choose 'Transaction Correction' in the correction type with other details and save it.
.png)
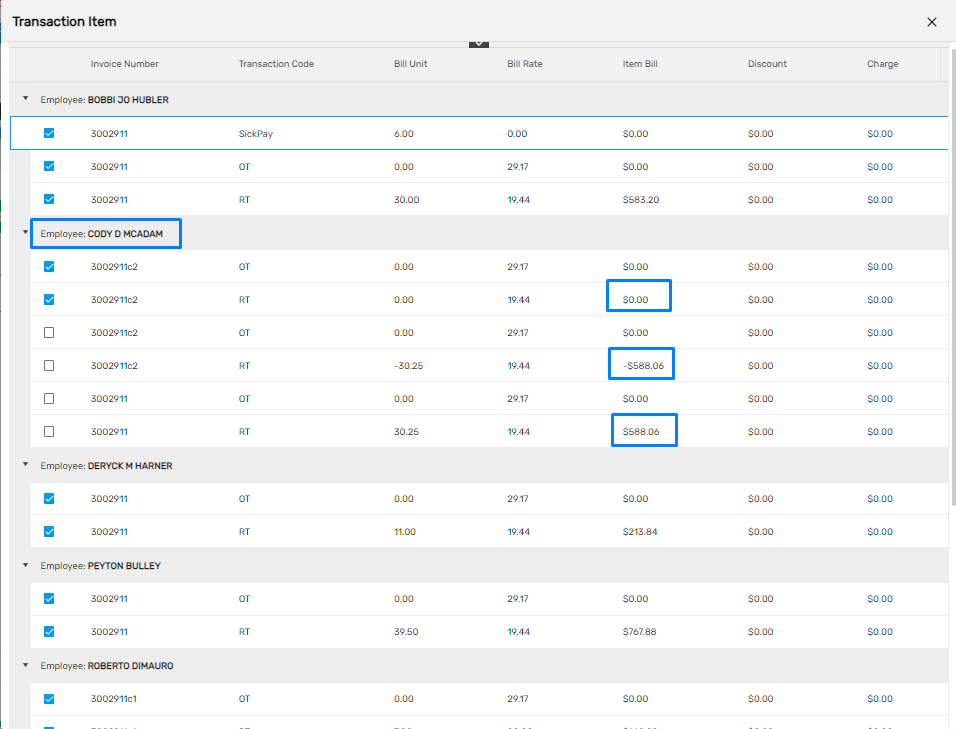
The list of each transaction is displayed below.
Click on the '+' icon to expand the detail and click on the 'Edit' icon to edit the transaction.
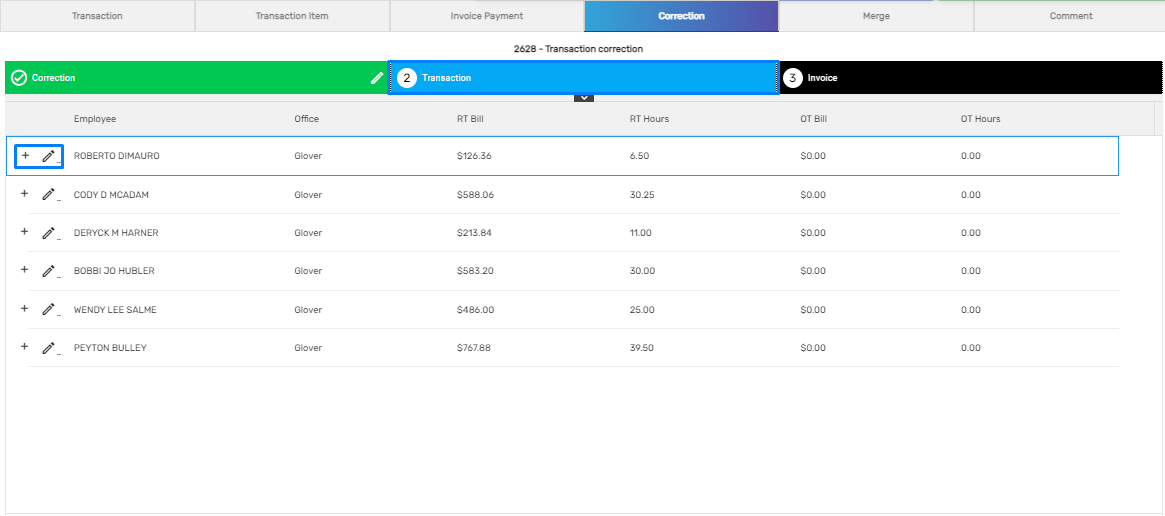
Edit the transactions as required.
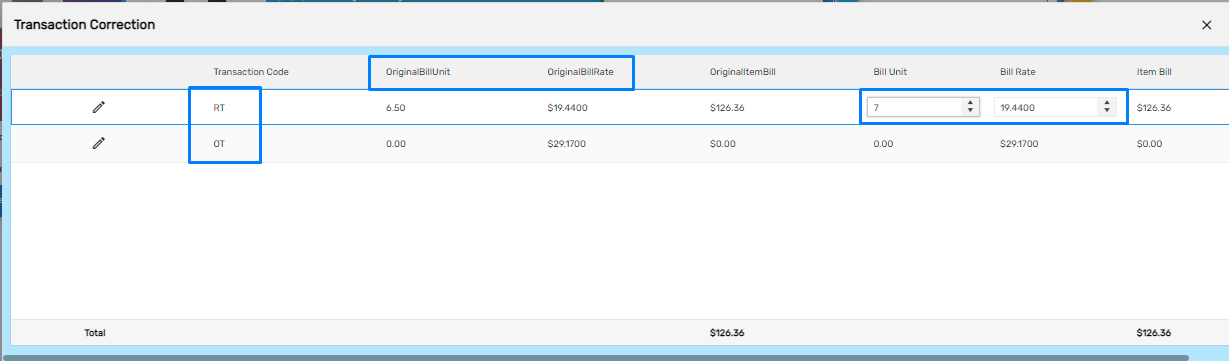
The info card defines that the transaction has been modified.
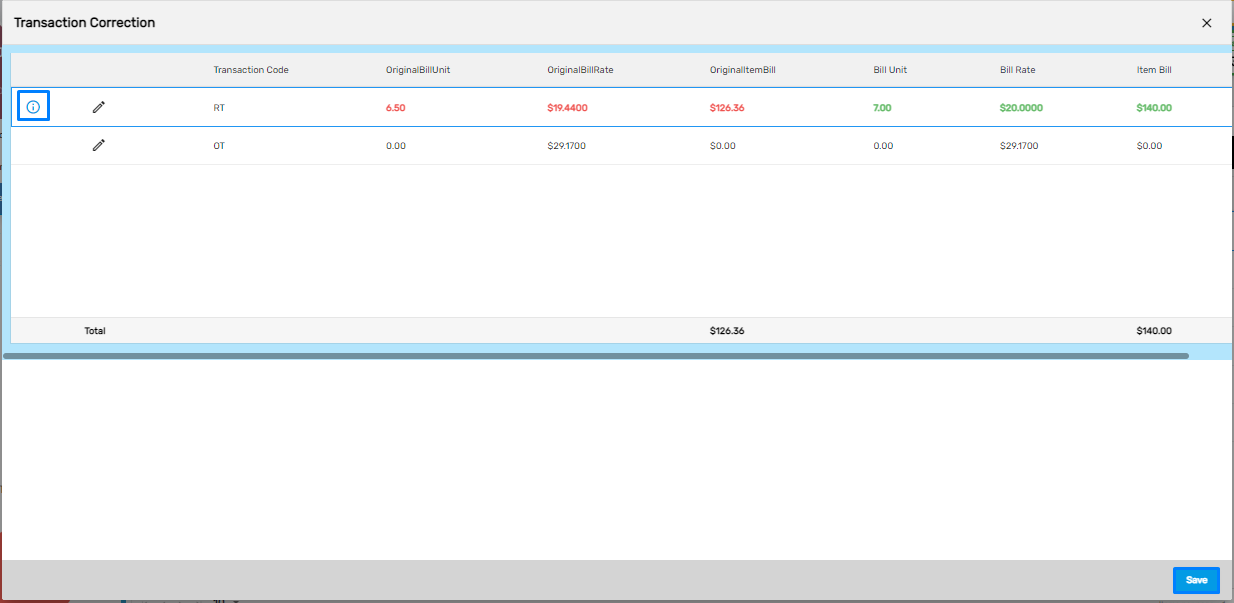
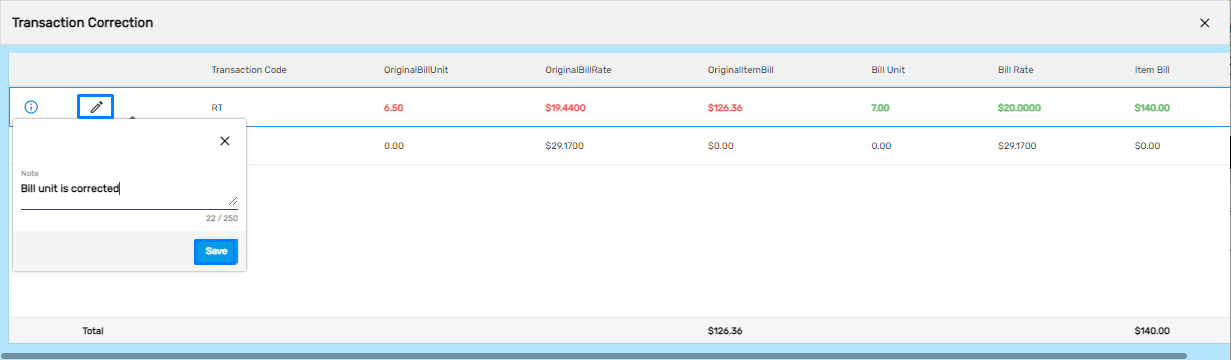
Click on the 'Edit' icon to add the note as required.
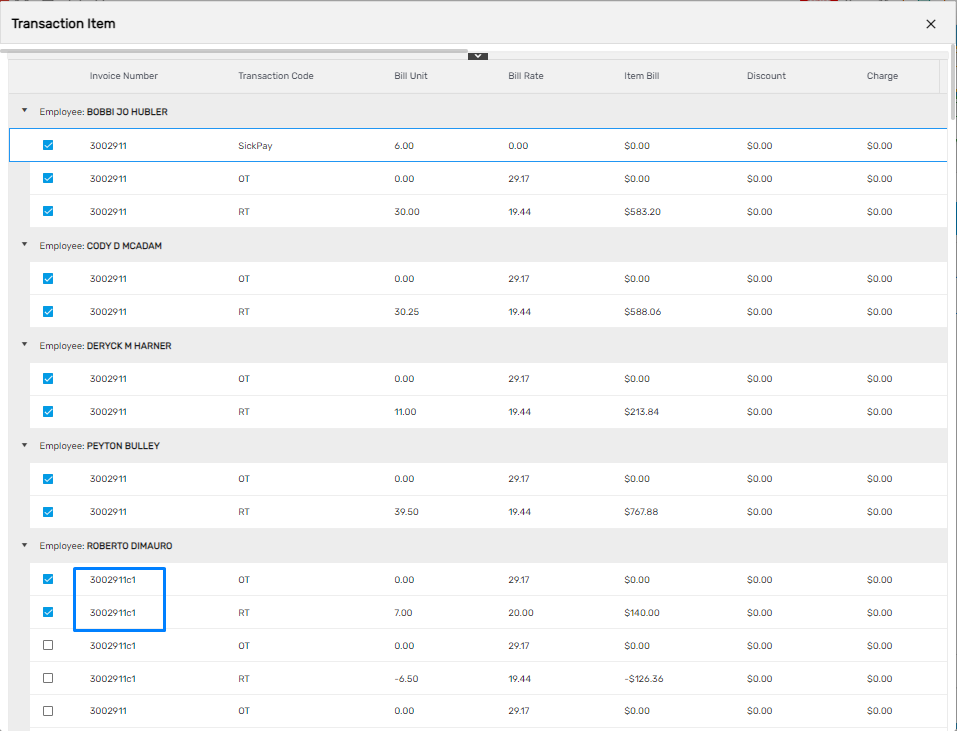
Users may view the transaction from the favorite icon after the correction is done.

The corrected transaction will have a different invoice number with a reference letter 'C.'
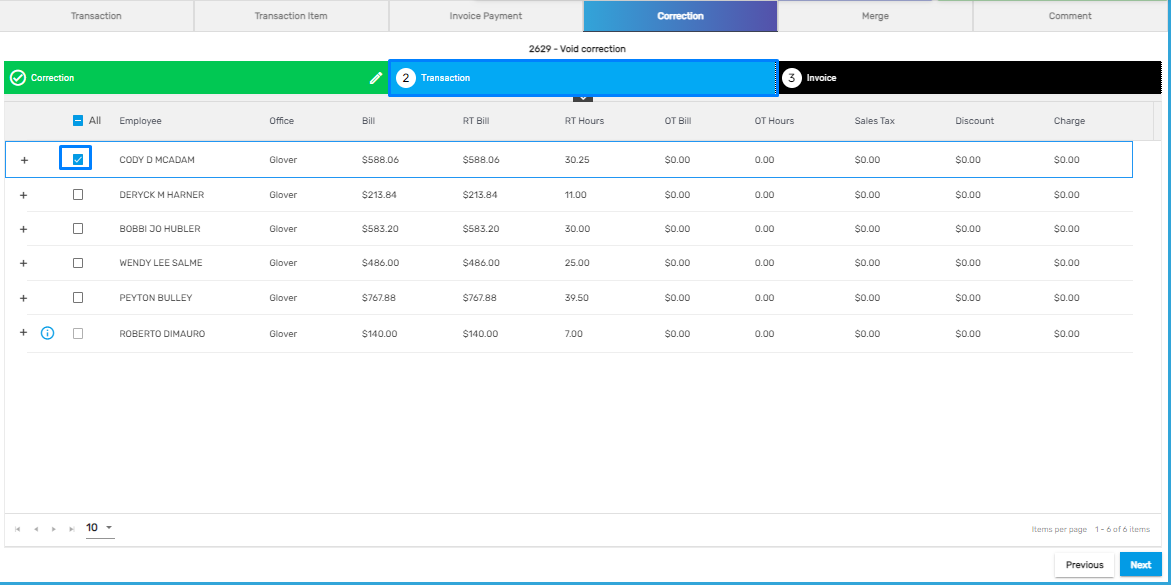
'Void Correction' allows users to void the invoice transaction or discard the invoice. This correction creates a negative amount that is equal to the invoice amount and balances the amount to zero.
The process to make the void correction
Add the batch and select 'Void correction' as correction type with other details as required.
.png)
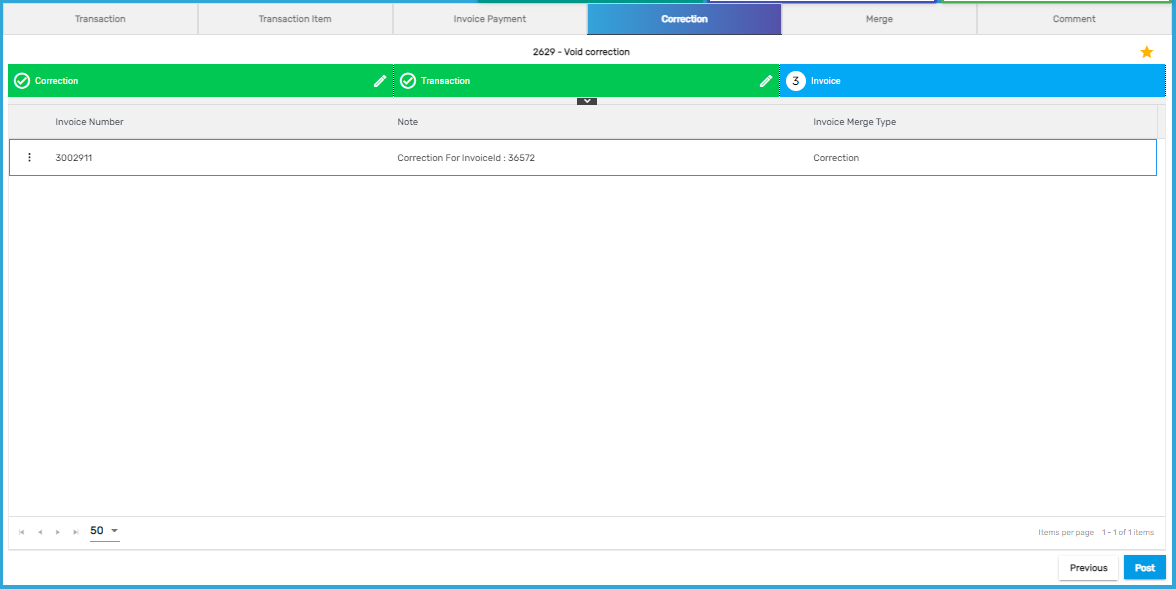
Select the transaction which needs to be voided from the list of transactions and click on 'Next.'
The selected invoice transaction voided will be displayed as below.
Click on 'Post' to confirm the voided transaction and post it.
Users may view the transaction from the vertical ellipsis button.
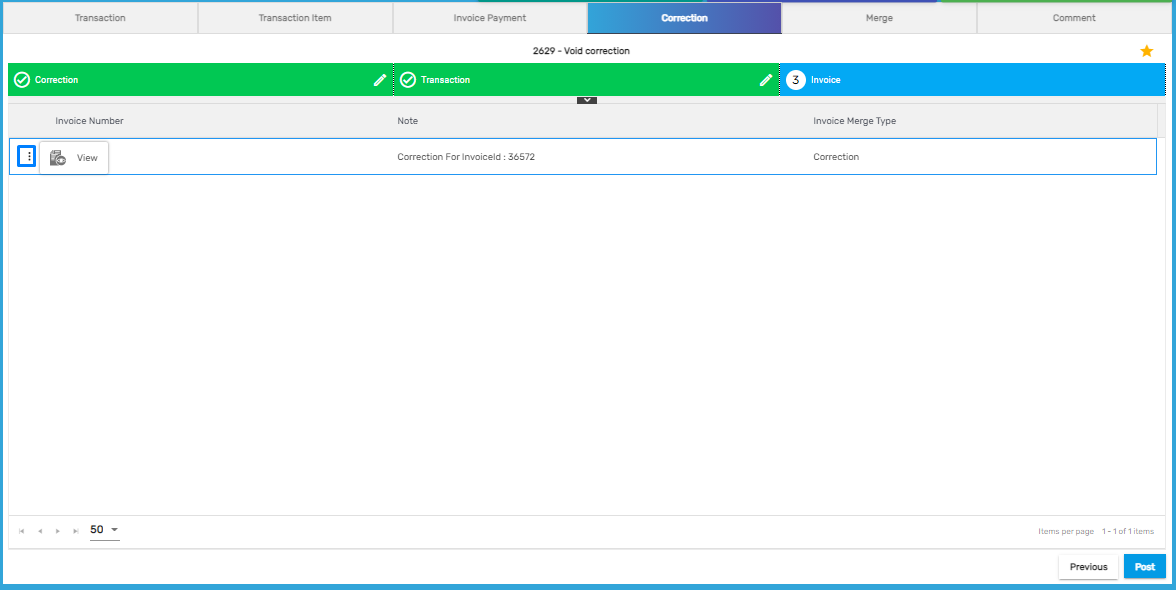
Users can also view the transaction from the favorite icon.
The voided transactions will be displayed as below.
After verifying the corrections, users can post the correction.
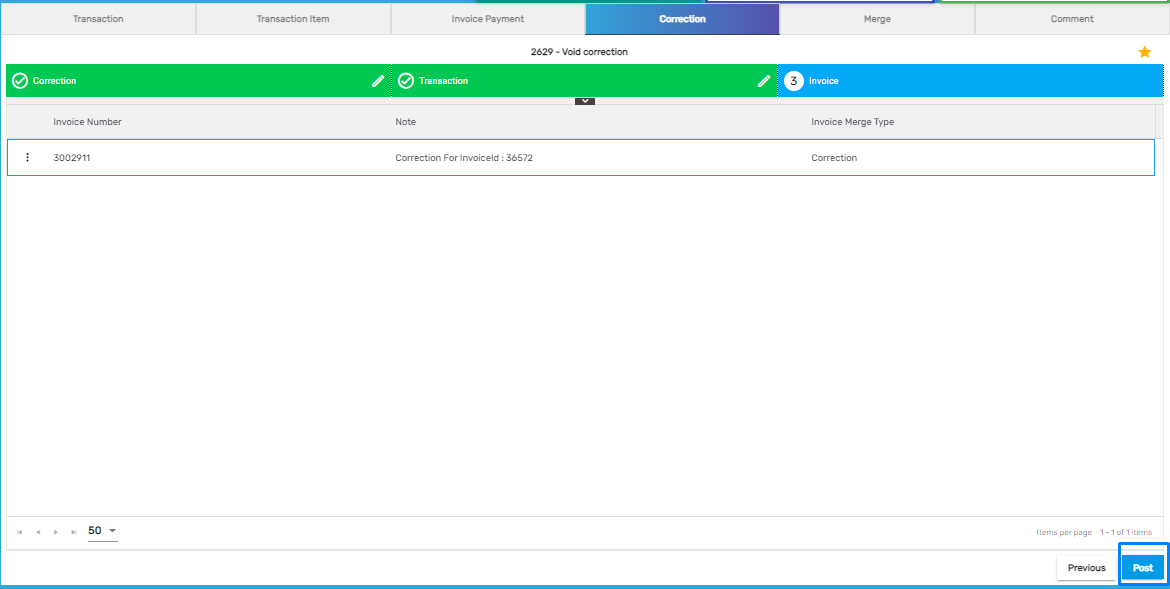
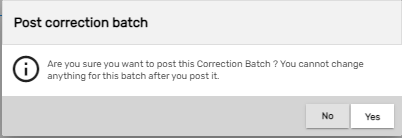
After clicking on the 'Post' button, users will be asked to confirm the 'Correction Batch' posting as it cannot be changed after it gets posted.
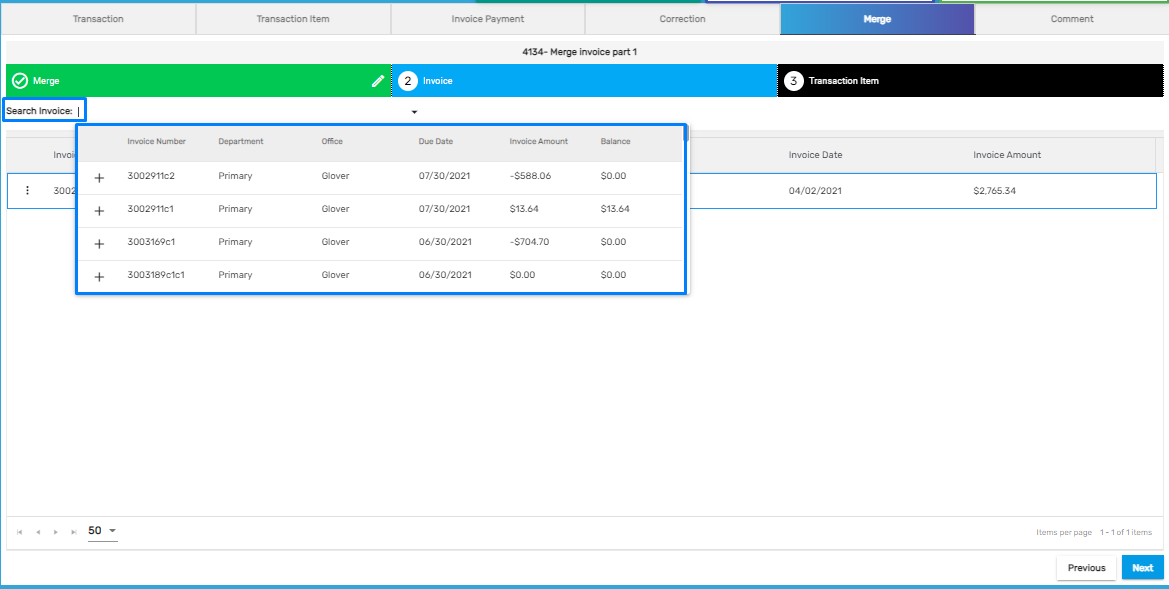
Merge
It allows users to add multiple merge batches where users can merge various invoices into one single invoice of the same customer.
Note: The correction batches created will automatically create a merge batch.
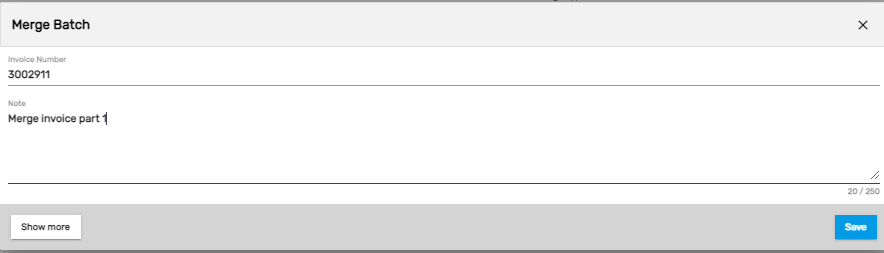
Add the 'Merge Batch' details as required.
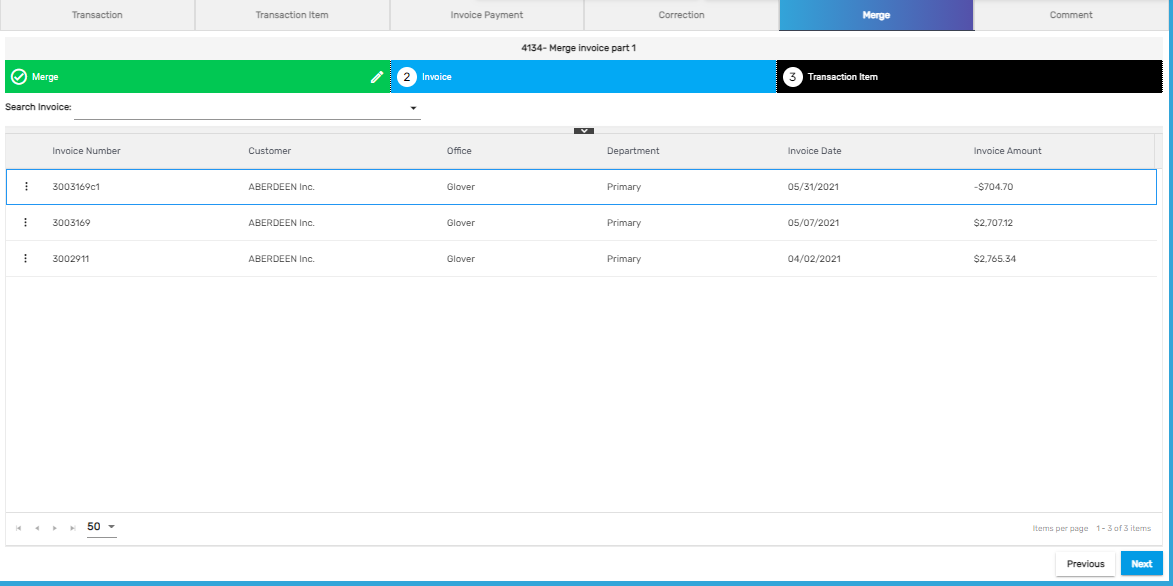
Search the invoices from the dropdown, add the invoices that need to be merged into a single invoice.
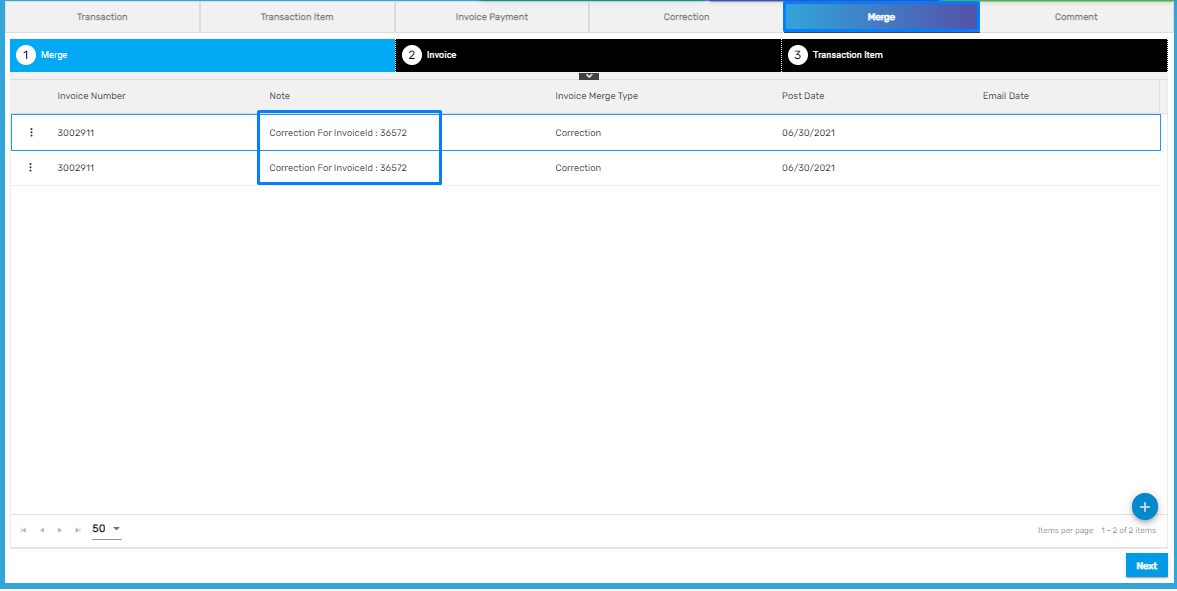
After the transactions are selected to be merged, they are displayed as below and click on the 'Next' button to move forward with the merge.
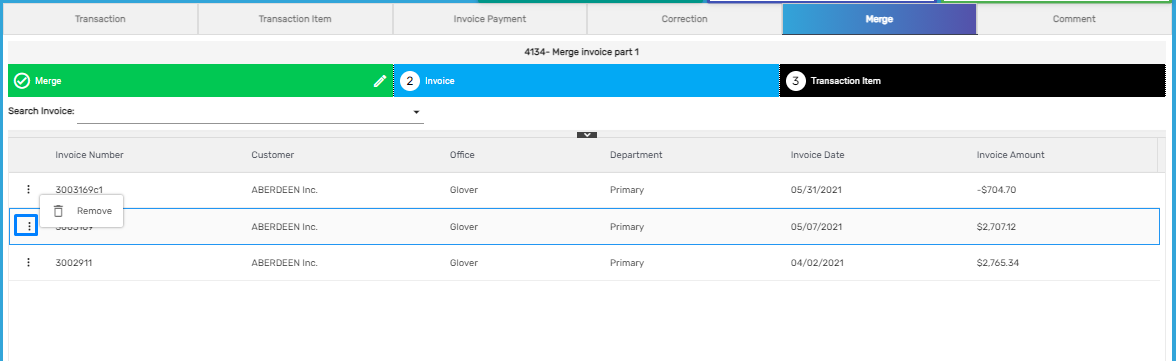
 Users may remove the transaction for merge from the vertical ellipsis button.
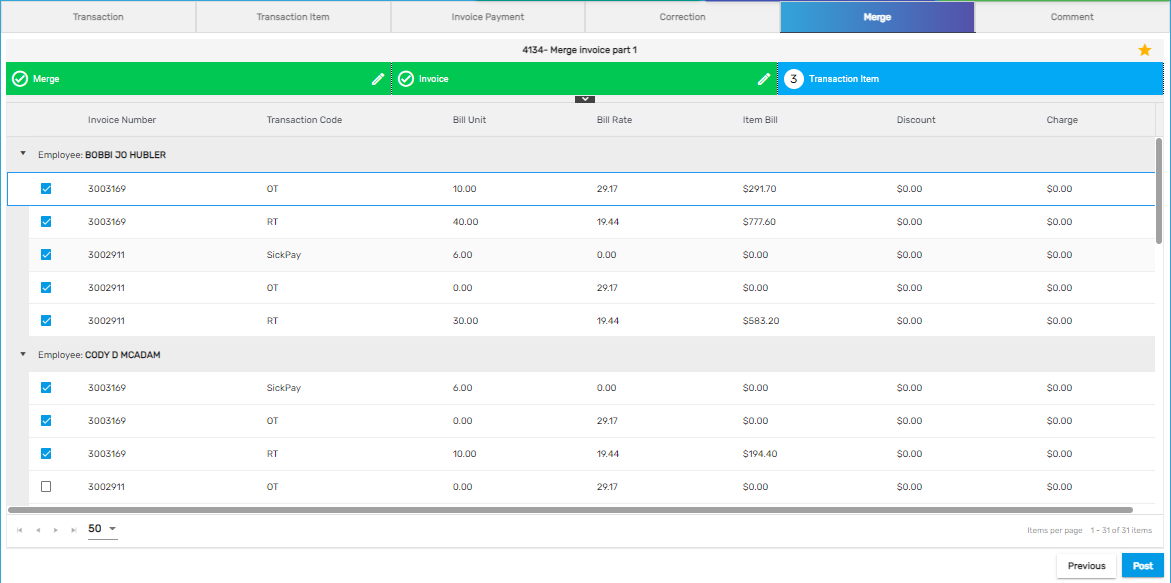
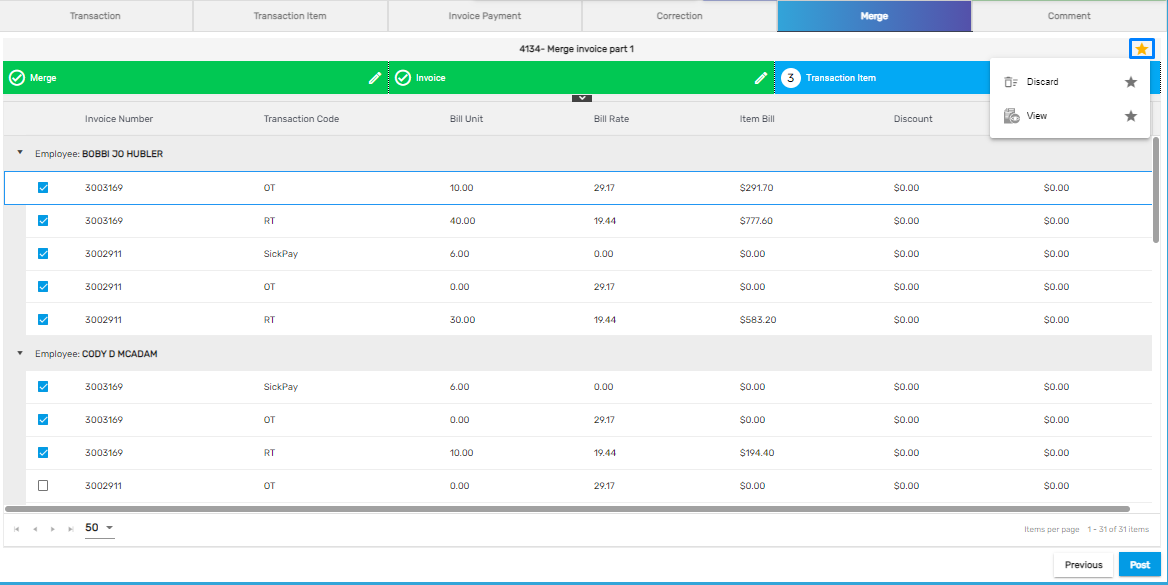
All the transactions which are to be merged into one single invoice are displayed as below. Click on the 'Post' button to merge the invoices.
 There are two actions in the favorite icon. They are:
- Discard
- View
1. Discard
It allows users to discard the merged invoice and delete the merged batch.
2. View
It allows users to view the invoice report of the merged transaction.
 The invoice merge report will display the merged invoices in a single invoice report.
The invoice merge report will be displayed as below:

Comment
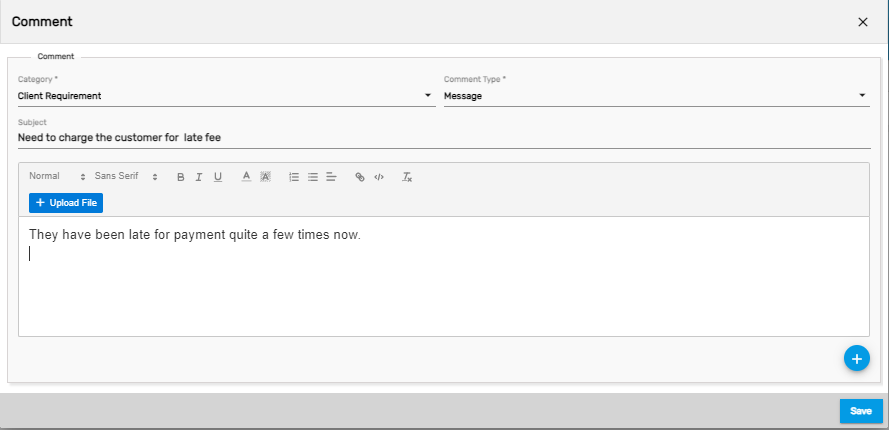
The top navigation, 'Comment' allows users to add and edit multiple comments under various categories and types. Users may also upload the attachment such as images or Excel files with the comment.
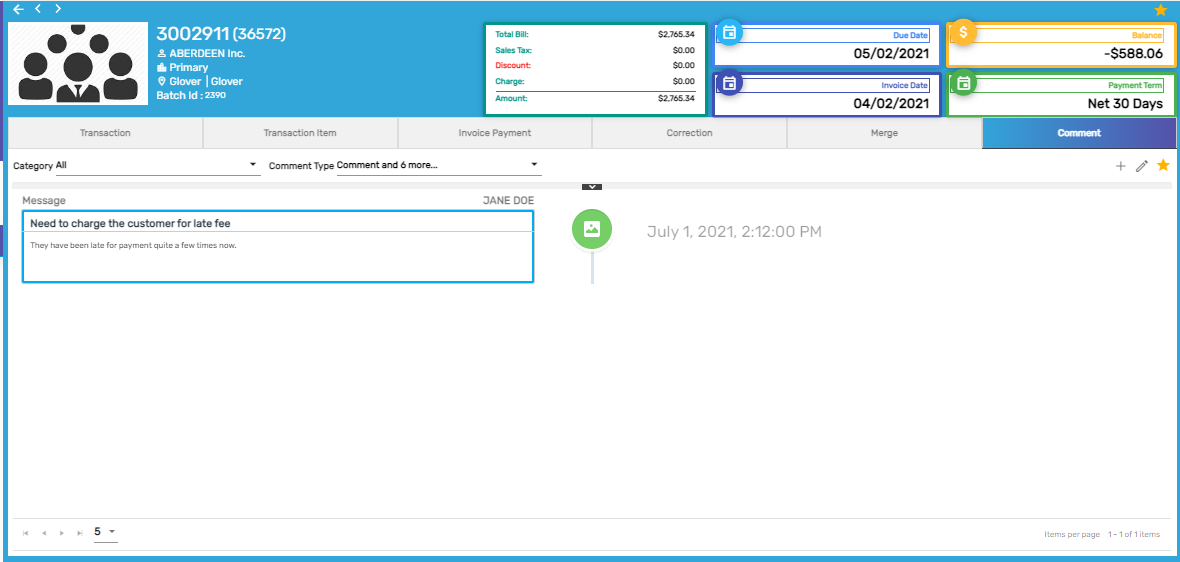
The added comment will be displayed in the comment records with the details of the commenter and the comment date.
Users can view the comment report from the favorite icon.
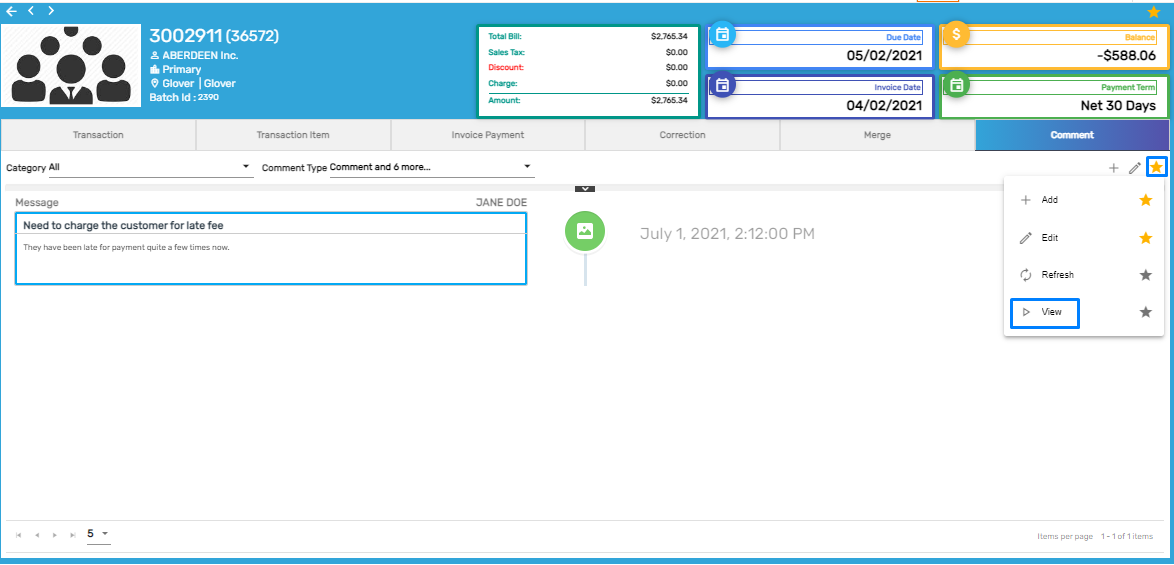
The comment report is displayed below. This report shows comments inserted for the corresponding invoice which is displayed in the invoice detail .
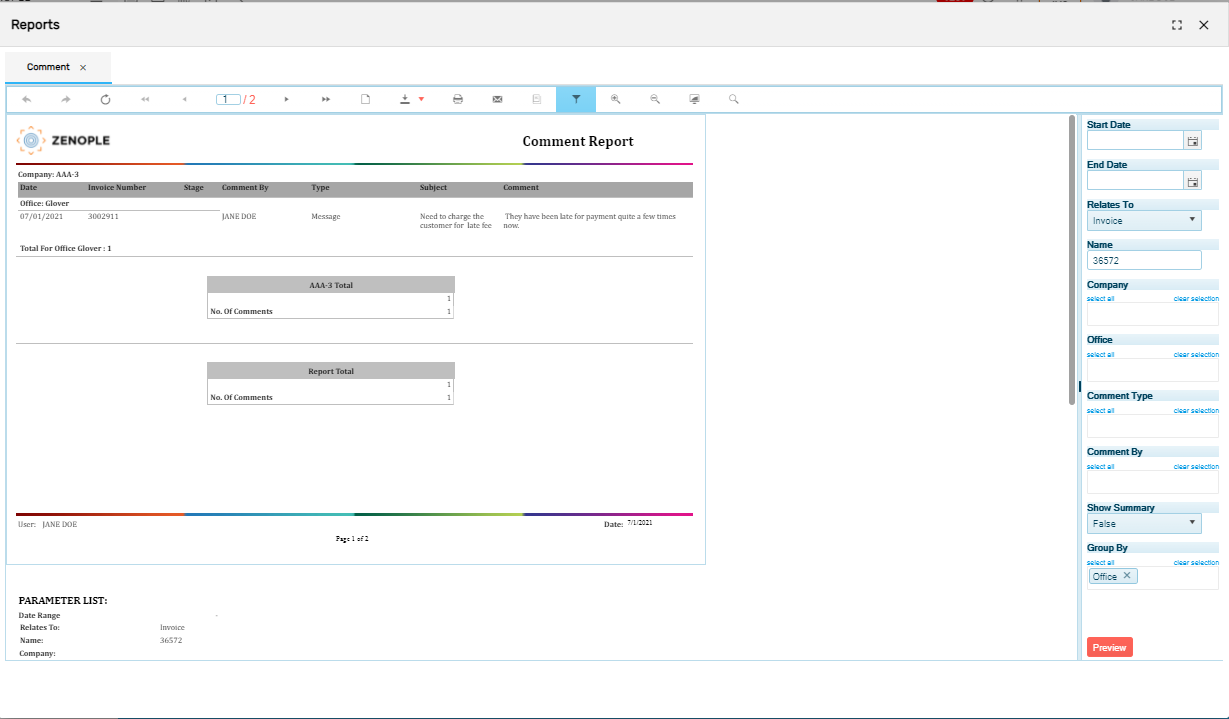
Note: The parameter field seen on the right side of the report allows users to enter the appropriate parameters and preview various other comment reports as required.