Overview
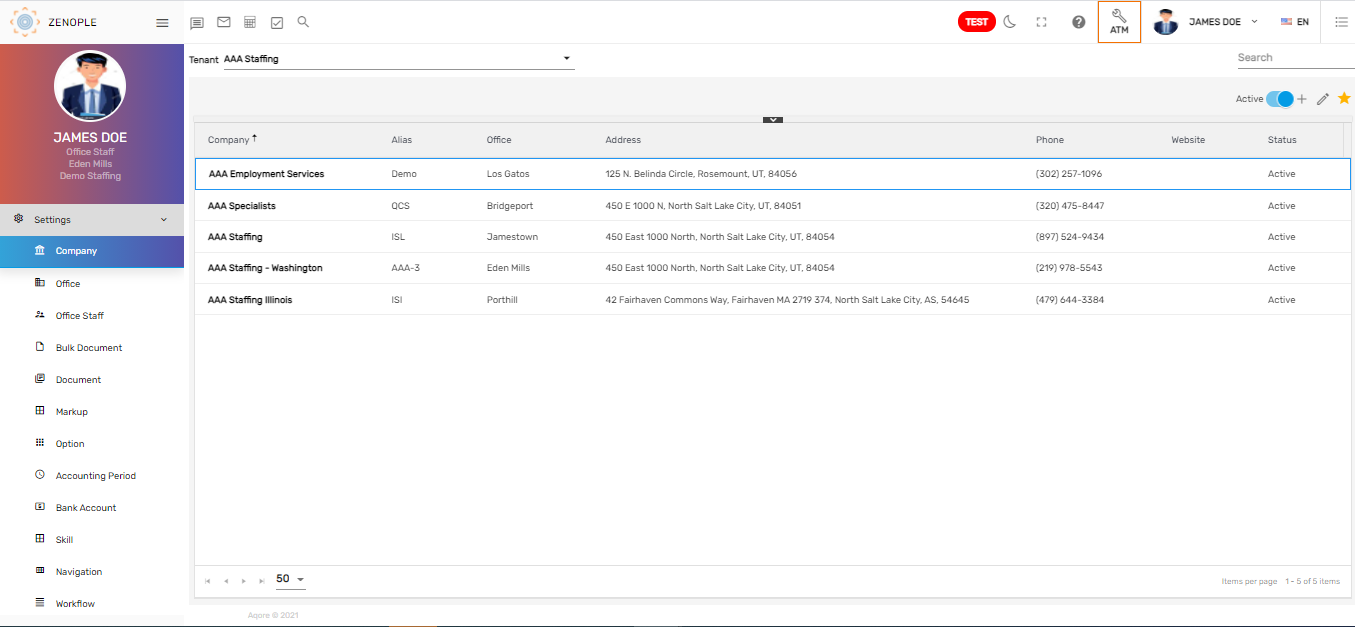
‘Company’ main navigation consists of a list of company records in the directory. It allows users to add and edit multiple companies with company details such as ‘Company Name,’ ‘FEIN,’ ‘Alias,’ ‘Service Type,’ ‘Status,’ ‘Default Office,’ ‘Phone Number,’ ‘Website,’ ‘Address Info,’ and so on.
Users can enable or disable the ‘Active’ toggle button to view active or inactive companies as required and also search for the company from the search box. By default, Active companies are displayed.
Favorite Action
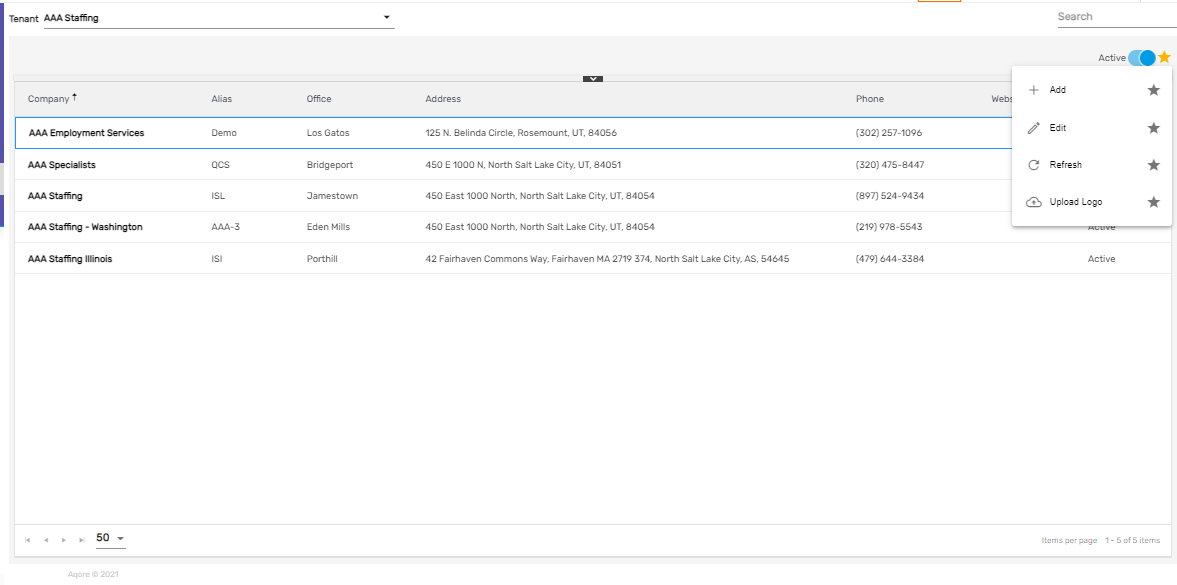
There are four actions in the favorite icon of the 'Company' directory. They are:
- Add
- Edit
- Refresh
- Upload Logo
Add
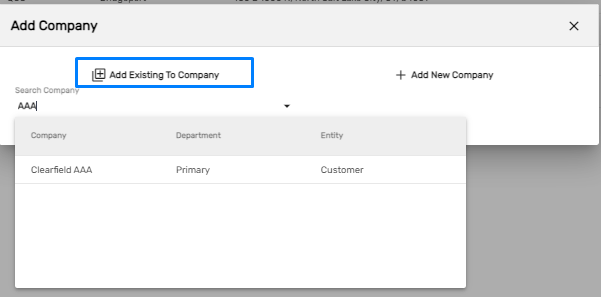
It allows the user to add multiple companies with various company details. The user may ‘Add New Company’ with new company details or ‘Add Existing To Company’ as required.

There are two steps that the user must complete in case of adding a ‘New Company’. They are:
- Company Info
- Company Profile
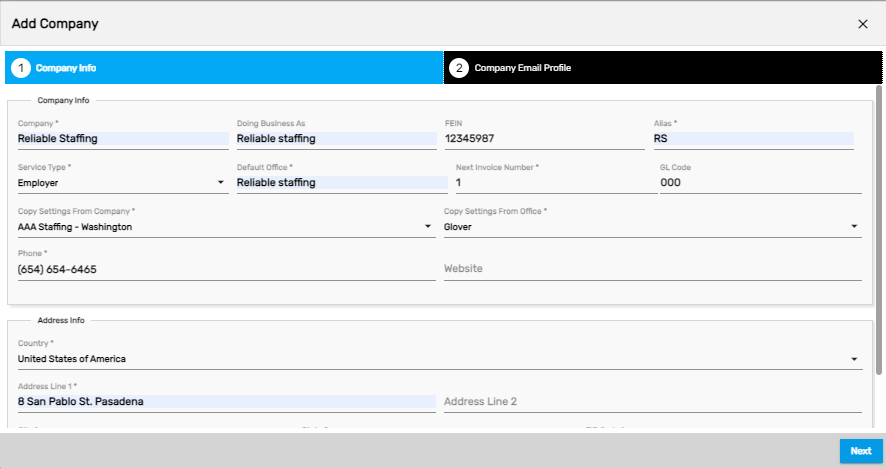
1. Company Info
Users must fill up required details about the company in this step.
| Field Name | Description |
|---|---|
Company | Type the company name |
Doing Business As | Short or renowned name for identifying your company, if you have any |
FEIN | Federal Employer Identification Number |
Alias | Another familiar name or also known as |
Service Type | Type of service that your company gives |
Default Office | Name of your default office |
Next Invoice Number | Starting number for your next invoice |
GL Code | General Ledger Code |
Phone | Contact number |
Website | Website of your company |
Copy Settings From the Company | Choose the company you want to copy the settings from |
Copy Settings From Office | Choose the office you want to copy the settings from |
2. Company Profile
This step requires information about the email profile and credentials settings for the company.
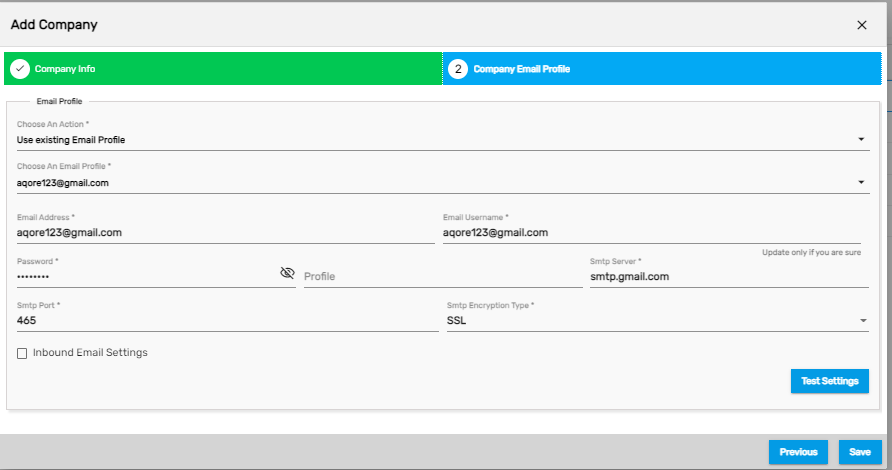
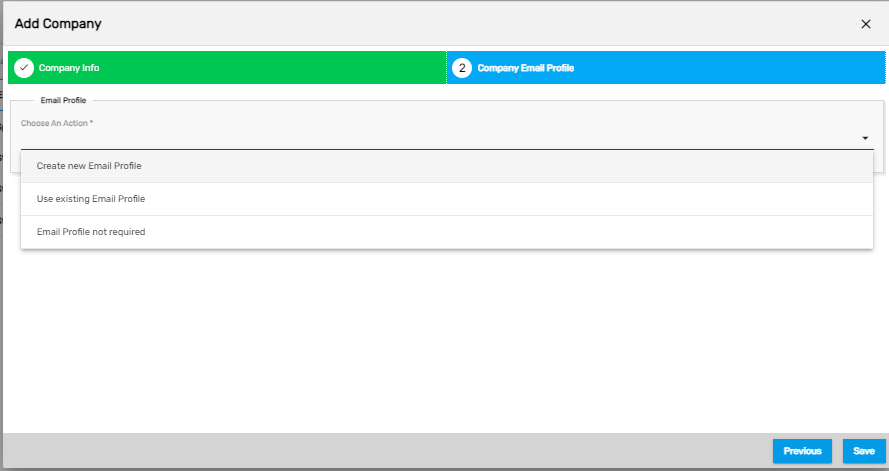
The email profile has three options and they are:
- Create a New Profile
- User Existing Email Profile
- Email Profile Not Require
1. Create a New Profile
It allows users to create a distinct new email profile for the company for official email purposes throughout the application.
2. User Existing Email Profile
It allows users to set up email profiles from the existing email profile available. This will copy all the settings from the selected email profile.
3. Email Profile Not Required
Users may select this option if the email profile is not required for the company.
Users must search for the company from the dropdown to add an ‘Existing company’.
This will copy all the details from the selected company and allow users to make required changes as required to create a new company.
Edit
It allows users to edit and update the company details.
Refresh
It allows users to refresh the company details in case of any changes.
Upload Logo
It allows users to upload various types of logos that will be reflected in the overall application. Six types of logos can be set up for the application. They are:
- Confirmation Page Logo
- Email Header
- Invoice Logo
- Report Logo
- Slider
- Slider Logo

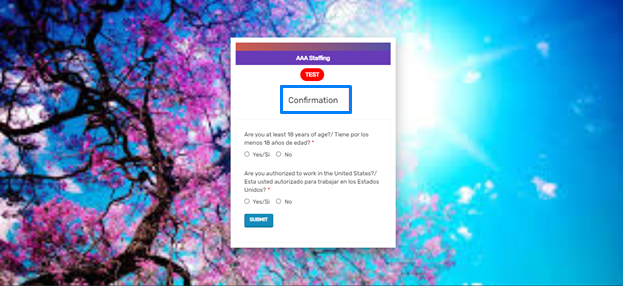
1. Confirmation Page Logo
This logo represents the logo on the confirmation page of the applicant registration page. Users can change the logo if there is already one, by clicking on the cross.

After uploading the logo, it appears on the confirmation page of the applicant registration page.

2. Email Header
This logo represents the logo in the email header while emailing.
3. Invoice Logo
This logo represents the logo in the invoice.
4. Report Logo
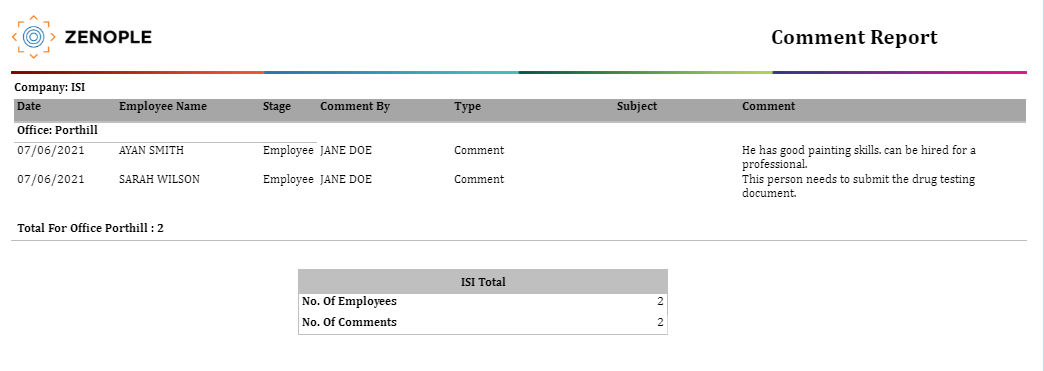
This logo represents the logo in all the reports. Users can upload the report logo using this option.
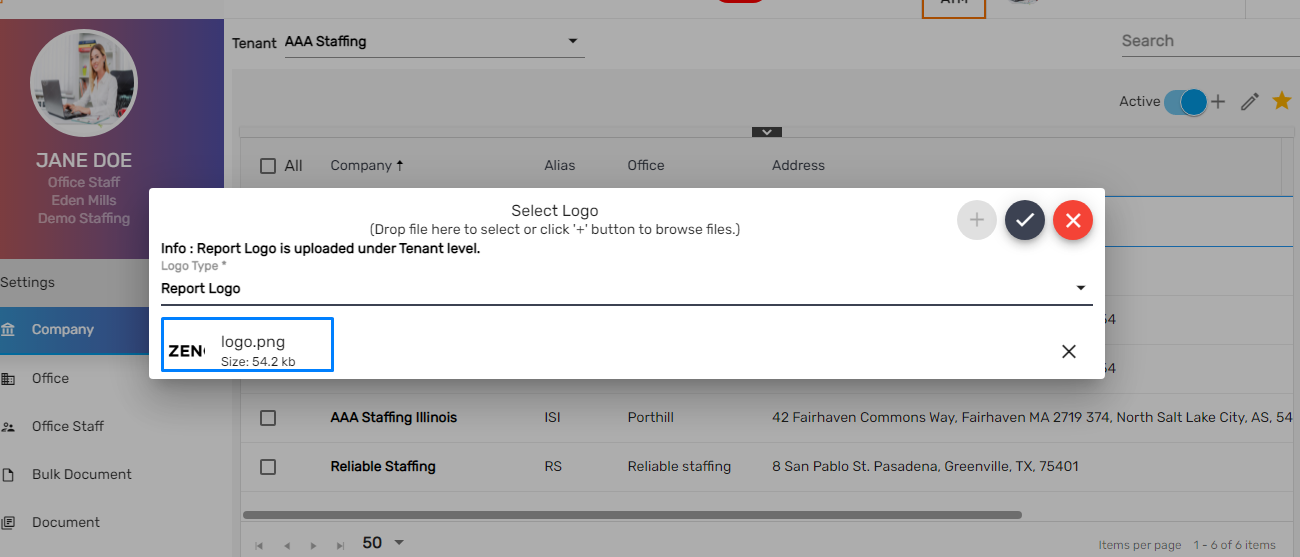
The uploaded logo will be displayed on the reports (paginated reports) while previewing.
5. Slider
This represents the images that will be displayed as slides on the login page.
6. Slider Logo
This logo represents the logo on the login page.
Email Profile setup at Company and Office level
Zenople application allows users to set the Email Profile for sending automated and manual emails.
Email Profile can be set from the ‘Email’ icon of the ETC section.
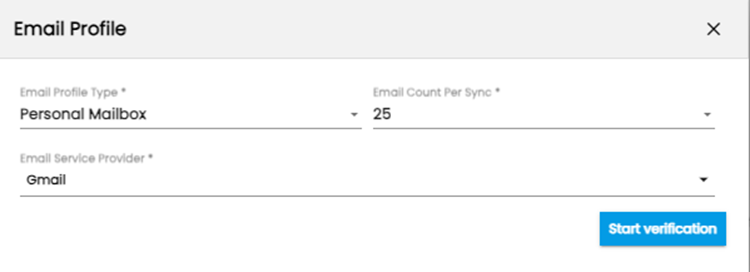
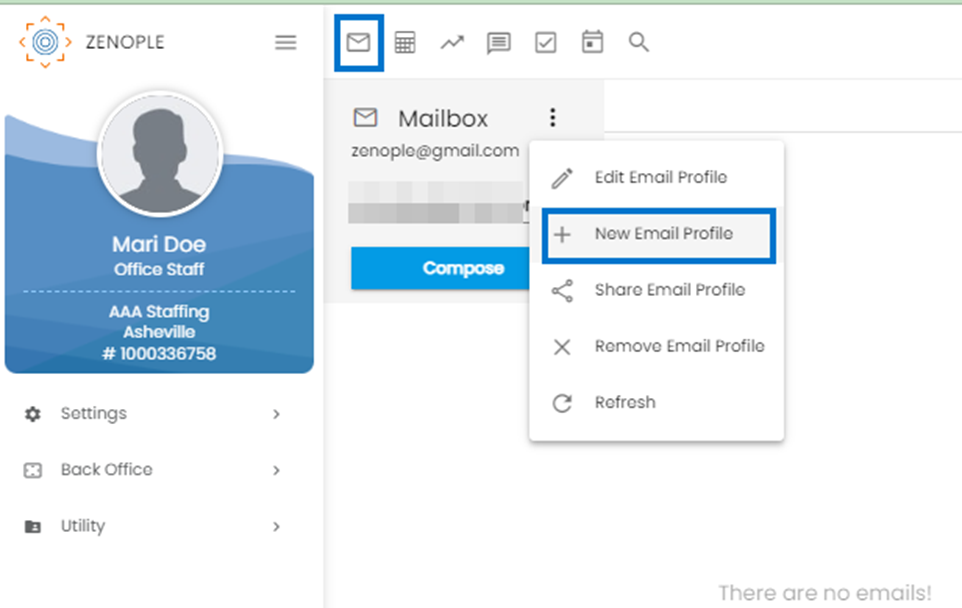 Select ‘Use OAuth verification’ from the Email Profile window.

Enter all the necessary information as per requirement then click on Start verification.
Users will then be directed to the Email verification page.
At the company level, users can define company level email profiles that apply to all offices within the company. The company-level email profile can be set by going to the detailed page of the company.
Users can go to the ‘Email Profile’ side navigation of the ‘Others’ main navigation as show in below.
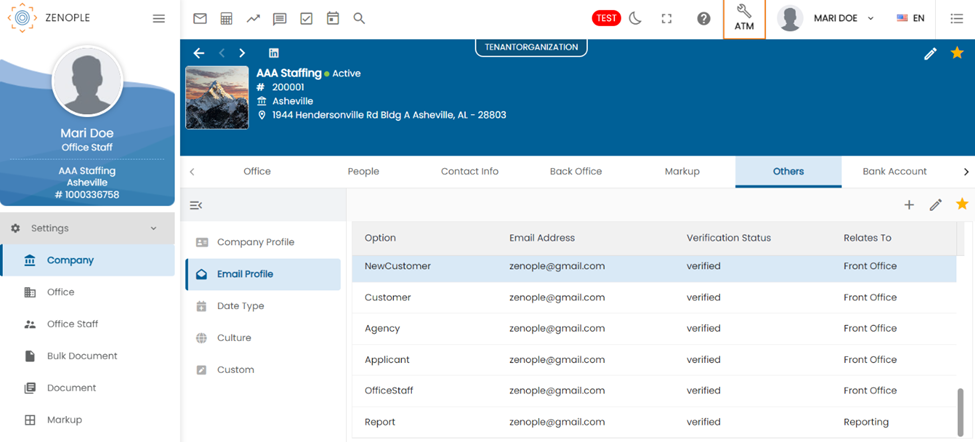
Email profile can be added by clicking on the ‘+’ Add icon from the top right corner of the Email Profile Window.

The following entities can be selected from the Select Options dropdown field:
Agency | NewHire |
Agent | OfficeStaff |
Applicant | Payroll |
Assignment | System |
Customer | Target |
Employee | TempAgent |
Invoicing | Timesheet |
JobCandidate | Unemployment |
Lead | WorkInjury |
NewCustomer |
|
Here are some examples about entities setup to send an email profile.
Office Staff | For instance, if a user set ‘officestaff@gmail.com’ as an Email Profile for an option selecting entity name ‘Office staff’, an email sent regarding the office staff like Welcome email, Transaction batch close email will be sent by using the email profile ‘officestaff@gmail.com’. |
Temp Agent | For instance, if a user set ‘tempagent@gmail.com’ as an Email Profile for an option selecting ‘Temp agent’, an email sent regarding the Temp Agent like sending email for authorized representative for reviewing I-9 forms will be sent by using the email profile ‘tempagent@gmail.com’. |
Lead | For instance, if a user set ‘lead@gmail.com’ as an Email Profile for an option selecting ‘Lead, an email sent regarding the Lead like New Client Approval task completion email will be sent to the 'Entered By' User Role by using the email profile 'lead@gmail.com' |
Target | For instance, if a user set ‘target@gmail.com’ as an Email Profile for an option selecting ‘Target, an email will send by completion the following tasks
|
System | For instance, if a user set ‘system@gmail.com’ as an Email Profile for an option selecting ‘System’, an email will send to the employee for |
|
|
Report | For instance, if a user set ‘report@gmail.com’ as an Email Profile for an option selecting ‘Report, Report viewer will have an option to send an email by using the email profile report@gmail.com. |
Agent, Agency | No need to setup an email profile for these entities. |
Users can select different emails under the ‘Choose an Email Profile’ field.
The list of Email Profiles that has been added from ‘Add Email Profile’ section of the ETC, gets displayed in this field.
In the case of Report Subscription, no additional setup is required.
Same email setup can be configured from the office level setup from the Office external navigation->Others->Email profile option as shown in below.
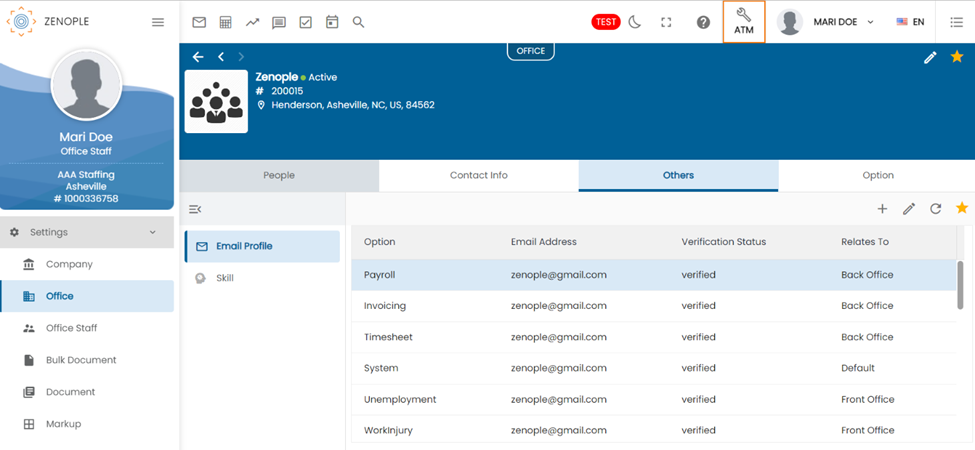
For instance, if a user set ‘zenople@gmail.com’ as an Email Profile for an option selecting ‘Applicant’, all the emails sent regarding the applicant will be sent from the email profile ‘zenople@gmail.com’.
Likewise, the similar functionality works for different email profiles for different options.
The following setup is implemented for different case scenarios:
- If an Email Profile has been setup at Company level, all the emails get sent by the email profile set at Company level.
- If an Email Profile has been setup at Office level only, all the emails get sent by the email profile set at Office level.
- If an Email Profile has been set up at both the Company and Office level, all the emails get sent by the email profile set at Office level rather than Company level.
- If an Email Profile has not been set up in any level, email delivery is halted.