Overview
Payment allows users to create a new batch and process the payment company-wise. Users can search and check all the pending payments and previous payments from the system.
Add AR Batch
Users must select the organization and accounting period before creating the payment batch. The 'Add' icon redirects users to the 'AR Batch.' Further, users need to select the bank account and proceed.
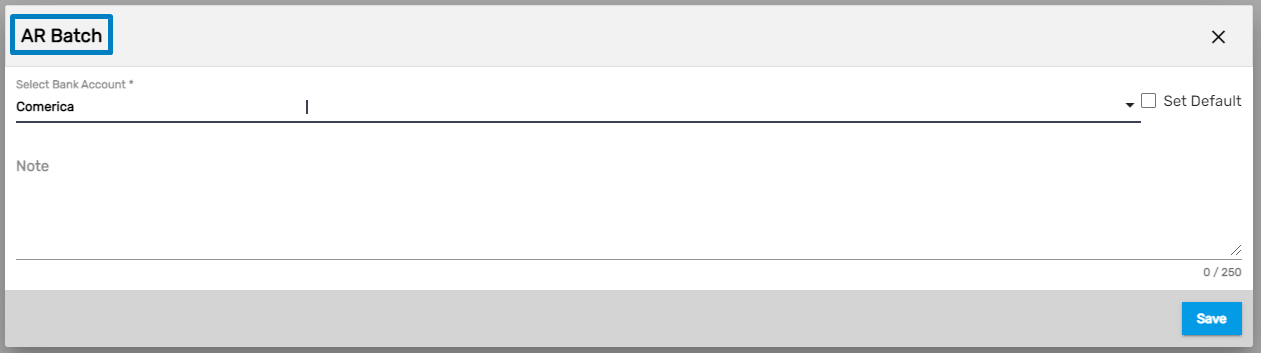
Users can discard and edit the added batch by clicking on the vertical ellipsis button.

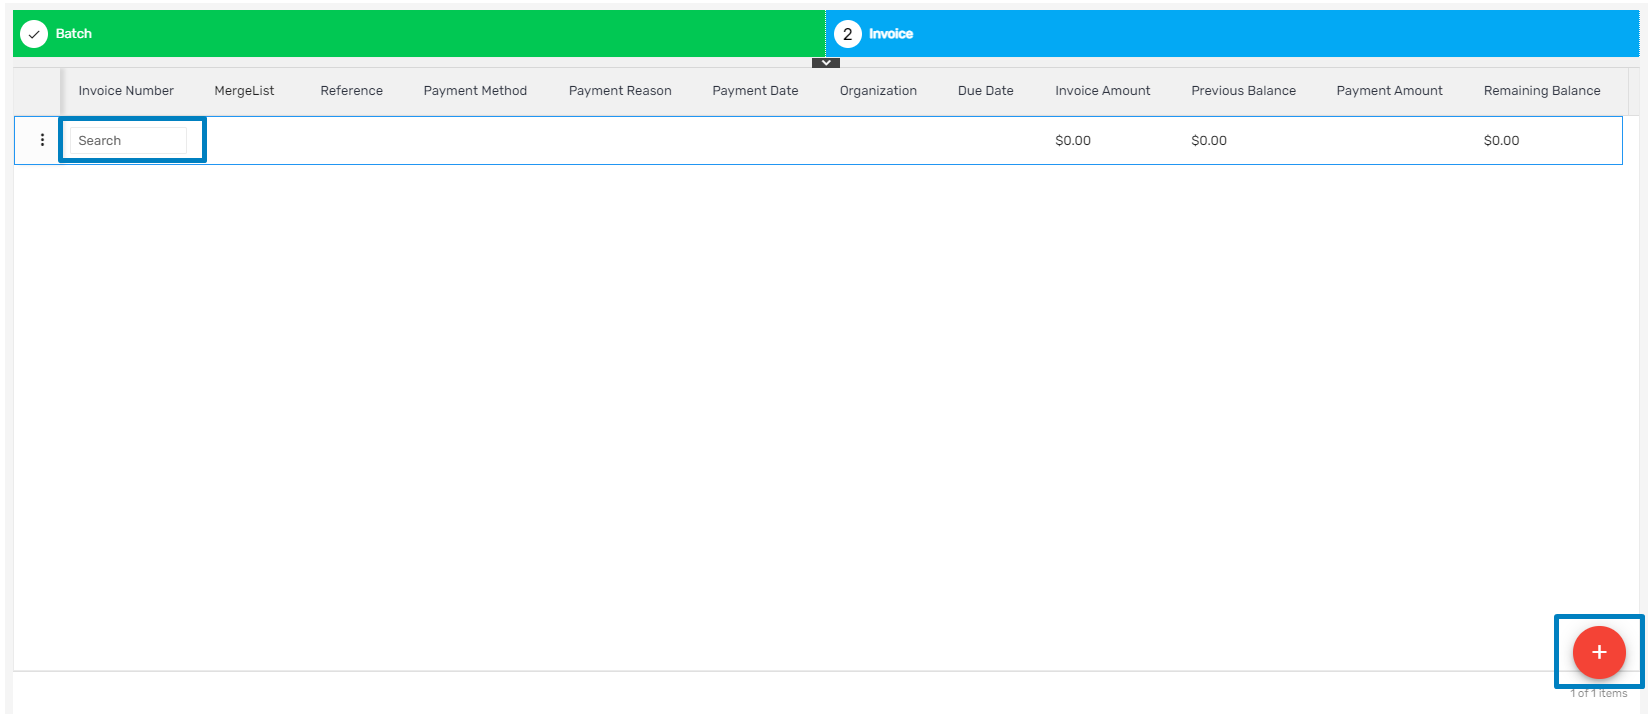
Invoice
There are two different methods for payment.
- Users can do a single payment by entering the invoice number generated from the Invoice Management System (IMS) application.
- Users can click on the ‘Add’ button and proceed with the customer wise payment.
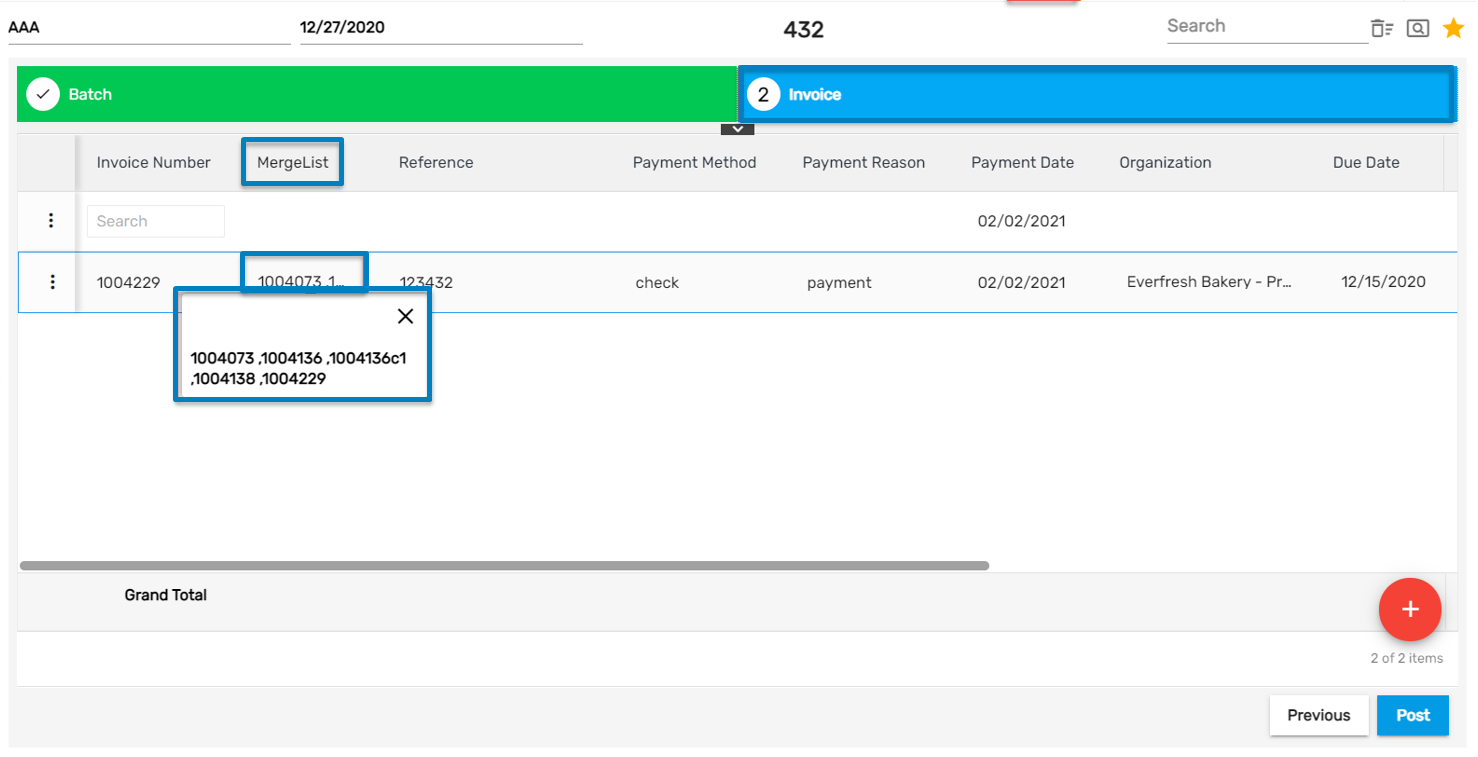
Merged Invoice List
Users can view the merged invoice list by clicking the 'MergeList' Invoice Ids, and can be copied when clicked on the merge list column grid.
Add Payment
The ‘Add’ button redirects users to the 'Payment' dialog box.
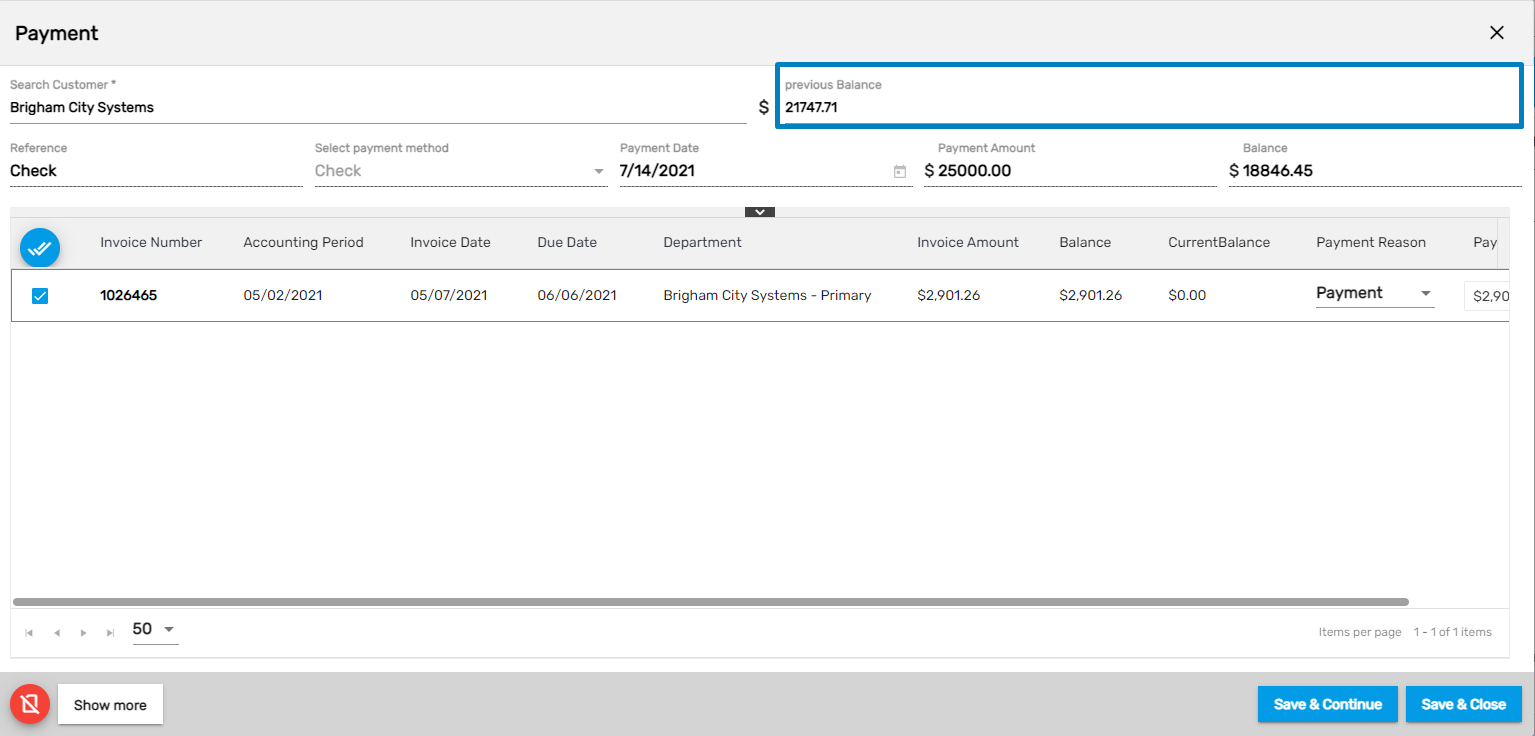
- Users need to search the customer they want to do payment of
- The 'Reference' field is mandatory and it can be either a check or a card number.
- Select the payment method. It can be either a check or credit card.
- Select the payment date
- Enter the payment amount. The balance amount is equal to the payment amount at first and then the balance amount decreases simultaneously as payments are made to the invoice.
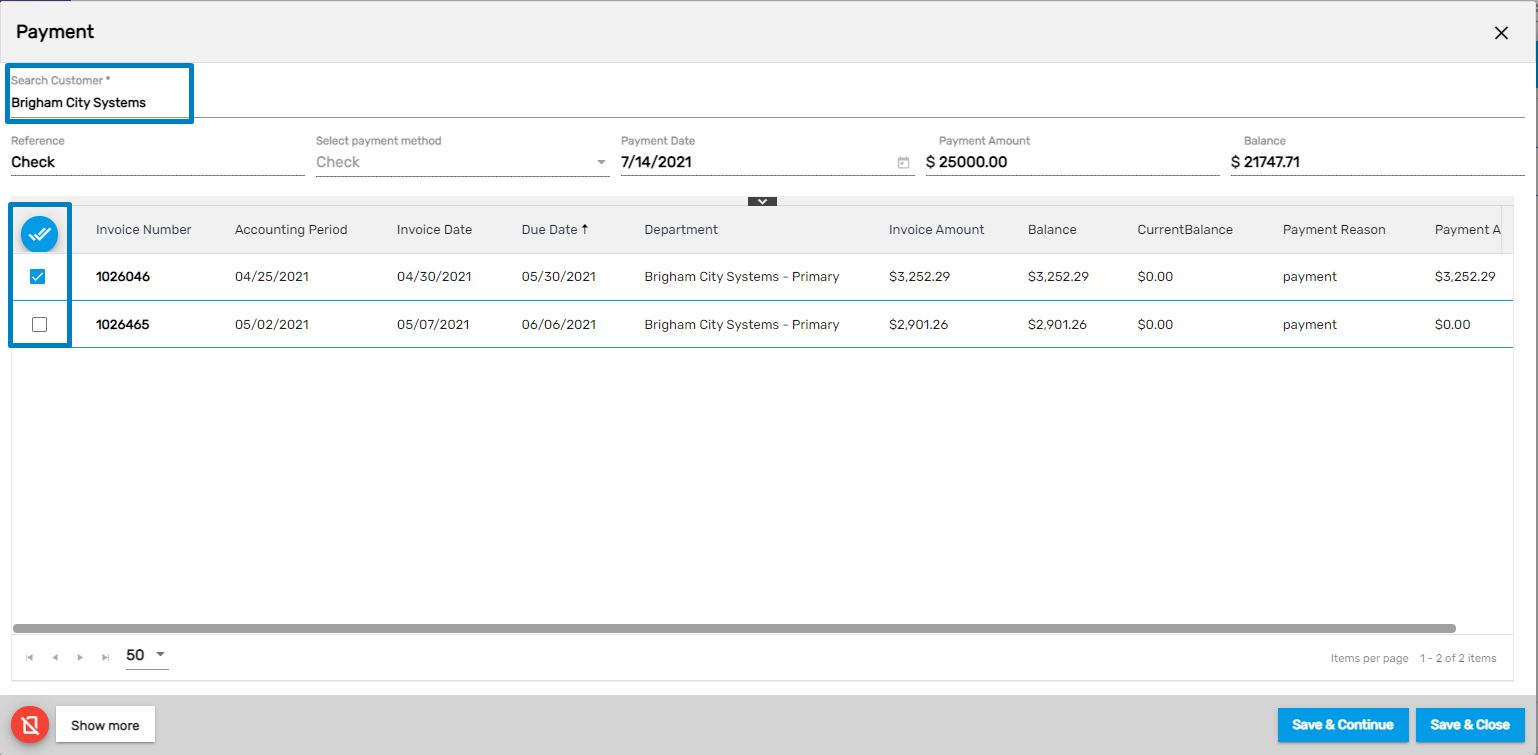
Select the invoice and proceed with payment. Users can edit and update the payment amount as well.
Note: Users can multi-select the invoice list during invoice payment. Selected invoices can be saved by using the 'Save & Continue' or 'Save & Close' action.
Users have two different options ‘Save & Continue’ and ‘Save & Close’. Selecting 'Save & Close' payment closes the dialog box while 'Save & Continue' allows users to continue the payment for the remaining balance.
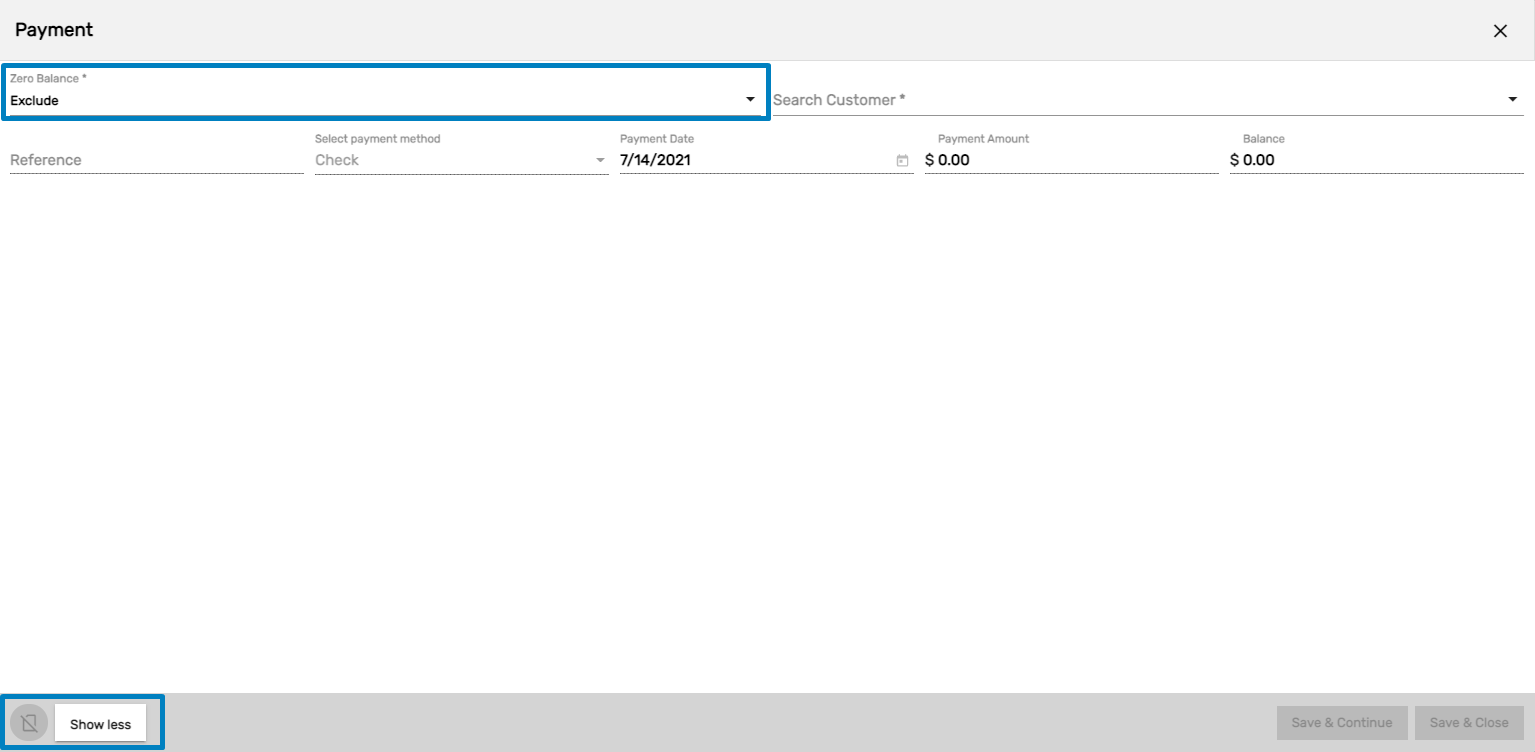
The ‘Show More’ button at the end of the dialog box allows users to view another field ‘Zero balance.’ Users can choose to include/exclude zero balance invoices.
If users want to continue the payment, then they can search for the same customer and proceed. Users can view the details of the previous balance by using the drop-down ‘Previous Balance’.
Users can do the advance payment without applying to any invoice. Users need to enter ‘Advance’ in reference and proceed.
Users can do the invoice overpay payment or create a credit memo or even ask about the payment. To set up, go to the ‘ATM’ application.
- Go to setting and click on ‘Option’ navigation.
- Select entity as ‘Company’ and search credit
- Select the default value as ‘Overpay Invoice,’ ‘Credit memo,’ or ‘User.’
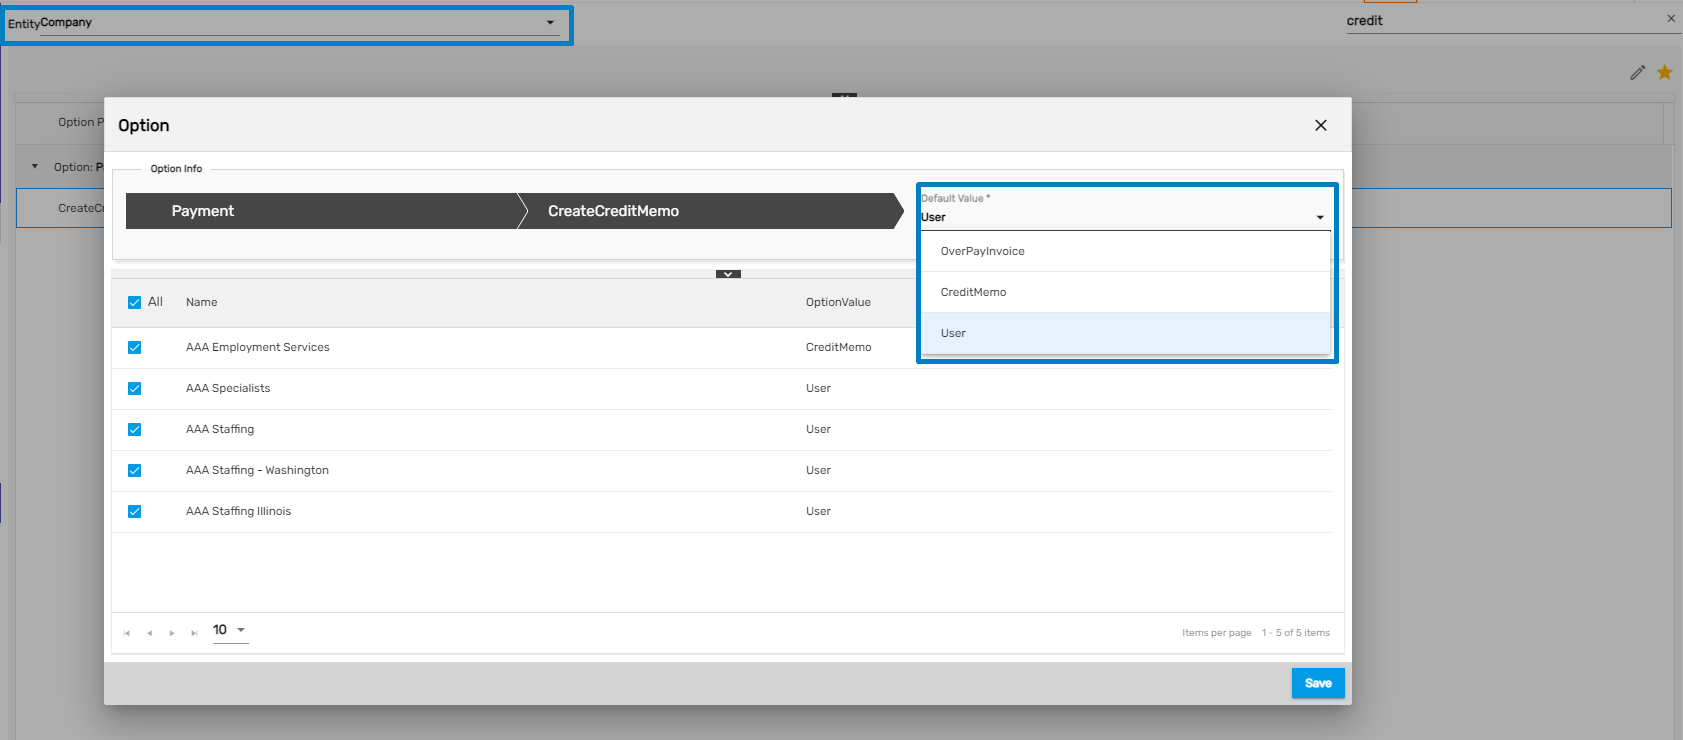
We have two 3 options to process the credit memo:
1. Credit Memo: During the invoice payment if an overpayment is made then the remaining balance can be applied to other invoices. For example: If the invoice to be paid is $500 and the customer has sent $600 then the $500 will be applied to the invoice and $100 will be set as a remaining balance for that customer so that, in the next invoice payment that $100 can be applied to a new invoice.
2. Overpay Invoice: This option will apply all the paid balance to that invoice and make an extra payment to the invoice and the balance of the invoice will be in a negative amount. For example: If the invoice to be paid is $500 and the customer has sent $600 then $600 will be applied to that invoice and the invoice balance will be -$100 and that $100 will not be shown for other invoices.
3. User: This will basically ask the user to choose between Credit memo and Overpay Invoice each time they apply for payment when the applied amount is greater than the invoice amount.
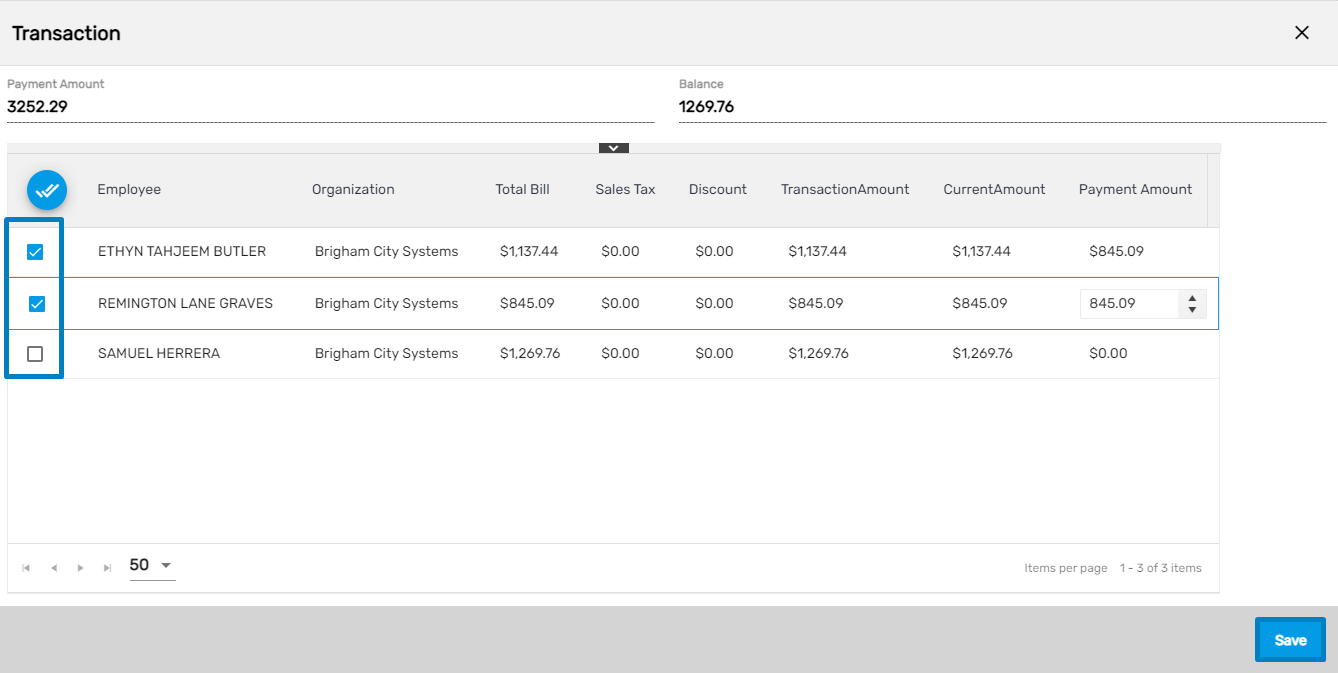
Add Transaction
The vertical ellipsis button allows users to ‘Add Transaction’. The invoice consists of multiple transactions. If the users don’t want to pay for a certain transaction, then they can ‘Add Transaction’ and proceed.
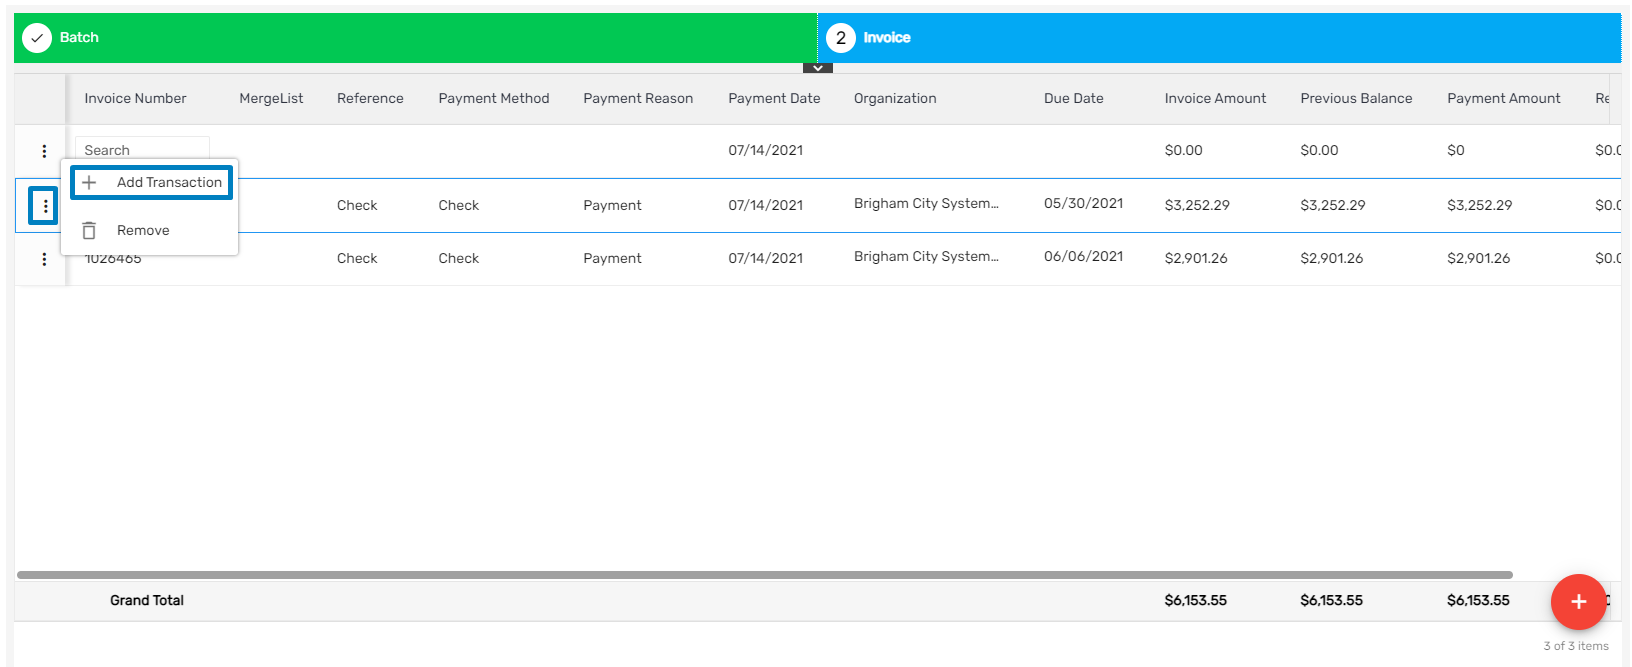
The ‘Transaction’ dialog box opens on clicking the ‘Add Transaction.’ Users can select the required transaction and save it.
Remove
The vertical ellipsis button also contains the ‘Remove’ feature from where users can remove the invoice payment.
Favorite Action
There are four different actions in the invoice. They are:
- Discard
- Payment
- Post
- Summary
1. Discard
The ‘Discard’ action allows users to select the invoice and discard the batch
2. Payment
The ‘Payment’ action allows users to view the slider view of the payment details of the selected invoice.
3. Post
The ‘Post’ action allows users to post the AR batch.
4. Summary
The ‘Summary’ action allows users to view the AR Batch report of the company with all the payment details.