Overview
'Time Clock' main navigation in TMS is a summary of time entry. Choose the 'Company' and 'Time Clock' of the organization to view the time entry details.
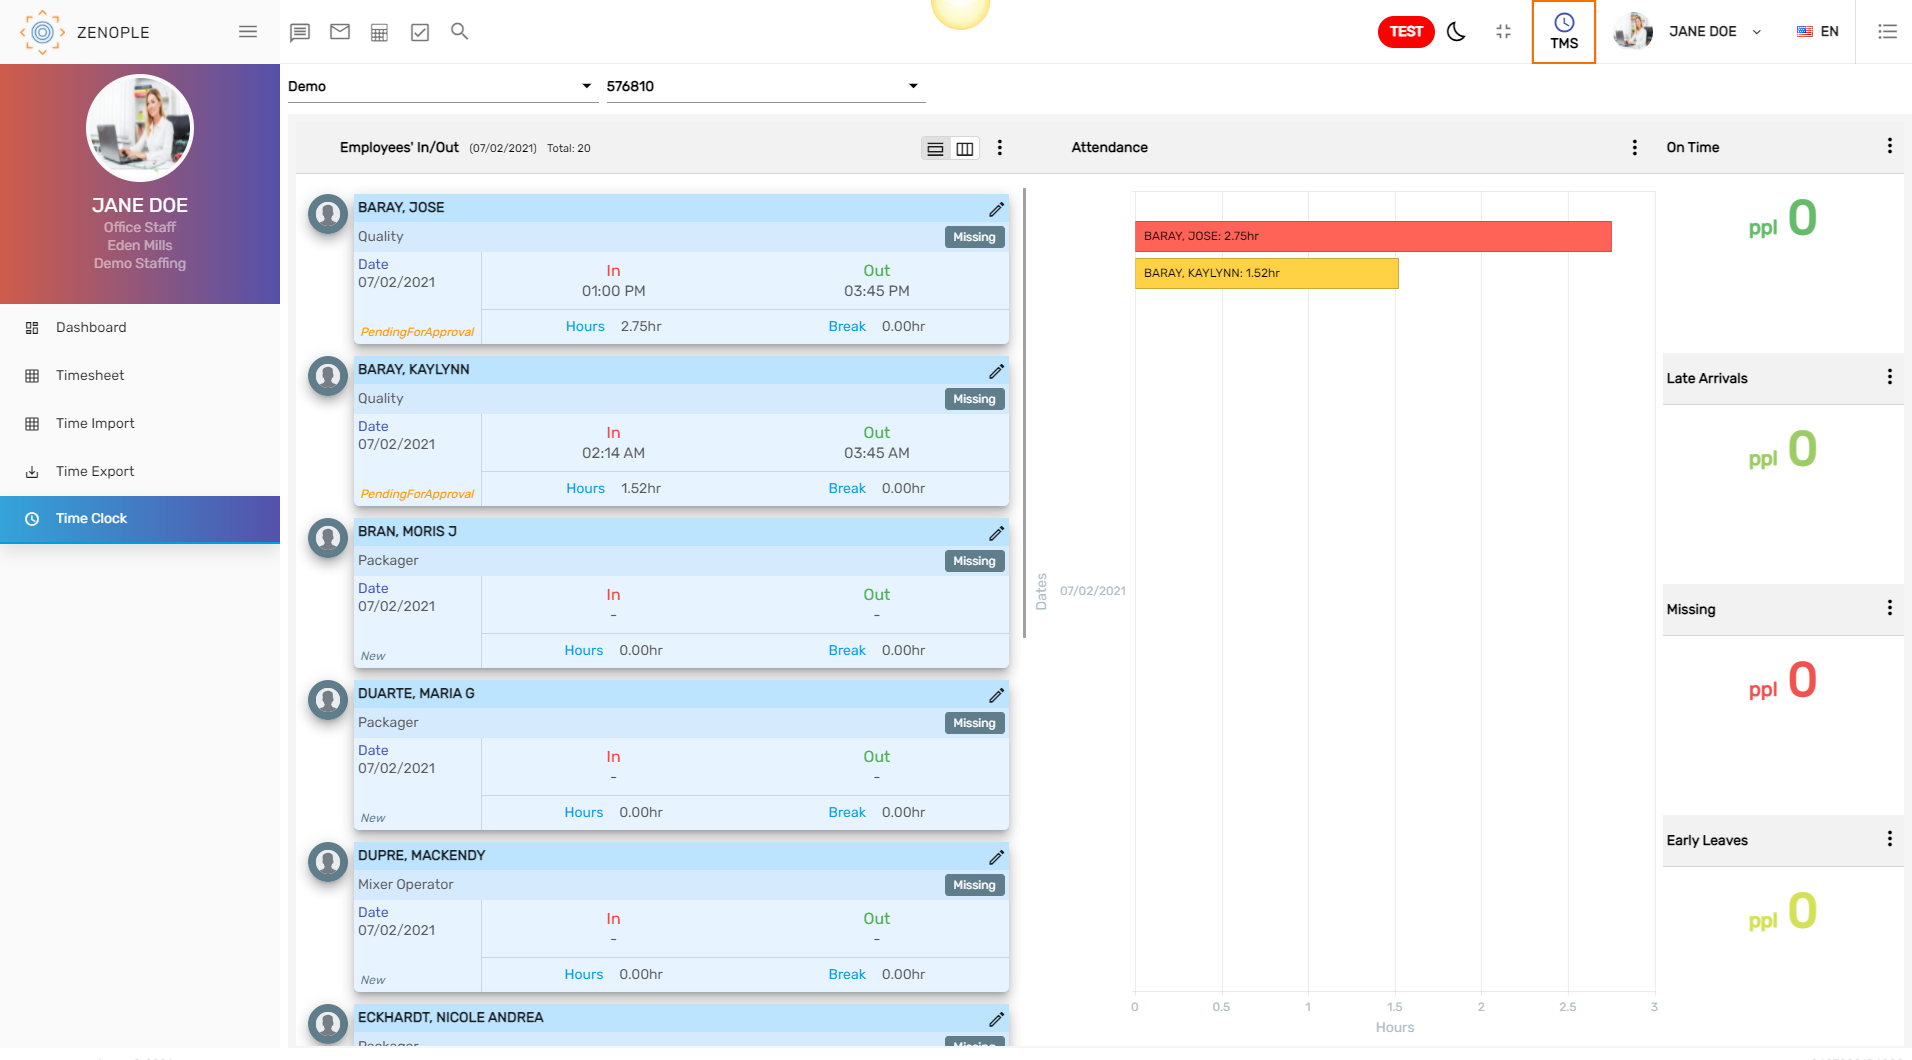
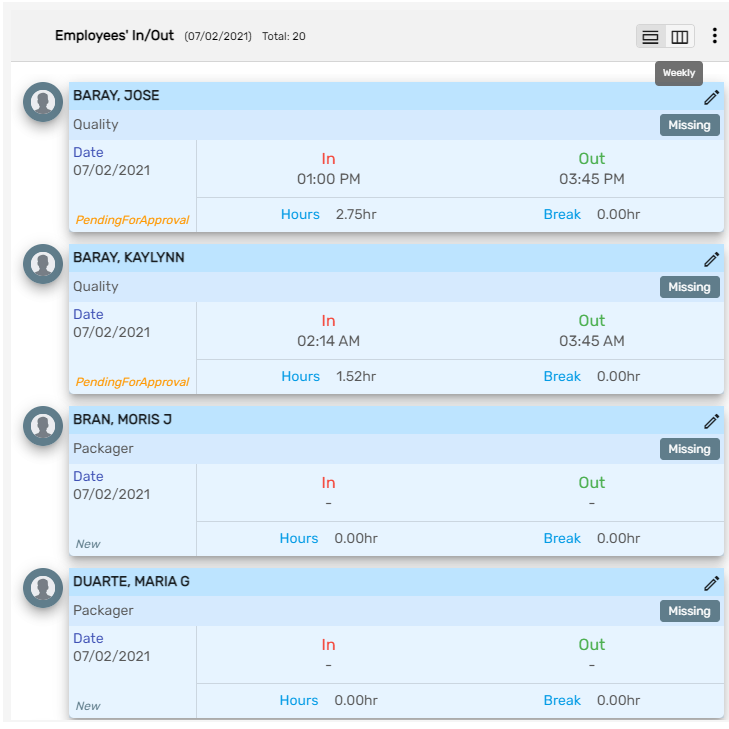
Employees' In/ Out
You can view the time entry of employees on a daily or weekly basis. The status of time entry is also shown.
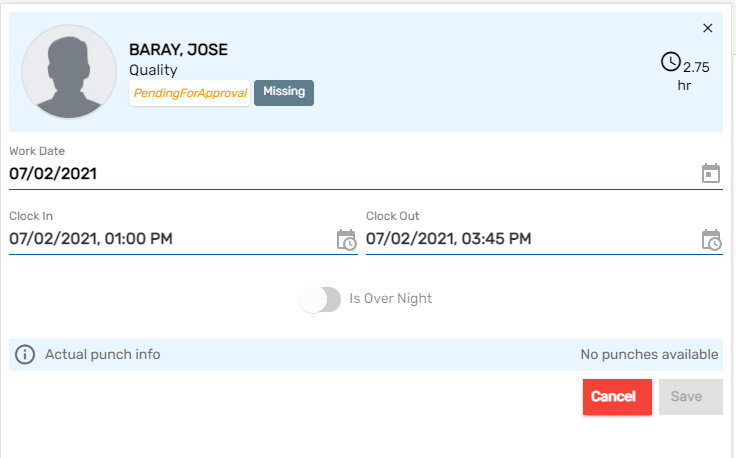
Users can update the employee's time entry by clicking on the pencil icon. After editing the information, users can save the changes. Punch information can also be seen if available.
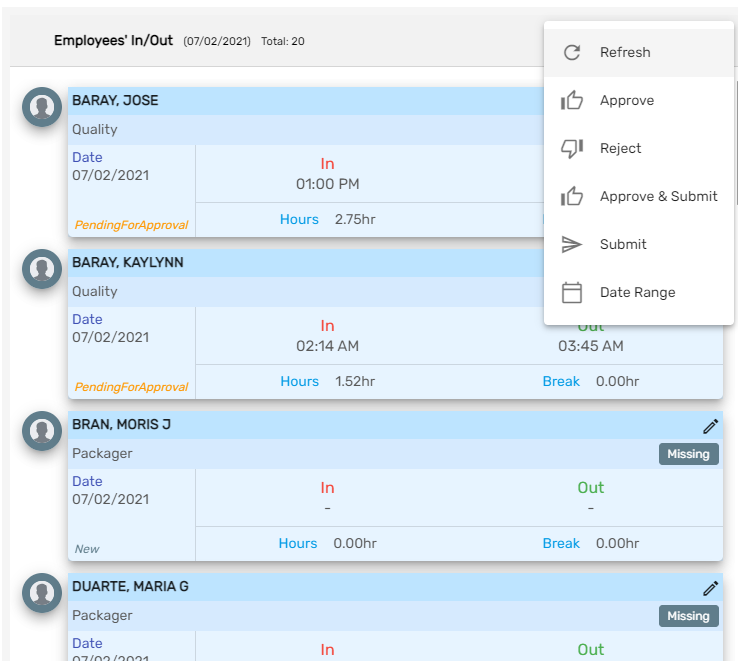
Multiple actions are available on the vertical ellipsis beside Employees' in/ out. They are:
- Refresh
- Approve
- Reject
- Approve and Submit
- Submit
- Date Range
1. Refresh
The refresh button is used to refresh the time entry details.
2. Approve
Approve action is used mostly by the time approver to approve the time entry of an employee. Once the time entry is approved, the status is changed to 'Approve.'
Users can see the lists of those employees whose time entry needs to be approved by clicking on Approve.
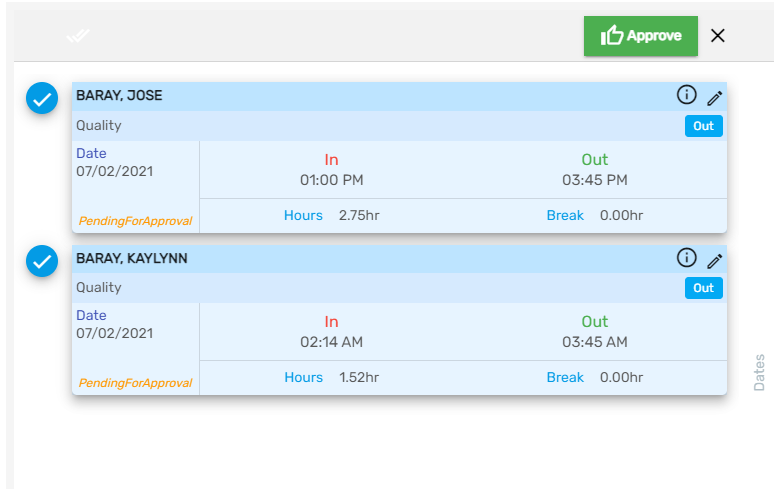
Users can edit the time entry if required and approve the time entry.
3. Reject
The user can reject time entry by clicking on reject action.
4. Approve and Submit
If the 'Approve and Submit' button is clicked then it is directly submitted to the timesheet. Mail will be sent to the email recipient of TMS and the payroll specialist of the office associated with that organization/ customer.
The payroll specialist as well as the group emails listed in 'Email Recipient' will get the notification when the timesheet is submitted.
The steps to set up the email recipient are:
Go to the ATM option tab and edit 'Email Recipient'
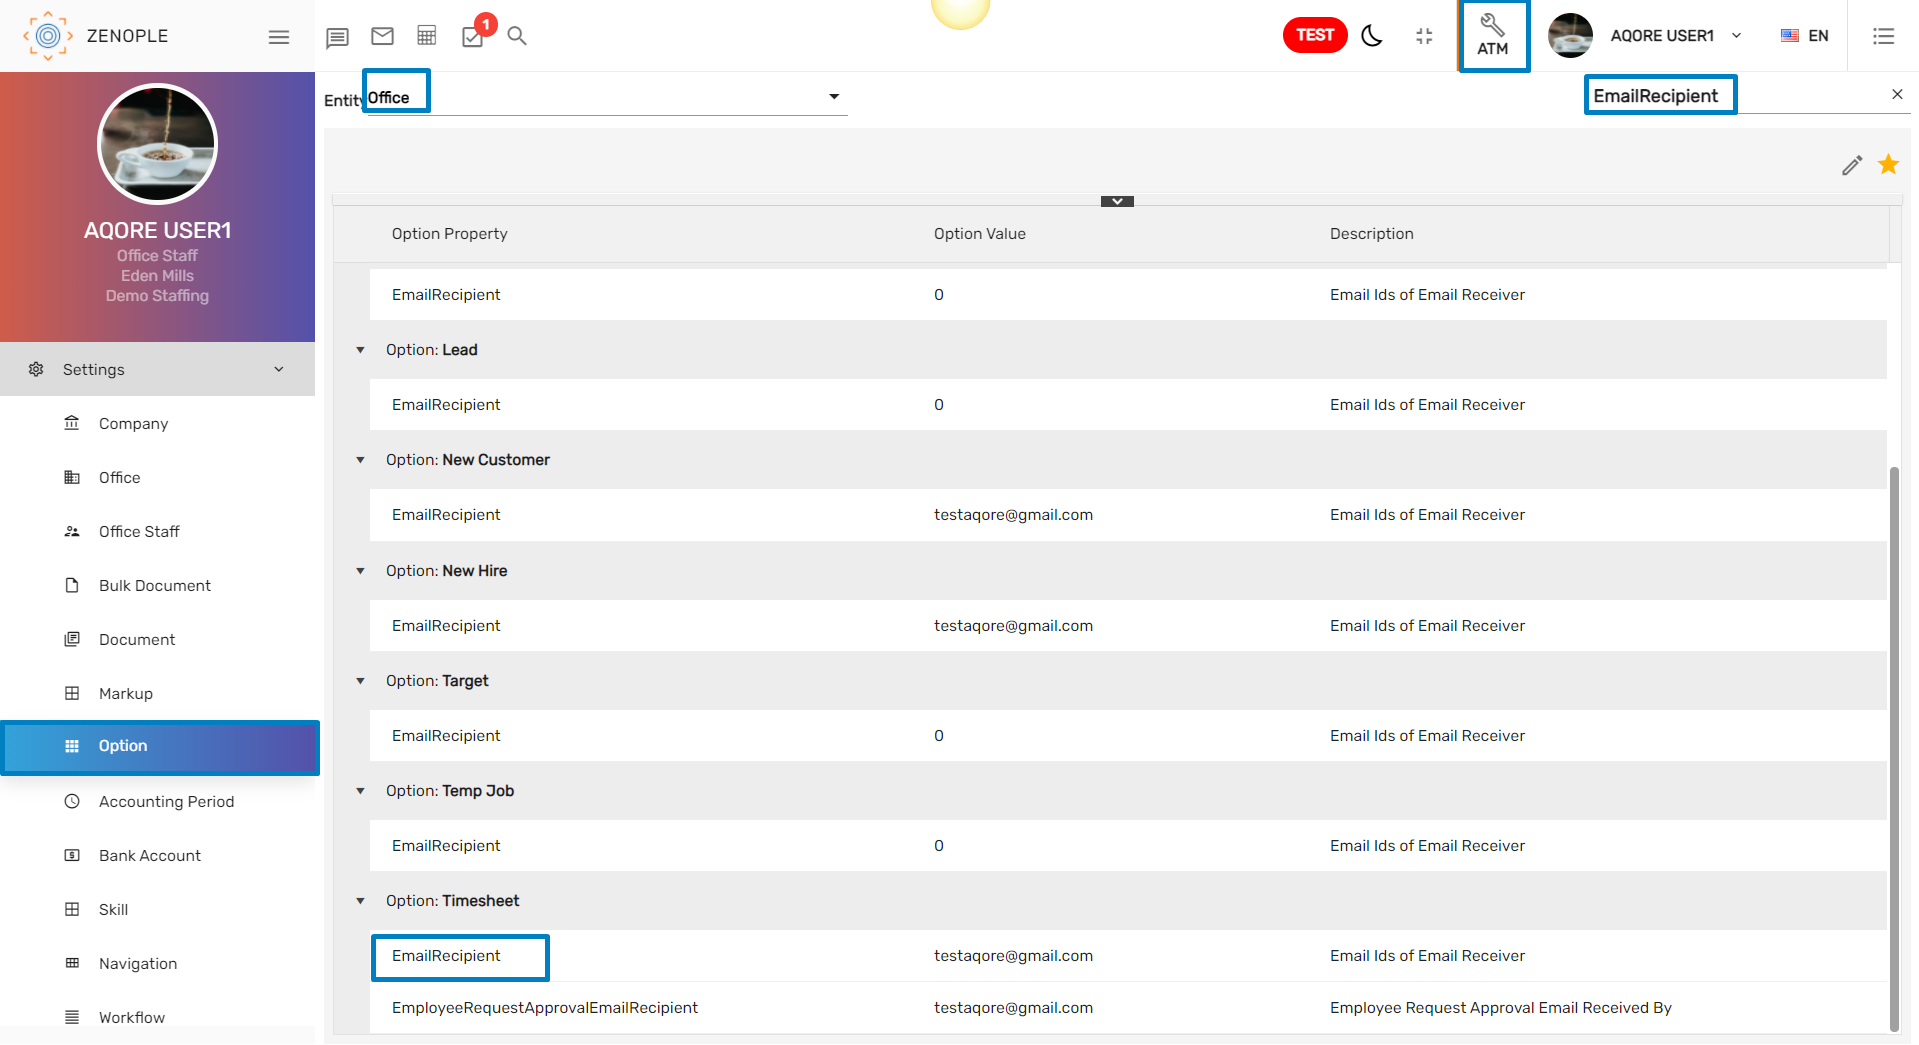
Step 2
Edit 'Option' by separating email addresses with a comma and without any space.
For example, john.doe@aqore.com,mary@aqore.com
If you want to apply for all offices, check all and save. If you want to apply for a specific office, you can use a filter, select that office's checkbox and save.
5. Submit
Users can send emails to the email recipient of TMS and the payroll specialist of the office associated with that organization/ customer by clicking on the 'Submit' button.
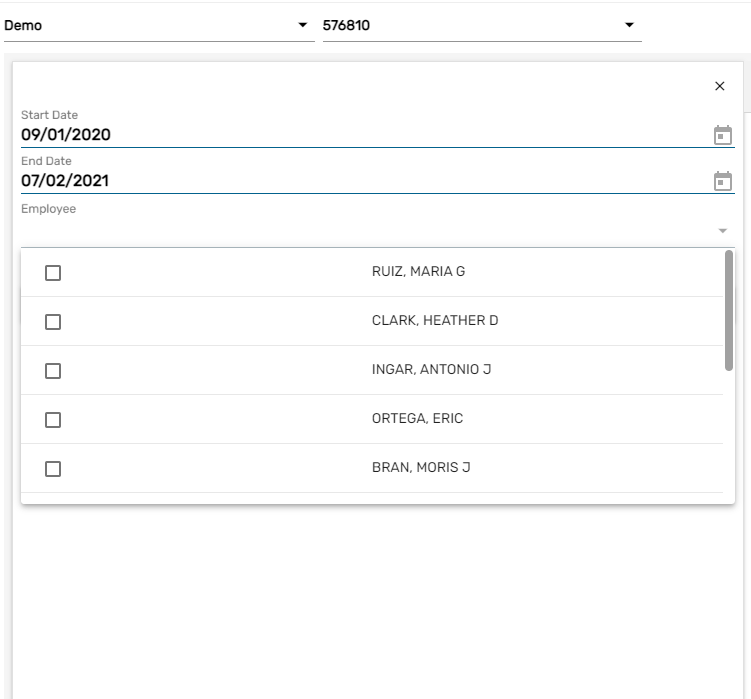
6. Date Range
Users can select the date range and view the time entry of employees within the selected date range.
Attendance
Users can see the employee's working hours in a horizontal bar chart. Moreover, users can view it daily, weekly, or in the selected date range. 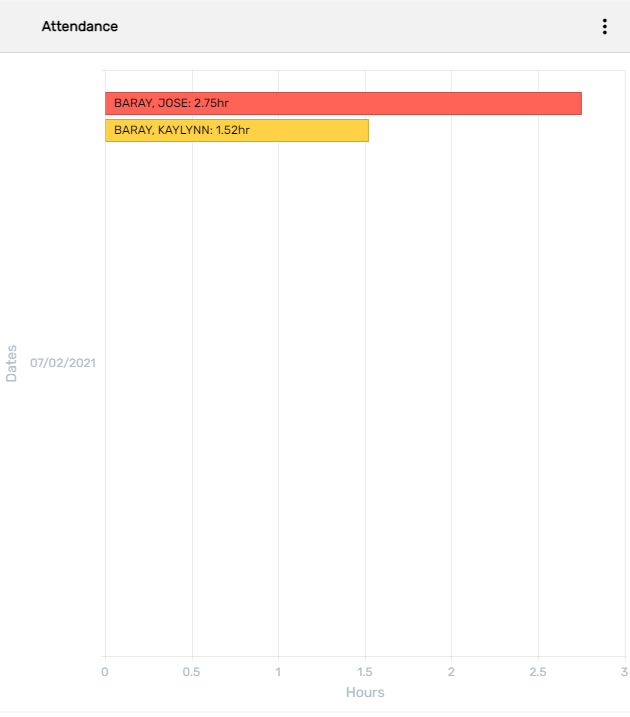
Tiles
Time Clock tiles allow users to see the number of employees who are on time, late arrivals, those who missed punching, and those who took early leaves.