Features Added on TMS
The features added on TMS are:
Exception For California OT Plan Added
Users will see an exception of type ‘Warning’ if the following criteria are not fulfilled:
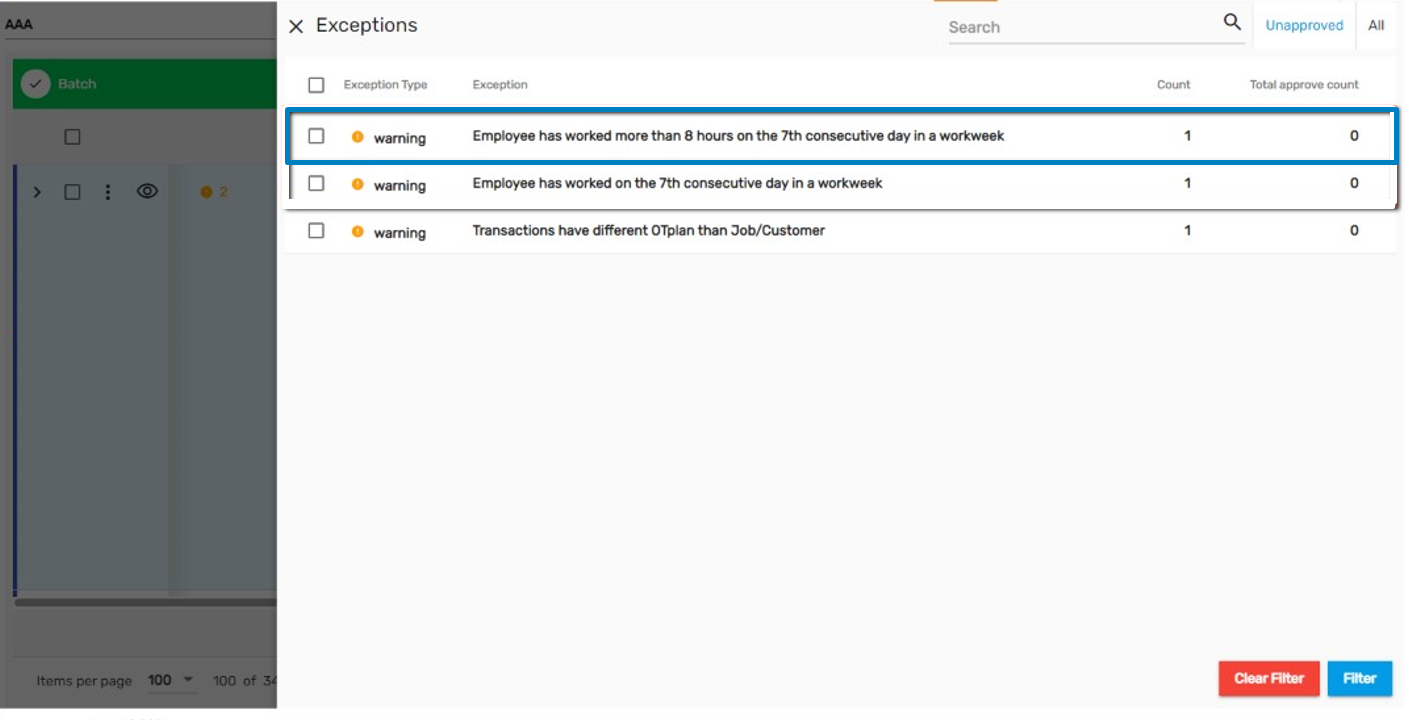
- If an employee works continuously for more than 8 hours for 7 consecutive days in California then Sunday should be considered as DT. (Double Time)
- If an employee works continuously for 7 hours for 7 consecutive days in California, then it should also be considered as OT. (Time and a half)
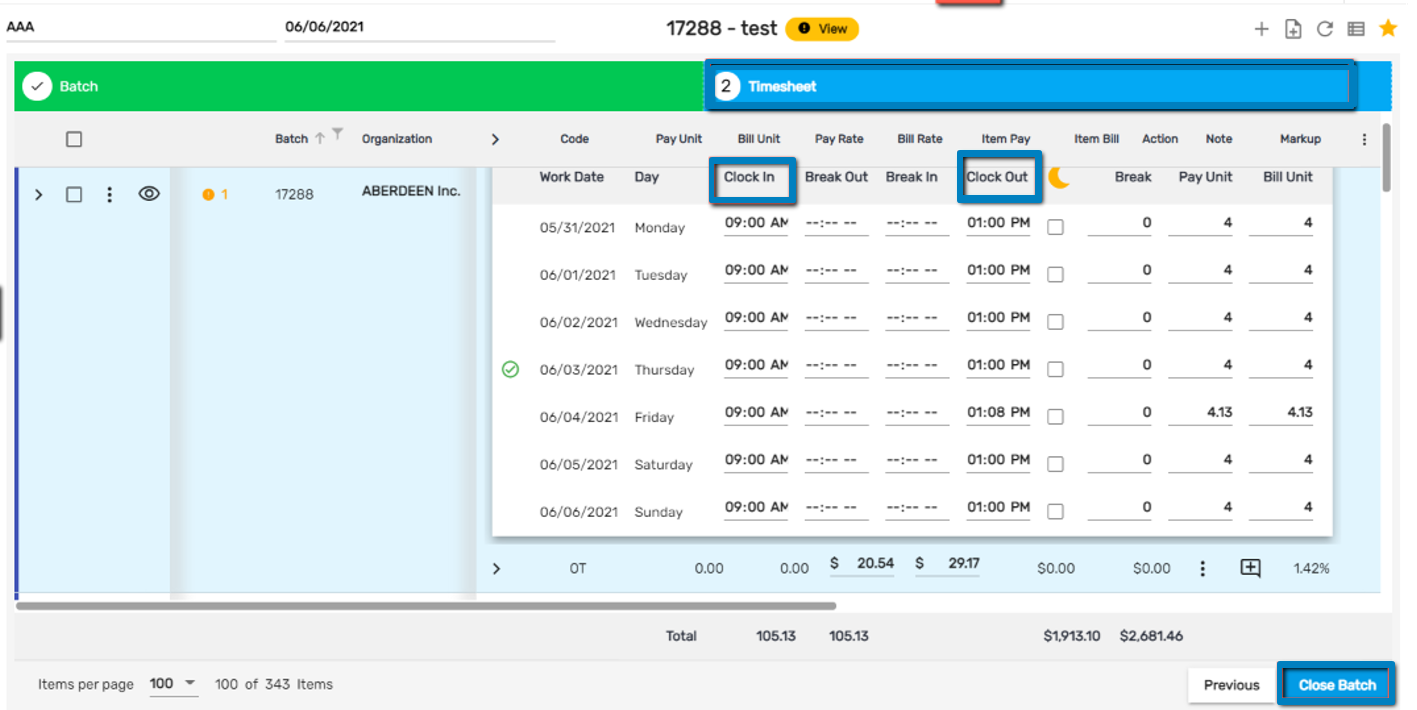
Scenario 1:
When the employee has worked less than 8 hours and 7 days of the week, exceptions will pop up as shown below.
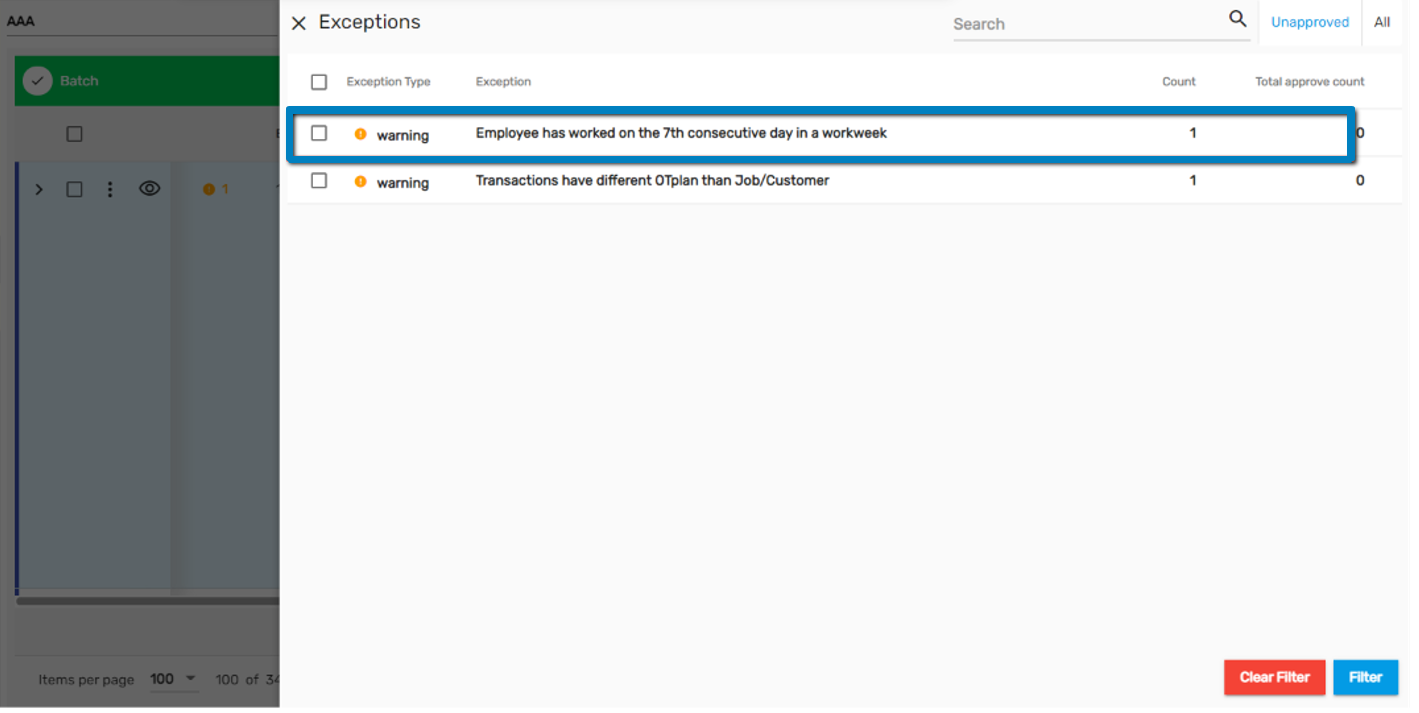
Scenario 2:
When the employee has worked more than 8 hours and 7 days of the week, exceptions will pop up as shown below.

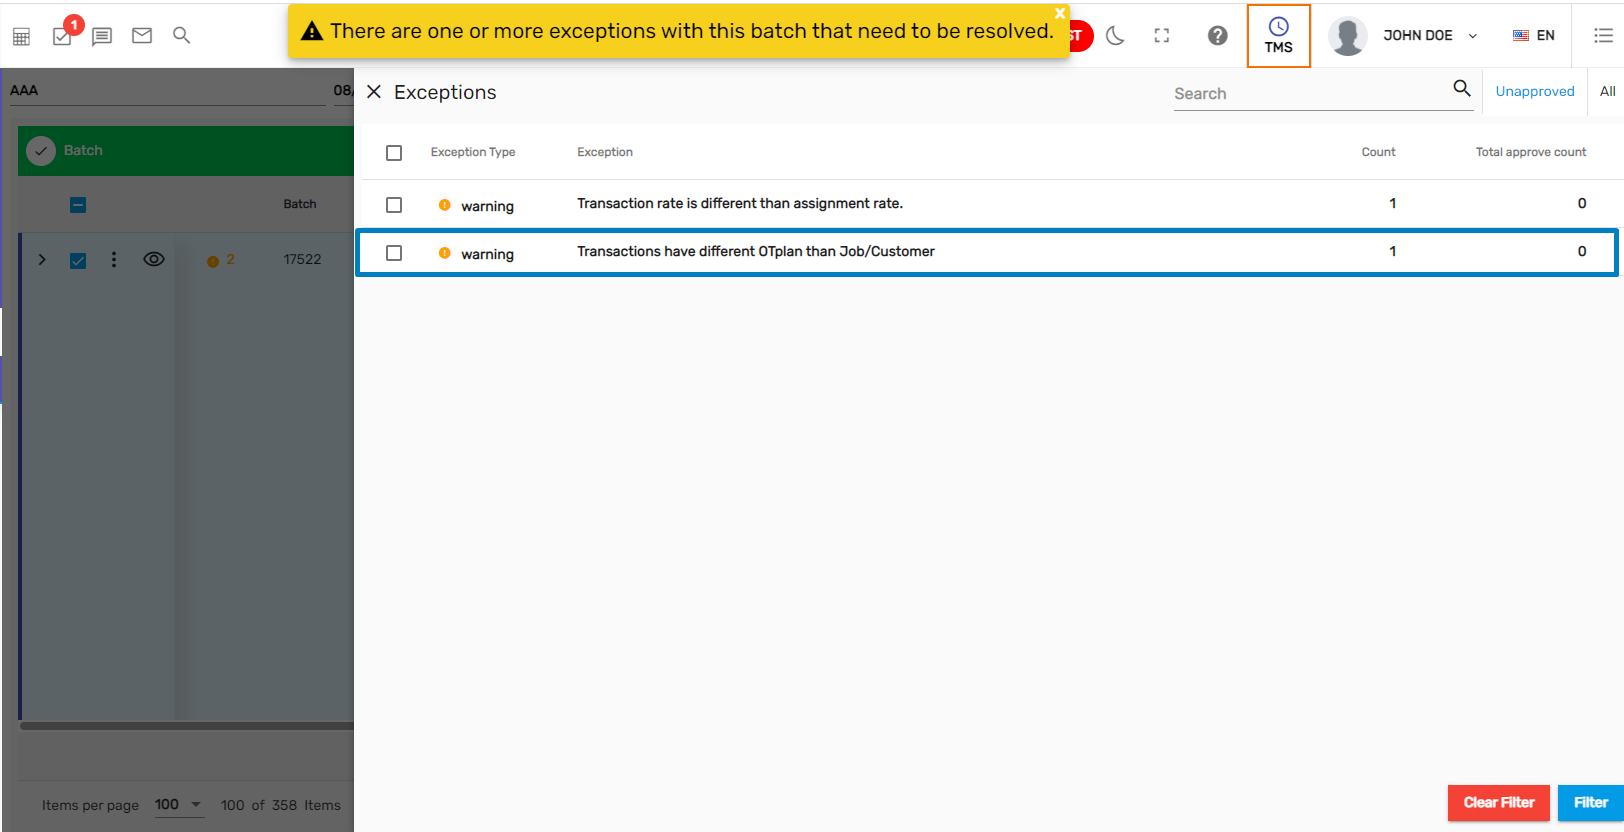
Warning for a Difference in OT Plan Added
A warning type of exception has been added for cases when OT Plan is configured differently at the Job and Customer level. The exception will occur and users need to resolve it before closing the TMS batch.
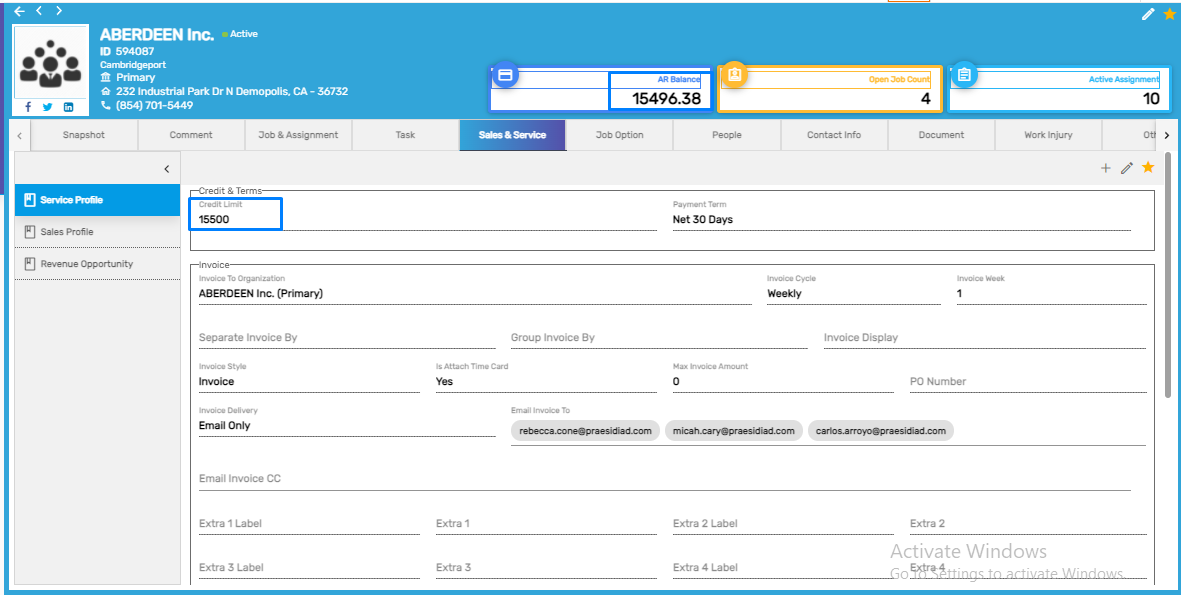
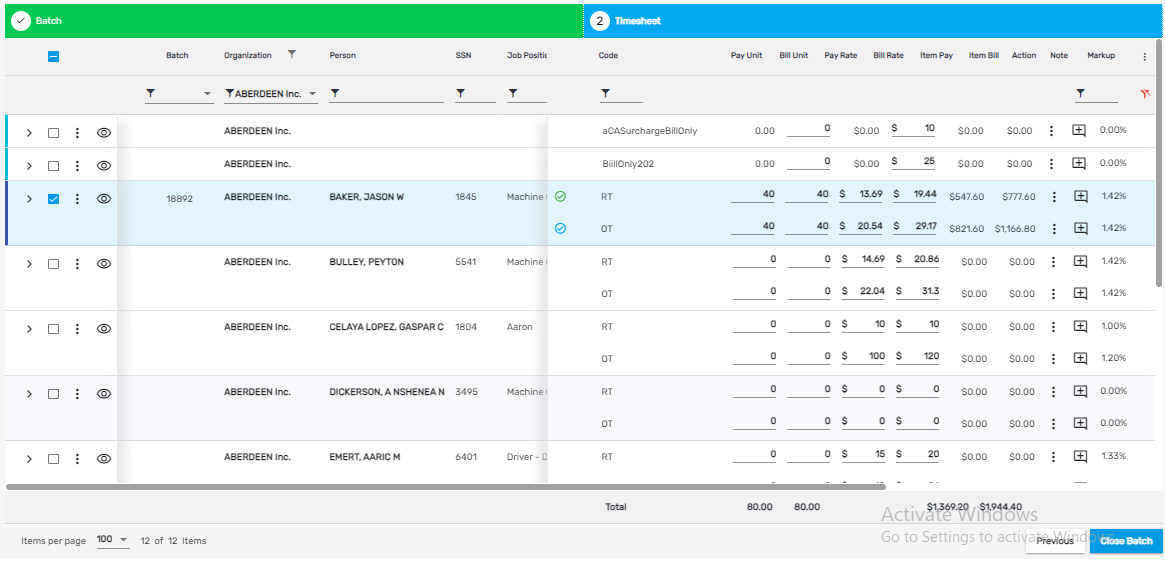
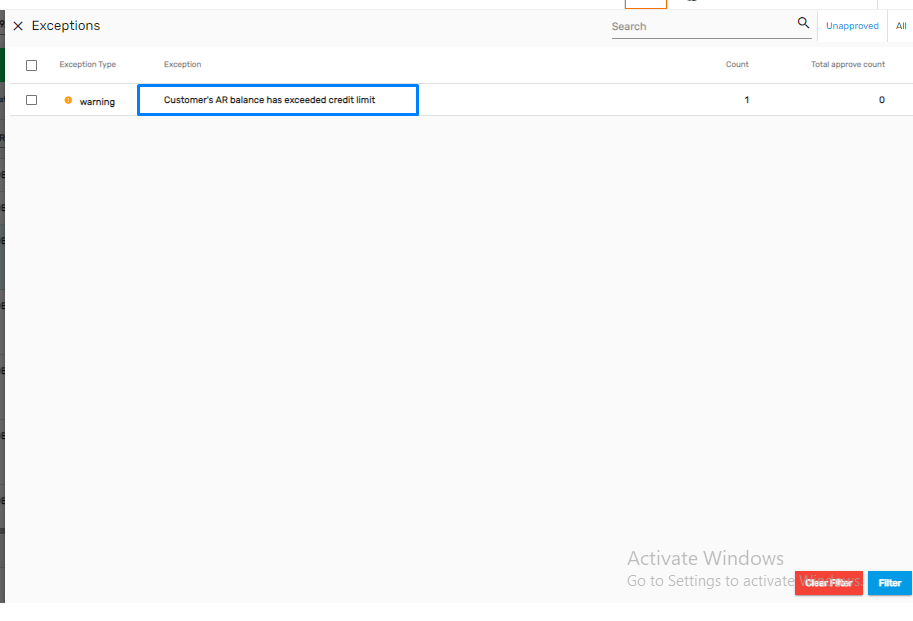
Logic Updated for Credit Limit Exception
Earlier, only the transactions of posted invoice batches were considered while calculating the AR balance of the customer which contributed to displaying credit limit exception in TMS.
Now, all the transaction batches of the customer whose invoices are not processed are taken into consideration and calculated.
Once, the transaction exceeds the set credit limit for the customer in the current processing batch, the exception will be displayed.
Credit Limit Setup
Processing Timesheet Batch
Exception
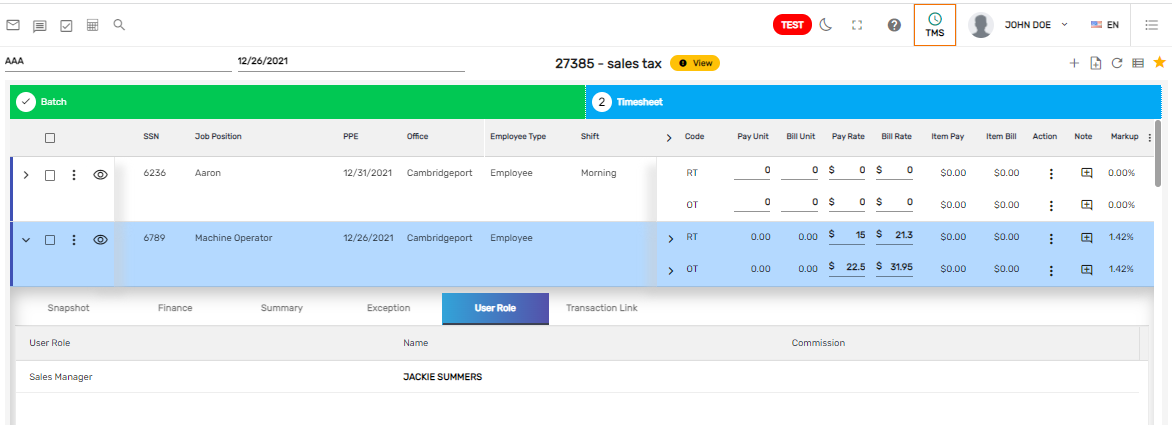
Copy User Type from Assignment in Transaction
User Type will now be copied from the Assignment along with the Job and Customer when transactions are made. Only the user types with the ‘Copy to Transaction’ property set to True will be copied. Furthermore, if user types are not set in the Assignment, then it will be copied from Employee.
Update Rate in Future Transactions When Rates are Changed
When the user adjusts the rates in the assignment, the system checks to see if future transactions have already been created or not.
If users select the option 'No,' only the rate of the assignment will be updated.
If users select the option 'Yes,' both the pay rate and bill rates will be updated. Markup will also be checked to see if the OT/ DT rates are set up in the assignment or not.
Rates will get updated in transactions if:
- the batches are not tagged in case of the manually created transaction
- the transactions created from the portal/ timeclock batch are not closed
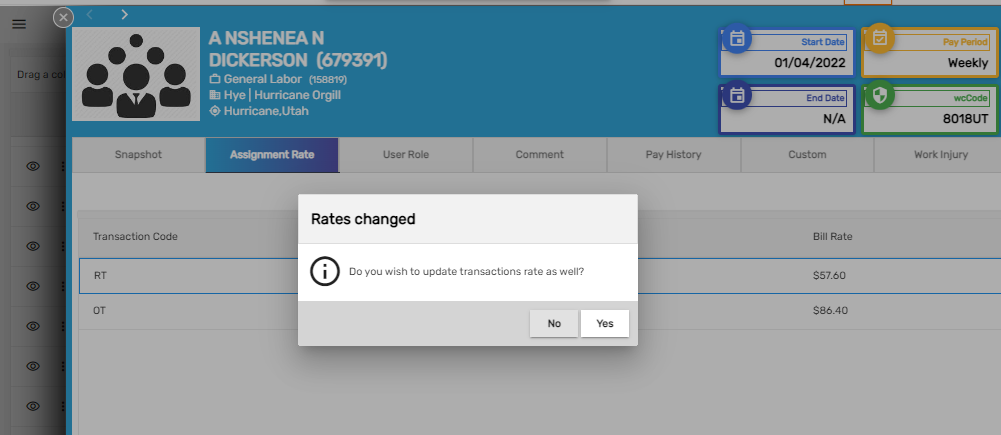
Warning exception will pop up while closing the batch if the assignment rate is different from the transaction rate.
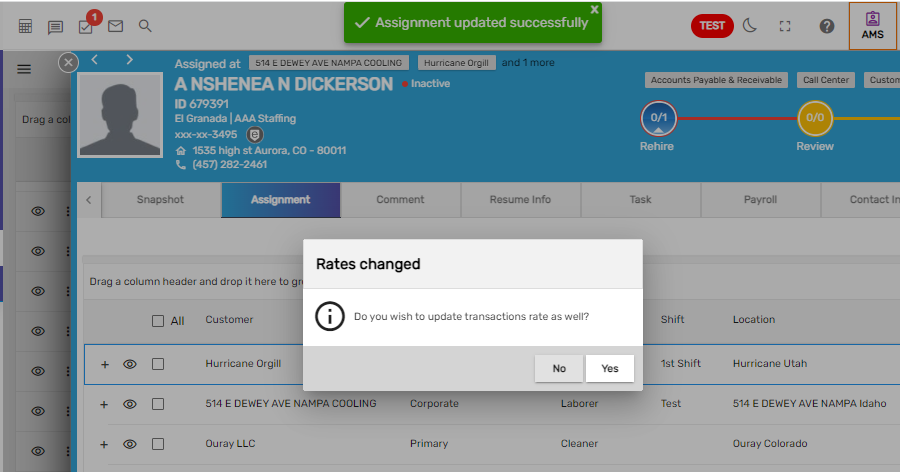
When rates are updated in job level, it asks whether to update in assignments. So if, yes is selected it will also update at the transaction level.
A similar feature has been added while editing the assignment. Users will be asked whether to update transactions that are created with future accounting periods.
WC Code Import Plan Implementation
WC Code Import plan allows users to import multiple WC Codes in bulk that will be reflected in the WC Code main navigation of ATM under Back Office.
Earlier users could only edit and add WC code one at a time but now, users will be able to update WC codes in bulk.
How to Use This Feature
- Go to the TMS application.
- Click on Time Import main navigation.
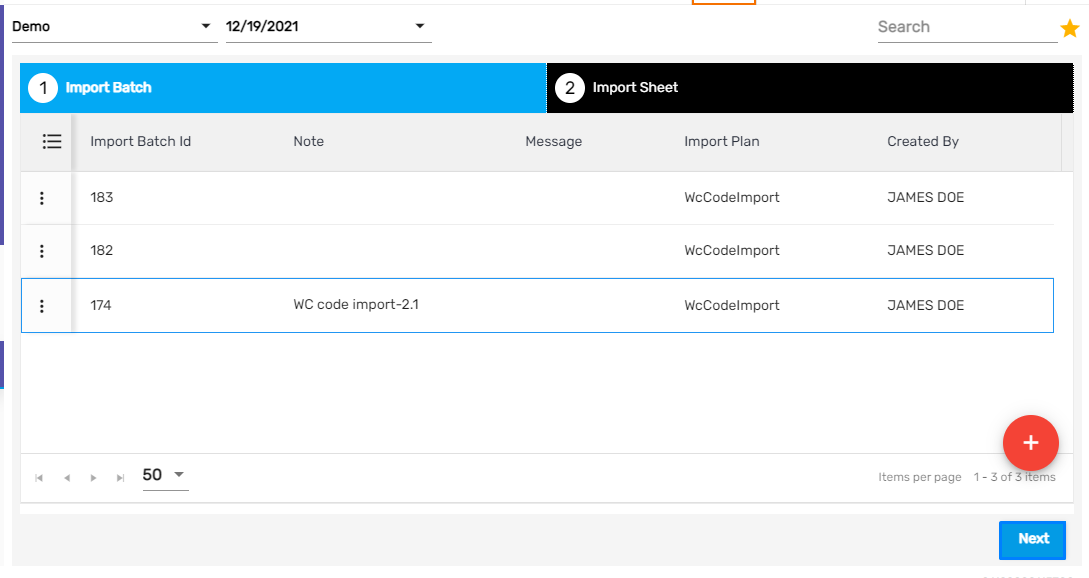
- Select the Company and Accounting Period and create an Import Batch from the Add icon.
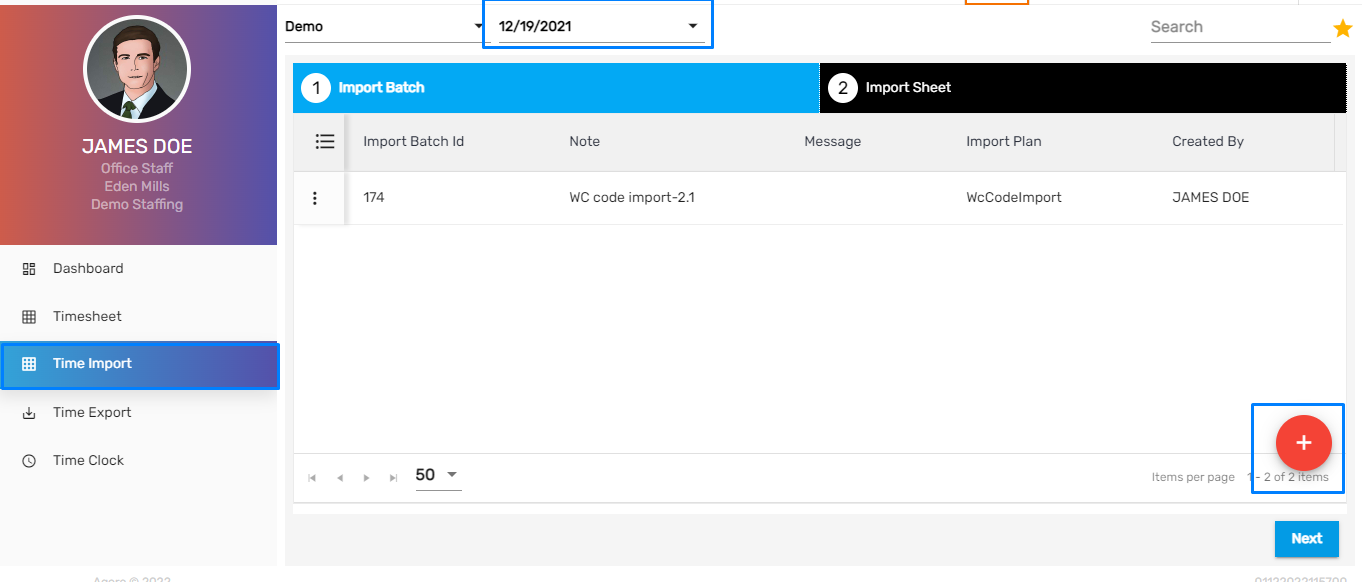
Select WC Code Import plan, upload an Excel file according to the standard format to import, and enter other details as required.
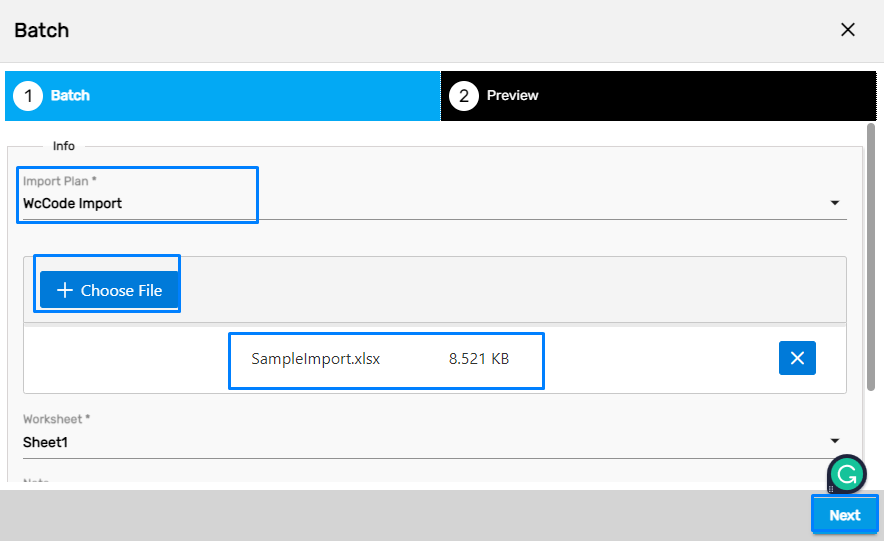
Click on ‘Next’ and preview the imported file. Further, click on ‘Create &Import’ to successfully create the Import Batch.
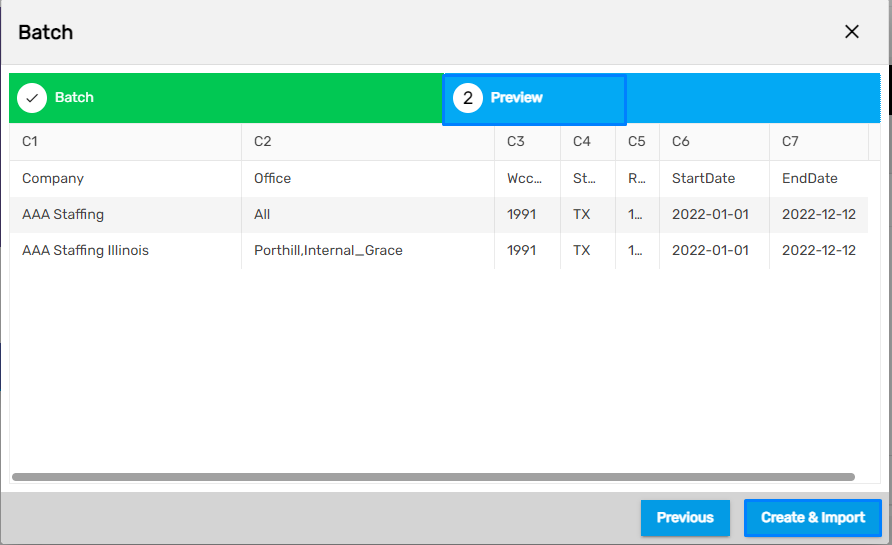
The imported file will be reflected as shown below.
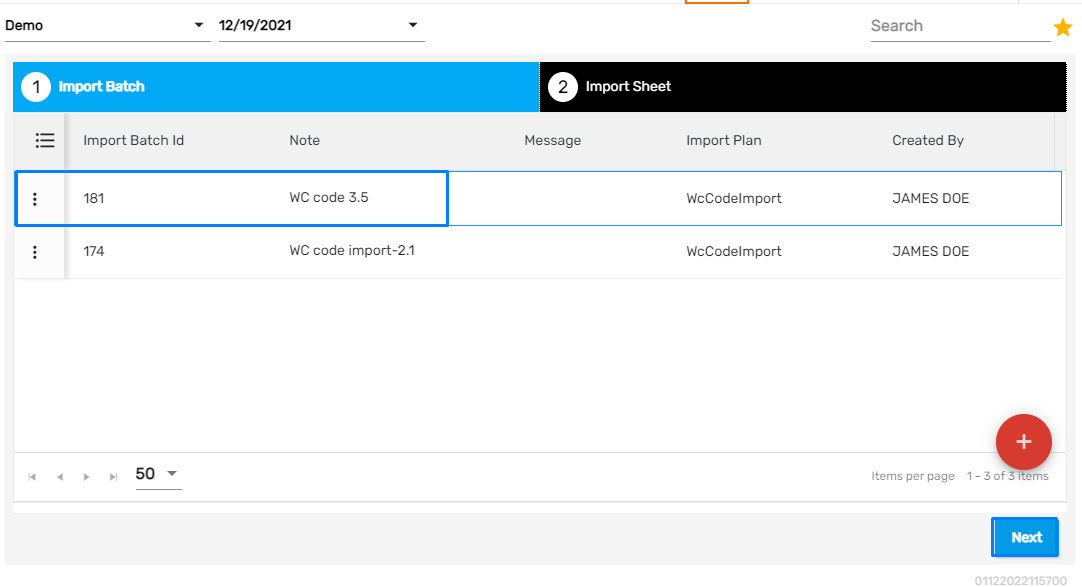
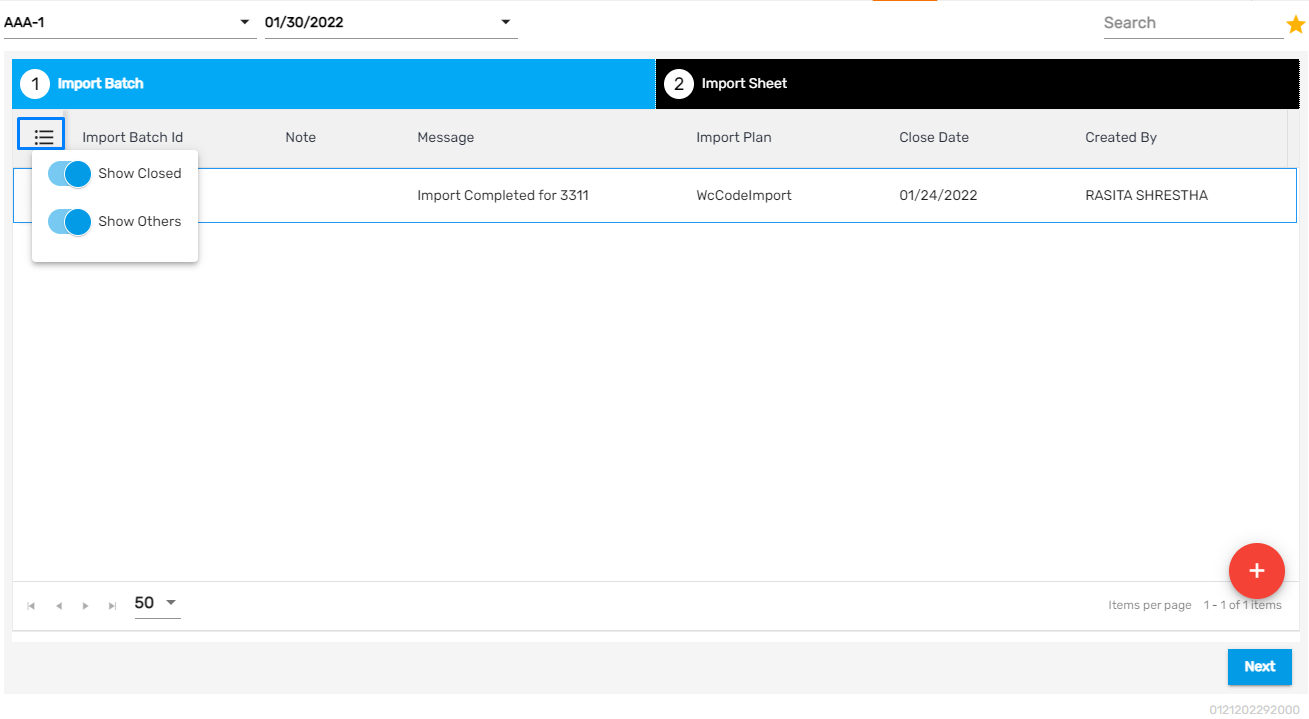
There are two toggle buttons in the Grid Options. They are:
- Show Closed
- Show Others
Show Closed
This will display the Import Batches that are closed.
Show Others
This will display the Import Batches that are created by other users as well.
Click on the ‘Next’ button to view the selected imported batch.
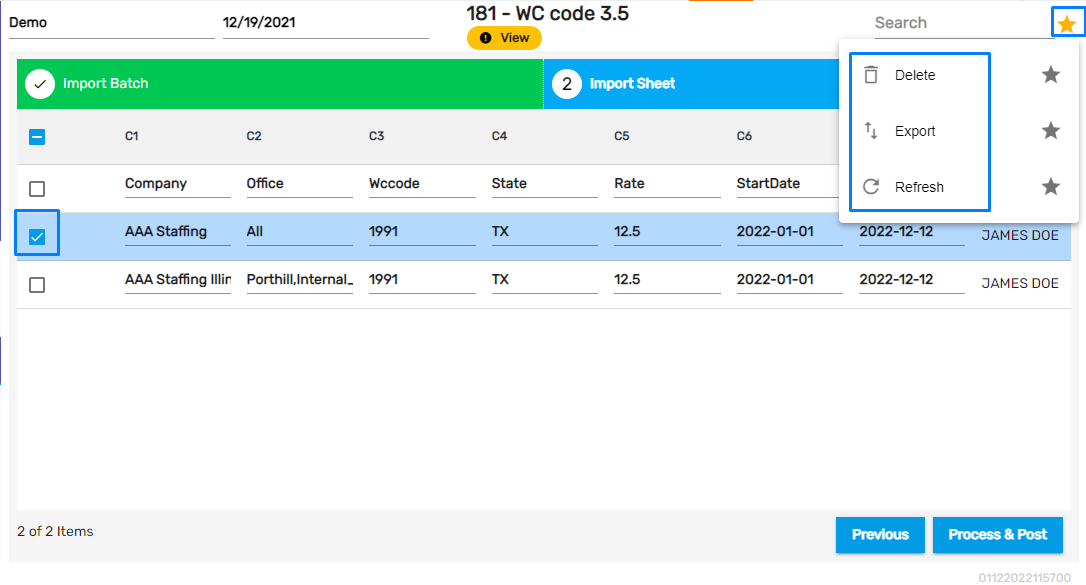
The Favorite Action consists of three actions. They are:
- Delete
- Export
- Refresh
Delete: Users can delete multiple imported rows as required.
Export: Users can export the imported rows in case of edited imports. These are saved as excel files.
Refresh: This action refreshes the page in case the changes are not reflected.
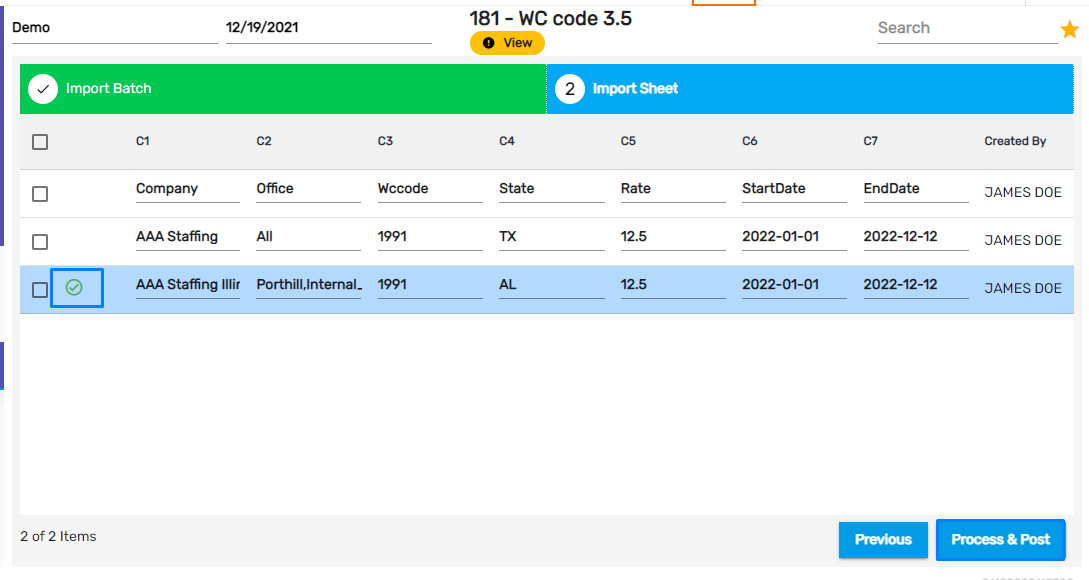
Users can edit the details of the Import Batch as required. The edited Import Batch will have a tick mark making it easier to be identified as shown below.
Click on ‘Process & Post’ to complete the import process.
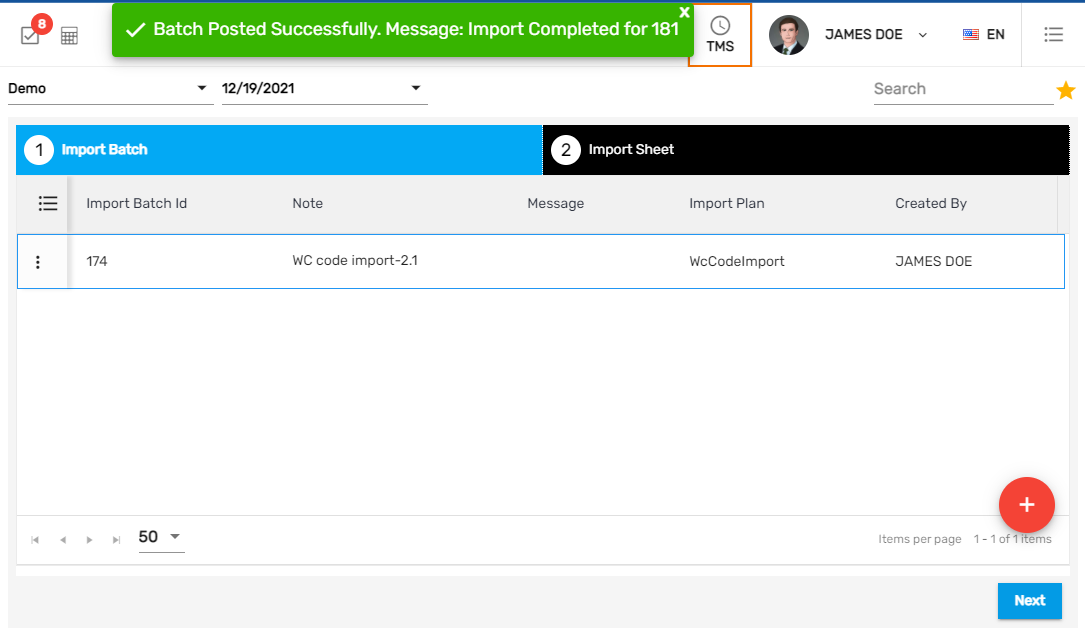
Users will receive toast message about the successfully posted Import Batch.
Now, the imported WC codes will be reflected under the particular Company and State along with its other details.
These WC codes will be displayed in the WC Code navigation under the Back Office main navigation of the ATM application.
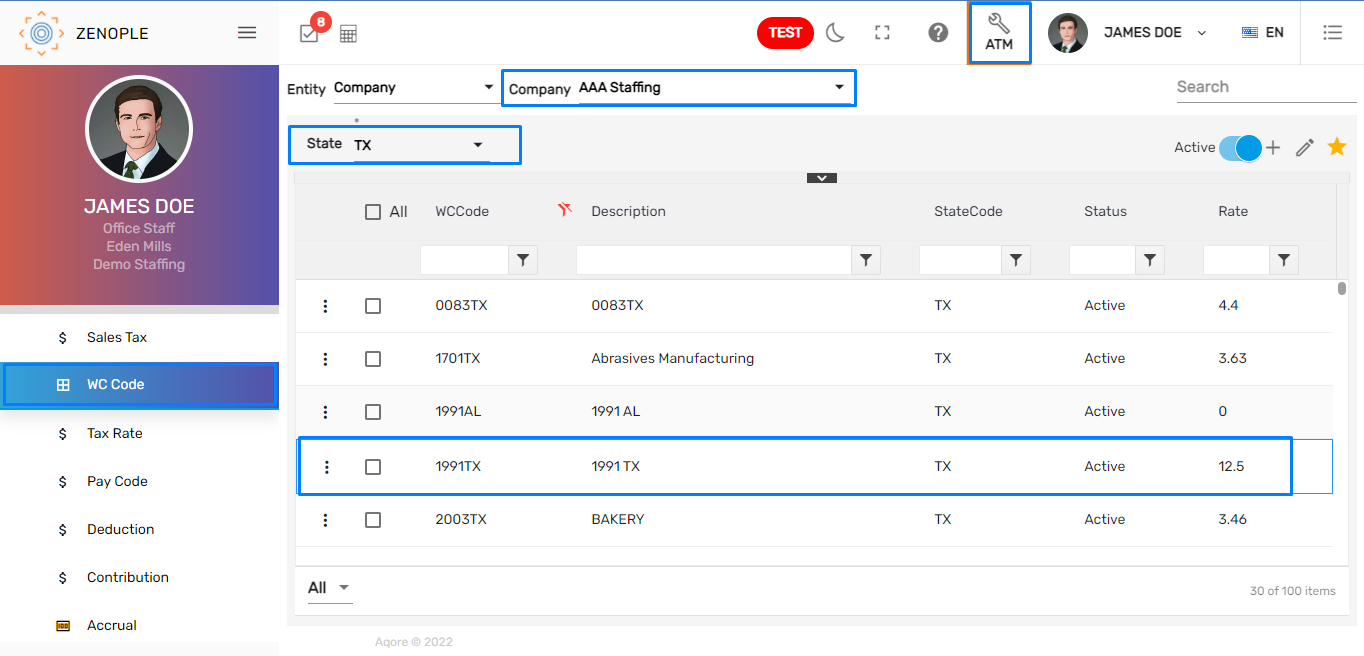
The access for the offices will be reflected based on the imported file.
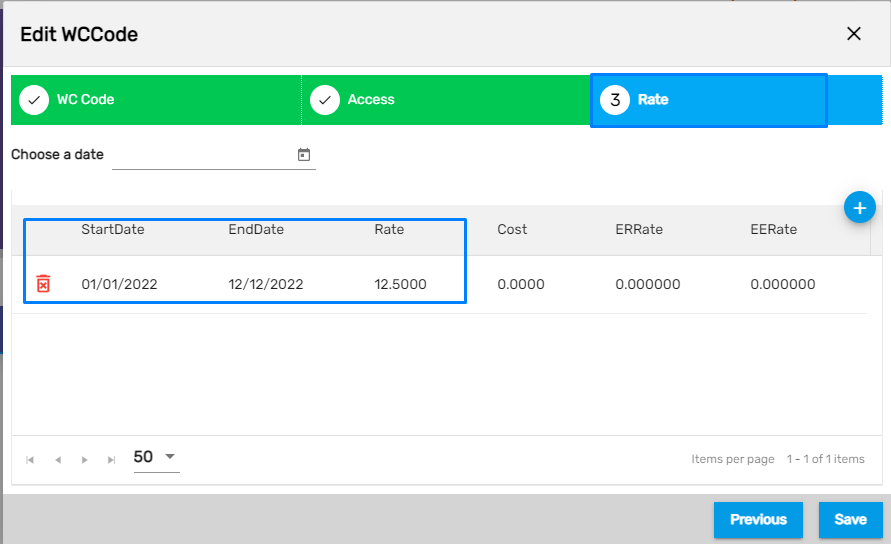
Likewise, the rates and the effective date interval will also be reflected.
Standard Format of the WC Code Import

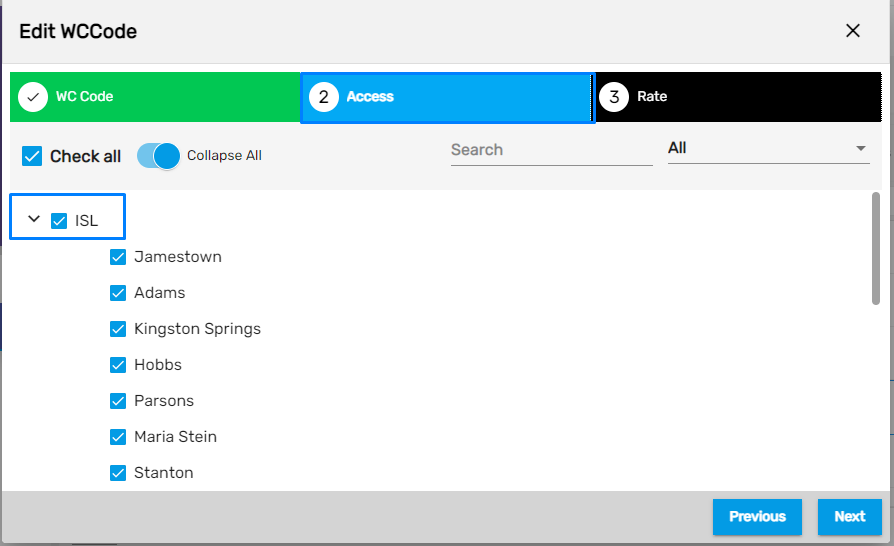
The values in the ‘Office’ column determine the access of these WC codes. The ‘ALL’ value under the Office column defines access to all the offices under the company ‘AAA Staffing’ for the WC Code.
If the ‘Office’ column has a null value then all offices under the company will have access to this WC Code.
Note: WC Code Import file must be an Excel file.